Replaces


Recommended for your 2001 Buick Park Avenue
Frequently bought together
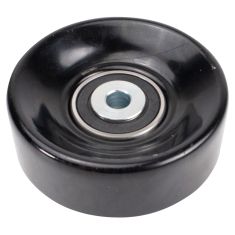
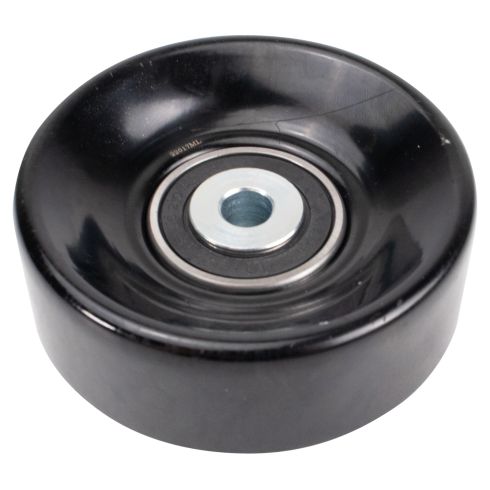
Part Details
Specifications
About TRQ:
TRQ is a trusted brand dedicated to making every repair a success story by combining premium parts with easy installation. Each TRQ part is engineered by a team of automotive experts to meet or exceed OEM standards, delivering enhanced performance and maximum longevity. With rigorous in-house testing, the brand ensures superior fit and function across every product line. TRQ also provides customers with best-in-class, step-by-step installation videos—so you can complete repairs with confidence, whether you're a first-time DIYer or an industry professional.
Attention California Customers:
 WARNING: This product can expose you to chemicals including Lead and Lead Compounds, which are known to the State of California to cause cancer, and birth defects or other reproductive harm. For more information, go to www.P65Warnings.ca.gov.
Lifetime Warranty
This item is backed by our limited lifetime warranty. In the event that this item should fail due to manufacturing defects during intended use, we will replace the part free of charge. This warranty covers the cost of the part only.
FREE Shipping is standard on Orders shipped to the lower 48 States (Contiguous United States). Standard shipping charges apply to Hawaii, Alaska and US Territories. Shipping is not available to Canada.
Expedited is available on checkout to the United States, excluding Alaska, Hawaii and US Territories as well as P.O. Boxes and APO/FPO/DPO addresses. Final shipping costs are available at checkout.
Created on:
Tools used
Brought to you by 1AAuto.com, your source for quality replacement parts and the best service on the Internet.
Hi, I'm Don from 1A Auto. I hope this how-to video helps you out, and next time you need parts for your vehicle, think of 1AAuto.com. Thanks.
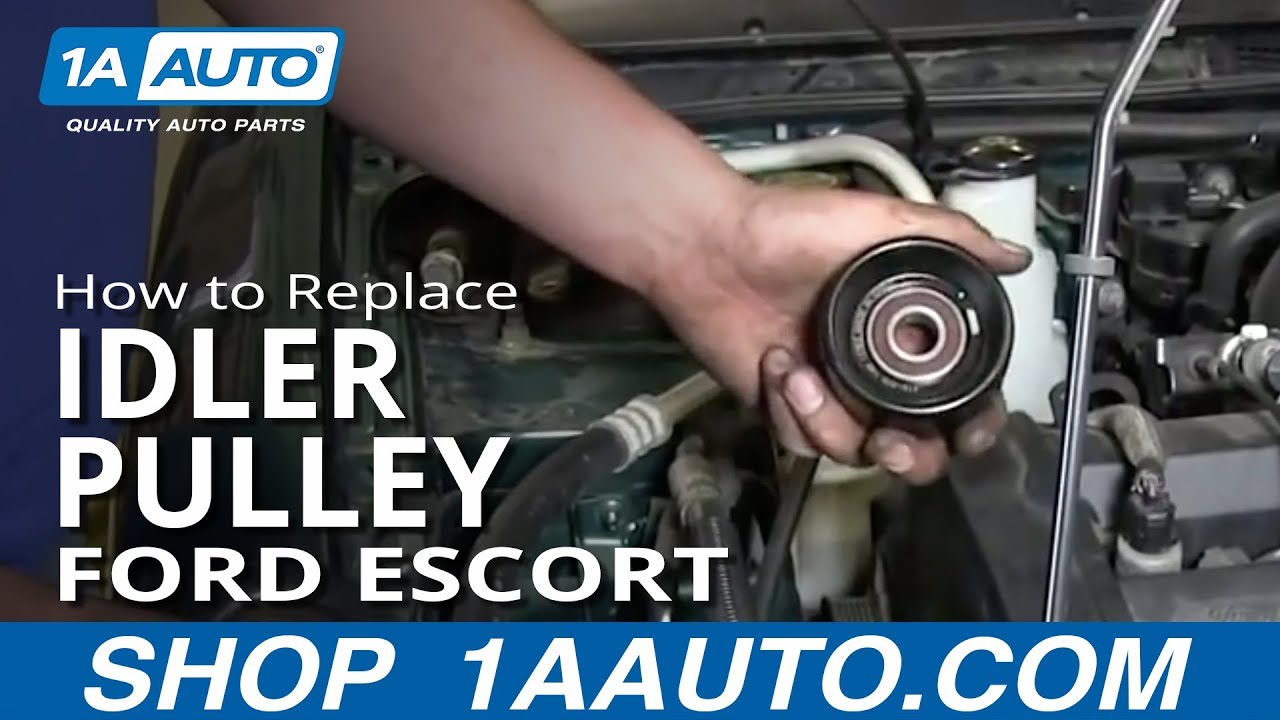
In this video, we're going to show you how to replace the idler pulley on a Ford Escort ZX2 with 2 liter dual overhead cam engine. It's going to be pretty similar to most of the Ford Escorts with that engine type. The items needed are a new idler pulley from 1AAuto.com; 10, 13, and 15mm socket and socket wrench; a 17mm wrench; and a floor jack.
The first thing you're going to want, before you do this repair, is a belt diagram and we have a nice one made up for you right here. It should give you a pretty good representation of how the belt is routed. Starting at the top left, that's the alternator. Then, going to the right, that's an idler pulley, to the power steering pump them down to the A/C compressor, then over to the crank shaft, then to the tensioner pulley, then to the water pump, another idler pulley and up to the alternator.
In the lower front and right in the wheel area, there's seven 10mm bolts that hold this splash pan in place. In this case, on our car, there's only four, but you're going to remove all of them. Actually, what we find is we take off one and the pan kind of bends down, and we try to remove the other ones but the clips in behind were so rusted that we decided we didn't want to break all of them. We just left it that way and let the pan, or the splash pan hang down out of the way.
I've got a 13mm socket on the end of my ratchet and I'm going to put it on the bolt that goes through the pulley, on the tensioner pulley. I'm going to turn it clockwise to remove the pressure on the belt and then slide the belt off the crank and the rest of the pulleys. The rest of the way, it's a matter of just pulling it down, twisting it a little bit to get it off some of the pulleys and you could also pull it off from the top, as well.
We've got the jack under the oil pan, just enough to support it. We're not really lifting the engine, we're just supporting it. I'm taking out the 17mm bolt that holds on the engine mount. I'm going to fast forward through me removing that bolt. We've got Mike jacking up the engine just a little bit to give us a little more clearance. Here, I've got the wrench on the idler pulley. I'm going to fast forward removing the bolt.
We've got the old part and we've got the identical part from 1A Auto. We're going to fast forward this but it's just the idler pulley and bolt going back in.
Here, I'm reinstalling the bolt for the engine mount and I'm having Mike lower the engine slowly so it lines the holes back up. Once you've got the bolt in, just go ahead and tighten it up.
You're not really going to be able to see me doing the belt, but snake it back in and follow the diagram for routing it. That first step that Don just did, he just got the belt down below the A/C and the crank pulley, preliminarily. Here, I'm just continuing the push the belt down in and trying to get it around as many of the pulleys as I can. I'm just going to speed it along a little bit as I get the belt on. What Don just did there was, there's just some clearance issues getting by the water pump and those tensioner pulleys, he just kind of twisted it to the side and got it over on its way to the alternator. With the top part, it's pretty much done. It's around the alternator, underneath the idler and over the power steering. I want to get this belt on the other side of this pulley, the ribbed pulley here. I'm going to twist it and try not to have it fall of the alternator pulley which is right above it. All right, good.
What we've done here is we've pulled a loop across and you can see I'm helping him out a little bit. I'm holding the belt off of the A/C pulley so he can pull the loop from that tensioner on the back side of the motor towards the front and put it on to the tensioner in the front of the engine. In order to get the wrench in there, it's better to have the pulley off of the crank rather than the A/C pulley, so he just transfers it, takes it off the crank so he has enough room to get it on. I'm using a 15mm here, which is what the new one came with and turning it clockwise. I have to release the tension on the bearing and I've got to make sure, too, that all my belts are on the pulleys because if they're off a little bit, it's not going to give me the room I need. Everything is on except for the crank pulley, and as I do this, it's going to give me room. I'm going to hold it in tight. You can see, Don. He's working the wrench with the right hand and then using the left hand push the belt on to the crank pulley.
Make sure they're all on. Make sure all of them are on and the belt is lined up with the teeth on your pulleys and plug your AC back in. I'm just going to give it one more look up top, like below. I want to make sure that the toothed belt is seated correctly on the power steering, alternator, water pump and below this idler pulley. Once you've done that, just put the splash pan back up and bolt it back in place.
We hope this video helps you out. Brought to you by www.1AAuto.com, your source for quality replacement parts and the best service on the Internet. Please feel free to call us toll-free, 888-844-3393. We're the company that's here for you on the Internet and in person.
Tools used
Brought to you by 1AAuto.com, your source for quality replacement parts and the best service on the Internet.
Hi, I'm Don from 1A Auto. I hope this how-to video helps you out, and next time you need parts for your vehicle, think of 1AAuto.com. Thanks.
In this video, we're going to show you how to replace the idler pulley on this 2004 Chrysler Sebring with the 2.7 liter V6 engine. The items you'll need are a new idler pulley from 1AAuto.com, jack and jack stands, 13 millimeter and 19 millimeter sockets and ratchet, a 1/2 inch ratchet, a T50 torx bit, and a torque wrench.
To start off, you'll want to remove your wheel. You just want to remove the 19 millimeter lug nuts. You want to loosen them while they're on the ground, raise the vehicle and then remove them the rest of the way, unless you have air powered tools. Then, you can do the entire process up in the air.
With the wheel off, you can see the entire serpentine belt, and you just want to loosen up this bolt at the top of your tensioner. We'll just fast forward as Don does this. Now, you want to just loosen the lower bolt here on the tensioner. As he loosens it, you'll see the tensioner go slack. Now, you can pull your serpentine belt off the pulleys.
Now, you can remove those two bolts you loosened up earlier in the tensioner. Then, the tensioner comes right off. Use a flat blade screwdriver to pry off that cap. We're going to fast forward as he removes this T50 bolt. Once that bolt is removed, your idler pulley will pull right off the tensioner.
You can see the old idler pulley on the left and the new one from 1A Auto on the right. They do look a little different, but they'll work and mount exactly the same. Take your new idler pulley, push it into place and replace that T50 torx bolt. Now put your tensioner back up into place and hand tighten the two bolts in the tensioner. You don't want to over tighten them yet, because you still have to put your serpentine belt back on.
As a reference point, we're going to give you a belt diagram that's from the front of the vehicle. This is for the six cylinder. You can reference it on how to put the belt back onto the pulleys. You can also see pretty clearly in this shot how the belt goes back on. The only thing you can't see is the alternator, but you would want the ribbed side going over that. Using your half inch ratchet, you want to pull that tensioner down and then tighten those bolts up. We'll fast forward as Don tightens those the rest of the way. We'll continue to fast forward as Don replaces the wheel. You want to replace your lug nuts while it's still jacked up. Lower the vehicle and tighten them the rest of the way. Then, you want to use your torque wrench and tighten them to one hundred foot-pounds.
We hope this video helps you out. Brought to you by www.1AAuto.com, your source for quality replacement parts and the best service on the Internet. Please feel free to call us toll-free, 888-844-3393. We're the company that's here for you on the Internet and in person.

BPA03853