Replaces
This part doesn’t fit a . Select from parts that fit.
Frequently bought together
Item Condition:
New
1 Year Warranty
This item is backed by our 1-year warranty. In the event this item should fail during intended use, we will replace the part free of charge. This warranty covers the cost of the part only.
FREE Shipping is standard on Orders shipped to the lower 48 States (Contiguous United States). Standard shipping charges apply to Hawaii, Alaska and US Territories. Shipping is not available to Canada.
Expedited is available on checkout to the United States, excluding Alaska, Hawaii and US Territories as well as P.O. Boxes and APO/FPO/DPO addresses. Final shipping costs are available at checkout.


Created on:
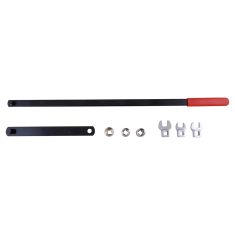
Tools used
Brought to you by 1AAuto.com, your source for quality replacement parts and the best service on the Internet.
Hi, I'm Mike from 1A Auto. I hope this how-to video helps you out, and next time you need parts for your vehicle, think of 1AAuto.com. Thanks.
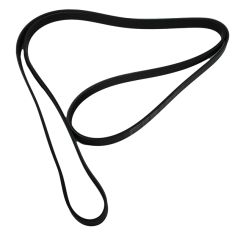
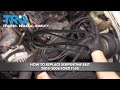
In this video, we're going to show you how to replace the serpentine belt on this 2005 Ford F150 with the 4.6-liter V8 engine. The items you'll need for this is a new serpentine belt from 1AAuto.com, 1/2 inch ratchet, a piece of pipe for some extra leverage, and a flat blade screwdriver.
Using your screwdriver, just loosen up the hose clamp here and right here. Then push the tab on this hose, pull it free, and then pull your air intake hose free. Now your serpentine belt tensioner is located right down here, and, using a 1/2 inch ratchet or breaker bar, you just want to insert it into that square hole on the tensioner. Then using a piece of pipe for some extra leverage, just pull the tensioner back and it will loosen up the belt. You can lift the belt up and off the alternator. Then just carefully let the ratchet back down and then pull it free. Now you can pull your belt up and out.
Reach way down and pull the belt off the A/C compressor pulley first which is way down to the left as you're looking at the front of the engine. Then once it's off of that, go down and pull it off of the crank pulley which is right in the center of the engine. Now when you go to put your belt back on, you want to follow this diagram right here. You can just refer back to this as you're doing this procedure. Mike's also going to explain how to do it.
First step for putting the belt on, make a sharp bend in your new belt, and you want to feed that between your tensioner pulley and the idler pulley and go down that way. I need to help it along a little bit here. As that loop goes down, reach down, and this is your A/C compressor down here. Put the loop down and around your A/C compressor. Now I'm going to take a loop and loop it down, it's going over the tensioner pulley, but I'm going down and around the crank pulley. Then, hopefully, you can see, from the crank pulley, let me make sure it gets onto the crank pulley, and then a little tight up and around the water pump pulley here. Then there's an idler pulley and your power steering pump pulley. I'll leave it off of the alternator for right now.
I'll put it around the power steering pump pulley over here, around this idler pulley. All right, so take my pipe, go as far as I can on the tensioner, and I should be able to lift it up, so I'm going to try and take it off of this idler pulley, get it up on the alternator, pull my tensioner, and then push the belt down. You can see the idler pulley is the last one, push it right down under. Replace your air intake hose. Reconnect this hose and then tighten up those two hose clamps.
We hope this video helps you out. Brought to you by www.1AAuto.com, your source for quality replacement parts and the best service on the Internet. Please feel free to call us toll-free, 888-844-3393. We're the company that's here for you on the Internet and in person.
Tools used
Tools used
Tools used
If you're worried about the belt routing, you can either draw what this looks like on a piece of paper, or of course, if you were to look at the front of your vehicle, right along the cowl, you should see a nice diagram here for you, and just go by that. With that said, we're gonna use a serpentine belt tool and we're gonna come right down along this area, to the serpentine belt tensioner right in the center. We're gonna turn this counter-clockwise and it will relieve tension of the belt and then we'll get the belt out of the way. Counter-clockwise, then we'll get the belt right off. Release that. Get our tool out of the way.
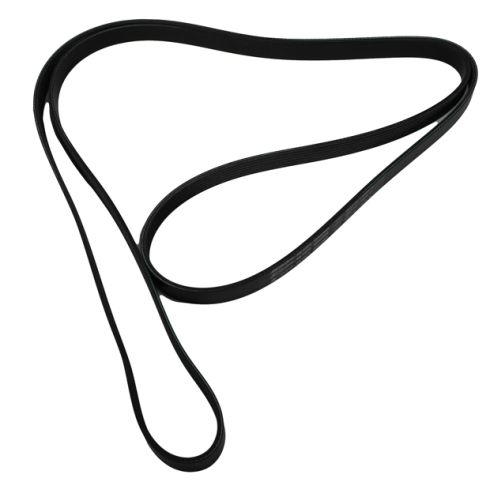
Remove the belt fully, so you can inspect it. Gonna set that aside for now. Now, we wanna compare our old belt to our new belt. I'm just gonna take one finger like this and put it through. Then I'm gonna go down to the other end. Same thing, with one finger. Put it through, and then I wanna try to line these up. We want them to be approximately the same length overall. This looks great. The next thing that you would wanna do is, of course, turn them to the inside, and you'd wanna count those ribs. For me personally on mine, I know that my belt was damaged and it was missing a whole rib. So, I'm just gonna have to go with the imagination that it's there. Count 'em up, it should come out even. Perfect.
Now that we've got the belt up inside the engine compartment area, we just wanna take a quick look at that belt routing. If you have it written down someplace, or if you look at that diagram, you're gonna be ready to go. Whenever I'm gonna be replacing my serpentine belt, or even just removing and re-installing, I always like to try to clean out any of the areas on the pulleys as I can. So now we're just gonna open up our belt like this, and I'm gonna take this end right here. I'm gonna go down and around that crank. The crank is the main pulley of the engine, so that's where I always like to start. I'm gonna go right around it completely, try to make sure it's set in there if possible.
I'm gonna take the rib dent, and I'm gonna go out and around this idler pulley right here. So what I did here is, I put my belt around all my pulleys, an exception of just the one. And yeah, you could try to go where the tensioner is, but that's gonna be the hardest pulley to put it over last because of course, you're gonna have your tool in the way. What I would do at this point is I would just hold tension where my finger is now. I would remove the belt carefully from the power steering pump all the way on the other side. Put it on the tensioner, just like this. And now of course, I'm holding pressure again and I'm gonna get my belt tensioner on there, on my tool, on my belt tensioner. Relieve the tension from it, and just try to slide it over the pulley now. Be careful for any pinch points, you don't want to get your finger pinched in any way.
Once you feel as though you get your belt on there, it's ultra important to make sure you double check all of your pulleys. What I mean by that is, you wanna make sure that the belt is sitting directly inside of all the grooves on the pulley. If you notice that the belt is hanging off on one side or the other, you're gonna cause detrimental damage to your belt and you're gonna have to replace it again. Nobody wants to do that. Double check all the way around all of your pulleys, you can feel around. This actually feels really great. All right, let's start it up and double check it. And when I start this up, I'm only gonna run it for maybe five seconds. And then I'm gonna turn it right off and I'm gonna double check to make sure it's sitting the way that it needs to. After a short amount of time of running, you should very easily be able to see if you missed a tooth on your belt routing.
Okay, so now I'm just double checking. I always like to double, even triple check my work sometimes. This feels perfect. All right, next thing, close the hood, take it for a road test.
Tools used
Hi, I'm Mike from 1A Auto. We've been selling auto parts for over 30 years. We're dedicated to delivering quality auto parts, expert customer service, fast and free shipping, all backed by our 100% satisfaction guarantee. Visit us at 1AAuto.com, your trusted source for quality auto parts.
In this video, we're going to be working with our 2006 Ford Explorer. We're going to show you how to remove and replace your vehicle's serpentine belt. If you like this video, please click subscribe. We have a ton more information on this and many other vehicles. If you need this part for your car, you can follow the link down in the description over to 1AAuto.com. Here are the items you'll need for this repair.
Loosen the clamp on the air box side of the intake duct with a flat blade screwdriver. You'll then want to disconnect the breather lines. There's a little green tab here that you just pull back and pop them off. You'll then need to undo the clamp on the throttle body. You'll then want to remove the intake duct.
For some jobs like your alternator or idler pulleys, it may not be necessary to remove the belt fully. However, if the pulley has been dragging from a bad bearing or a weak alternator, it's probably damaged your belt a bit too and it's not a bad idea to replace it while you're in here.
Using a 1/2" drive ratchet, place it into the square drive of the serpentine belt tensioner and rotate the tensioner clockwise to release pressure and remove the belt from one of the pulleys. It's usually easiest to do this from a smooth pulley. Then carefully release tension and remove your ratchet. Remove the serpentine belt from under the A/C compressor and then pull the loop up and through over your tensioner. You'll then want to get it out from under the crack where it loops over the water pump. You've already unhooked it from the idler pulley on this side so loop it out from the grooved idler pulley and the power steering pump and remove your belt.
Here we have our old serpentine belt that we removed from our vehicle and our new part from 1AAuto.com. As you can see, these belts are exactly the same length and rib count. They actually look a little different right now, but if you open them up, they are the same. Obviously the old one's been stretched so it's a little bit larger. It will still work just fine. If your old belt has become cracked, dry-rotted, damaged, or is soaked in contaminants like this one has got some oil and coolant and other things from various leaks on the engine on it, this new belt from 1A Auto will go in direct fit just like your original equipment and fix you up right.
Now reinstalling the serpentine belt on this is going to be pretty difficult to show. You want to start with a loop and send it down and around the crank pulley. Now you're going to take the passenger side of the belt and bring it down between the tensioner and the A/C compressor at the bottom of the motor. With the right side of the belt, you're going to go up and over the water pump pulley all the way to the button of the motor on the driver side, where you'll go under the grooved idler pulley, as well as under the power steering pump pulley. Install your 1/2" drive into the tensioner and rotate it clockwise to release the belt tension. It's usually easiest to get over the alternator, then move your hand to the other side of the engine and go under the smooth idler pulley on the driver side, and then just use a light or your hand to check the belt path and make sure that everything went over and under all the pulleys currently and that it isn't hung up anywhere.
Reinstall the intake duct and pop on the two breather connections, then tighten it down with a flat blade screwdriver.
Thanks for watching. Visit us at 1AAuto.com for quality auto parts, fast and free shipping, and the best customer service in the industry.