Replaces

This part doesn’t fit a . Select from parts that fit.
Frequently bought together
Part Details
Install Tip: When replacing steering components, have a professional alignment performed afterwards. This ensures proper tracking and even tire wear.
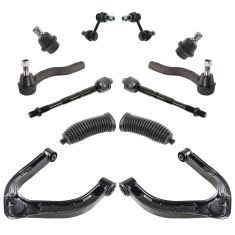
Complete Repair in One Purchase - Stop searching for parts individually and complete your repair with a customized kit or set from DIY Solutions.
High-Quality Parts from Trusted Brands - DIY Solutions' kits and sets are selected from the best automotive brands and include hard-to-find and even obsolete parts you may need for your vehicle.
Guaranteed Fit - DIY Solutions ensures its selected parts are quality-tested to guarantee fit and function.
Item Condition:
New
Attention California Customers:
 WARNING: This product can expose you to chemicals including Chromium (Hexavalent Compounds), which is known to the State of California to cause cancer, and birth defects or other reproductive harm. For more information, go to www.P65Warnings.ca.gov
Lifetime Warranty
This item is backed by our limited lifetime warranty. In the event that this item should fail due to manufacturing defects during intended use, we will replace the part free of charge. This warranty covers the cost of the part only.
FREE Shipping is standard on orders shipped to the lower 48 States (Contiguous United States). Standard shipping charges apply to Hawaii and Alaska.
Shipping is not available to a P.O. Box, APO/FPO/DPO addresses, US Territories, or Canada for this item.
Expedited is available on checkout to the United States, excluding Alaska, Hawaii.
Final shipping costs are available at checkout.


Created on:
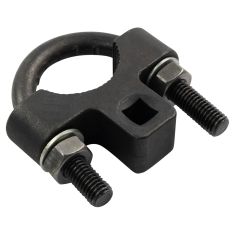
Tools used
Brought to you by 1AAuto.com, your source for quality replacement parts and the best service on the Internet.
Hi, I'm Mike from 1A Auto. I hope this how-to video helps you out, and next time you need parts for your vehicle, think of 1AAuto.com. Thanks.
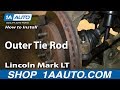
In this video, we're going to show you how to replace an outer tie rod on this 2005 Ford F150. We show you on the driver side but the passenger side is the same procedure. The items you'll need for this is a new outer tie rod from 1AAuto.com; a 7, 10, and 21mm socket and ratchet with a piece of pipe for leverage; two adjustable wrenches; a tape measure; a hammer; a torque wrench; and jack and jack stands.
Start off by prying off the hub cap. Then loosen up these lug nuts using a 21mm socket and ratchet and a piece of pipe for some extra leverage. Once you get each of them loosened up you can raise the vehicle and remove them the rest of the way. Now pull the wheel off.
Now turn the wheel and then remove this 21mm nut at the top of your outer tie rod. Then once you remove it, you want to just put it back on just a couple threads. Spray the nut at the end of your outer tie rod with some penetrating fluid, and then, using two adjustable wrenches, just loosen it up. Now hammer the knuckle until the outer tie rod drops down. Now you can remove that nut and just set your outer tie rod off to the side.
Now measure from the boot on your inner tie rod to the center of your outer tie rod, and just remember that distance. Then you can twist your outer tie rod free. We'll fast forward as Mike does that.
On the left is the old outer tie rod. On the right, is the new one from 1A Auto. You can see they're identical and they'll fit exactly the same. Take your new outer tie rod and twist it into place. We'll fast forward as Mike does that. Now, measure from the boot to the inside of the outer tie rod and make sure it's the same distance. If it is, you're all set. If not, you'll have to move that nut to adjust it.
Now, feed your outer tie rod up through the wheel knuckle and replace that nut and tighten it up. If the studs start spinning when you use your 21mm socket just use a 21mm wrench and a 10mm socket to hold the stud in place and tighten it up. Then torque that to 111 foot pounds.
Now, using two adjustable wrenches just tighten that nut back up, and then put your grease fitting into place on the outer tie rod. Then just tighten it up with a 7mm socket and ratchet. Using a grease gun, just top it off with some grease.
Now we'll fast forward as Mike replaces the wheel, and replaces the lug nuts, and tightens them preliminary, and then lowers the vehicle and tightens them the rest of the way. Then torque each of them, in a crossing pattern, to 120 foot pounds. Then just replace your hub cap and you're all set.
We hope this video helps you out. Brought to you by www.1AAuto.com, your source for quality replacement parts and the best service on the Internet. Please feel free to call us toll-free, 888-844-3393. We're the company that's here for you on the Internet and in person.
Tools used
Tools used
Tools used
Tools used
Tools used
Tools used