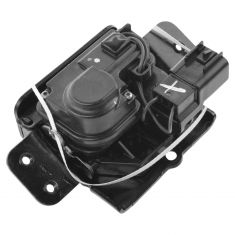
Replaces


Recommended for your 2012 Chevrolet Traverse
Frequently bought together
Genuine original equipment part (OEM) that was factory installed on your vehicle by the manufacturer.
Returns: Parts with electrical components cannot be returned once installed.
1 Year Warranty
This item is backed by our 1-year warranty. In the event this item should fail during intended use, we will replace the part free of charge. This warranty covers the cost of the part only.
Returns: Parts with electrical components cannot be returned once installed.
FREE Shipping is standard on orders shipped to the lower 48 States (Contiguous United States). Standard shipping charges apply to Hawaii and Alaska.
Shipping is not available to a P.O. Box, APO/FPO/DPO addresses, US Territories, or Canada for this item.
Expedited is available on checkout to the United States, excluding Alaska, Hawaii.
Final shipping costs are available at checkout.

Created on:
Tools used
Hi, I'm Mike from 1A Auto. We've been selling auto parts for over 30 years. We're dedicated to delivering quality auto parts, expert customer service, fast and free shipping, all backed by our 100% satisfaction guarantee. Visit us at 1AAuto.com, your trusted source for quality auto parts.
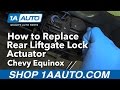
In this video, we're going to be working with our 2008 Chevy Equinox. We're going to show you hour to remove and replace your rear door lock actuator and latch assembly. If you like this video, please click subscribe. We have a ton more information on this and many other vehicles. If you ever need parts for car, you can follow the link down in the description over to 1AAuto.com. Here are the items you'll need for this repair.
Open your hatch and remove the two T30 Torx screws at the bottom here by the latch. We'll do this with the T30 Torx socket, ratchet, and extension. Now, in order to remove the rear panel, we'll have to move the top and both side panels, to get it off safely. We'll use our interior trim removal tool and carefully pry the panel out. We'll do the same thing for both sides. These actually – the side panels – pop in toward the middle. You want to make sure you lift up and bring it around the wiring for the defrosters. You don't want to risk breaking those. Now, the bottom panel should be loose enough that we can pop it out by hand. Remove that from the vehicle as well.
Remove the two Phillips head screws here securing this trim cover panel to the bottom of the lock actuator. We'll disconnect the electrical connector while we're here. Remove these with the Phillip's head screwdriver. When you're getting the last screw out, put a hand on that plastic cover, pull down, and remove that. Remove the connector from the assembly.
We'll use a paint marker. You can also use white out or a sharp punch just to make some indications here of where the edges of that latch are going to line up. Then, in the rear here, we have this little hole at the top, which we'll just mark the center line of to help make sure that our new latch goes into the same place, and closes and locks securely.
Once your marks are in place, we'll use a T30 Torx socket and ratchet to remove the three Torx screws from the assembly. Be careful because there are small washers in between the latch assembly and the body here. Those will fall our when you remove the screws. Just make sure you keep an eye on them because they need to go back in when we're reinstalling. Keep a hand on the assembly. Make sure you catch that washer. Remove it from the vehicle.
When reinstalling the latch assembly, you'll put your screw through, place your washer on the back, and then set that latch assembly in. We'll get all of these screws hand tight, just a couple of threads to start, to make sure that we have plenty of room to move and get those washers into place. Once everything's started by hand, we'll check that our marks are lined up. There is just a little bit of wiggle room here, but not much. Make sure those are all lined up, and tighten down all of our screws.
Reconnect the electrical connector on the backside. Before we go any farther, we'll want to make sure that our hatch closes nice and square and tight, and opens smoothly. If you get any kind of binding, or it won't latch or unlatch easily, loosen the bolts up and make some slight adjustments until everything goes smooth.
Set the tabs on the cover panel back into place, and push up, and start both your Phillips head screws on the back by hand before tightening them down with your screwdriver. Line up the tabs in your panel. Snap everything back into place. Reinstall the side panels. Once the side panels are reinstalled, you can install the top. Reinstall your two T30 Torx screws at the bottom panel. Close the hatch, and you're good to go.
Thanks for watching. Visit us at 1AAuto.com for quality auto parts, fast and free shipping, and the best customer service in the industry.
Tools used
Hi, I'm Mike from 1A Auto. We've been selling auto parts for over 30 years.
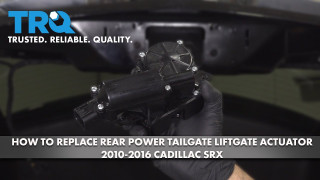
What's up, guys? I'm Andy from 1A Auto. In this video, I'm going to be removing and replacing the liftgate latch in this 2013 Cadillac SRX. If you need this part or other parts for your vehicle, click the link in the description and head over to 1aauto.com.
Open the liftgate. Next, we're going to take this cover off. You can try to take this off with a trim tool, right here—right here—and get underneath. It's a little bit tight, so I'm just going to use a pick. Just be careful not to scratch the plastic. Get underneath here and pop it off there. Slide it out. Then we're going to take this screw out. It's a T30, so use a T30 socket extension and ratchet.
So, there're multiple clips that hold this in, underneath here; then a couple of retainers that go that way on the back. So, we're just going to take some trim tools—we actually sell these trim tools at 1aauto.com. Just go underneath here; try to pry it out a little bit.
Just grab it with your hands and pull it straight down—just going to force it—and then the back is going to come this way—just like that. See—these are those clips that are in the back. Be careful not to break those. And then you have all these other retainers, all around. Then we have to disconnect this electrical connector. Push down on this lock; slide it off. I'm going to take a T30; I'm going to take these three screws out. Take a T30 and a ratchet; pull that screw out. Pull that bolt out. All three of those are out, and we can grab the latch and slide it through here, and the connector, right here. We need to slide this gray piece up. That's just a lock. And push down on the lock, and slide the connector out.
This is the old part. This is the new latch from 1aauto.com. As you can see, the shape is the same. Flip it over. The latch part is the same. Connectors are the same. Get yours at 1aauto.com and you'll be ready to rock 'n' roll.
Now we're going to take the new latch. We're going to plug in the connector, right here. Now we'll push down on that lock tab. I'm going to feed that wiring harness back in. Put that latch in position, like that. Next, we're going to take these screws—you can put a little bit of Threadlocker on them if you need to. Get these started here. Get this one. I'm going to get them all started first, before I tighten them down. I'll take the T30 and the ratchet and I'll tighten this down. I'll snug these down.
Before I put this panel on, I'm just going to make sure everything's working properly. Just manually close the liftgate. Latch is good. I'm going to open the liftgate, and it's working properly.
I'll take this cover. Connect the connector, right here; lock it on, and you want to slide these two pins in from the back first. Lock those on and then line up the other guides. There's a guide pin right here—you line that up and then line the other one up as well. Just push; give it a tap. Install this bolt with a T30 socket extension, and once I get it down, I'll snug it up with the ratchet. Just snug—not too tight. It is plastic. Get this little cover; line it up, lock it in. We can close this.
Thanks for watching. Visit us at 1aauto.com for quality auto parts, fast and free shipping and the best customer service in the industry.