Replaces


Recommended for your 2015 Acura TLX
Frequently bought together
About TRQ:
TRQ is a trusted brand dedicated to making every repair a success story by combining premium parts with easy installation. Each TRQ part is engineered by a team of automotive experts to meet or exceed OEM standards, delivering enhanced performance and maximum longevity. With rigorous in-house testing, the brand ensures superior fit and function across every product line. TRQ also provides customers with best-in-class, step-by-step installation videos—so you can complete repairs with confidence, whether you're a first-time DIYer or an industry professional.
Returns: Parts with electrical components cannot be returned once installed.
Left Hand Drive:
All of our auto parts are intended for Left Hand Drive USDM vehicles. If your vehicle is Right Hand Drive, please ensure the part is correct for your specific vehicle.
Attention California Customers:
 WARNING: This product can expose you to chemicals including Di(2-ethylhexyl)phthalate (DEHP), which is known to the State of California to cause cancer, and birth defects or other reproductive harm. For more information, go to www.P65Warnings.ca.gov.
Lifetime Warranty
This item is backed by our limited lifetime warranty. In the event that this item should fail due to manufacturing defects during intended use, we will replace the part free of charge. This warranty covers the cost of the part only.
Returns: Parts with electrical components cannot be returned once installed.
FREE Shipping is standard on orders shipped to the lower 48 States (Contiguous United States). Standard shipping charges apply to Hawaii and Alaska.
Shipping is not available to a P.O. Box, APO/FPO/DPO addresses, US Territories, or Canada for this item.
Expedited is available on checkout to the United States, excluding Alaska, Hawaii.
Final shipping costs are available at checkout.
Created on:
Tools used
Hi, I'm Mike from 1A Auto. We've been selling auto parts for over 30 years. We're dedicated to delivering quality auto parts, expert customer service, fast and free shipping, all backed by our 100% satisfaction guarantee. Visit us at 1AAuto.com, your trusted source for quality auto parts.
The blower motor is located right behind the glove compartment on the very bottom of the dashboard. Right down here there's a panel that you have to remove so that you can get to the blower motor. The great news is it's really easy to remove. You just pull it straight down. There's three clips that hold it in. There's one, there's two, and there's three. Then there's one connector right here that we need to unplug by pushing down the tab on it. At that point, this whole piece comes right out.
Right here is the blower motor connector, which we can squeeze the clip on and pull right out the bottom with maybe some wiggling. There we go. That's what the connector looks like. You just push this tab to remove it. Now we can take out the three mounting bolts. Here's one, here's one straight in the back, and there's one right here on the driver side. We're going to use a flat-tip screwdriver to remove these. There's the first one. Here's the third one. Then we should be able to wiggle the wiring out of the way and hopefully pull this right out. Looks like we have to pop this one wiring connector out of the way first just like that. There we go. Then you can pull it right out the bottom.
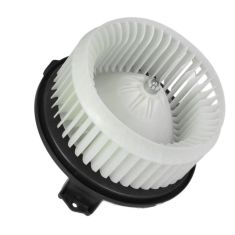
Here we have the two blower motors. This is the old one; this is the new one. They obviously look identical. They have the same connections on them. They both have the cages. The connections are a little bit different, but they function the same way. It will blow air just like the original one does and keep you hot in the winter and cold in the summer.
Now we're going to slide the blower motor up into the housing. We'll make sure that it is lined up with this port over here. We can slide this clip back on, and then begin to hand-tighten these three screws into place. Now we'll screw these in with a flat blade screwdriver. Using a shorter flat blade screwdriver is probably better than a long one for at least the front-most screw. With the three screws in, you can plug in the blower motor connector. Now you can take this underdash panel and plug in this light.
Up in the back, there's a couple of clips that you want to make sure you get hooked on properly. You can see there's one right here and there's one right here. You want to clip those into the right spots. Then right up here, you want to make sure each of these three things gets snapped in properly. At that point, your blower motor is installed.
Thanks for watching. Visit us at 1AAuto.com for quality auto parts, fast and free shipping, and the best customer service in the industry.
Tools used
Hi, I’m Mike from 1A Auto. We’ve been selling auto parts for over 30 years!
What's up, guys? I'm going to show you how to remove and reinstall a blower motor in this 2009 Honda CR-V. If you need a blower motor for your vehicle, check out 1AAuto.com.
Underneath the glove box on the passenger side, there's a little cover here. What you're going to do is you're going to grab the front part of that cover and pull it down. There's some clips that hold it in. And then you're going to pull it forward. There's some pins in the back that hold that in. All right, and our blower motor is right here, and the connector is right here. I'm going to push on this little tab here and pull it down.
So, we have some T25 screws. There's one right here, there's one right here, and also one in the back here. Three of them. We're going to use a T25 Torx bit and an extension and a ratchet. It's easiest to take the back one out first. Oh, that one came out. And then take the last one out. Get that last one out, and then we can pull the blower motor right out.
Now, to reinstall the blower motor. There's this little exhaust port that lines up with this little hole here, so we want to line that up first, and then the bolt holes will line up, and we can install these screws. Get one started, then try to get the other one started as well. All right, once you get those all started, then we're going to snug these up with our T25, extension, and our ratchet. Just make sure those are all snug, then we can connect the electrical connector. Just line that up, click it into place. Then reinstall this cover. These two pins line up with these two holes in the back. Line those up, and when the cover's in place, just push it straight up.
Thanks for watching. Visit us at 1AAuto.com for quality auto parts, fast and free shipping, and the best customer service in the industry.
Tools used
Hi, I’m Mike from 1A Auto. We’ve been selling auto parts for over 30 years!
Now, underneath the glove box we're going to pull this panel down. Just grab it with your fingers and pull straight down. And then you're going to slide it out. There's these two things that slide in. These two little tabs, and these are the clips that pull right down. So pull that out of our way.
This is the blower motor right here. We're going to disconnect the electrical connector. We're going to push this little tab right here, and the connector will come out. Next, there's these bolts that hold it in. We you use an eight millimeter socket and extension, and a ratchet. We'll take these out. Hard to see there's one back here. We're going to hold the blower motor up while I'm taking this last bolt. Remove this wiring harness out of your way little bit. I actually have to unclip this wiring harness back here like that. You can pull the blower motor straight down.
To make it easier, I'm going to pop this retainer off the wiring harness and hold that out of the way. I'm going to slip this blower motor back in. Line it up. Install the screws that hold it in, so get that last one in. I can start to tighten them down with the ratchet. Remember it's plastic, so don't over tighten them, just snug. Install the wiring harness on those retainers—this one as well. We can install this connector. Slip it up until it clicks. We're going to slide these two pins in the back—line those up with where those go. Then line up these retainers up here and push in.
Thanks for watching. Visit us at 1AAuto.com for quality auto parts, fast and free shipping, and the best customer service in the industry.
Tools used
Hey friends, it's Len here at 1A Auto. Today, I'm working on a 2007 Toyota FJ Cruiser, and I'm going to be replacing the blower motor. It's going to be very simple and you can do it too. If you need this or any other part. You can always check us out 1aauto.com. Thanks.
Okay, so I took out the glove box just so you can see what's going on down there, because getting underneath here at the same time as I'm underneath there is going to be a little difficult for the camera guy. Just a heads up, you don't need to take out the glove box to do the blower motor. While this is underneath the dash, it's going to be sitting just like this, but I'm going to turn it like this so I can show you. You've got a mounting hole here, there, here. Those are Torx bits, 25s.
You also have an electrical connector right here. To do that, you just grabbed right here with your thumb, wiggle it, pull down your electrical connector, and then you take out your three mounting bolts. This will drop right out. Okay, so I'm going to go under here and do it. You're not going to really be able to see much of anything, so I wanted to just quickly explain it to you. Grab the push connector, give it a little wiggle. There's our connector. Look around for any colors, any corrosion. Rainbow colors inside of electrical connectors are very bad, could come from moisture or something like that.
Now I'm going to use my Torx bit 25, remove these little, there we are, little screws. Once you break them free, generally speaking, you should be able to spin it out by hand because they just screw into plastic so they're really not torqued in or anything. Screw number two looks exactly the same as the first. I don't have to worry about mixing those up, that's nice. Screw number three, same as the other two. Easy peasy. I'm going to grab my blower motor, give it a little wiggle, pull it right out of here. Blower motor. For the head on these bolts, you can use something as basic as a flathead, so you got the long slash there. You can you use the T25, which is what I used to remove it. Or you can also use an 8 millimeter socket. Any of those three we'll remove these bolts.
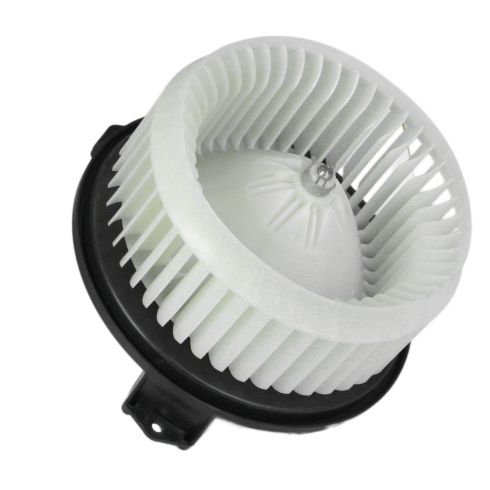
Here we are friends, a quick product comparison for you. Over here, we have our blower motor out of our 2007 Toyota FJ Cruiser, just removed it. Over here, we have our brand new quality 1A Auto part. Your blower motor comes with a brand new cage, which is very important. A lot of times you'll get these and they'll just come with the bottom assembly. You have to take the cage off of your old one and then mount it on there, and of course they break. Ours comes with a brand new cage, which is great. It comes balanced, so you know you're not going to get too much of a hum coming out of that. That's nice. Don't have to worry about it vibrating and wobbling. It's got your electrical connector down here, and of course your three mounting holes. With all that said, I don't see any reason why this isn't a quality part to install on the vehicle, so I'm going to go ahead and do it. If you need this or any other part, you can always check us out 1aauto.com. Thanks.
Okay, so we have our brand new blower motor down here. We're going to come underneath the dash, line it up with the holes, slide it in, just like that. Very nice. We'll take our three mounting bolts, there we go, come on. Nice. I'm not going to tighten any of them up until I get all three of them started, and then once they're all in, I'll go ahead with the electrical connector. I'm going to do the electrical connector last, just in case the blower motor decides it wants to come down for some reason. I don't have to worry about it putting a tug on my harness.
I'm going to start with tightening the one that's farthest away from me/the hardest to get to. That one's definitely going in. All right, all three of them are going in so I'm just going to go ahead and tighten this up. I'm just screwing into plastic here, so I'm not going to go super tight once it bottoms out, which I think it just did, yep. A teeny bit more and that's it. Do the same to all three screws. There we are. Okay, there it is. Blower motor's nice and tight. There's a little wiring clip up here, that just holds that up. Pop this in. There we are. Here we go. Oh yeah, there she blows. Cool.
Thanks for watching. Visit 1aauto.com for quality auto parts shipped to your door, the place for DIY auto repair. If you enjoyed this video, please click the subscribe button.
Tools used
Hi, I’m Mike from 1A Auto. We’ve been selling auto parts for over 30 years!
If there is a plastic cover here—ours may be missing, not sure, it's an older car. If you do have a plastic cover, it looks like it would clip into here, and then up here along the trim, just pull that down, get it out of the way, and get to your blower motor.
The blower motor is located under the glove box, right here in the passenger foot well. There is a guard over the plug. Use a Phillips head screwdriver to remove the screws. Then I can unplug it.
So it's two screws: one on the front here, self-tapping screws into the plastic. Find the one that's in the back here. Just around the back of it. This plastic guard's coming down. Put that aside.
There's a lock here. You can push it in on the connector and unplug the connector. Wiggle it out at the same time. Unclip the harness, just pull it down, and put that aside. There's three screws that are holding the blower motor. It's the HVAC case. We use a T25 Torx to unscrew them. You could also use a flat bladed screwdriver, there's a slot for it. Torx is a little easier, because it doesn't want to slip out. Just unscrew these. I'll support it while I unscrew this one. Lower the blower motor right out of the case.
This is the original blower motor from our vehicle, brand new one from 1AAuto.com. It's an exact match. It has the same three style mounting holes and the same style plug. This will fit great and work great in our vehicle.
Going to line up this with this opening here. Put it right in place. Hold it up there. Get this screw started. It’s closest to me. And just repeat that for the other two. Plug our harness in, and clip it into place. Install this little guard up here. Get that one started. Get the back one started now.
Thanks for watching. Visit us at 1AAuto.com for quality auto parts, fast and free shipping, and the best customer service in the industry.

HMA84756