Replaces
This part doesn’t fit a . Select from parts that fit.
Frequently bought together
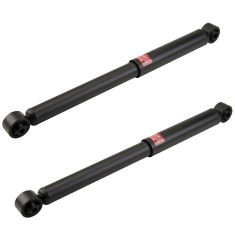
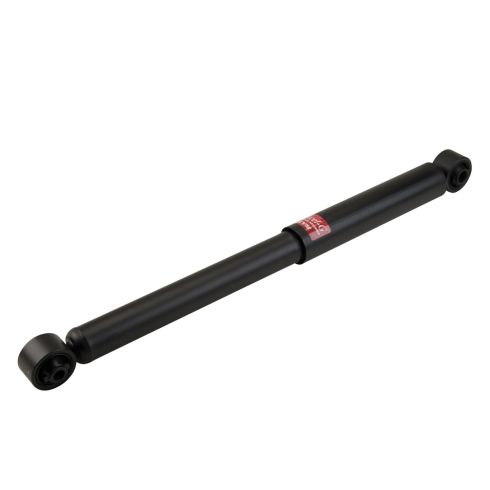
Why Buy KYB Excel-G?
KYB Excel-G shocks and struts will match your vehicle’s Original Equipment (OE). These shocks and struts are perfect for restoring or surpassing your original suspension performance. Some of their perks include:
Item Condition:
New
Lifetime Warranty
This item is backed by our limited lifetime warranty. In the event this item should fail due to manufacturing defects during intended use, we will replace the part free of charge. This warranty covers the cost of the part only.
FREE Shipping is standard on Orders shipped to the lower 48 States (Contiguous United States). Standard shipping charges apply to Hawaii, Alaska and US Territories. Shipping is not available to Canada.
Expedited is available on checkout to the United States, excluding Alaska, Hawaii and US Territories as well as P.O. Boxes and APO/FPO/DPO addresses. Final shipping costs are available at checkout.


Created on:
Tools used
Brought to you by 1AAuto.com. Your source for quality replacement parts and the best service on the internet. Hi, I'm Mike from 1A Auto Parts. I hope this how to video helps you out and next time you need parts for your vehicle, think of 1aauto.com. Thanks.
In this video, we're going to show you how to replace the rear shocks on this 2003 Honda Odyssey; same for any 1999-2004. We show you the right hand or passenger side rear and the driver side or left hand rear is the same procedure. Tools you'll need are jack and jack stands to raise and support the car. You will also need a 17-mm socket and ratchet, as well as either a 19-mm socket or your lug wrench.
First, raise and support the vehicle then use a 19-mm socket and breaker bar. If you're just using hand tools, actually, you'll want to loosen the lug nuts when the wheel is on the ground and the vehicle is in park. Loosen the lug nuts first, then raise and support the vehicle. Remove the five lug nuts and remove the rear wheel. So you see my wrench is on the top of the shock absorber. Just spray some Anti-Seize or penetrating oil in there, and then do the same thing down here for the bottom. All right. Speed up here as we loosen that bolt. Don't take it out all the way yet. You can see it requires some force, but you should be able to do it with a regular ratchet handle. Again, fast forward as we loosen, and then we will remove this bolt.
Now back up to the top. Remove the top bolt the rest of the way. And now reverse the procedure, re-install. Use a hammer. Tap the bottom of the new shock onto the shock mount on the bottom. Now, use a jack to lift the suspension just a little bit to line up the top mounting hole and once you get it lined up, then slide the bolt in and start tightening it up. We'll fast forward. You may have to tap lightly on the bolt to get it going and then push firmly on it to start it and then tighten it up nice and tight. Then thread the bottom nut on and tighten that up as well. Both these should be around 65 to 70 foot pounds.
Now I'm going to fast forward to put the wheel back in place. Start all five lug nuts on by hand first and then just kind of preliminarily tighten them and then lower your vehicle to the ground. Now set your torque wrench to 90 to 100 foot lbs and torque the wheel using a star pattern. Whenever you have the brakes apart, just make sure that you pump the pedal a few times. Make sure it's nice and firm. And then before you road test your vehicle, just do test stops from 5 and 10 miles an hour just to make sure the brakes are working properly.
We hope this helps you out. Brought to you by www.1AAuto.com. Your source for quality replacement parts and the best service on the internet. Please feel free to call us toll free 888-844-3393. We're the company that's here for you on the internet and in person.
Tools used
Tools used