Replaces


Frequently bought together
Part Details
About TRQ:
TRQ is a trusted brand dedicated to making every repair a success story by combining premium parts with easy installation. Each TRQ part is engineered by a team of automotive experts to meet or exceed OEM standards, delivering enhanced performance and maximum longevity. With rigorous in-house testing, the brand ensures superior fit and function across every product line. TRQ also provides customers with best-in-class, step-by-step installation videos—so you can complete repairs with confidence, whether you're a first-time DIYer or an industry professional.
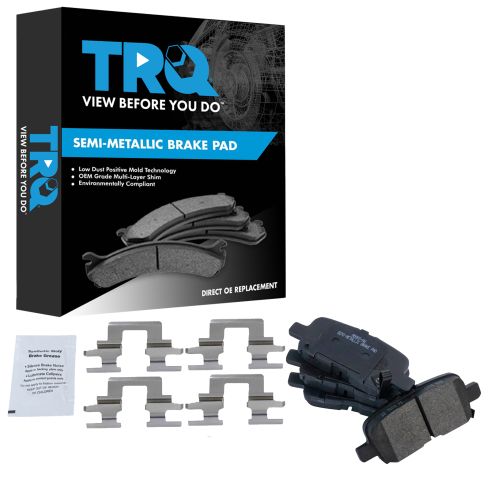
Product Features
TRQ brake pads are manufactured using premium raw materials and design standards to restore original performance. TRQ brake pads are positive molded and utilize a multi-layer shim for enhanced performance and service life. TRQ’s combination of materials and design ensures a low dust and low noise braking experience. TRQ recommends replacing your brake rotors when you replace your brake pads to ensure even wear of components and improved braking comfort. All products are fit and road-tested in our Massachusetts R&D facility to ensure we deliver on our promise of Trusted Reliable Quality.
Attention California Customers:
 WARNING: This product can expose you to chemicals including Lead and Lead Compounds, which are known to the State of California to cause cancer, and birth defects or other reproductive harm. For more information, go to www.P65Warnings.ca.gov.
Lifetime Warranty
This item is backed by our limited lifetime warranty. In the event that this item should fail due to manufacturing defects during intended use, we will replace the part free of charge. This warranty covers the cost of the part only.
FREE Shipping is standard on orders shipped to the lower 48 States (Contiguous United States). Standard shipping charges apply to Hawaii and Alaska.
Shipping is not available to a P.O. Box, APO/FPO/DPO addresses, US Territories, or Canada for this item.
Expedited is available on checkout to the United States, excluding Alaska, Hawaii.
Final shipping costs are available at checkout.
Created on:
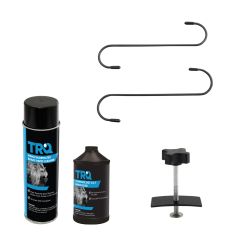
Tools used
Brought to you by 1AAuto.com, your source for quality replacement parts and the best service on the Internet.
Hi, I'm Mike from 1A Auto. I hope this how-to video helps you out, and next time you need parts for your vehicle, think of 1AAuto.com. Thanks.
In this video, we're going to show you rear brake replacement on this 2003 Honda Odyssey, same as any '99 to '04 Odyssey. We're going to show you the right hand or passenger side. Obviously, you will always want to replace brakes for both sides. We show you one side. Do the other side as well.
Tools you'll need: You'll need a new brake set from 1A Auto.com, jack and jack stands, a 19 millimeter socket and breaker bar or your lug wrench, 12 to 14 millimeter sockets and ratchet, a wire brush. You may or may not need a large C Clamp, and you'll need an impact driver and a hammer if the original screws are still in your disks. Lastly, you'll need a torque wrench to put everything together correctly.
First, raise and support the vehicle. Then use a 19 millimeter socket and breaker bar. If you're just using hand tools, actually, you'll want to loosen the lug nuts when the wheel is on the ground and the vehicle is in park. Loosen the lug nuts first. Then raise and support the vehicle. Remove the five lug nuts and remove the rear wheel.
Okay, we're in around behind the rotors. We've got two bolts. They're 12 millimeter, here and here. So I'll put a wrench on them, put another wrench on there for some extra leverage, then loosen them. Then just fast forward, as we take them the rest of the way out. Now we're going to grab on the caliper and pull it towards the outside of the vehicle. As we pull it out, that forces the piston back into the caliper and then loosens it up and it comes right off and then we can kind of prop it up in behind. Then we take the pads out just by pulling them out of their brackets. Now we're putting a wrench on this 14-millimeter bolt here, so we want to remove this one and then this one up here. These two bolts hold the caliper bracket on. Let's put a 14 millimeter wrench on there and hook the larger wrench on to it or use a larger handle socket and ratchet. Loosen up those bolts and then remove them and remove the caliper. Fast forward here a little bit.
So now we're going to use an impact driver. We're going to load that into the screw and then you turn it counterclockwise, use the hammer, and give it a good whack, and it loosens up some bolts. We're going to just fast forward as we remove the screws the rest of the way, and hopefully your rear rotor comes off this well. If not, you can use a hammer. Okay. Now install your new brake from 1A Auto, and then use the two screws I'll fast forward as we put those back in to hold it in place. There's a small rubber plug you want to force out of the old rotor and then just put it into the new rotor, press it in by hand first. Then grab a screwdriver and push it in the rest of the way.
Before you reinstall the brackets, you want to use a wire brush and clean the stainless steel slides. Some brake pads actually come with new ones, so you either replace them or clean them up. Then you make sure that your bolt slides are free. If they're not free or have too much, they're too sticky, pull them right out, clean them up and grease them. Now take your brackets and put them into place. Start the two bolts on, and in a minute here I'm just going to fast forward as I get those, basically just get those bolts started and seated. Set your torque wrench to 45 foot-pounds. Now, just slide the outer pad in. It goes right into the slides. Then the inner one goes in the exact same way. Now you'll want to take your caliper. Use a large C-Clamp and make sure you reset the piston. As you tighten it up, the piston gets pushed back into the caliper. Usually just by pulling on it in the beginning, you're able to reset the piston but you just want to make sure. Then you can slide the caliper right on. Now put your 12 millimeter bolts back in. Set your torque wrench to 20 foot-pounds and tighten them up.
Now, I'm going to fast forward to put the wheel back in place. Start all five lug nuts on by hand first. Then preliminarily tighten them, and then lower your vehicle to the ground. Now set your torque wrench to 90-100 foot-pounds and torque the wheel using a star pattern. Whenever you've had the brakes apart, just make sure that you pump the pedal a few times, make sure it's nice and firm. Then before you road-test your vehicle, just do test stops from 5 and 10 miles an hour just to make sure the brakes are working properly.
We hope this helps you out. Brought to you by www.1AAuto.com, your source for quality replacement parts and the best service on the Internet. Please feel free to call us toll-free, 888-844-3393. We're the company that's here for you on the Internet and in person.
Tools used
Hi, I’m Mike from 1A Auto. We’ve been selling auto parts for over 30 years!
If your vehicle's equipped with a locking lug nut, you're going to want to have it ready. Get it to fit on there. These are 19mm. Take our breaker bar, loosen them up a half turn. Once you loosen your lug nuts, raise and support your vehicle. We're going to use a lift for this so it will make it easier for you to see what we're doing, but you can do this on jack stands in your driveway. These are pretty loose now.
Going to take my socket in my hand and undo them with my hands. When I'm doing the last one, just make sure you've got hold of the wheel. It might come loose. This one came off pretty easy, and remove the two 12mm slide pin bolts. You get the top one loose and get the bottom one loose. I'm going to switch to a ratcheting wrench. So put these two slide pin bolts so you don't lose them. I've got a bungee cord here. Just going to place it right there for now. I'm going to work this caliper off.
If it doesn't come off very easily, you can get a large flat-headed screwdriver or pry bar and pry it off. I'm going to take the caliper and our bungee cord and I'm just going to wrap it around the suspension just because we don't want it to fall or hang on this rubber brake line. You don't need to undo the caliper for the brake line. I'm just going to check these slide pins to make sure they're free. They should move fairly easily in and out just like that. If the rubber boot comes off, that's okay, you can just push it back up.
Now we can get the brake pads out. You can use a small flat-bladed screwdriver or a pry bar. I'm going to use a pry bar. Just work them out. Same for the inside. Next, remove the 14mm caliper bolts, caliper bracket bolts. There's a bottom one here and a top one here. 14mm wrench. If they're really stuck, take a rubber mallet or a dead blow. I'm going to hit on the wrench. Those free, I'm going to switch to a ratcheting 14mm wrench.
Those are pretty loose. Use your other hand to hold on to the bracket so it doesn't fall. I'm going to take our bolts that we took out that were holding the bracket on, and thread them back into the bracket so we don't lose them. I'm going to spray some rust penetrant oil around the hub here and on these screws that we need to remove that are holding the brake rotor to the hub. I'm going to use a large Phillips head socket attachment on a 3/8 dry ratchet to remove these. So make sure your parking brake is released.
Parking brake is inside this part of the brake rotor. There might be a rust ridge in there that will catch on the brake shoes. This rotor should come off without too much effort. If it gets really stuck, you can put 8mm x 1.25 bolts in here to help push it off. Before I put the bolts in here, I'm going to spray some rust penetrant oil on the threads. The bolts that I'm using have a 12mm head, so I'm going to use my ratcheting wrench. I'm going to go evenly on each side. Now I've got it free. You can see that's your parking brake assembly, and sometimes they just get held up. A rust ridge builds up in here and the shoes get held up on it.
So now's a good time to inspect your parking brake assembly and replace any parts as necessary. These pads are in really good shape, or shoes. They've got plenty of material on them. Especially on an automatic car—this doesn't get used very much. There is some penetrating oil that got in here from spraying down the hub. I'm going to take some brake parts cleaner at this time and just spray it out. I'm going to make sure these pads stay nice and clean.
Here we have our old rotor and pads from our vehicle. Here is the new rotor and pads from 1aauto.com. You can see that the old pad comes with backing plates and shims as do the new pads. Comes with the wear indicators. These pads are getting pretty thin than the original ones. Now's a good time to replace them. So the rotors are identical. Same amount of lug holes, same screw holes, and same pusher thread holes. Inside it has the same parking brake setup hub. These should fit great on your car and give you great stopping power.
We're also going to switch over this rubber plug. We're going to put it in our new rotor. Just going to push it out from the back. Almost got away from me there. Take our new one, push it in and you're all set. If your hub is really rusty, you should take a wire brush and just knock some of the rust off. This one's in pretty good shape, so I'm going to leave it alone. We'll take our rotor. Going to put it on inside out. Take brake parts cleaner and clean it. Clean the inside, because that's where your parking brake shoes will ride. Now I can flip it over.
We're going to line up these holes with the holes in the hub. So the reason why you clean these brake rotors before you use them is because when they're shipped, they're shipped with a light coating of oil or Cosmoline to prevent surface rust. And you don't want that into your brake pads. I'm going to take our small Phillips head screws here and reinstall them. I'm just going to go until they get tight. All these do is hold the rotor in place while you're working so the rotor's not flopping around while you're trying to. With the rotor installed the correct way, I'm going to take my brake parts cleaner and finish cleaning it. If there's really heavy stuff, you can take a rag, wipe it down.
The wear on this inside pad looks a little bit uneven. It's got a bit of a slope to it. It's not straight. It should be nice and straight, so that typically means that one of these caliper slides may be sticking. This one's a little hard to move. This one's fairly easy to move. I'm going to pull one out. Start with this one. If you need to, you can take a little pick, carefully pop this boot over it. That pin looks a little bit dry. I'm going to wipe it off with a rag. Make sure you don't lose the little rubber piece that's on the end of it.
Take some brake caliper grease and grease it up. Reinsert it back into the caliper. Those can take a little bit of force, usually because there's some air stuck in there. So then what I'll do is squish it in and use my pick and sort of let some of the air out and work that boot back up into the groove. That's got a lot smoother movement on there now. The reason why it's pushing out is probably an air pocket in there. You can just open this up and squish it down. That's okay, we'll push that back together when we put the caliper on. We'll do the same thing for this one.
The boot already came off the little lip here. Take a flat-bladed screwdriver to remove the brake pad clips. These are typically stainless and they don't really rust, just get full of dirt. So we're going to pop them out and clean them. I like to use the old box to keep all the dirt and grit and brake parts cleaner in one place, because we're going to spray them with brake parts cleaner. Take a wire brush, scrub where the pads ride. Take a paper towel and just wipe them down. If you want, you can take your wire brush and clean right here, some of the rust out. A little brake parts cleaner. Same to the other side.
Now we can reinstall our clips. They just snap back into place. Reinstall the caliper bracket on the car. Hold it in place with one hand and take my bolts. Might have to wiggle it around. This one went in pretty easy. I'm just going to thread it down by hand. I'm going to take our inside pad. I'm going to spray it with some brake parts cleaner. I just want to make sure that the surface is clean and it doesn't have any grease or oil on it. I'm going to take a little bit of grease, caliper grease, and put it on the edge. I'm going to start in the bottom slot and push it up against the rotor. That's a little too much. You don't need much. Seat it in the lower tab. Slide it in the upper one.
Before we reinstall the caliper, we need to compress this piston back into the brake caliper, so I'm going to take the old brake pad. I'm going to take our C-clamp and get it sort of in place. It will be a little tricky with one hand. Now I'm just going to rest the rotor on the top of the dust shield. I'll hold it with one hand and just slowly thread it in so it compresses the piston into the caliper. I'm just going to go 'til the pad bottoms out on the edge of the caliper just like that. We can undo our bungee cord. Also take it off the suspension so I don't forget it.
Make sure these pads are nice and tight against the rotor. I'm going to roll our caliper down. You may just need to push this pin in. These pins have little flat spots that will line up with the caliper. That way, as you're threading in your slide pin bolts, they won't spin. You just want to make sure that those are lined up correctly.
Now I've got these caliper slide bolts started by hand. I take my 12mm ratchet wrench. Use a 14mm socket and extension. Torque the top caliper bolt to 41 foot-pounds. Just a 14mm socket and the torque wrench on the bottom one. Watch out for your ABS wire. You may need to move it out of the way. Torque it to 41 foot-pounds. Torque the caliper slide pin bolts to 27 foot-pounds with a 12mm socket.
Reinstall the wheel. Thread the lug nuts on by hand. 19mm socket ratchet. I'm going to snug these lug nuts. The torque wrench set to 80 foot-pounds, torque the lug nuts in a star pattern. Before you drive the vehicle, gently press the brake pedal about 1/3 of the way repeatedly until it gets hard. Once you feel the brake pedal become hard, the job is complete and you're ready to drive the vehicle.
Thanks for watching. Visit us at 1AAuto.com for quality auto parts, fast and free shipping, and the best customer service in the industry.

BFA73684