Replaces


Frequently bought together
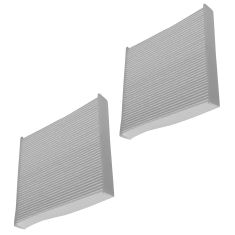
Part Details
About TRQ:
TRQ is a trusted brand dedicated to making every repair a success story by combining premium parts with easy installation. Each TRQ part is engineered by a team of automotive experts to meet or exceed OEM standards, delivering enhanced performance and maximum longevity. With rigorous in-house testing, the brand ensures superior fit and function across every product line. TRQ also provides customers with best-in-class, step-by-step installation videos—so you can complete repairs with confidence, whether you're a first-time DIYer or an industry professional.
Attention California Customers:
 WARNING: Cancer and Reproductive Harm - www.P65Warnings.ca.gov.
Wear and Tear
This item is backed by a 60-day warranty against defects in materials and workmanship under its intended use. The warranty does not cover normal wear and tear. This warranty covers the cost of the part only.
FREE Shipping is standard on Orders shipped to the lower 48 States (Contiguous United States). Standard shipping charges apply to Hawaii, Alaska and US Territories. Shipping is not available to Canada.
Expedited is available on checkout to the United States, excluding Alaska, Hawaii and US Territories as well as P.O. Boxes and APO/FPO/DPO addresses. Final shipping costs are available at checkout.
Created on:
Tools used
Hi, I'm Mike from 1A Auto. We've been selling auto parts for over 30 years. We're dedicated to delivering quality auto parts, expert customer service, fast and free shipping, all backed by our 100% satisfaction guarantee. Visit us at 1AAuto.com, your trusted source for quality auto parts.
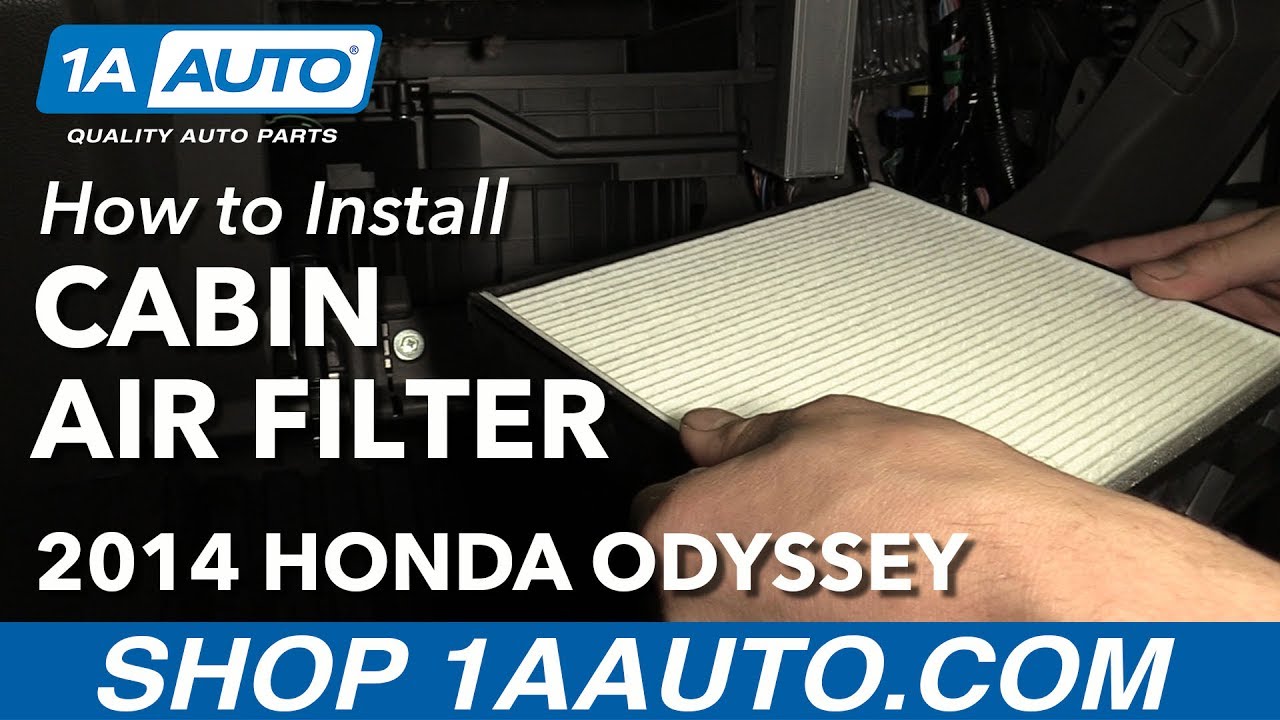
Here we have the dashboard of a Honda Odyssey. We want to change the cabin air filter, which is sort of tucked away behind the glove compartment. We're going to start this off by removing the glove compartment. We'll pop it open. Over on the left side you're going to push down on this little device here. Then, on the top sides of the glove box, you're going to push in. You'll see that there's a tab here, and there's the tab on the other side that's identical. Those hold it in. At that point, you can pull it completely out and you cannot even dump out all of your items, which is great. We're going to set this aside.
Then, right up here on the heater box is where the cabin air filter lives. There's a tab on each side of this which you can pull out. There's not a ton of room to pull it out of here. Here we go. Here's the cabin air filter. You can see it's got some leaves on it. We're going to go ahead and pop that right out. Remove all the bugs and the leaves, and set that aside.
Here we have the old filter, which you can see is full of bugs and debris. Over here we got the new filter. It essentially looks the same. You can see the bottom has the air flow marking on it, so you know which way to put it in. It's the same size and shape, so it's going to filter out all the future bugs and leaves just like the original one did. You can see on here the filter says "air flow down."
Then right on the holder it says "air flow down," so you know you're putting it in the right direction. It looks like I actually had to turn this 90 degrees and drop it right in the plastic holder. I got to make sure it's tucked in the edges because you don't want any open areas where the bugs can flow through. Otherwise, you're going to have bugs flowing through your vents. Now you can see it's tight around the edge, tight around this edge.
Now we can slide it back in just like that. Now we're going to clip the glove box right back into its dashboard area. It clips right in the bottom first on the driver side, then it clips on the passenger side right here. Then we'll lift this up just to make sure it's not catching anything. At this point you can push it right into place, then come down here. You'll see a little flange or something that this attaches to.
We'll pull it out and lift up on it. It's a little bit difficult to get with your fingers. There we go. You can see it comes up from the bottom and it locks onto this little tab right here. At that point, you can close your glove box and your filter is changed.
Thanks for watching. Visit us at 1AAuto.com for quality auto parts, fast and free shipping, and the best customer service in the industry.
Tools used
Hi. I'm Mike from 1AAuto. We've been selling auto parts for over 30 years!
Open the glove box. Empty the glove box, because we're going to flip it down. Push in on the plastic. It's going to pull it off of these little bump stops and you can slide it down.
The cabin filter is behind this whole door here. There's little arrows telling you where to push on the tabs. Push them in and it's going to slide out a whole tray, and the cabin filter sits inside of this tray. See it's pretty dirty. We're going to change it out.
Here's our original cabin air filter. It's sitting in the tray that came out of the car. It's really dirty and filled up with nastiness. Here's our brand new one from 1AAuto.com. I’m just going to take it out of the plastic bag. It’s got a little arrow, showing the direction of air flow. You can see it's an exact match. It doesn't really matter which direction the pleats are going. Could fit this way, too. It's pretty much a square.
Just take out the old one. The airflow arrows are pointing down, so I'm going to install this one with the airflow arrow pointing down. Put it in place. Now it's ready to go back in the car.
I’ve just got to reinsert the tray with the new cabin air filter. Push it right into place. Then we take our glove box and squeeze the tabs together. Put our stuff back in the glove box. The cabin air filter is replaced.
Thanks for watching. Visit us at 1AAuto.com for quality auto parts, fast and free shipping, and the best customer service in the industry.
Tools used
Tools used
Hi, I’m Mike from 1A Auto. We’ve been selling auto parts for over 30 years!
We're going to open up the glove box. We're going to have to grab the inside of the glove box, and fold it in, like this, and then it will flip down. We can access the cabin filter right here. There's a little tab on this side. Right here, and push in on that. Same with the tab on this side. Push in, and then it'll release. We can pull it straight out. Just like that. I can pull the cabin filter right out, just like that.
As you can see, this is our old cabin filter. If you open the pleats, you can see how dirty it is. There's a lot of debris in there. This is our new cabin filter from 1aauto.com. It's designed the same. All the pleats are the same.
Right here there's an arrow of which direction the flow is. So you want the air flow to go down, and suck in from the blowing motor. Get yours at 1aauto.com, and you'll be ready to rock and roll.
So we're going to take the cabin filter. Remember the arrow, it's going to go down. So, the tray is like this. We want the arrow going down into the tray. This back part you want to line up in there, and push it down. Just like that. And we can slide it in to the slot, and clip it in. And we can take our glove box, we're going to fold these corners in a little bit, and push it back.
Thanks for watching. Visit us at 1AAuto.com for quality auto parts, fast and free shipping, and the best customer service in the industry.
Tools used
Hi, I’m Mike from 1A Auto. We’ve been selling auto parts for over 30 years!
Right. We're going to replace the cabin filter. We're going to open the glove box right here. We're going to release this by pushing down. Just like that, and we're going to grab the glove box and push in these ears and then you can flip it down.
Underneath here, there's two release tabs inside of this. Pull this out. So there's two locks, you just push them in, and then we can pull the air filter out of this housing.
This is our old air filter, this is our new air filter, cabin filter from 1aauto.com. As you can see, these are extremely dirty and it's due for a replacement.
You're going to want to keep in mind to have the arrow, have the flow of air go in that direction. So we'll take the new filter, put it down like that.
Then we can reinstall this. Click it in place then take the glove box slide it up then slide that back on there, and you're good to go.
Thanks for watching. Visit us at 1AAuto.com for quality auto parts, fast and free shipping, and the best customer service in the industry.
Tools used
Tools used
Tools used
Hi, I’m Mike from 1A Auto. We’ve been selling auto parts for over 30 years!
Open the hood, go inside, the latch is way down here, by your left foot. Hood release for the safety is under here, lift it up. Hood has two positions: there's one here, and it also has a service position down here. Push the hood way open—this way you don't bump your head into the hood.
Air filter’s located in the air box here on the driver’s side. There's three metal clips holding it on, and it slides into two plastic tabs on this side towards the shock tower. Unclip all these, push them down, and unlock them. It'll lift up on the air box, and it'll slide out of these pins. Kind of pick it up and slide the air filter out. It's got some leaves stuck in it.
Take a new air filter, wider parts going to go towards the bottom. This sort of flat part goes towards the intake. Lift this up, slide it down into place, and sit right in the air box. Get the cover down and slide it past these harnesses. Make sure the filters seated in there. These tabs are going to go into here, like that, and push it down. Pull up on the locks. The air filters replaced. Put the prop right back in its spot. You're all set.
Thanks for watching. Visit us at 1AAuto.com for quality auto parts, fast and free shipping, and the best customer service in the industry.
Tools used
Hi, I’m Mike from 1A Auto. We’ve been selling auto parts for over 30 years!
Cabin filter is located behind the glove box. You just open it up. There's a little strut here. It keeps the glove box from dropping too far and too fast. You're going to push in and pop it off, just like that. Then you take the two sides of the glove box and just push them in gently. It will fold down.
You may want to take whatever is in your glove box out because it's going to fall right down. There's a panel right here with a couple arrows and some tabs. Cabin filter is located in here. Now push in these locks, and pull it straight out. This one is pretty dirty. It’s full of all the stuff it catches, so it doesn't go into your blower motor.
Here's our original cabin air filter with the tray from our vehicle. Here's the brand new replacement filter from 1AAuto.com. It's an exact match. It will fit perfectly. It's marked with the direction of flow just like the front of this is marked with the direction of flow. Simply lift this out of the tray, and throw it away.
This shows the direction of flow. I want to put it in the same direction with the pleats. There's little tabs here on the edges. Slide it in just like that. This will fit in our vehicle perfectly. Keep our blower motor from getting filled with outside debris.
Reinstall it. We'll slide the tray right back into the heater box. It clicks, and it locks into place.
Push the glove box back up. Then attach this little strut part. You may have to push the glove box up just a little more. Glove box might even lock into place. We'll push this forward.
This has the little strut, so when you open it, it doesn't slam down. Replace all your stuff in your glove box. The cabin filter is changed.
Thanks for watching. Visit us at 1AAuto.com for quality auto parts, fast and free shipping, and the best customer service in the industry.

CFA18010