Replaces


Recommended for your 2004 Acura TSX
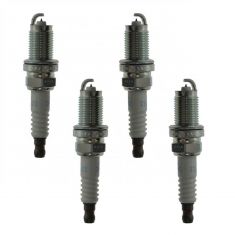
Frequently bought together
Part Details
Specifications
Returns: Parts with electrical components cannot be returned once installed.
Lifetime Warranty
This item is backed by our limited lifetime warranty. In the event this item should fail due to manufacturing defects during intended use, we will replace the part free of charge. This warranty covers the cost of the part only.
Returns: Parts with electrical components cannot be returned once installed.
FREE Shipping is standard on Orders shipped to the lower 48 States (Contiguous United States). Standard shipping charges apply to Hawaii, Alaska and US Territories. Shipping is not available to Canada.
Expedited is available on checkout to the United States, excluding Alaska, Hawaii and US Territories as well as P.O. Boxes and APO/FPO/DPO addresses. Final shipping costs are available at checkout.

Created on:
Tools used
Brought to you by 1AAuto.com, your source for quality replacement parts and the best service on the Internet!
Here's the old, original plug that came out of the engine, and new plugs from 1A Auto. We carry some different name brands. We have generic. This is actually an NGK example. Obviously, a spark plug is going to be just like the original.
Some background information: your old plugs, they have a tolerance on these Hondas. This is a Honda with a 1.7-liter. The plug can be between 1 and 1.3 millimeters. If your plug is within those specs - right now, I'm at 1.27. This is a spark plug gapping gauge. You probably can't see it, but there are different measurements on the gap gauge.
It's at 1.3, so I'm going to go to my closest one, which is 1.27. It doesn't fit in there, okay, so this plug technically is still within spec and could be used. On that 1.02 on this one, you can see it goes in. It moves around, so it's definitely higher than 1.
When you go to put your new plugs in, and it's just for any spark plug, you want to find the specifications for your vehicle. New plugs in this vehicle should be between 1 and 1.1 millimeters, so I've got 1.02. To gauge a plug, try and force it in there. They really should come gapped, but it looks like this one's just a little bit off.
You use this part here to bend the tab and open it up slightly. Then try to put your gauge in there again. If it starts to go in, you can just kind of work it in until it goes in and out. It takes a little bit of force. Now you could be between 1 and 1.1. That's 1.02, it goes in. At 1.14, it shouldn't go in, and it doesn't.
Thanks for tuning in. We hope this video helped you out. Next time you need parts for your car, please visit 1AAuto.com. Also check out our other helpful how-to and diagnosis videos.
Tools used
Brought to you by 1AAuto.com. Your source for quality replacement parts and the best service on the internet.
Hi. I'm Mike Green. I'm one of the owners of 1A Auto. I want to help you save time and money repairing and maintaining your vehicle. I'm going to use my 20 plus years experience restoring and repairing cars and trucks like this to show you the correct way to install parts from 1aauto.com. The right parts installed correctly. That's going to save you time and money. Thank you and enjoy the video.
In this video, we'll be showing you how to replace the spark plugs and plug wires on this Honda Accord V6. Process is similar for most Honda V6s. Tools you'll need are a five eighth inch spark plug socket, an extension and ratchet and maybe an extendable magnet.
Replacing spark plugs and wires on these Honda V6s is actually a pretty easy job but it's also kind of easy to mess up. Many times I've heard people say, "I took all the wires and plugs out and then I put it all back together but now my car doesn't run right." That's because you have to put everything back together correctly. The key is just do them one at a time. Take one wire off and one plug off, put the plug back in and put the wire back on. Very easy to work on like I said; all these six plugs are accessible.
On the rear, you can easily see, they're all very easy to get to. What you want to do is you pull the plug out over to here and then you give it a good twist. While you're twisting, pull it up and out. That's your plug wire. You'll need a five eights spark plug socket and an extension and put it right down in there and then just take the plug out. Once it gets easy to turn, it's usually a pretty good sign that your plug is all the way out and if you have a good socket you should be able to pull it up and out. My socket is a little worn out so my plug stayed down in there.
So a good tool to have around is a little extendable magnet which goes right down in and pulls the plug out. Actually, you can see somebody that did this before. It looks like they put a little bit of a paper towel around it to hold it into their socket probably. So you got the plug out and if you're replacing the wires at the same time or if separately. Now, you want to just take the whole wire off and, again, here at the distributor, twist and pull and then the wires on this car are actually fairly new so I'm not going to replace them, but you would not put your new wire on right in place because you have to make sure that you put each wire back on the same spot on the distributor. That's why you don't want to just take them all off and then try and put them back on, you just do them one at a time. Always route the back the way they were originally.
Before your installing your plugs, you want to check the gap and according to the sticker that's on the hood, right there, it tells you what kind of plugs to have and it also tells you what the gap is supposed to be. I'm sure you can't read it, maybe you can, but it says the gap is 1.1 millimeters which translates into .044 inches. I have a little gap tool and .044 just barely gets through there. That's set correctly. You might have noticed I've skipped through a different hole, but a good way to put these plugs back in is actually with a little bit of glue. Just put a little glue on there because my socket is worn and it won't hold on to the spark plug. A little bit of glue makes it so the spark plug sticks in there. You get it down in, start turning.
You always want to make sure you could turn it by hand first because if it's difficult to turn at all then you might be cross-threading is and you don't want to do that. Okay, tighten it. You want them snugged but not too tight. Put the spark plug wire down in there, make sure it clicks. Make sure you put the wire back into its correct spot.
We hope this helps you out. Brought to you by www.1AAuto.com, your source for quality replacement parts and the best service on the internet. Please feel free to call us toll free, 888-844-3393. We're the company that here's for you on the internet and in person.
Tools used
Mike: Hi, I'm Mike from 1AAuto. We've been selling auto parts for over 30 years.
Hey, everyone. Sue here from 1AAuto and today on our '06 Honda Element with out 2.4 liter we are going to be changing the spark plugs. We got these from 1AAuto. So, if you need this part or any other part for your car, click on the link below and head on over to 1AAuto.com. Going to take the cover off that covers the actual ignition coils and spark plugs. It's just a plastic cover with these four nuts on there and these nuts are a 10 millimeter socket. The coming out. That's okay. Same with that one. There we go.
So, a quick note, you'll see that there's two bolts missing. They're not actually missing they are part of the cover. So, these bolts are also bolts that go and hold the coils down. So, that's why I expected the nuts to come off. So, I'm going to put a 10 millimeter wrench on it. It's cut out as a hex and I'm going to break free the actual nuts. And then I'll put the studs down in to mount the coils. We'll start with the first cylinder, cylinder one, the 10 millimeter socket, and just to dismount the mounting bolt. Just grab that, lift the coil up. So now I'm going to disconnect the coil connector. It's that black tab here I'm going to push down on that. Pull it, drop that, and pull the coil up. So now I'm going to take a spark plug socket. I'm going to put it down in the cylinder hole. Get an extension. The spark plug socket is a five eighths. It's got that rubber bushing in it to hold onto the socket. I mean, hold on to the actual spark plug so that you don't drop it.
So here we have an iridium spark plug. It's looks fairly new, it's just black soot. So, here I have the new spark plugs from 1AAuto. It's an NGK brand. It's the actual brand that this manufacturer recommends. So, and here's the one that we took out. It's the same exact spark plug, same number, and it's iridium. So you cannot gap an iridium spark plug, you can only get a visual and make sure that it has a gap of what it mentions. In this case it's 0.43 which I know from experience about the gap of it and you just want to make sure that they're not, it's not closed touching.
Some people drop them, it gets dropped in the package. Accidents happen. And it looks pretty gapped pretty good. When you do all four lay them against each other and line up the gap to make sure they're all pretty much the same. You never want to touch in iridium spark book with your gapper because they say that it can actually chip the tip of the iridium. And then of course you're going to have a misfire and the spark plug would not be covered under defective because you made it defective.
So, if you need this part or any other part for your car click on the link below and head on over to 1AAuto.com. I'm going to put the spark plug in a spark plug socket. There's a rubber boot in there. We sell these at one 1AAuto so you can get an actual socket for your particular car and you'll never have to search for it again. So, we'll line that up, see the gap, and we're just going to bottom it out. Now the rubber is holding it in there and it won't come off. We've got a crush washer and that's when you look it up and it reads bottom out to crush washer, turn a quarter turn after, compressing that washer. That's what it means.
So, align it up into cylinder one, and I always like to start spark plugs by hand. And I'm just going to bottom it right out. Once I feel it's bottomed I'm going to turn it a quarter turn. I always like to apply a little bit of new dialectic grease silicone paste and it just helps the friction on the spark plug. So, line that up bring that down, find my ignition harness, line that up, click it in. And then drop that down in on my mounting bolt. Start that by hand. Just snug it up. I'm going to repeat that process for the other three cylinders.
Now the morning bolt for these two coils were missing in the beginning because the nuts were frozen on the plastic cover so we took them apart. I took a 10 millimeter wrench and a 10 millimeter socket broke them free. Now I'm going to install these on the actual coils then we can put the cover on. So I'm going to install the little plastic cover here. So those two front bolts or the coil hold down so these are the nuts and the actual back bolts, they're all one piece. And those go through the harness. There's an open casing in the harness so you're holding down exactly the harness. This is just a cover so you don't have to go crazy on the actual tightening. Just snug it down, let it just bottom out.
Thanks for watching. Visit us at 1AAuto.com for quality auto parts, fast and free shipping, and the best customer service in the industry.
Tools used
Tools used
Brought to you by 1AAuto.com, your source for quality replacement parts and the best service on the Internet.
Hi, I'm Mike from 1A Auto. I hope this how-to video helps you out, and next time you need parts for your vehicle, think of 1AAuto.com. Thanks!
In this video, we're going to show you spark plug replacement. This is a 2003 Honda Civic with a 1.7-liter VTEC engine, and it's the same process for many vehicles with a 1.7-liter as well as a 3.5-liter. Items you'll need include new spark plugs from 1AAuto.com, flatblade screwdriver, 10mm socket, ratchet, or wrench, a 5/8 spark plug socket with a ratchet and extension.
Open the hood. Just pull the lever right here. Underneath, there's a safety latch, lift up. Lift it up and put the prop rod in place. Your ignition coils are located right on the top of the engine. Right here: one, two, three, and four.
Remove the top trim panel with a flat blade screwdriver. Remove the nut that holds the coil in place with a 10mm socket or a wrench. Lift it out. There's a tab on the harness connection, press down and pull and disconnect. Pull it up and out. And we'll do the same thing for the other three. Once you have the coils out, the plugs are right down inside.
Use a 5/8 inch spark plug socket with a ratchet and extension. The reason you want a spark plug socket is that once you twist it out, pull it up and out and the plug comes right with the socket. The socket has an insert that holds on to the plug. The spark plug socket is the best tool but if you didn't have one, you just had a regular 5/8, you would at least need a deep socket, and obviously when you unscrew it the plug is not going to come up with the socket, so you'll need a stick magnet put down in there to pull the spark plug up and out.
Use the spark plug gap tool and make sure you set the gap on the new plug to between 1 and 1.1mm. Once you have your gap checked, install it in. You can see the spark plug socket keeps it from falling down. Put it down in and very carefully start to spin it in. Make sure you don't cross-thread it. Once you get them in place, tighten them up. Use a torque wrench, 13 foot pounds. Then repeat the same thing for the other three.
I highly recommend a spark plug socket, but if you do have to use just a regular 5/8 socket, you want to be very careful not to cross-thread the spark plug. So use your magnet, put the plug down in there first, and then socket. Make sure you get the socket on to the spark plug, and then lightly turn it. If you feel too much force back it out, because you don't want to cross-thread the spark plug. As long as you're just lightly turning and it's not giving you any resistance, you can kind of look down in and it's centered in the hole.
Everything is good so you can then proceed the same way. Reinstall, push them down in. You'll want to just put the connector on them. It should go down. Then push them nice and firm, and then make sure your connect is clean. Put your four 10mm nuts back on and tighten them. You don't want to go too tight. Reinstall your cover. You're all set.
Thanks for tuning in. We hope this video helped you out. Next time you need parts for your car, please visit 1AAuto.com. Also check out our other helpful how-to and diagnosis videos.
Tools used
Brought to you by 1AAuto.com, your source for quality replacement parts and the best service on the Internet!
Here's the old, original plug that came out of the engine, and new plugs from 1A Auto. We carry some different name brands. We have generic. This is actually an NGK example. Obviously, a spark plug is going to be just like the original.
Some background information: your old plugs, they have a tolerance on these Hondas. This is a Honda with a 1.7-liter. The plug can be between 1 and 1.3 millimeters. If your plug is within those specs - right now, I'm at 1.27. This is a spark plug gapping gauge. You probably can't see it, but there are different measurements on the gap gauge.
It's at 1.3, so I'm going to go to my closest one, which is 1.27. It doesn't fit in there, okay, so this plug technically is still within spec and could be used. On that 1.02 on this one, you can see it goes in. It moves around, so it's definitely higher than 1.
When you go to put your new plugs in, and it's just for any spark plug, you want to find the specifications for your vehicle. New plugs in this vehicle should be between 1 and 1.1 millimeters, so I've got 1.02. To gauge a plug, try and force it in there. They really should come gapped, but it looks like this one's just a little bit off.
You use this part here to bend the tab and open it up slightly. Then try to put your gauge in there again. If it starts to go in, you can just kind of work it in until it goes in and out. It takes a little bit of force. Now you could be between 1 and 1.1. That's 1.02, it goes in. At 1.14, it shouldn't go in, and it doesn't.
Thanks for tuning in. We hope this video helped you out. Next time you need parts for your car, please visit 1AAuto.com. Also check out our other helpful how-to and diagnosis videos.

NGETK00001