Replaces


Recommended for your 2004 GMC Envoy XUV
Frequently bought together
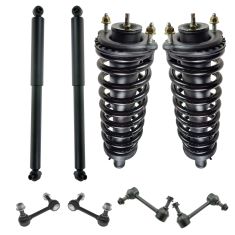
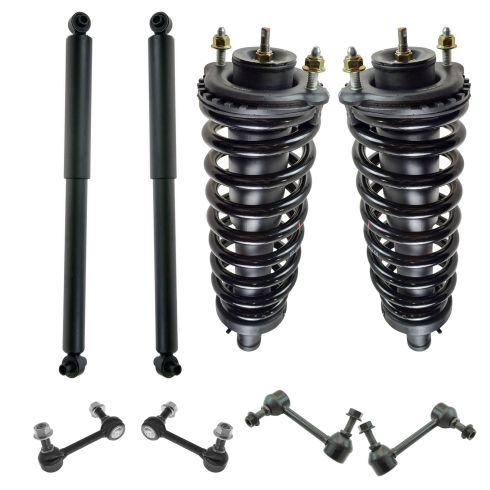
Part Details
Specifications
About TRQ:
TRQ is a trusted brand dedicated to making every repair a success story by combining premium parts with easy installation. Each TRQ part is engineered by a team of automotive experts to meet or exceed OEM standards, delivering enhanced performance and maximum longevity. With rigorous in-house testing, the brand ensures superior fit and function across every product line. TRQ also provides customers with best-in-class, step-by-step installation videos—so you can complete repairs with confidence, whether you're a first-time DIYer or an industry professional.
Product Features
TRQ suspension kits are manufactured using premium raw materials and coatings for extended service life. Each TRQ suspension component is designed to be a direct, maintenance-free replacement to the stock unit. To extend the life of your steering and suspension components, TRQ recommends replacing components in pairs, sets, or kits. All products are fit and road-tested in our Massachusetts R&D facility to ensure we deliver on our promise of Trusted Reliable Quality.
Our direct fit gas-charged shock absorbers help restore your vehicle's handling and ride quality to just like new.
Replacing struts used to require specialized tools to compress, remove, and transfer the old spring and mount. Our Pre-assembled, complete strut & spring assemblies come with all new parts and make the job much quicker and easier for the do-it-yourself mechanic.
Strut & spring assembly contains:
Our steering and suspension components are pre-greased and sealed for long life and do not require the extra maintenance typically required by greaseable versions.
Attention California Customers:
 WARNING: This product can expose you to chemicals including Chromium (Hexavalent Compounds), which is known to the State of California to cause cancer, and birth defects or other reproductive harm. For more information, go to www.P65Warnings.ca.gov
Lifetime Warranty
This item is backed by our limited lifetime warranty. In the event that this item should fail due to manufacturing defects during intended use, we will replace the part free of charge. This warranty covers the cost of the part only.
FREE Shipping is standard on orders shipped to the lower 48 States (Contiguous United States). Standard shipping charges apply to Hawaii and Alaska.
Shipping is not available to a P.O. Box, APO/FPO/DPO addresses, US Territories, or Canada for this item.
Expedited is available on checkout to the United States, excluding Alaska, Hawaii.
Final shipping costs are available at checkout.
Created on:
Tools used
Brought to you by 1AAuto.com, your source for quality replacement parts and the best service on the Internet.
Hi, I'm Mike from 1A Auto. I hope this how-to video helps you out, and next time you need parts for your vehicle, think of 1AAuto.com. Thanks.
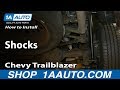
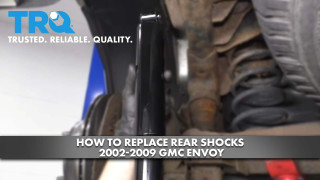
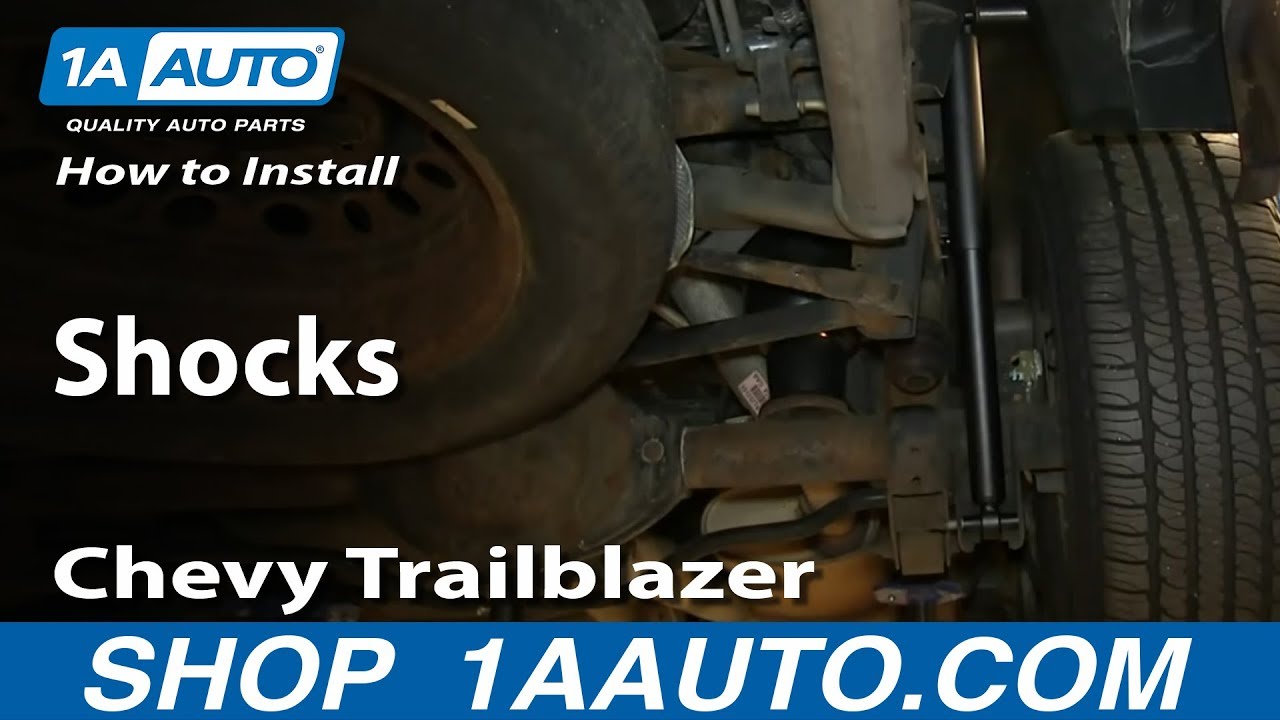
In this video, we're going to show you how to replace the rear shocks on this 2003 GMC Envoy. It's the same procedure for all these SUVs: Envoy, trail blazer, Ascender, Ranier,. We show you the right side; the left side's the exact same procedure. Always replace your shocks in pairs, and you'll need new rear shocks from 1AAuto.com, 18mm socket and ratchet with an extension, and it helps to have a deep socket, an 18mm wrench. You can do this without even jacking up your vehicle, but for the video, to make it easier, we do put it up on a lift and use a jack.
Your rear shock is held in with an 18mm bolt up here and an 18mm bolt down here. Using an 18mm socket and ratchet, and 18mm wrench, just loosen up this lower bolt and hit it out as far as you can with the wrench. We'll fast forward as he loosens up the top bolt. You don't have to entirely remove them until you've loosened both of them. That makes it a little bit easier. If you are using jack and hack stands, have the jack stands supporting the frame of the vehicle, and then put some upward pressure on the rear axle with your jack to take some of the load off of the shock. I'm just watching the top of the shock to see it compress some. Now with the bolts loosened, you can pull the lower bolt out and then pull the top bolt out. You see that? Then it pulls free.
Up top, is the old shock. Below it, is the new one from 1A Auto. You can see they're identical, and they'll fit exactly the same. Feed your new shock up into place and replace that top bolt to hold it in place. Now, you'll need to line up the lower hole and this I only have to push up a little bit. If you have your vehicle on the ground you'll have to push it up more, push the shock up and then put the bolt through. We'll fast forward as Mike tightens those both up. Right now you're just tightening them preliminarily, although you can, if you're working without a jack and jack stands, and the vehicle's on the ground, you can tighten them up. What we do is we start up the vehicle just to give the air suspension a chance to inflate and make sure the vehicle's at its correct ride height. Then once we know it's at the correct ride height tighten up the bolts for the shocks.
We hope this video helps you out. Brought to you by www.1AAuto.com, your source for quality replacement parts and the best service on the Internet. Please feel free to call us toll-free, 888-844-3393. We're the company that's here for you on the Internet and in person.
Tools used
Brought to you by 1AAuto.com, your source for quality replacement parts, and the best service on the Internet. In this video, we're going to show you rear shock removal and replacement on this 2004 Trail Blazer, same as most of these mid-size SUVs. Tools you'll need are 18 mm socket with a ratchet and extension, and also an 18 mm wrench, and you probably would want jack and jack stands to raise and support the vehicle, but not totally necessary.
So to replace your rear shocks, as you can see I still have the tire on the truck, and you could actually do this on the ground, although it will cause a little clearance issue as you try and remove this lower bolt. But it's possible, you can do it on the ground. So there's that lower bolt, and there's a bolt up high right there. And if you are jacking your vehicle up, you can see my lift is under the frame. And then I have a bottle jack right here that's supporting the axle. You just want to give a little support of the axle so it doesn't drop down when you release the shock. What you probably want to do is take a couple extensions, that way you can work right outside your tire. And it'll come right apart, as you can see.
This is an 18mm again, and you might need two wrenches. One for here, and one to hold. But little trick... if all you have is wrenches, hook another wrench onto the end of that one, and that gives you some extra leverage. And like I said, on the ground this is going to be somewhat more difficult. Now I'm going to cheat 'cause I've got 18mm deep socket and an impact wrench. Comes right out. Back up top here. So that's how your shock comes out. Again, the shocks on this vehicle are fine. Just showing you how to do it. So to reinstall it, you want to put the top back up in. Put this top bolt in first. Now the bottom. Put that back in. Start that nut on. A good rule of thumb for these is get it about as tight as you can get it with a ratchet like that. And up to the top here. Again, just got my ratchet on here. That's tight as I can get it with the ratchet.
We hope this helps you out. Brought to you by www.1AAuto.com, your source for quality replacement parts and the best service on the Internet. Please feel free to call us toll free, 888-844-3393. We're the company that's here for you on the Internet and in person.
Tools used
Brought to you by 1AAuto.com, your source for quality replacement parts and the best service on the Internet.
Hi, I'm Mike from 1A Auto. I hope this how-to video helps you out, and next time you need parts for your vehicle, think of 1AAuto.com. Thanks.
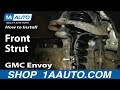
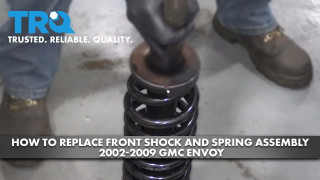
In this video, we're going to show you how to replace the front strut on this 2003 GMC Envoy XL. We'll show you on the passenger's side, but the driver's side is the same procedure. The items that you'll need for this include a new front strut from 1AAuto.com, 10mm, 15mm, 17mm, 18mm, and 19mm socket, a ratchet, piece of pipe for extra leverage, a 15mm and 18mm wrench, flat blade screwdriver, torque wrench, hammer, jack and jack stands, pry bar, and a 4.5mm Allen wrench. We recommend that if you replace the strut on one side, that you do it on the other side as well.
Start off by prying off your hub cap, and then just loosen out this 35mm nut. Now, loosen the lug nuts in a crossing pattern. We'll just fast-forward as Mike does this. Once you've loosened them, just jack the vehicle up, then remove the lug nuts the rest of the way. Now, the wheel will pull off.
Now, you want to remove these two 17mm bolts. You can see Mike is using an 18mm wrench to hold the nut on the inside. It will just make it easier to remove that bolt. Now, using a flat blade screwdriver, just pry out on the caliper, and then you can just set that aside. Now, pry out your brake pads. Now, you want to remove these two 18mm bolts. We'll just fast-forward as Mike does that. You can see, he's using a piece of pipe for some extra leverage to help brake those bolts free. Once those are removed, the bracket will pull right off. If your rotor doesn't slide right off then you may just want to tap it with a hammer, turn it, and then hit it again with a hammer.
Right, so if you have trouble getting the rotor off, it actually has press holes. You would get a bolt that's the proper size. I believe this is an M12 bolt. Use two bolts, thread them into those holes. As you tighten them up, they press against the hub and push the rotor off.
To get your axle out, maybe use a pry bar or some other the long item. You will put it up, in, and put it on the back of the axle right where it connects to the transmission or the axle, I should say. Make sure you're hitting the metal and it comes right out.
If you want to do the driver's side, you'll need to remove these four 15mm bolts and pull this panel down in order to access it. Using a 15mm socket, ratchet, and wrench, just remove this bolt. We'll fast-forward as Mike does that. Now, using a hammer, just hit the upper control line off the ball joint. Now, just pry open this clip and pull the harness free. You want to secure your caliper to somewhere out of the way, so we'll just wire-tie it right here on to the back end plate.
Now, you want to remove these 10mm bolts. We'll fast-forward as Mike does that. Now, just lift up on the upper control arm, pull this back, and make sure that the axle is loosened. Pull your axle the rest of the way out of the differential. You step around a little bit, and you can get it going up in. Just got to ankle it up, get it going up and in a little bit from the hub. Careful with all of your ABS wires, hoses and stuff.
Just spray this bolt right here on your sway bar link with some penetrating oil. Then, using a 15mm wrench and a 4.5mm Allen wrench (you can use some other wrench with some extra leverage on the Allen wrench), you want to just separate that nut and remove it. Next, you want loosen up these two 15 mm bolts. Just spray them with some penetrating oil. Then we'll just fast-forward as Mike loosens those up. Just push the wheel knuckle up, and then loosen those just so that they're finger tight and just a few threads on. That will hold the strut in place.
Then you want to remove this 18mm bolt right here. Using your socket, ratchet, and a piece of pipe just brake that free. Once you remove the nut, just tap out the bolt a little bit. You'll notice the brake lines in the way, so you just need to use a pry bar and pry that bolt out the rest of the way. Just lift up on the wheel knuckle, and then that will allow you to pull that out.
Spray some penetrating oil around the base of the strut, and then just hammer the wheel knuckle off with the strut. To keep the wheel knuckle from going all over the place, we're just going to wire tie it up. If you do this, you want to make sure that it's still kind of loose so you can still move the upper control arm up and down. Then remove those two 15mm nuts at the top of the strut, and just maneuver the strut down and out.
On the bottom is the old strut; above it is the new strut from 1A Auto. You can see they're identical, and they'll fit exactly the same.
Feed your new strut up into place. Then once you get the studs through, just replace those two 15mm nuts to hold it in place. Place a jack underneath the lower control arm. I've also got the lift where you have jack stands next to the vehicle. Just line up the strut and jack up the control arm into the strut. We will fast-forward as Mike tightens up that bolt. Now, just torque this bolt to 90 foot-pounds. Tighten up those two 15mm nuts and torque them to 50 foot-pounds.
We'll fast-forward as Mike replaces the nut in the sway bar. Using his 4.5 mm Allen wrench and his wrench, he's going to tighten that back up. As you're tightening up that final bit, make sure you have a wrench between the Allen wrench and the sway bar so you can still remove the Allen wrench from that bolt. Then just clip those wire ties if you ended up using them. Be careful not to hit wires. I just set it right into the hub and pull it, staying up around, and get it all the way into the hub. Then pull on it and feed it into the axle. Careful with the seal. You want to put that in, just doing a kind of back up in place that you go. Do not overextend. Just put that in place and push your axle right in and make sure it's locked.
Now, replace your brake line bracket in the two 10mm bolts to hold it into place. You want to just use the upper control arm to hold the wheel knuckle in place while you're doing this. Re-clip this harness. Now, hammer your upper control arm back down into the old one. Replace the bolt and the nut and tighten them up. You want to make sure that these holes line up in between the two holes that are on the hub. Then you just slide your rotor back into place and replace the lug nut to hold it into place. You want to check these slides on your caliper bracket and make sure they're greased up. If they're not, just apply some brake grease to them. Then fit the bracket into place. You can then just start twisting in your bolts by hand and then tighten them up.
Now, torque these two bolts to 110 foot-pounds. Torque each of these to 110 foot-pounds and then just replace your brake pads. If there's no grease on the ends, just apply some brake grease. Now, push your caliper back down into place and replace those two 17mm bolts. We'll fast-forward as Mike does that and tightens those up. Now, torque each of those to 40 foot-pounds.
Replace the hub nut. Remove the lug nut that you put on there to hold the rotor in place. Then put your wheel in place. Then replace each of the lug nuts and tighten them preliminarily. Now, torque each of these to 100 foot-pounds in a crossing pattern. Then torque the hub nut to 103 foot-pounds. Then replace your hub cap.
After you've done any work on the brakes, you want to just pump the brake pedal until it firms out. Then you want to do a stopping test from 5 miles per hour and 10 miles per hour.
We hope this video helps you out. Brought to you by www.1AAuto.com, your source for quality replacement parts and the best service on the Internet. Please feel free to call us toll-free, 888-844-3393. We're the company that's here for you on the Internet and in person.

PSA63588