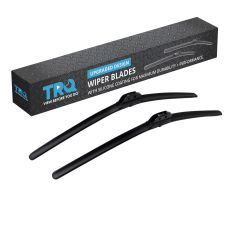
Replaces


Recommended for your 2009 Ford Explorer
Frequently bought together
Part Details
Specifications
About TRQ:
TRQ is a trusted brand dedicated to making every repair a success story by combining premium parts with easy installation. Each TRQ part is engineered by a team of automotive experts to meet or exceed OEM standards, delivering enhanced performance and maximum longevity. With rigorous in-house testing, the brand ensures superior fit and function across every product line. TRQ also provides customers with best-in-class, step-by-step installation videos—so you can complete repairs with confidence, whether you're a first-time DIYer or an industry professional.
Attention California Customers:
 WARNING: This product can expose you to chemicals including Lead and Lead Compounds, which are known to the State of California to cause cancer, and birth defects or other reproductive harm. For more information, go to www.P65Warnings.ca.gov.
Lifetime Warranty
This item is backed by our limited lifetime warranty. In the event that this item should fail due to manufacturing defects during intended use, we will replace the part free of charge. This warranty covers the cost of the part only.
FREE Shipping is standard on Orders shipped to the lower 48 States (Contiguous United States). Standard shipping charges apply to Hawaii, Alaska and US Territories. Shipping is not available to Canada.
Expedited is available on checkout to the United States, excluding Alaska, Hawaii and US Territories as well as P.O. Boxes and APO/FPO/DPO addresses. Final shipping costs are available at checkout.

Created on:
Tools used
Hi, I'm Mike from 1AAuto. We've been selling auto parts for over 30 years! We're dedicated to delivering quality auto parts, expert customer service, and fast and free shipping, all backed by our 100% satisfaction guarantee. We've created thousands of videos to help you install our parts with confidence. That saves you time and money, so visit us at 1AAuto.com, your trusted source for quality auto parts.
In this video, we're going to show you how to replace your coolant thermostat. This is a 2006 Ford Explorer with the 4.6-liter V8. Pretty much the same for Explorer, as well as Mountaineer with this engine.
Hope you like the video. If you do, please click subscribe. Check out our thousands of other videos for all kinds of makes and models. And, for the part in this video, click the link down in the description. Visit 1AAuto.com for all your parts needs.
On the driver side of the radiator down below, there's a big 19 millimeter cap here, but ours is broken off. If you take the appropriate size Allen key, you can actually put it in to what might be remaining if you break yours and loosen. For various reasons, our vehicle doesn't have any fluid in it but, as you loosen this up, you'll get fluid flowing out of this hole here. Just make sure you have an appropriate container to catch the coolant. Once you've drained enough fluid, tighten the plug back up.
Even though we've drained the coolant down, I'm going to put an appropriate container below where we're working in case some coolant comes out. Just pull the hose off, twist, and pull. Then, two 10 millimeter bolts hold the bottle in place. Then the bottle just pulls up and out.
We're going to loosen these two clamps that hold it in place. Then unplug this line. You want to just pry this green tab up and pull it off. Then we'll just pull the tube off this side. There is another hose here. The same thing, push on the green tab. Twist and pull it up and off. Then remove the upper tube from there. Disconnect this lead. There’s a red safety tab that you pull back and then you can push in with a screwdriver the tab in there to push down and it disconnects.
On the throttle step motor, there's just a tab on the harness connection. Push it down and remove the four 8 millimeter bolts. Hold your throttle body in place. Remove those. The throttle bottle will come out. Sometimes it sticks a little more than that. If it is stuck, just tap on it from a couple different angles and pull it off. Disconnect this hose and it'll go that way. Push down on the tab. Use groove jaw pliers to squeeze this clamp. It actually has a little locking tab on it, so when you squeeze it, it'll stay. You can see it actually stays open, so you can just slide it up the hose some. Then twist on this hose and pull it off of the thermostat housing.
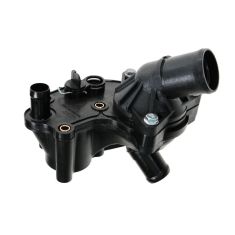
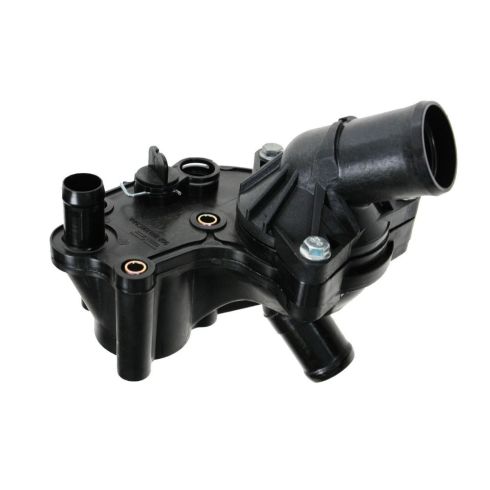
Two 8 millimeter bolts hold the thermostat housing in place. Use a wrench to loosen them. Then having a ratcheting wrench really helps the process. Actually, after I loosened them up, they started coming out easy, which actually made it more difficult because you have to kind of reach in behind there and thread them out with your fingers. After this point, screwdriver, try tapping on it. Comes up and out. Looks like somebody used some extra silicone on this one. Pull the thermostat up and out.
We're going to use a vacuum, a screwdriver, and a wire brush. We need to get all this residue out of the inside of the thermostat housing. You may not need to do this. You just need to install a new thermostat gasket from 1A Auto. You only need to do this if somebody used a bunch silicone on the vehicle like they did on this one.
Here’s a new thermostat from 1A Auto. If your vehicle is running hot or not circulating the coolant, a new thermostat will fix you up. Put it in. You want an O-ring gasket. I'm going to use and coat it with just a little bit of motor oil just to make sure that when I put everything together it slides into place correctly. If you're replacing your thermostat, make sure you use a new O ring from 1AAuto.com. For some applications, we also sell thermostat housings from 1AAuto.com.
We thoroughly cleaned it. Again, we're going to use just a little bit oil just to make sure it slides on to that O ring correctly. Put it down into place, and then we'll start our two bolts. To seat that O-ring correctly, you want to just make sure that you kind of tighten these up evenly. Don't tighten one all the way up and then the other one; get one seated a little bit and go to the other one. Just switch back and forth until you get it tight. Final tightening with the larger wrench. Make sure they're good and firm and then reattach this line. Make sure it clicks.
Put the hose back in place. You can just take that and hold the bottom of it and just tap it, and it'll go back in place. Just check and make sure the O-ring is in place for your throttle body. I always like to put the two top bolts in and then the two bottom bolts. I’m just going to get them hand tight first. You want to tighten these bolts to 89 inch-pounds. I like to start half way, so I've got it set to 45 inch-pounds. Now, I'll set it to 89 inch pounds and tighten them again.
We connect the leads. Make sure you lock that tab on. Then, we'll put our intake duct back in. Then tighten with a flat blade screw driver and reconnect these lines on here. We have one here. This double tab goes down into this clip here, so kind of look over it. Feed it down in. Make sure that goes in, and that goes right in place, and the bolt holes should line up. 10 millimeter bolts back in place. Reconnect the overflow hose to the radiator.
Then refill your radiator. Fill the radiator first, obviously while the vehicle is cool. Fill the radiator til you can see the coolant. Then fill your radiator bottle up to the fill cold line, which you can see on this side. You want to run the vehicle a few times and just check your radiator fluid each time.
Thanks for watching. Visit us at 1AAuto.com for quality auto parts, fast and free shipping, and the best customer service in the industry.

ECA92798