Replaces


Recommended for your 1997 Ford Ranger
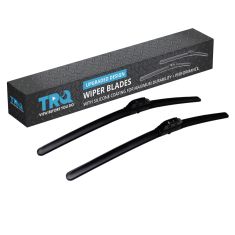
Frequently bought together
About TRQ:
TRQ is a trusted brand dedicated to making every repair a success story by combining premium parts with easy installation. Each TRQ part is engineered by a team of automotive experts to meet or exceed OEM standards, delivering enhanced performance and maximum longevity. With rigorous in-house testing, the brand ensures superior fit and function across every product line. TRQ also provides customers with best-in-class, step-by-step installation videos—so you can complete repairs with confidence, whether you're a first-time DIYer or an industry professional.
Returns: Parts with electrical components cannot be returned once installed.
Left Hand Drive:
All of our auto parts are intended for Left Hand Drive USDM vehicles. If your vehicle is Right Hand Drive, please ensure the part is correct for your specific vehicle.
Attention California Customers:
 WARNING: This product can expose you to chemicals including Lead and Lead Compounds, which are known to the State of California to cause cancer, and birth defects or other reproductive harm. For more information, go to www.P65Warnings.ca.gov.
Lifetime Warranty
This item is backed by our limited lifetime warranty. In the event that this item should fail due to manufacturing defects during intended use, we will replace the part free of charge. This warranty covers the cost of the part only.
Returns: Parts with electrical components cannot be returned once installed.
FREE Shipping is standard on Orders shipped to the lower 48 States (Contiguous United States). Standard shipping charges apply to Hawaii, Alaska and US Territories. Shipping is not available to Canada.
Expedited is available on checkout to the United States, excluding Alaska, Hawaii and US Territories as well as P.O. Boxes and APO/FPO/DPO addresses. Final shipping costs are available at checkout.
Created on:
Tools used
Brought to you by 1AAuto.com, your source for quality replacement parts and the best service on the Internet.
Hi, I'm Mike Green. I'm one of the owners of 1A Auto. I want to help you save time and money repairing or maintaining your vehicle. I'm going to use my 20-plus years experience restoring and repairing cars and trucks like this to show you the correct way to install parts from 1AAuto.com. The right parts installed correctly: that's going to save you time and money. Thank you and enjoy the video.
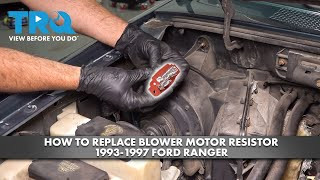
In this video, we replace the blower motor resistor. The symptoms of one of these going bad is that your fan will work at certain speeds but not at others and it's a pretty easy replacement. The tools you'll need are 8,10, and 11mm sockets with ratchets and extensions. That's all you should need after that the resistor should unplug and you should be able to replace it but as you'll see on our vehicle and probably on a lot of vehicles, they corrode and we ended up using a flat blade screwdriver and pliers to basically ruin the old resistor and break it apart to get it unplugged.
Inside the truck, turn the key on. Now, turn the ventilation on and if you listen really carefully you can hear the fan going. You can hear it go faster. Now, when I go from two to three, you can hear that it doesn't really do anything. When I go to four, obviously, it really winds up. There's nothing from two to three. Actually the first time I got in this, when I turned it on there was actually no fan, one, two and three and then four it started working and the other speeds started working so that was an indicator that my blower resistor was starting to go bad.
First, we're going to unbolt our radiator and washer fluid jar and just move it forward to give ourselves a little extra room back here and it's four bolts: one there, one there, another one on the side and then another one down there. Use a little penetrating oil, coat those two nuts down low/ Those are 11mm and I'm going to speed it up here as we remove those two and then the bolts that are up on the fender, the ones up higher, are 10mm and we'll remove those as well. We're just going to pull this up and push it forward some.
With that bottle out of the way, our resistor is this part right down here. What we're going to want to do is just to give ourselves a little room is we'll disconnect our fan connection here and then you'll see this little rubber, almost a rubber band, take that off, which allows you to pull this tube out and off and then just gives you a more clear shot. You can see there's one screw right there, 8mm, and there's another one on the other side, 8mm. Use an 8mm socket with a ratchet and extension. This far one's the most difficult and I'm sure I'm blocking your view but just get your wrench down there on it. I'm just going to speed up as I go to remove those two 8mm bolts and one tip is to remove them most of the way with a wrench as they start getting easy reach down in there with your fingers and take them out the rest of the way so you don't drop them. Once you get them a certain way out, you can reach in with your fingers, you want to avoid dropping them. Then pull the resistor straight out. Now, obviously, you have to disconnect the resistor from the harness and on this vehicle and probably on most vehicles, they corrode very badly and it makes it very difficult to get the resistor apart. I'm actually just showing you the end here, what you can see is the resistor, it's already broken into a few pieces. You can just see I'm prying it off. I used needle nose pliers and other pliers and basically just broke all the plastic around the resistor. Now you don't want to break the plastic that's part of the wiring harness of the car, you just want to break the plastic around the resistor and then get a screwdriver in there and pry the connection out. You can see here I bring in an even bigger screwdriver, it's just really difficult to get that apart and then I end up really breaking the resistor up and then grabbing some pliers to get the rest of it out. Now with the resistor out, I still have a little piece of the plastic housing that it's plugged into that I broke away and then it's just a matter of actually pulling that off with my hands. Now here just use some more penetrant, spray right into the terminal. It just cleans things out.
The new part from 1A Auto goes right in, plugs in. You can see that's how it should come apart. It goes right down. As you're putting it down and in, you will notice the resistor is shaped a certain way and there are little rectangles on the housing and so the resistor only goes in one way. You get it in and get one of the bolts started. I'll fast forward here as I'm starting those bolts and use my 8mm socket with my ratchet and extension to tighten them up. You want to be careful, don't tighten them up too much you don't want to strip the plastic housing. If you do that then the bolts won't hold the resistor in there very well. When you tighten them up just get them to a firm point where you can start feeling them give some resistance and then that's enough. Push the vent tube into the motor, on there and reconnect our fan motor.
Turn the key on, turn the system on. Test: one, two, three, four. Looks good. Again, we'll go into light speed here as we put the radiator and windshield washer bottle back in. Again, the two bolts that go into the fender are 10mm, the two nuts that are down lower are 11mms. Tighten those up. Again, don't over-tighten them, nice and firm and you should be good.
We hope this video helps you out. Brought to you by www.1AAuto.com, your source for quality replacement parts and the best service on the Internet. Please feel free to call us toll-free, 888-844-3393. We're the company that's here for you on the Internet and in person.
Tools used
Hi, I'm Mike from 1A Auto. We've been selling auto parts for over thirty years. We're dedicated to delivering quality auto parts, expert customer service, fast and free shipping, all backed by our 100% satisfaction guarantee. We've created thousands of videos to help you install our parts with confidence. That saves you time and money, so visit us at 1AAuto.com, your trusted source for quality auto parts.
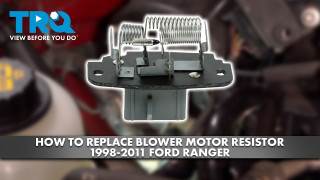
In this video, we're going to be working with our 2001 Ford Ranger, 4.0 liter, V6. We're going to show you how to remove and replace your blower motor resistor for the blower fan responsible for getting hot air or A/C through your vents.
If you like this video, please click subscribe. We have a ton more information on this truck as well as many other makes and models and if you need this part for your vehicle, you can follow the link down in the description over to 1AAuto.com. Here are the items you'll need for this repair.
Your blower motor resistor is located at the back passenger side of the engine bay on the bottom of the heater box. While it is accessible from the top side, we already had our fender liner out and it was a lot easier to access it, so we'll show you how to do it that way. The removal process for the connector and the bolts will be the same whether you do it from above or below.
Using the taped flat blade screwdriver, locate the relief cuts in the hubcap. Stick the screwdriver in and pry out to release it from the wheel. This particular truck has a wheel lock on it, so we'll need the wheel lock key in order to remove it. Otherwise, the rest of the nuts come off with a 19 millimeter socket and breaker bar. Simply crack them loose for now. Then raise and support your vehicle and remove the lug nuts the rest of the way. Remove the wheel from the vehicle.
Remove this 7 millimeter bolt on the mud flap. Using a pair of side cutters, we'll reach under these plastic clips. Be careful not to cut them. Simply grab it and pry it out. Remove the remaining two 7 millimeter bolts from the bottom side of the mud flap. Move these three 5.5 millimeter screws with a socket ratchet and extension. Remove these four 8 millimeter bolts with a socket and ratchet. Remove this plastic clip at the back outer side of the fender. Work the inner wheel liner out of the fender. Remove the vacuum lines on the vacuum reservoir inside of the wheel well, and fully remove the wheel well from the inside of the car.
With the inner wheel well liner removed, the blower motor resistor is much more easily accessible here at the bottom of the heater box. Our blower motor resistor has clearly been removed before because normally there's a clip here that secures the connector onto the bottom of this resistor. It's twin is located on the top side here. Normally you would have to release both in order to be able to remove the connector. We're going to use a small flat blade screwdriver to pry up on the tab that we do still have intact. Remove the connector and using an 8mm socket and ratchet, remove the two screws on either side of this resistor.
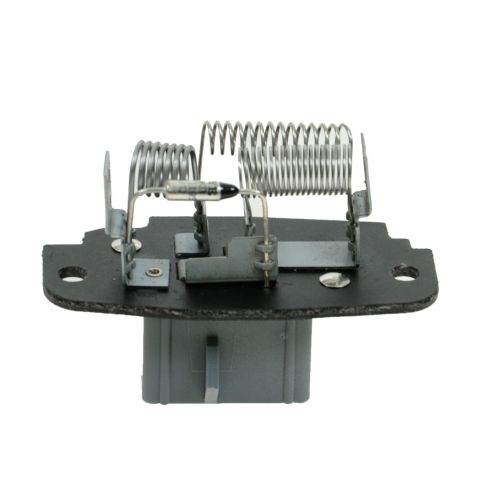
Here we have our old blower motor resistor that we removed from our vehicle and our new part from 1AAuto.com. These parts are exactly the same, see we have the same coils here, as resistors, as well as the same resistor here. We have the same two bolt mounting locations and the same pattern where it actually sits into the heater box. Flip it over, you can see that we have the same four pin connector on each with the same blades here to lock our connector onto. If your blower motor is only working on certain higher speeds, it's likely that your blower motor resistor is to blame. This new part from 1A Auto is going to go in direct fit just like our original equipment and fix you up right.
Reinstall your blower motor resistor into the heater box. Start your two 8mm screws. We'll tighten these screws down with an 8mm socket and ratchet. Reinstall your electrical connector and you're ready to put the wheel liner back into place if you removed it for this repair.
Reinstall the wheel well liner into the car. Reinstall the four 8 millimeter screws for the socket ratchet and extension. Reinstall the three 5.5 millimeter screws. Reinstall the bottom outside edge. Place the clip into the opening at the bottom of the fender. Line up your mud flap onto the bottom of your fender, and reinstall the plastic clips: one on the side and one on the top here. Reinstall the three 7-millimeter screws.
Reinstall the wheel and tire, and start your lug nuts by hand. With the weight of your vehicle on the tires, torque the lug nuts to 100 foot-pounds in a cross pattern. Line up the tabs on the inside of your hubcap to the lug nuts. Tap it back into place.
Thanks for watching. Visit us at 1AAuto.com for quality auto parts, fast and free shipping, and the best customer service in the industry.

HCA40086