Replaces


Frequently bought together
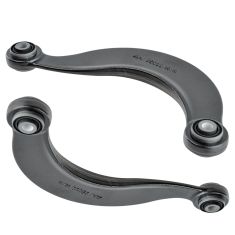
Part Details
Specifications
About TRQ:
TRQ is a trusted brand dedicated to making every repair a success story by combining premium parts with easy installation. Each TRQ part is engineered by a team of automotive experts to meet or exceed OEM standards, delivering enhanced performance and maximum longevity. With rigorous in-house testing, the brand ensures superior fit and function across every product line. TRQ also provides customers with best-in-class, step-by-step installation videos—so you can complete repairs with confidence, whether you're a first-time DIYer or an industry professional.
Our control arms are designed to be direct replacements for the original factory parts. They are 100% brand new and require no modifications for installation. No special tools are required because all of the bushings come pre-installed.
Our steering and suspension components are pre-greased and sealed for long life and do not require the extra maintenance typically required by greaseable versions.
Attention California Customers:
 WARNING: This product can expose you to chemicals including Lead and Lead Compounds, which are known to the State of California to cause cancer, and birth defects or other reproductive harm. For more information, go to www.P65Warnings.ca.gov.
Lifetime Warranty
This item is backed by our limited lifetime warranty. In the event that this item should fail due to manufacturing defects during intended use, we will replace the part free of charge. This warranty covers the cost of the part only.
FREE Shipping is standard on orders shipped to the lower 48 States (Contiguous United States). Standard shipping charges apply to Hawaii and Alaska.
Shipping is not available to a P.O. Box, APO/FPO/DPO addresses, US Territories, or Canada for this item.
Expedited is available on checkout to the United States, excluding Alaska, Hawaii.
Final shipping costs are available at checkout.
Created on:
Tools used
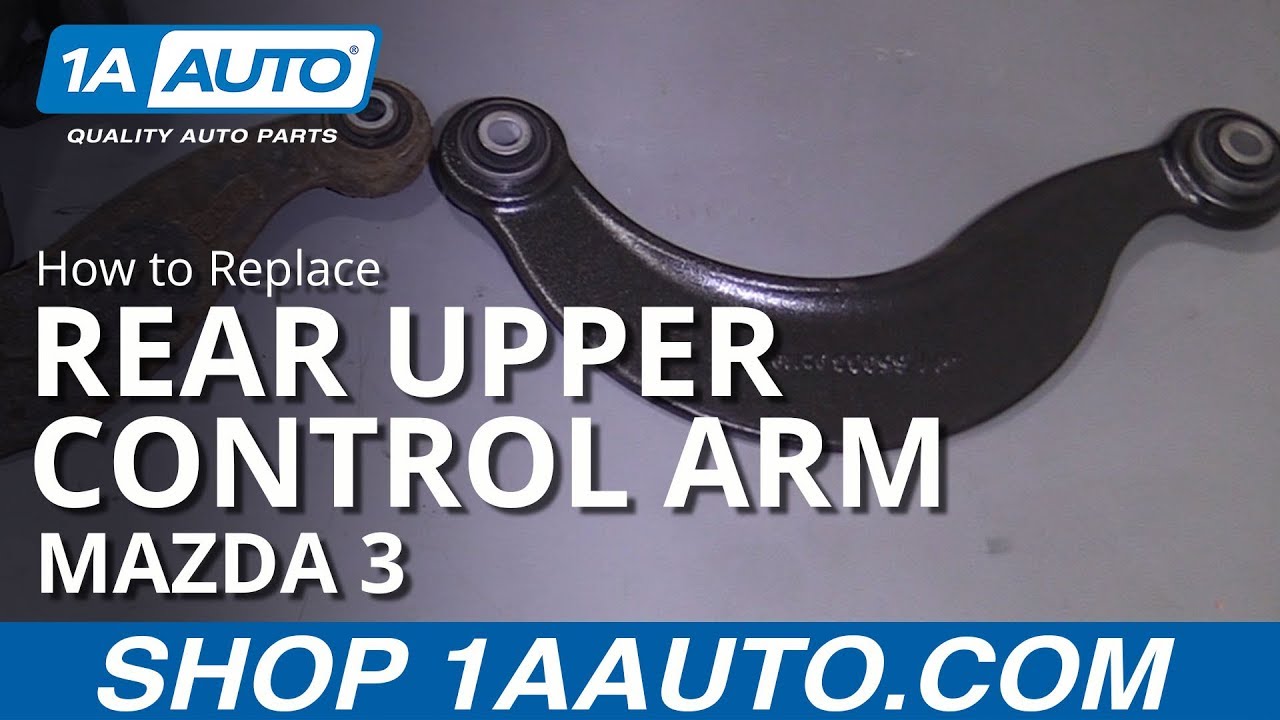
Oh, hey friends. It's Len here at 1A Auto. Today, I'm working on a 2011 Mazda 3, and I'm going to be replacing the upper control arm in the rear. It's going to be a very easy job. I want to be the one that shows you how to do it. If you need this or any other part, you can always check us out at 1AAuto.com. Thanks.
Okay, friends, so here we are. We've got the vehicle partially supported off the ground, but the wheels still touching so it can't spin. We're going to use our 21 millimeter socket and we're going to loosen up all of these lug nuts. Okay. Just give them a crank or two. This is just to break them free, in case you're not using an air gun to do this job. If you are, well, you don't really have to worry about doing this part. Now that all five of these are loosened, we can go ahead up with the vehicle. We'll make sure that it's secured safely, so it can't shake around or fall off or anything like that. We'll move ahead to the next step.
All right, so now we're going to go ahead and fully remove these lug nuts. I'm going to take off three of them. The fourth one, I'm going to take all the way off, put it back on a few threads and then I'll remove the last one. There we are. Just going to put this one on a few threads like I said. That's just going to help keep this wheel from falling off, and potentially hurting me while I put all this stuff away. Hold the wheel, our lug nuts, we'll slide this out of the way. On to the next step.
All right, let's get our 17 up on there. There we are. I'm using a swivel socket. Let's get that up on there. I've got a nice long extension on there. I'm going to use this nice long ratchet. Oops. I'm going to remove this bolt, and we'll move ahead to the next step. Pretty sure it's all the way dethreaded. It's just being held in there now with the pressure, I'm having the other side on. I'm going to come right up top here, and I'm going to take out this 17 millimeter headed bolt. This also holds a bracket on for the flex hose here, okay. Once we take this off, we're just going to set that aside, and we'll get the bolt right out of there. Get this out of here. There's our outer bolt, has a little shank area on it right down near the end. We'll set this aside, and move onto the next step.
All right, now we're just going to stick our pry bar in here. See if we can get this arm to pry its way out. There we are. Okay. Got our brake flex hose here, so you want to make sure that you don't put too much pressure on that. Once we have this loose enough, theoretically, I should be able to put my hand up in here, pull out the other bolt. This bolt is also shanked towards the end here, so it feels as though they're about the same. We'll set this aside, get this arm out of here at the same time. Maybe. There we are. Let's move ahead to the next step.
Here we are, friends, a quick product comparison for you. Over here we have our rearward upper control arm out of our 2011 Mazda 3, and over here we have our brand new quality 1A Auto part. These two parts are built the exact same. They have the same exact shape and the same exact mounting holes. We'll line them up with each other so you can see, sitting right on top of each other. Everything lines up perfectly. We've got our two mounting holes here, mounting holes there, same curvature, super important. It's made out of quality steel right here, and it even comes with brand new bushings. With all that said, I don't see any reason why this wouldn't be a great part to install into the vehicle, so I'm going to go ahead and do it. If you need this or any other part, you can always check us out at 1AAuto.com. Thanks.
Okay, so now when we install this, we've got the part that comes down drastically, and then it comes off and it kind of levels out. It's kind of like the longer area here. The longer area is going to go towards the outward portion of the vehicle, or towards the wheel, okay? So it's going to be sitting inside the vehicle just like this. Let's go ahead and get this installed.
I'm going to try to come right in through up here. Try to get the top area in first. I've just going to get the hoses out of the way. There we are. Okay. I'm going to grab one of my bolts, bring my arm up and across the top here again. Oh, wow. Yeah. It's fun. Shooting blind here. Ooh, nice. That's a good noise. Okay. I've got a few good threads. Get my arm back out of here. Now, we're going to work on doing the upper portion. Getting this in here is going to be a little bit difficult, but we can do it. What I'm going to do, I'm going to take this little bracket off of here. Actually, I'll use it. I'll just keep it right out of the way, just like that. Why not? Just give this a couple loving bonks, see if I can get it down in there. Okay. All right. This in here. Get our bolt through. There we are. 17, let's go ahead and snug this right down. Okay. It's bottomed out, tight. We'll move ahead to the next step.
All right, so now we're going to go ahead and tighten up the upper bolt for the upper control arm in the rear here. 17 millimeter, got a universal, or I guess a wobble socket on there. Universal socket 17. I'm just going to go ahead and snug it right up here. There we are. Okay. It's bottomed out. There were are, nice and tight. Let's get our tool out of here. All right, next step. Okay, so now it's time to get the wheel up onto the vehicle. Instead of going in front of it and trying to lift and potentially hurting our back, you just come around the side of it, roll it right up your leg, and use your ab muscles to lift it up. There we are. Hold your wheel. Make sure it can't go anywhere. There we are. Our next step is going to be to bottom these out and then we'll bring it down completely and torque them down.
Okay, so now that we have all the lug nuts started on here, what I'm going to do is I'm just going to bottom them out. When I go to bottom them out, what I'm going to do is I'm going to go in a star pattern. Boom, boom, boom, boom, boom, okay? Basically, crisscross pattern, and that's to ensure I'm not going to go around in a circle this way, the wheel is not going to get kinked on just like this, and I think everything's nice and tight, you drive it down the road, the wheel's going like this. Next thing you know, you're breaking studs, your wheel comes off, God knows what could happen. Let's avoid that. Let's go crisscross star pattern. Okay. I'm not making them very tight, I just wanted to bottom them out. Now I'm going to go ahead and torque them down.
Okay, so here we go. We're going to go ahead and torque these down. We're going to make the same star pattern in a crisscross manner. 21 millimeter, 85 foot-pounds. I could have probably brought it down another inch. Okay. Just to be sure we torqued them all, let's just hit them again. Cool. Easy peasy.
Thanks for watching. Visit 1AAuto.com, your place for DIY auto repairs, for great parts, great service, and more content.
Tools used
Hey friends, it's Len here at 1A Auto. Today we're working on our 2001 Ford Focus ZX3 and I want to show you how to do a rear upper control arm. It's going to be very simple. I can do it. You can do it too. If you need this or any other part you can always check us out at 1AAuto.com. Thanks.
Okay, so one of the first things we have to do is take off the wheel obviously. We're going to remove our lug nuts. These are missing the caps. Usually they have a chrome cap on them that would make them 19s. These are actually closer to an 18 so that's what I'm going to use to remove it. But generally speaking, you're going to use a 19 to remove your lug nuts. Leave that one on there a little bit. That's just going to help prevent the wheel from falling off when I take off the last one. Set this aside. Take off our wheel, set it aside.
Here's the arm. We're just going to take it, bring it right into the vehicle, to the approximate area where the old one is. Just make sure it's the same shape. Everything lines up right. Make sure we're dealing with the right beast. This is it. Looks good. Right up here, you've got a mounting bolt. It's a 15 millimeter head. I'm going to use 3/8ths drive because my 1/2 inch drive is a much longer ratchet and I just don't think I can probably get it in there. I'm sure if you used an extension, a universal 15 millimeter socket, air gun could probably figure something out a little quicker here, but I'm not going to worry about that right now. I just want to show you how to get it out of here.
I just threw on an extension with a swivels universal socket gives me a little bit more space to be able to swing my ratchet. It feels like it's in there pretty good. Get that one pretty loose. Let's go ahead and loosen this one up. The whole bolt at this point, it's just kind of threading its way out because this is under tension trying to come this way.
It's our bolt. Just comes right through here. Now that we have that one out, I can come back here, grab this one. That's the inside upper bolt there. Looks like it's about the same as this one, but we won't mix them up. Set that aside. Try to grab this arm out of here. There it is. Easy peasy.
Here we are friends, a quick product comparison for you over here. We have our original upper control arm out of the rear of our 2001 Ford Focus ZX3 hatchback. And over here we have our brand new quality 1A Auto part. Both these parts are created the exact same. They have the same shape, the same mounting bushings. To show you, I'll just line them up real quick. As you can tell, same shape, same mounting bushings. They're the exact same. With that said, I don't see any reason why this wouldn't be a quality part to install onto the vehicle, so I'm going to go ahead and do it. If you need this or any other part, you can always check us out at 1AAuto.com. Thanks.
Okay, so this is how it's going to go inside the vehicle. Just like this. You've got where it swoops down at a sharp angle. Then it comes back up and it just kind of hangs out and comes out this way. The area where it comes up and out is going to be the outer area where it goes here. This area is going to go up and in there. Grab my bolt. Can use thread locker if you'd like, it's your prerogative. For the purpose of this video, I'm not going to worry about it. I'm just going to take my bolt. First. I'm going to get my arm up in there.
Now I'm going to get my bolt through my hole. Just start it in a couple of threads here. Not going to tighten it up or anything. I just want it to be in and the threads so I don't have to worry about stripping anything. Now here comes the hard part. Remember I was telling you that it had pressure. Look at how much, how far away this is and the angle. It's going to be a little difficult. If you happen to have a ratchet strap, it's going to come in handy. Let's give it a try. I just got my ratchet strap set up down along the bottom here. I brought it up through, along here, up around this stud and then down around this way and I'm just kind of using the ratchet strap to pull me in. Grab a pry bar. I'm going to have to resituate it.
Brought it down along the bottom there, up and over across, in between the coil spring here, over the lug nut area, and then just over to this side. And that's just so I can draw this in. Now I just need to get this lined up. See if I can get this to turn a little bit from the other side. Looks like it's close but not close enough.
Get almost. Getting this upper one lined up is just really interesting. Get this bolt so it's turning in there. Once we get it so it's definitely in a few good threads, we'll go ahead and get this ratchet strap out of here. It's definitely in. We'll relieve our ratchet strap. I'm just putting a jack underneath here. I'm trying to bring the suspension up to the point where if this vehicle had its wheel on and it was sitting on the ground, it would have that amount of pressure on the suspension. Sitting at curb height is what you would say. That's it right there. that's as far up as it's going to go because our lift is happy there.
Now I'm just going to go ahead and snug up these bolts and then we'll torque them to 85 foot pounds. We'll go 85 foot pounds. Just going to hit it one more time. All right. And do the inside one. There it is. Hit it one more time. All right, both of those are tight. There we are. Just going to wheel it up my leg. Cool. We've got our lug nuts. We're just going to snug up these lug nuts. There we are. Bring it down, torque them up. Here we go, we're going to torque these down to 94 foot pounds with our torque wrench. Go around again. There we are. Do the same to the other side of the vehicle.
Thanks for watching. Visit 1AAuto.com for quality auto parts, shipped to your door. The place for DIY auto repair. And if you enjoyed this video, please click the subscribe button.

PSA62963