Replaces


Recommended for your 2005 Ford Expedition
Frequently bought together
About TRQ:
TRQ is a trusted brand dedicated to making every repair a success story by combining premium parts with easy installation. Each TRQ part is engineered by a team of automotive experts to meet or exceed OEM standards, delivering enhanced performance and maximum longevity. With rigorous in-house testing, the brand ensures superior fit and function across every product line. TRQ also provides customers with best-in-class, step-by-step installation videos—so you can complete repairs with confidence, whether you're a first-time DIYer or an industry professional.
Returns: Parts with electrical components cannot be returned once installed.
Left Hand Drive:
All of our auto parts are intended for Left Hand Drive USDM vehicles. If your vehicle is Right Hand Drive, please ensure the part is correct for your specific vehicle.
Attention California Customers:
 WARNING: This product can expose you to chemicals including Lead and Lead Compounds, which are known to the State of California to cause cancer, and birth defects or other reproductive harm. For more information, go to www.P65Warnings.ca.gov.
Lifetime Warranty
This item is backed by our limited lifetime warranty. In the event that this item should fail due to manufacturing defects during intended use, we will replace the part free of charge. This warranty covers the cost of the part only.
Returns: Parts with electrical components cannot be returned once installed.
FREE Shipping is standard on Orders shipped to the lower 48 States (Contiguous United States). Standard shipping charges apply to Hawaii, Alaska and US Territories. Shipping is not available to Canada.
Expedited is available on checkout to the United States, excluding Alaska, Hawaii and US Territories as well as P.O. Boxes and APO/FPO/DPO addresses. Final shipping costs are available at checkout.
Created on:
Tools used
Brought to you by 1AAuto.com, your source for quality replacement parts and the best service on the Internet.
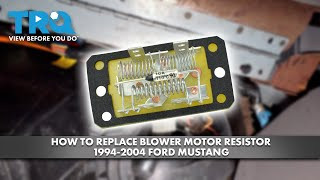
In this video, we're going to show you how to replace the air conditioning and heater fan resistor. This is on a 2000 Ford Mustang, same as any '94-'04. The only tool you'll need is an 8mm socket with a ratchet and extension. Basically, when this starts going bad, you start to lose fan speeds. I've seen vehicles that only have high, or maybe they will work on the 2 low speeds but not the high speeds.
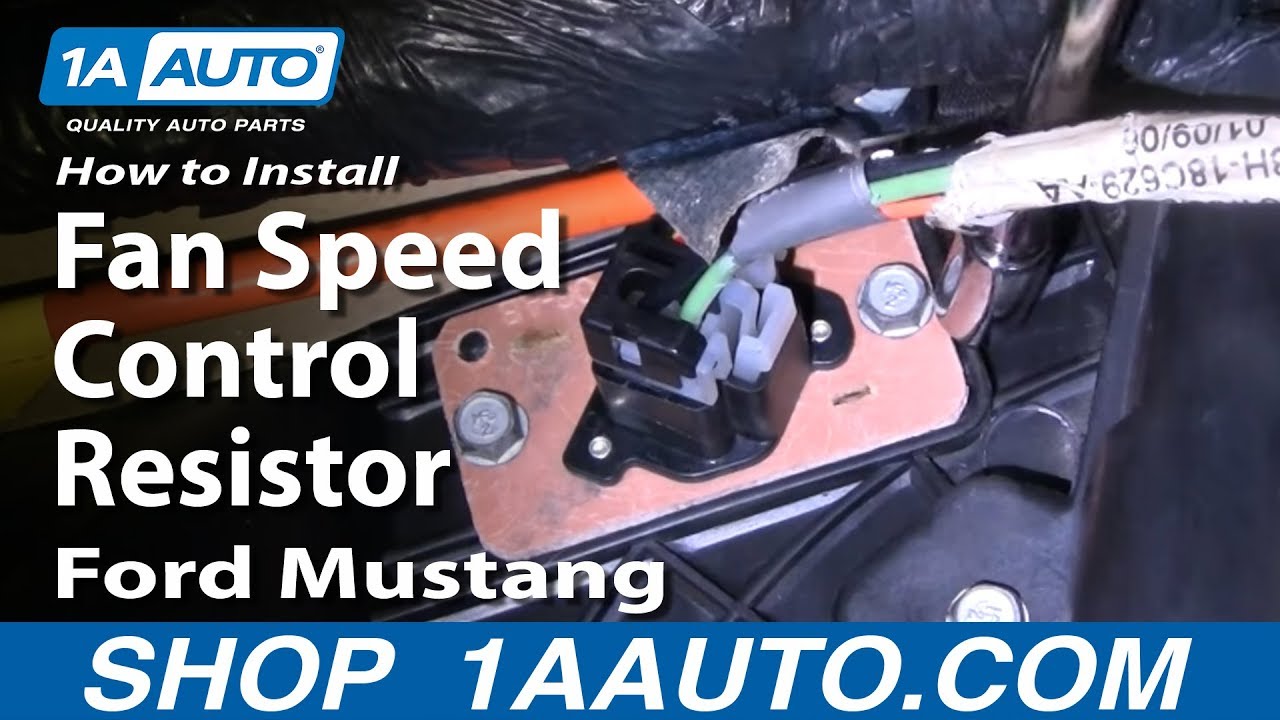
Your resistor is right up underneath here. There are two 8mm bolts. Here's your resistor hanging down. You just want to push on a little tab here, and pull your connector out.
Here's a new resistor from 1A Auto. Plug it right in. Push it right up in place here. Once you have both bolts fed in by hand, then use your 8mm socket with ratchet and extension and tighten them up.
We hope this video helps you out. Brought to you by www.1AAuto.com, your source for quality replacement parts and the best service on the Internet. Please feel free to call us toll-free, 888-844-3393. We're the company that's here for you on the Internet and in person.
Tools used
Brought to you by 1AAuto.com, your source for quality replacement parts and the best service on the Internet. Hi, I'm Mike from 1A Auto, and I hope this how-to video helps you out; and next time you need parts for your vehicle, think of 1AAuto.com Thanks.
In this video we're going to show you how to replace the AC and heater fan blower resister. We'll show you the beginning but basically the symptom of this part being bad is that you lose fan speeds. Say your fan works in position 1 and 2, but not 3 and 4, or position 1 and 4, but not 2 and 3, or any combination thereof. The only tool you'll need to do this is a 7 millimeter socket with a ratchet. Okay, if you're having any trouble with your fan speeds, say it works on 1 ... it only works on 1 and 4, but no 2 and 3, or any combination thereof, the usual culprit is what I'm about to show you here. There is a resister, and it's right under here. See, right there; and replacing it usually fixes that problem. To replace it, you are gonna want to disconnect it. There's a little tab right in the backside, push on that tab, got to work it back and forth, and pull the connector down. Now, pretty obviously, there are 2 7 millimeter bolts that hold it in, so I'm just fast forwarding through using a 7 millimeter socket and ratchet to remove their fasteners.
Okay, so here's our original, and new one from 1A Auto. See, they're all the same and you can see that even though this original one works, you see by how corroded it is how they can go bad. Any one of these resisters breaks or anything, that's what usually happens. But our new one from 1A Auto, it's going to go in there, work correctly. It's got a nice foam seal on here and everything. Okay, and pretty obviously, reinstalling it is just a matter of reversing the procedure. You want to make sure that the clip ... actually, it really doesn't matter, you can install it either way. But, usually you want to have the clip where the wire harness plugs in, the clip that locks it, that is usually towards the firewall, or the front of the vehicle. I put it up in there and I already have a bolt in it, then start that bolt, then start the second bolt, and then tighten them up. Obviously once it's bolted in place, then reconnect the wiring harness.
We hope this helps you out. Brought to you by www.1AAuto.com, your source for quality replacement parts and the best service on the Internet. Please feel free to call us toll free, 888-844-3393. We're the company that's here for you on the Internet and in person.
Tools used
Hi, I'm Mike from 1A Auto. We've been selling auto parts for over thirty years. We're dedicated to delivering quality auto parts, expert customer service, fast and free shipping, all backed by our 100% satisfaction guarantee. We've created thousands of videos to help you install our parts with confidence. That saves you time and money, so visit us at 1AAuto.com, your trusted source for quality auto parts.
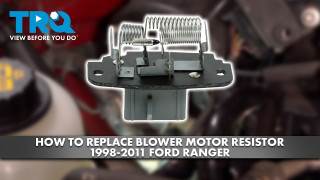
In this video, we're going to be working with our 2001 Ford Ranger, 4.0 liter, V6. We're going to show you how to remove and replace your blower motor resistor for the blower fan responsible for getting hot air or A/C through your vents.
If you like this video, please click subscribe. We have a ton more information on this truck as well as many other makes and models and if you need this part for your vehicle, you can follow the link down in the description over to 1AAuto.com. Here are the items you'll need for this repair.
Your blower motor resistor is located at the back passenger side of the engine bay on the bottom of the heater box. While it is accessible from the top side, we already had our fender liner out and it was a lot easier to access it, so we'll show you how to do it that way. The removal process for the connector and the bolts will be the same whether you do it from above or below.
Using the taped flat blade screwdriver, locate the relief cuts in the hubcap. Stick the screwdriver in and pry out to release it from the wheel. This particular truck has a wheel lock on it, so we'll need the wheel lock key in order to remove it. Otherwise, the rest of the nuts come off with a 19 millimeter socket and breaker bar. Simply crack them loose for now. Then raise and support your vehicle and remove the lug nuts the rest of the way. Remove the wheel from the vehicle.
Remove this 7 millimeter bolt on the mud flap. Using a pair of side cutters, we'll reach under these plastic clips. Be careful not to cut them. Simply grab it and pry it out. Remove the remaining two 7 millimeter bolts from the bottom side of the mud flap. Move these three 5.5 millimeter screws with a socket ratchet and extension. Remove these four 8 millimeter bolts with a socket and ratchet. Remove this plastic clip at the back outer side of the fender. Work the inner wheel liner out of the fender. Remove the vacuum lines on the vacuum reservoir inside of the wheel well, and fully remove the wheel well from the inside of the car.
With the inner wheel well liner removed, the blower motor resistor is much more easily accessible here at the bottom of the heater box. Our blower motor resistor has clearly been removed before because normally there's a clip here that secures the connector onto the bottom of this resistor. It's twin is located on the top side here. Normally you would have to release both in order to be able to remove the connector. We're going to use a small flat blade screwdriver to pry up on the tab that we do still have intact. Remove the connector and using an 8mm socket and ratchet, remove the two screws on either side of this resistor.
Here we have our old blower motor resistor that we removed from our vehicle and our new part from 1AAuto.com. These parts are exactly the same, see we have the same coils here, as resistors, as well as the same resistor here. We have the same two bolt mounting locations and the same pattern where it actually sits into the heater box. Flip it over, you can see that we have the same four pin connector on each with the same blades here to lock our connector onto. If your blower motor is only working on certain higher speeds, it's likely that your blower motor resistor is to blame. This new part from 1A Auto is going to go in direct fit just like our original equipment and fix you up right.
Reinstall your blower motor resistor into the heater box. Start your two 8mm screws. We'll tighten these screws down with an 8mm socket and ratchet. Reinstall your electrical connector and you're ready to put the wheel liner back into place if you removed it for this repair.
Reinstall the wheel well liner into the car. Reinstall the four 8 millimeter screws for the socket ratchet and extension. Reinstall the three 5.5 millimeter screws. Reinstall the bottom outside edge. Place the clip into the opening at the bottom of the fender. Line up your mud flap onto the bottom of your fender, and reinstall the plastic clips: one on the side and one on the top here. Reinstall the three 7-millimeter screws.
Reinstall the wheel and tire, and start your lug nuts by hand. With the weight of your vehicle on the tires, torque the lug nuts to 100 foot-pounds in a cross pattern. Line up the tabs on the inside of your hubcap to the lug nuts. Tap it back into place.
Thanks for watching. Visit us at 1AAuto.com for quality auto parts, fast and free shipping, and the best customer service in the industry.
Tools used
Hi, I'm Mike from 1A Auto. We've been selling auto parts for over 30 years. We're dedicated to delivering quality auto parts, expert customer service, fast and free shipping, all backed by our 100% satisfaction guarantee. Visit us at 1AAuto.com, your trusted source for quality auto parts.
The blower motor resistor is on the passenger side up underneath the glovebox. There's usually a trim panel that goes under here. It attaches via the plugs here and here, or bolts in, so you would pull those plugs out and then pull the panel down.
You just follow this wire right up, and there is a tab on the connector right there. Push that tab and pull down. Then two bolts hold it in place: one on each side. One there, and I'm going to block it, but one on the other side. Remove those two 8 millimeter bolts.
When you go to reinstall, you have your two holes where the bolts go, and then there's a locating hole in one of the corners. That goes towards the driver's side of the vehicle. Just put it up into place. Then start the bolts into place. Plug back in your lead.
Thanks for watching. Visit us at 1AAuto.com for quality auto parts, fast and free shipping, and the best customer service in the industry.
Tools used
Brought to you by 1AAuto.com, your source for quality replacement parts and the best service on the internet. In this video, I'm going to show you how to replace the AC and heater fan speed resistor on this 2003 F-250, same as any '99 to '07 F-250 and F-350. In a perfect world the only tool you'll need is the is the 8 millimeter socket with a ratchet and a small extension but most of these go bad because the contacts corrode so you'll need some needle nose pliers as well as a flat blade screwdriver to force the resistor and the harness plug apart. Then some penetrating oil and grease to condition the contacts before you put it back together.
With they key on, turn on the ... Now if you listen you can hear the blower motor and as I turn it up you don't really hear any difference in the sound of the motor. Then when I go to high ... okay, so I'm basically missing my 2 middle speeds and this is not the switch, it's usually the resistor. Blower motor resistor is right here on the passenger side. This is it right here and it's held in by 2 8 millimeter screws, one up there and then there's one down below that you can't really see. For the bottom one, I've got an 8 millimeter socket. If you have a small extension like that it'll help but you can just do it with a socket and ratchet. Okay, I'm just going to hit fast-forward here so you don't have to sit there and watch my hands working a ratchet.
Now once the bolt's not giving the ratchet much resistance then you can just reach in there and take it out the rest of the way with your hand. Again, fast-forward for that top bolt. Use the ratchet and then once it doesn't give resistance, use your hand. You might ask why didn't I unplug it first, because generally these things are so corroded together that they don't just unplug in the conventional manner. What I usually do is take a pair of needle nose pliers ... You don't want to break the harness part of the connection but ... I just start breaking the resistor side. I'm going to fast-forward here as I go at the plastic part of the resistor side. Again, do not break the part of the plug that the wires go into. You want to just break off the plastic that is part of the resistor. You can look at your new resistor to see which part that is. Now I'll trade in for a screwdriver and now I'm just trying to pry away the remains of the resistor from the connection.
Once you get it pretty much to that point ... This doesn't want to come apart ... Now you've gotten the resistor part off ... now the plastic part ... Put your screwdriver in there, pry up ... I generally like to take a little penetrating oil and clean up the contacts a little bit. New resistor from 1A Auto, only the color is a little different. Put it back in place. Start our upper bolt a little bit by hand first. If I reach in here with my left hand underneath, I can feel the hole and start our lower bolt as well. Make sure it's in there well. Now I'll just use my 8 millimeter socket with my ratchet and extension and tighten up those 2 screws. When you tighten them up, you want to tighten them firm but don't over-tighten them because you could strip the plastic housing. Okay, that's installed. Now we can take our lead and plug it back in.
At this point you're going to want to run a test, see if you have all your speeds back. I found on this truck that I actually ... it changed and that was because the contacts still weren't making good contact so I actually unplugged it again, sprayed some more penetrating oil in there, then re-plugged it in and just moved the connection around a little bit and that restored my fan speeds. Also, putting a little bit of bearing grease or something more permanent on there, that helps make a better connection with the prongs clips. Now you can hear speed 1, 2 ...
We hope this helps you out. Brought to you by www.1AAuto.com, your source for quality replacement parts and the best service on the internet. Please feel free to call us toll free 888-844-3393. We're the company that's here for you on the internet and in person.

HCA40093