Replaces
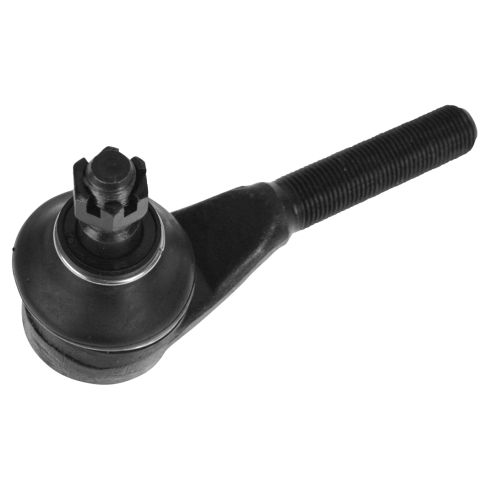
1991 Mercury Colony Park Front Driver Side Outer Tie Rod TRQ PSA68258


PSA68258
This part doesn’t fit a . Select from parts that fit.
Specify your vehicle's year, make and model to guarantee fit.
This part doesn't fit a . Select from parts that fit.
Buy in the next and
Orders must be placed by 2pm ET
Recommended for your 1991 Mercury Colony Park
Frequently bought together
Specify your vehicle's year, make and model to guarantee fit.
This part doesn't fit a . Select from parts that fit.
Part Details
- No
- Yes
- Male
- Male
- Steel
- Steel
- Yes
- E-Coated
Specifications
- Outer
- Driver Side
- Front
About TRQ:
TRQ is a trusted brand dedicated to making every repair a success story by combining premium parts with easy installation. Each TRQ part is engineered by a team of automotive experts to meet or exceed OEM standards, delivering enhanced performance and maximum longevity. With rigorous in-house testing, the brand ensures superior fit and function across every product line. TRQ also provides customers with best-in-class, step-by-step installation videos—so you can complete repairs with confidence, whether you're a first-time DIYer or an industry professional.
Install Tip: When replacing steering components, have a professional alignment performed afterwards. This ensures proper tracking and even tire wear.
Our steering and suspension components are pre-greased and sealed for long life and do not require the extra maintenance typically required by greaseable versions.
Attention California Customers:
![]() WARNING: This product can expose you to chemicals including Lead and Lead Compounds, which are known to the State of California to cause cancer, and birth defects or other reproductive harm. For more information, go to www.P65Warnings.ca.gov.
WARNING: This product can expose you to chemicals including Lead and Lead Compounds, which are known to the State of California to cause cancer, and birth defects or other reproductive harm. For more information, go to www.P65Warnings.ca.gov.
Lifetime Warranty
This item is backed by our limited lifetime warranty. In the event that this item should fail due to manufacturing defects during intended use, we will replace the part free of charge. This warranty covers the cost of the part only.
FREE Shipping is standard on Orders shipped to the lower 48 States (Contiguous United States). Standard shipping charges apply to Hawaii, Alaska and US Territories. Shipping is not available to Canada.
Expedited is available on checkout to the United States, excluding Alaska, Hawaii and US Territories as well as P.O. Boxes and APO/FPO/DPO addresses. Final shipping costs are available at checkout.


Created on:
Tools used
- Pry off the center cap with a flat blade screwdriver Loosen the lug nuts with the vehicle on the ground Raise the vehicle with a floor jack Secure the vehicle on jack stands Remove the lug nuts Pull off the wheel
- Turn the rotor by hand or turn the steering wheel to access the tie rod Remove the cotter pin from the tie rod nut with needle nose pliers Loosen the 19mm nut from the tie rod end Loosen the 1/4 inch nut and bolt from the tie rod clamp Apply penetrating oil to the tie rod end Separate the tie rod from the steering knuckle with a pickle fork and hammer If a pickle fork is not available, remove the 19mm nut from the tie rod end Then thread the nut on upside down and separate the tie rod from the steering knuckle with a hammer Mark the outer tie rod threads with a marker where they meet the inner tie rod Twist off the outer tie rod with an adjustable wrench
- Measure the distance from the end of the old tie rod to the marked threads Mark the new tie rod in the same location
- Remove the shipping boot Twist the new outer tie rod into place Clean the steering knuckle Push the outer tie rod into the steering knuckle Thread the 19mm nut onto the tie rod end Tighten the 19mm nut to 50 foot-pounds of torque Line up the nut with the cotter pin hole Insert the cotter pin into place Bend the cotter pin with needle nose pliers Insert the 1/4 inch nut and bolt into the tie rod clamp Tighten the 1/4 inch bolt to between 20 - 25 foot-pounds
- Slide the wheel into place Start the lug nuts by hand Tighten the lug nuts preliminarily Lower the vehicle to the ground Tighten the lug nuts to 100 foot-pounds in a crossing or star pattern Reattach the center cap
Brought to you by 1AAuto.com, your source for quality replacement parts and the best service on the Internet.
Hi, I'm Mike Green. I'm one of the owners of 1A Auto. I want to help you save time and money repairing or maintaining your vehicle. I'm going to use my 20-plus years experience restoring and repairing cars and trucks like this to show you the correct way to install parts from 1AAuto.com. The right parts installed correctly: that's going to save you time and money. Thank you and enjoy the video.
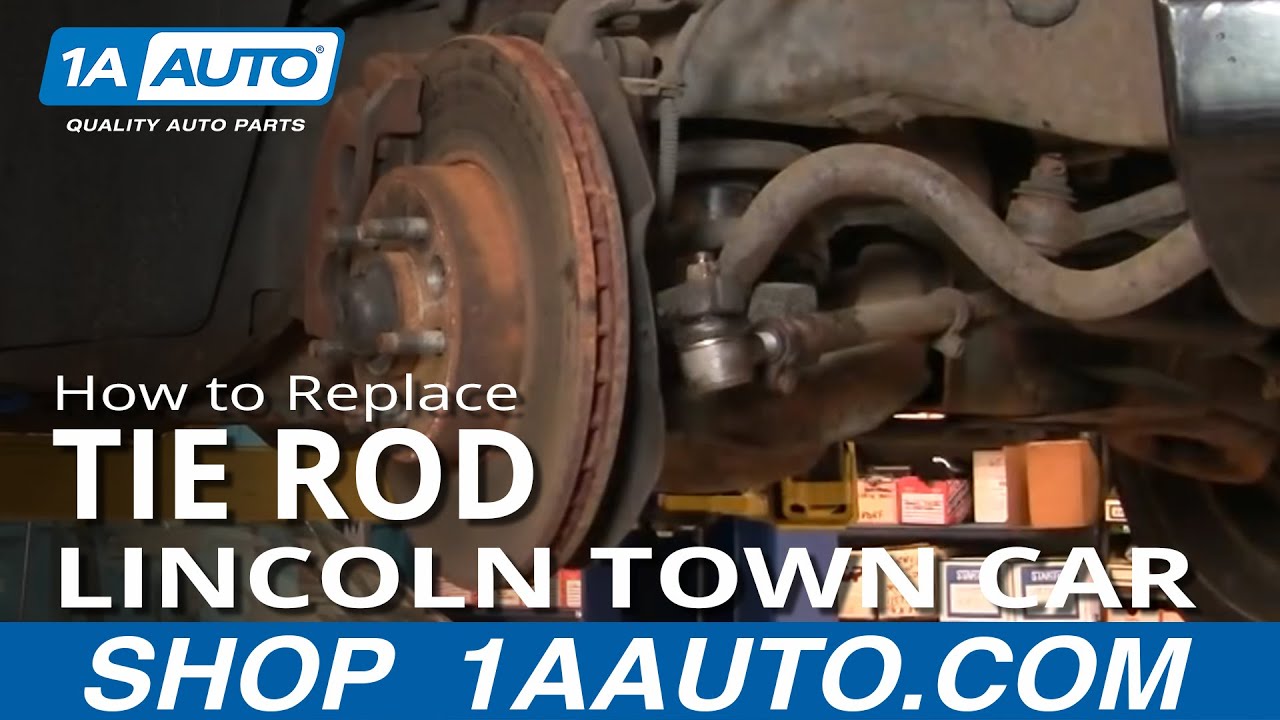
In this video, we're going to show you how to replace the outer steering tie rod end on this 2000 Lincoln Town Car. It's actually the same as any '81 to 2002 Town Car. Tools you'll need are 13/16 inch and 19 millimeter sockets with a ratchet, a torque wrench, pliers, tie-rod separator fork, hammer, ruler, and a marker or a grease pencil.
We're going to start out. Remove your center cap. If you're using hand tools you'll want to loosen your lug nuts while the wheel's on the ground first, then raise the car with the jack stand, and then remove your lug nuts. I have the benefit of air tools. These are 13/16 inch lug nuts. We'll just speed it up here as we remove those lug nuts and then remove the wheel entire.
Pull or turn your steering wheel so you can have easy access to the tie rod. Apologies here, I didn't get a very good shot of it, but all I'm doing is using a pair of needle nose pliers to break off the ends of the cotter pin, and then pull it out of the tie rod stud. This bolt's 19 millimeters. We'll speed it up here a little bit as we just remove that bolt the rest of the way. Now, right here, on the steering linkage there's a bolt with a nut on the back side that holds a clamp. It's a half inch, which I'm surprised about. It can seem to bounce back and forth between metric and standard, but we want to loosen up this bolt.
Now, we're going to hit the end of the tie rod end with a lot of penetrating oil. Now we want to separate the tie rod end from the steering knuckle. There are two ways you can go about this. The best way is using the correct tool which is a tie rod and ball joint separator, sometimes called a pickle fork. The other way is you could take your bolt, thread it back on, actually, upside down onto your tie rod end, and then use a hammer to try to force it out. That bolt keeps the tie rod stud from mushrooming and then not being able to go through here, so you'd want to make sure you get the bolt down level with the stud, and then beat on it. This is not always successful. It can cause stress to your steering knuckle, so it's not a hundred percent recommended. Also, if you do it this way, you probably will have problems getting this bolt back off because it will get stuck onto the stud. The right way is with a pickle fork. I do make a minor mistake here. You see I took that nut off. You actually want to loosen that nut and leave it on. You'll see later so that when you do break the tie rod loose the pickle fork doesn't fall and the tie rod or the steering linkage doesn't fall. It's not a big deal, but just a little safer way to do it is to leave that bolt threaded on there so it doesn't come apart too violently. You can see there's an ear on this side which means they want you to go at it just like this. This is one of those times when it's fun not to be nice. I don't have a lot of room here.
So, now what I'm going to do is use a red permanent marker, you can use anything. I mean grease pencil or something would be best. I'm going to really put a bunch of red ink there. That's going to tell me how far in the tie rod was. Now, I'm going to take a large adjustable wrench, and, on these tie rods, clockwise actually is moving them out, so you want to basically just start turning, and this one actually started turning pretty easy.
We'll measure from the end here. I would say it's about eight and three quarters centimeters. For this one, down here, do the same and mark. This'll just give you a rough alignment. After this repair, you should have your car aligned.
Remember on this side it's counterclockwise you can install it. Then up to my mark and one more. Remove the nut. That plastic is a shipping boot, so we want to remove that. If you have paper towels, clean off. Clean out the steering knuckle. I'm just going to push the new tie rod. It's going to be stiff. Push it a little bit. Work it up in there. Get the nut on. Now, we need to torque our nut on here. I've got the torque wrench set to 50 foot-pounds. Then at a brief look, it looks like you pull it just a little tighter to get the cotter pin into it. I'll need a cotter pin. Put it in from the side here. It just needs a little convincing. It's got to get up and over. It doesn't go anywhere. Briefly tighten this bolt here. When I get this tight, it probably should be about 20 to 25 foot pounds. I'm just going to get it pretty tight with my ratchet here.
Now we're going to fast forward through putting the tire back on, thread the lug nuts on by hand. I use my impact wrench just to tighten them preliminarily, and then lower it down to the ground. Torque them to 100 foot-pounds using a star pattern, and then put my center cap back on.
We hope this video helps you out. Brought to you by www.1AAuto.com, your source for quality replacement parts and the best service on the Internet. Please feel free to call us toll-free, 888-844-3393. We're the company that's here for you on the Internet and in person.
Tools used
- Pry off the center cap with a flat blade screwdriver Loosen the lug nuts with the vehicle on the ground Raise the vehicle with a floor jack Secure the vehicle on jack stands Remove the lug nuts Pull off the wheel
- Turn the brake rotor by hand or turn the steering wheel to turn the rotor Remove the cotter pin from the tie rod nut using pliers Remove the 19mm bolt from the tie rod end Loosen the 1/2 inch nut and bolt from the tie rod adjusting sleeve Attach the tie rod press tool to the steering knuckle Use the tie rod press tool and a wrench to separate the tie rod end from the steering knuckle Apply penetrating oil to the tie rod adjusting sleeve Measure the distance from the end of the adjusting sleeve to the end of the tie rod Note this measurement Loosen the tie rod from the adjusting sleeve with an adjustable wrench Pull out the tie rod
- Thread the new tie rod into the adjusting sleeve Measure the distance from the end of the adjusting sleeve to the end of the tie rod This measurement should match the one noted in Step 2 Insert the tie rod into the steering knuckle Start the 19mm nut onto the tie rod Tighten the 19mm nut to between 40 - 45 foot-pounds of torque Turn the nut further to line up the space for the cotter pin Put the cotter pin into place Bend the cotter pin with pliers Tighten the 1/2 inch nut and bolt to 20 - 21 foot-pounds
- Slide the wheel into place Start the lug nuts by hand Tighten the lug nuts preliminarily Lower the vehicle to the ground Tighten the lug nuts to between 100 - 110 foot-pounds in a crossing or star pattern Reattach the center cap Have the vehicle professionally aligned
Brought to you by 1AAuto.com, your source for quality replacement parts and the best service on the Internet.
Hi, I'm Mike from 1A Auto. I hope this how-to video helps you out, and next time you need parts for your vehicle, think of 1AAuto.com. Thanks.
In this video, we're going to do an outer tie rod end on this 2000 Crown Vic, very similar for any of this era of Crown Vics as well as the Town Cars. As far as alignment goes, it's recommended that you have your car aligned after you do a job like this, but if your car is still steering straight down the road, the steering wheel is still centered, then the alignment can be at your discretion. Tools you'll need are jack and jack stands, and 19mm socket and ratchet. You'll need a 1/2 inch socket and ratchet and also 1/2 inch wrench, some needle nose pliers, penetrating oil, and a torque wrench.
Raise and support the vehicle and remove the cap, and then remove the lug nuts. If you don't have the luxury of having air tools, you want to loosen the lug nuts while the vehicle is on the ground, the wheel is on the ground. Then, raise and support the vehicle. Remove the lug nuts the rest of the way, and remove the wheel and tire.
You can pull the steering over or turn the steering wheel, so it's easier to access the end of the tie rod. In this shot, the green arrow points to the tie rod and the red arrow points to the steering knuckle. In the next scene, I'm going to shake the front steering a little bit, and what you'll see is that the steering knuckle, again, with the red arrow, moves more than it should, which indicates play in the tie rod. This is how you want to look for whether or not you have a bad tie rod. That's a little difficult to see, so you might want to rewind it a couple times, but you'll see that that steering knuckle that the red arrow is pointing to moves more than the tie rod end.
Next, you want to remove the cotter pin. Hopefully, you can just kind of straighten it out, break off the ends that are bent over, and it will pull out. Mine proves to be more difficult. What I end up doing is just breaking off as much of the pin as I can, and then, I put my wrench on it, and it takes a little bit of pulling but basically the bolt just shears the cotter pin right off after you've gotten most of it broken off. It's a 19mm bolt. Here, I'm going to loosen up the nut and bolt that hold the adjustment sleeve onto the tie rod end, and those are 1/2 inch tools believe it or not. Just standard size 1/2 inch socket and wrench. Now, here I'm putting the tie rod press tool onto the steering knuckle, and tightening it down in preparation for using my impact wrench. You can also just use a regular wrench for this. Now, coat the tie rod end and adjusting sleeve with a good amount of penetrating oil to loosen it up. Let it sit for a little while. Then, you take a measurement on the bottom side from the end of the sleeve right after the end of the tie rod. You get 3-1/4 inches, right out to the end. I'm going to speed it up here. I'm just taking a big adjustable wrench and pulling on to that tie rod end, getting it to move and spin. Then, you actually, on the driver side, turn it clockwise to remove it.
Put the tie rod in. Speed it up as I thread the new tie rod end from 1A Auto in. You can see here I'm using my tape measure, measuring it. For this car, it's a 3-1/4 inches from the end of the sleeve to the end of the tie rod. That will vary by car. If you set it up the same as you took it apart, it should be okay as far as your alignment. That's kind of up to you. If you drive the car and it still goes nice and straight and the steering wheel's straight, then you'll be all right. If it's pulling at all or the steering wheel is not straight, then have it aligned. Then, you insert the tie rod into the steering knuckle. You've just got to work it around a little bit, get it up in there, and then start the bolt on. Tighten this to 40 to 45 foot-pounds. Then we will go a little bit further just to get the cotter pin through. You can see I used the wrench just to tighten it just a little bit more so that cotter pin goes through nice and easy. Then, use pair of needle nose pliers to bend the cotter pin over. Now, tighten up the bolt and nut that pinch the adjusting sleeve to 20 to 21 foot-pounds.
Now, put your wheel back on, and yes I know this is the other side. This is the footage I had, but obviously the procedure is the same for either side. You want to put your wheel back on once you're done replacing the tie rod. Put the lug nuts on by hand first. Tighten them up primarily with your wrench or impact wrench and then let the vehicle down on the ground. Tighten the lug nuts to anywhere from 100 to 110 foot-pounds and use a star pattern as you're tightening them and then put the center cap back on, and you should be all set.
We hope this video helps you out. Brought to you by www.1AAuto.com, your source for quality replacement parts and the best service on the Internet. Please feel free to call us toll-free, 888-844-3393. We're the company that's here for you on the Internet and in person.

PSA68258
877-844-3393
Monday - Friday 8:00am - 9:30pm ET
Saturday - Sunday 8:00am - 4:30pm ET
Specify your vehicle's year, make and model to guarantee fit.
This part doesn't fit a . Select from parts that fit.


