Brought to you by 1AAuto.com, your source for quality replacement parts and the best service on the internet.
Hi, I'm mike Green. I'm one of the owners of 1aauto. I want to help you save time and money repairing and maintaining your vehicle. I'm going to use my 20+ years experience restoring and repairing cars and trucks like this to show you the correct way to install parts from 1AAuto.com. The right parts installed correctly, that's going to save you time and money. Thank you, and enjoy the rest of the video.
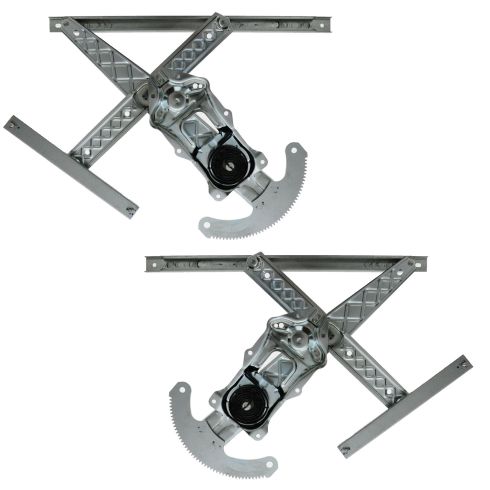
OK, this is part one of two. Window regulator on this '97 Ford Expedition, same as any '97-02 and '97-03 F-150. We're going to show you how to remove it. Tools you're going to need; a regular screwdriver, a Philips screwdriver, 11 mm socket and driver, a hammer, a punch and a drill with a -inch drill bit.
Start out here, we're going to fast-forward through taking the door panel off. If you want to see this in regular motion, just check out our other videos. Search for Expedition or F-150 door panel, or you can probably pick up enough. It's just a matter of removing a few panels and a few screws and then pulling up and off. Generally, it's the same for all doors, front and rear with the exception of obviously the extended cab trucks. ... took the panel off. You can see I have my window rolled down slightly. What that allows is remove two nuts. This one here and that one right in there.
Now, on this truck, there's nothing wrong with the regulator or the motor, so I can move the window around. Really that'll probably be your greatest challenge. If you have a stuck window regulator or motor, you'll have to reach in and get those nuts off wherever they may be. They may be it's stuck all the way down, you're going to have to reach down. There's quite a bit of room in the door and with these holes, so it shouldn't be too much of a problem. What I'm going to do is I'm going to remove those two nuts. They're 11 mm. Once you have those nuts off, I'm reaching into the middle of my window, lifting up on the window a little bit, and I'm just pulling the window regulator track away from the window. Lift up on the window, and I'll secure that with some tape. That holds the window up. Now, my regulator's separate from the window.
You can see I used a little bit of painter's tape just to secure the window up, so it doesn't fall down while I'm working. Just to get it out of the way, I'm going to pull this harness off the door. Whoops. Now, what I'm going to have to do is I'm going to remove these two bolts here, which are 11 mm. OK, now these rivets are actually pretty easy. This is where you want to make sure you have your window taped up well. You want to take the punch, and you want to put it right in the center of the rivet. You want to knock the little pin right through. I'm going to do that on all six rivets.
Now, I'm going to take a nice big -inch drill bit. I'm going to drill right into. Now, these are pretty soft metal rivets. You want to be careful not to drill too far and drilling through the door. Then, once you've gone a certain distance, can probably just take a screwdriver and clean off the rest of them. I'll do that for the other one. Once you have all those rivets drilled out. Again, it's a matter of separating them from the door. Can always resort to your punch again. Now, your regulator is free. Here is your harness's connector right here. See, this connects that, feed it through, bring the regulator out through there.
That ends this video for now. If you want to see the installation, please check out our other videos for the F-150 Expedition window regulator install. We hope this helps you out. Brought to you by www.1AAuto.com, your source for quality replacement parts and the best service on the internet. Please feel free to call us toll-free 888-8444-3393. We're the company that serves you on the internet and in person.