Replaces


Recommended for your 2001 Dodge Ram 3500 Truck
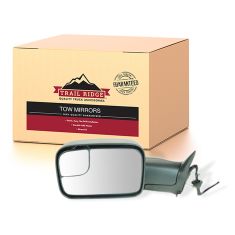
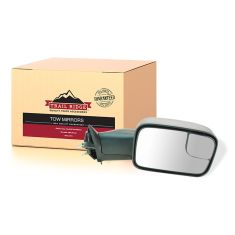
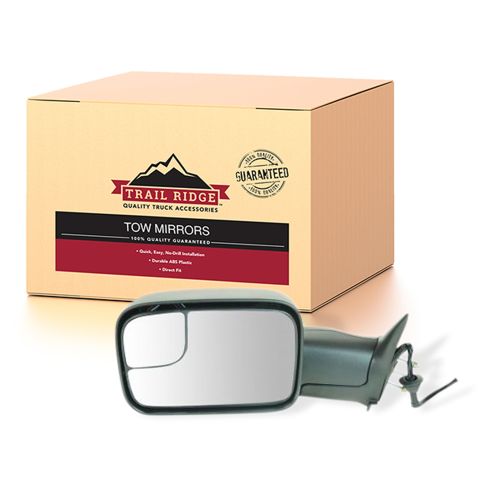
Part Details
Specifications
About Trail Ridge:
Trail Ridge Truck Accessories are developed and built with a promise to provide high quality, durable parts for your truck; backed by the best warranty in the automotive industry. Manufactured from the highest quality materials and constructed to meet or exceed OEM standards. Every Trail Ridge part is rigorously tested ensuring superior fit, function, and durability. Quality, trusted value, and hassle-free installation backed by our 100% satisfaction guarantee.
Install Tip: If this mirror is an upgrade and was not originally equipped on the vehicle, reinforcement mounting brackets need to be purchased for proper operation.
Install Tip: Use caution when installing, pinching the wires can result in shorting.
Exact fit - To obtain proper fit and function confirm your vehicle has the exact mirror options listed.
Attention California Customers:
 WARNING: This product can expose you to chemicals including Chromium (Hexavalent Compounds), which is known to the State of California to cause cancer, and birth defects or other reproductive harm. For more information, go to www.P65Warnings.ca.gov
Lifetime Warranty
This item is backed by our limited lifetime warranty. In the event that this item should fail due to manufacturing defects during intended use, we will replace the part free of charge. This warranty covers the cost of the part only.
FREE Shipping is standard on orders shipped to the lower 48 States (Contiguous United States). Standard shipping charges apply to Hawaii and Alaska.
Shipping is not available to a P.O. Box, APO/FPO/DPO addresses, US Territories, or Canada for this item.
Expedited is available on checkout to the United States, excluding Alaska, Hawaii.
Final shipping costs are available at checkout.
Created on:
Tools used
Brought to you by 1AAuto.com. Your source for quality replacement parts and the best service on the internet.
Hi. I'm Mike Green. I'm one of the owners of 1A Auto. I want to help you save time and money repairing or maintaining your vehicle. I'm going to use my 20 plus years experience restoring and repairing cars and trucks like this to show you the correct way to install parts from 1AAuto.com. The right parts installed correctly. That's going to save you time and money. Thank you and enjoy the video.
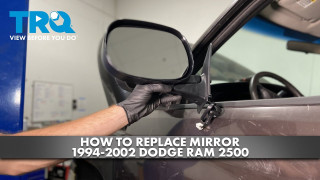
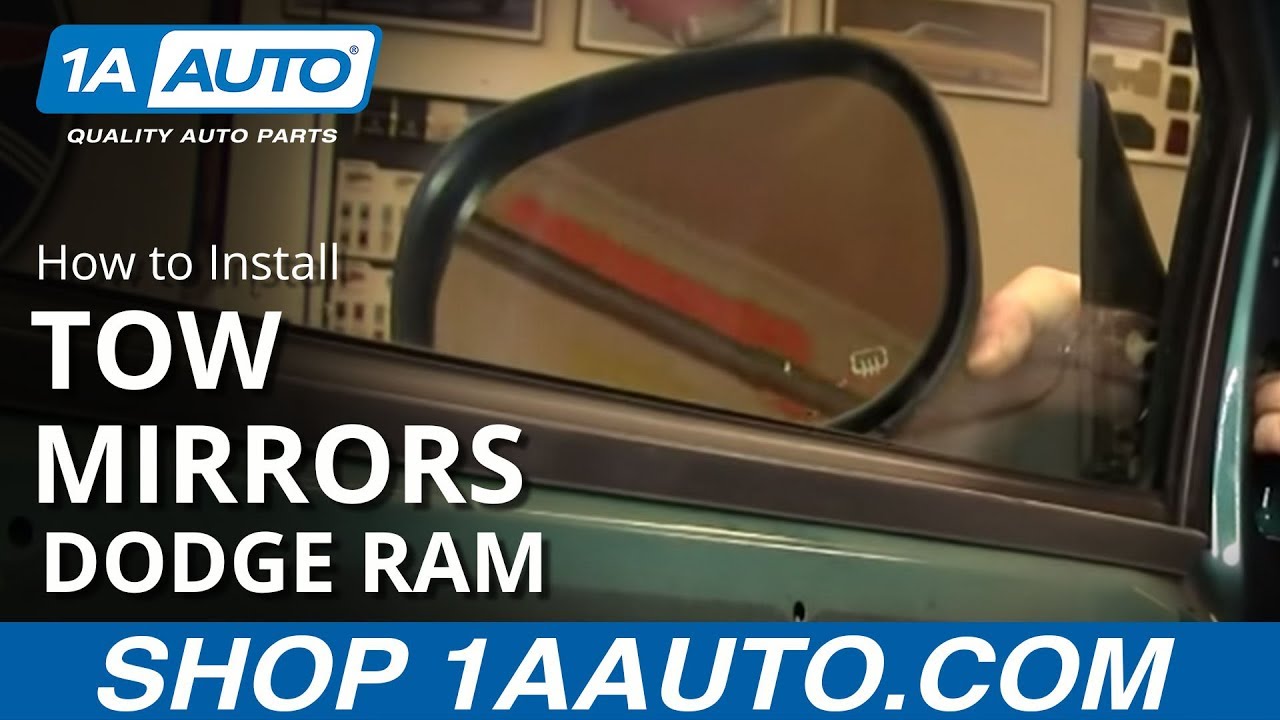
In this video were going to show you how to put a set of upgraded tow mirrors with a clearance light on this 1998 Dodge Ram. Tools you'll need are 10 millimeter socket with a ratchet and extension, Phillips screwdriver, putty knife and/or door panel clip tool, flat blade screwdriver, needle nose pliers. You'll need some type of stiff wire or even a coat hanger unbent and cut can work and wiring pliers.
Use a 10 millimeter wrench to loosen up the knot on your negative battery cable and disconnect your negative battery cable. Okay, going to take you through removing the door panel pretty quick. There is a 10 millimeter bolt that holds the inside door handle on. Then 3 Phillip screwdrivers, 2 down in the pull cup, and then 1 up at the corner. Then after you get those off there is a series of clips or pins that push into the door. Use a putty knife or door panel clip tool and pull those pins and they're basically all the way around the outside of the door. If you do want to see this footage here in regular speed check out our other videos for the Dodge Ram door panel removal. Okay, then once you pull the door panel off there's a couple more pins up top. Pull the door panel off, disconnect your power window connection as well as your mirror connection and then remove the pins. If the pins don't come out of the door like on this vehicle remove them with your took and needle nose pliers and put them back on the door panel so you're ready to reinstall.
Pull out the foam insulation from the mirror and now disconnect your mirror. Then there are three 10 millimeter nuts that hold the mirror. Fast forward through removing those three nuts with my 10 millimeter socket and with a ratchet and an extension. Pull the mirror off. Push your harness plug through. Mirror comes off. There are 4 Phillips screws that hold the speaker and you want to remove those screws. Pull your speaker down and then down here disconnect the lead of your speaker, pry the pin away that holds the wiring harness on, and remove. Underneath we're going to remove 3 Phillips screws and pull this bottom panel out. Okay. Our upgraded mirror with a signal comes with a 2 wire harness. The red you want to hook into whatever light you want and the black needs to go to a ground. Okay. Now you have a choice, you can hook the light up to your turn signal or you can hook the light up just to your parking lights and obviously if you hook it to your turn signal the light will flash when your turn signal flashes. If you hook it up to your parking light it'll be on anytime your lights are on and that's usually the better of the two because you want to have it on at night so people can see how wide your vehicle is.
I'm going to show you both so right now I have my key on. Okay, you can see I have my left blinker on and down underneath you need to find these two wires. There's a brown with a red stripe and a green with a red stripe. The green with the red stripe is your left blinker. I know that because I can look at where they're going into the terminal up here. Using an electrical probe you can see I'm probing the green with red and my indicator is flashing with the blinker. Change it to my right hand turn signal probe this brown with red and you can see my indicator starts flashing. Your parking lights it's going to be this black with yellow. Turn off my blinker and turn off my key and just turn on my parking lights. I apologize for the ringing. Probe this black with yellow you can see it's on. Turn off my parking lights and probe the black with yellow again and it's off. Again, the brown with red stripe and green with red stripe are right here. The black with yellow should be right there. Up underneath here's the emergency brake pedal. You want to remove the emergency brake pedal bracket bolt there about back on the firewall and another one back on the firewall and then just move that out of your way to the side a little bit. Bolt over here you're going to want to disconnect this rod from your brake release lever. Just pull that clip down, pull it right out. Now you can access, a little hard to see, but you can access the two right there.
Now we're going to remove the protector tube that runs between the door and the body of the truck. One the door side you just push it back through and into the door and then once you've pushed it through then you can turn it and bring it out. Then on the body side, the body side actually clips and it's a little- my camera's angle is off here. Then you can see. You basically just squeeze the body side and you'll feel there's basically a clip at each corner. You squeeze it and pull it out and then you'll release the tube from the truck. You're going to pull this out and you got a couple of connectors here. Press the buttons and disconnect them. Get a piece of stiff wire, a coat hanger untwisted and unbent and uncut will work. Feed that carefully into this tube and through and make a little hook and bend it over on itself so there's a hole. Okay. Take my wire, the non terminal end, and I fed this through terminal side into the door. Take this wire put it through my little loop I made in my wire and now pull everything right back through. Take my terminal end of the wire make sure it's fed into the door and up right through here. Right now we'll leave ourselves plenty of slack. Take our wire here again feed it in here pull it through this and back through the door.
Now you want to re-bolt your emergency brake or parking brake lever back onto the firewall. Be careful not to pinch the red and black wire. Make sure they are nice and free coming through there. Then obviously you'll need to repeat this whole step for the passenger side door. That is made one step easier because you don't have to, you can easily reach the tube. You don't have to remove the parking brake or any kind of trim or anything like that on the passenger side.
Okay and this is probably about as good or bad as place as any to end part 1 and you want to see us finish wiring it up and install the mirror just check out part 2.
We hope this helps you out. Brought to you by www.1AAuto.com. Your source for quality replacement parts and the best on the internet. Please feel free to call us toll free 888-844-3393. We're the company that's here for you on the internet and in person.
Tools used
Brought to you by 1AAuto.com, your source for quality replacement parts and the best service on the Internet.
Hi, I'm Don from 1A Auto. I hope this how-to video helps you out, and next time you need parts for your vehicle, think of 1AAuto.com. Thanks.
Here's part two of putting the upgraded tow mirrors on our '98 Dodge pickup. Here's a quick refresher of the tools that you're going to need. Basically, it's what you need to get the door panels and mirrors on and off as well as a couple of little wiring accessories.
Where we'd left off, we routed the wires and bolted the emergency brake pedal back into place. As a quick reminder, you want to decide if you want to hook your lights on the mirror, if you want to hook them up to the blinkers or to the parking lights. I prefer the parking lights so that they're on all the time so you can judge the width of your vehicle. Here, you can see if you're looking up to hook up your blinkers, you want your right hand signal hooked up to the brown with red stripe, and your left hand signal, hooked up to the green with the red stripe. If you're hooking them up to the parking lights, you want to hook them both to the black with yellow stripe.
First, you want to determine where you're going to route the wire to. This is going to be my ground wire so I route it right to a metal piece of my dash where there's a screw so I can put a terminal on it and the screw can go through. The next thing, choose the correct terminal. You want it to do what you needed to. In this case, I want to put a screw through so it's an eye terminal. There's all kind of different terminals and then also, you want to have the right size for the wire. This is a very small wire because it's an LED. These are the smallest gauge I can get as far as the terminal. Then, you want to have the right tool, okay? These are wiring pliers. The first thing you want to do is strip a little bit of the end off. I have to redo it, because the wire again is so small. I guess I have to go a little bit of an alternate way. Just trying to cut through the casing a little bit and then pull the pieces off. There's my wire exposed. I'm going to twist it because it's a stranded wire and because my terminal is a little bit big. I'm going to actually fold it over on itself. Then you want to take your terminal and put it in the crimping jaws. Make sure the crimping jaws are right over the metal part. You don't want to just crimp the plastic here. There's metal inside there so you want to see the metal. Put your wire in, so you make sure that the wire is the way into the metal terminal. I'm going to squeeze. Use the sharp pointed part of your crimp to really tear down. Test it. Pull it. Don't pull it really hard, but make sure you've got a good tight crimp on there. Now, you can see, I have a good tight ground of that wire in the terminal and screwed into the metal.
This is a wire tap and it's obviously designed to connect two wires. If you open it up, you can see that one passage goes straight through, the other passage is blocked. The way it's designed is if this is your existing wire in your vehicle, you put the tap on to it and then, you take your new wire, and put it right down in here until it stops. Then, take your pliers and drive the splice right into the wires like that and then you can close it off. Inside there, it's spliced, but you have nothing. There's no wires or anything that can short or anything like that. Here, you can see those two blue splices. Those are both my mirror wires, they're spliced into that black with yellow stripe wire.
Here's a new mirror from 1A Auto. We're going with the towing mirror upgrade on this truck. We do sell the regular replacement ones just like the original, but this is the later style, slide out or flip out tow mirror. It offers you a good angle for viewing, for towing and then it also has . this vehicle has the clearance light. We do offer these, as well as, just the regular replacement, as I said. Obviously, to reinstall, we're going to put our harnesses through. Just to hold it for a moment and just thread a bolt on here. These mirrors have a tendency for the wires to get pinched when you're installing them. After you put that little nut in, just separate your mirror out from the car a little bit, and look down in there. You can't really see what I'm doing, but you just make sure that your harness is pushed out of the way, and it's not close to either of the mounting studs. Make sure it routes right between them, and it doesn't get too close to either one of them. Because these mirrors are so big, we provide you with a reinforcement plate. Run the harness through that. I'm going to speed up here, and laugh at myself a little bit as I try and contort myself, getting this mirror on by myself. With these upgraded tow mirrors, they require that reinforcement plate, so it's a little bit of a challenge to get the plate on there and start the nuts, but that's basically what I'm doing. If you're just replacing it with a regular replacement OE style, then you don't even have to worry about the step, it's just putting the mirror on and starting the three nuts. Again, be careful with your wiring harness. Don't pull it hard through or pull it tight. You just want to make sure it's through all the way. You don't want to pull it tight, because pulling it tight will pull it against one of the mounting studs and you could pinch your wires. Continue to fast forward, as we just tighten up the three 10 millimeter nuts that hold it. You want to tighten this up firm. Be careful not to over tighten them though. This is all designed to plug in. We're going to plug in our mirror and our optional lights which I wired before.
So there's our new mirror on the truck, it fits very nicely. We're going to turn the parking lights on. The clearance light works. The mirror folds out. The clearance light stays out there. Once you've made sure everything works, use typical plastic wire ties to tie up your extra there. Make sure you put one down in here so these wires can't interfere with your window and then up underneath here, Im going to put more right up there, which keeps these wires from getting down, and then one on to the wire, up where the harness is as well.
The clearance light's on and the headlights are on. It's the same thing on this side: clearance light with the headlights. Obviously, what I've shown you mostly in this video was doing the driver side. The passenger side is all the same as far as taking the door panel off and putting it back on. The only difference is you have to route the wire a little further and then I ended up putting the grounds to the same screw and I did tap into the same wire for both lights. Everything works pretty well and now, we'll get into closing the dash back up and putting the door panel back on.
Put our speaker through. Pull the harness through. Speed up as we use the four Phillips screws to reinstall the speaker and reconnect it. On the back side, you can see we replaced all our clips. Put it in place, connect our mirror first, and connect our power window switch. Put the panel in place and our lock through. Then, you can peek behind. Make sure the pins are lined up with the hole and then, just push them in all the way around. Just kind of speed up. Put in that top screw, and I apologize. I didn't do a very good filming that. It was kind in the way. Then, put in your door pull cup and replace the two screws for that. Once that's done, then you take your door handle and the 10 millimeter bolt, put that back in, tighten up nice and firm and you should be all set.
This panel's got some clips on it. Let's put it in. See these red tabs? Watch it go right up into there. Just fast forward through putting those three screws in, reconnect your battery, if you haven't already, and you should be all set.
We hope this video helps you out. Brought to you by www.1AAuto.com, your source for quality replacement parts and the best service on the Internet. Please feel free to call us toll-free, 888-844-3393. We're the company that's here for you on the Internet and in person.

TR00100