Replaces
Part Details
Product Features
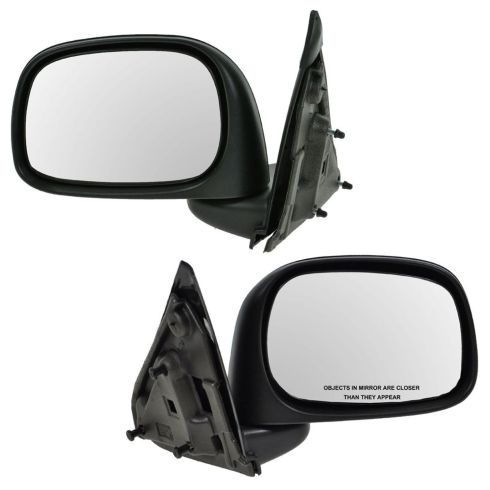
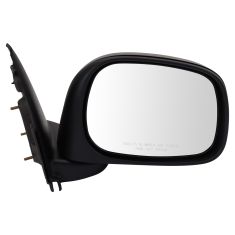
TRQ side mirrors and mirror components are designed to match the function, fixture, and performance of the original version for easy installation. TRQ mirrors are DOT certified, comply with all federal safety standards, and are independently lab tested to ensure our products comply with all government regulations. All products are fit and road-tested in our Massachusetts R&D facility to ensure we deliver on our promise of Trusted Reliable Quality.
Exact fit - To obtain proper fit and function confirm your vehicle has the exact mirror options listed.
Paint To Match Note:
"Paint-to-match finish" refers to a smooth, paintable surface. This item is not painted. Paint offers better coverage and adhesion, but it is not necessary for installation.
Attention California Customers:
 WARNING: This product can expose you to chemicals including Lead and Lead Compounds, which are known to the State of California to cause cancer, and birth defects or other reproductive harm. For more information, go to www.P65Warnings.ca.gov.
Lifetime Warranty
This item is backed by our limited lifetime warranty. In the event that this item should fail due to manufacturing defects during intended use, we will replace the part free of charge. This warranty covers the cost of the part only.
FREE Shipping is standard on orders shipped to the lower 48 States (Contiguous United States). Standard shipping charges apply to Hawaii and Alaska.
Shipping is not available to a P.O. Box, APO/FPO/DPO addresses, US Territories, or Canada for this item.
Expedited is available on checkout to the United States, excluding Alaska, Hawaii.
Final shipping costs are available at checkout.


Created on:
Tools used
Brought to you by 1AAuto.com, your source for quality replacement parts and the best service on the Internet.
Hi, I'm Mike Green. I'm one of the owners of 1A Auto. I want to help you save time and money repairing or maintaining your vehicle. I'm going to use my 20-plus years experience restoring and repairing cars and trucks like this to show you the correct way to install parts from 1AAuto.com. The right parts installed correctly. That's going to save you time and money. Thank you and enjoy the video.
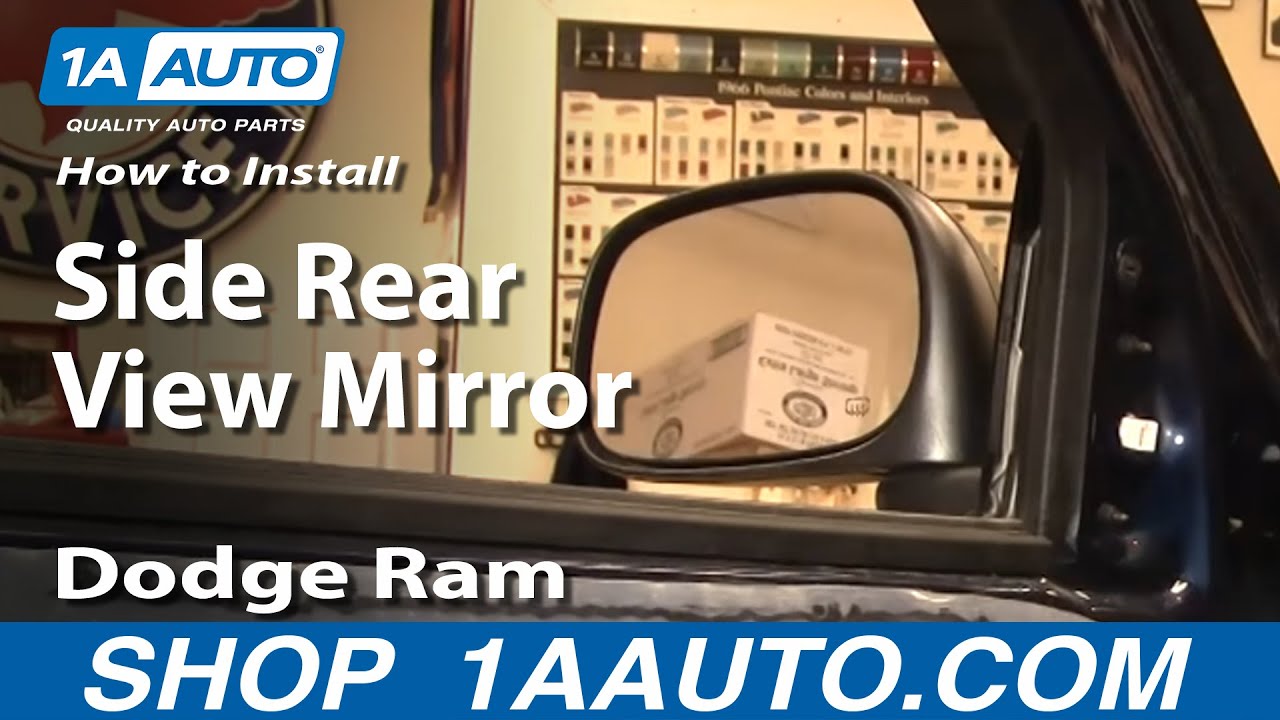
In this video, we're going to show you how to replace a side view mirror on this 2004 Dodge Ram, same for most '02 to '08. This is in case your mirror got into a little altercation with maybe a garage pole or a garage door or a baseball or something like that. Tools you'll need are a T40 torx driver, a Phillips screwdriver, a flat-blade screwdriver, and a 10-mm wrench or a socket and ratchet.
To remove your front door panel, you're going to start by removing a T40 torx screw and hold your handle on, right there. Okay, and then, you're going to remove four Phillips screws, one there, one up here, and then two down in the lower part of your door panel. This is a my T40 torx driver.
Okay, I'm going to speed it up here, take that t30 screw out and then your handle comes off, and then, I'm going to start with the Phillips screwdriver, take those two off, and then slyly take my jacket so you can see my 1A Auto sweatshirt, and remove the two lower Phillips screws.
Now use a regular screwdriver. Carefully pry up on your switch plate here. Okay, then pull it up and both these connectors, they have a little button right here. Press the button and work the connector and release the switch. Same thing here. This button right there. Okay, now you just lift the door panel up over the lock here and off.
To remove your mirror, or if your mirror's broken, what's remaining of your mirror, here is your harness lead. There's just a little button right on top. Push that down, unplug it. A 10-mm wrench, I happen to use just because these ones are a little bit long. Then, once you get them loose, they come right off by hand.
Okay, so we'll just fast forward through removing those three 10-mm nuts. The mirror has a couple of tabs. Just kind of pull them down. Okay, and here's just a quick close up. Use your screwdriver, pressing on each tab on each side and pull out the mirror at the same time. Push those tabs through and bring the mirror up and down.
Okay, so here we have our new replacement; I pulled one out, all comes right out of the box. It's shipped folded. Fold it back into place, and you can see, it's basically all the same as the original. It's going to mount the same. Same connector and everything. Looking outside, put it underneath my shield a little bit. Pop one in and then the bottom ones. Using my original fasteners. Okay, and we'll just fast forward through putting those three 10-mm nuts on and then tightening them up. You want to tighten them up, uh nice and firm but not too tight. You don't have to go crazy but good and firm. Poke it back in.
Okay, you can see everything works correctly. Take this off and put your door panel back on. Use this piece of insulation that fell off when we took our door panel off. Press that back on, and before you put the door panel back on, you want to take this lock bezel and push the clips in and pop it off. It just has a little teeth there. Okay, it just has a little teeth there that holds it in. So, you just kind of push them with your finger over.
Put it back on, what you want to do is, there's teeth at the bottom, kind of rest it like that and bring it up. Pull your harnesses up out of the way. Okay, lock your door, press your door lock down. Take that up and over and pull it back up. You might have to pull it up just a little bit and then slide it down. Then, okay put the four Phillips screws back in.
Okay, and we'll fast forward through just putting those four Phillips screws in and tightening them up. Okay, our switch. Put the smaller capture in and the larger capture and feed the wires down in. Push it down in. Our door handle. Just got to put my extension and my bit in. Put into place, and you should be able to just pretty much start turning. It pretty much finds its own way. For your lock, snap right down, and you're all set.
We hope this helps you out. Brought to you by www.1AAuto.com, your source for quality replacement parts and the best service on the Internet. Please feel free to call us toll free 888-844-3393. We're the company that's here for you on the Internet and in person.
Tools used
Brought to you by 1AAuto.com, your source for quality replacement parts and the best service on the Internet.
Hi, I'm Mike from 1A Auto. I hope this how-to video helps you out, and next time you need parts for your vehicle, think of 1AAuto.com. Thanks.
In this video, we're going to show you how to install tow mirrors on your Dodge Ram. This is a 2008, but the procedure is the same for 2002 to 2008 Dodge Ram. You'll need new tow mirrors from 1AAuto.com, 10 millimeter socket with ratchet and extensions, number two and #3 Phillips screwdrivers, flat blade screwdriver, electrical tape, needle nose pliers, wire stripping and crimping tool, a straight pick, and a pair of pliers.
Remove the 10mm bolt in the inside edge of the door handle. Remove the door handle from the opening. Remove the #3 Phillips behind the door handle, and in this top corner, two #2 Phillips on the bottom of the panel. Lift up on the door panel to release. Then we'll have to disconnect the two connectors from the window switch.
Disconnect the connector to the mirror by pressing down on the tab on the top. Remove these three 10 millimeter knots. Make sure to support the mirror before you finish removing the bolts.
We have to pry the bug deflector up on our car. Put it behind the mirror. Work the mirror out of the door.
Here, we have our old part from the vehicle and our upgraded tow mirror from 1AAuto.com. You could see this mirror sticks out a lot more, flips up, has a panoramic mirror already installed in it. It's going to be a really good upgrade. Going to give you a lot better view of what's going on behind you, especially when you have a big trailer on the back of your truck. Bolt right in just like the factory part. Comes with an easy-to-install two wire harness so we can use this lamp as either a turn signal or a parking light.
Be sure to take the two wire connector, feed it through first, wind up your bolts. Pop the new mirror in. Make sure you use the new hardware supplied with the kit. It has a larger flange on the knot to help support the extra weight of the bigger mirror. Tight the bolts back up with a 10 millimeter socket.
Reconnect the factory connector to the mirror. Connect the two wire harness included with your kit. Unravel all the wiring. Make sure there are no loops or kinks anywhere in it. Peel back the corner of your weather shield. Send the harness down into the door, being careful not to route it anywhere near a window regulator or any other moving part that may pinch the wire and cause damage. Make sure when you run the wiring down from the mirror, go through the round hole here and not to the square hole where the latch sits. Remove the rubber boot around the wiring harness inside the door jam.
You may need a flat blade screwdriver to pry this out. Reach through. Pull those all the way through. You want to make sure when you reinstall your weather seal that the wire stays clear that square hole. Pry the other side of the rubber loom off the truck side of the door jam. Twist the ends of the wire together. Keep the wires feeding in the same place. We're going to tape the end to a thin flat blade screwdriver. Use that to send our wire through the loom, careful not to puncture any other wires. Hold your wires and pull your screwdriver back through. Feed the rest of your wiring through the loom. Lift up on the seam of the kick panel. Lift up. Pull the panel out.
Just below the parking brake pedal is this weather shield. You'll have to pop that out of the way with a pair of needle-nose pliers behind the plastic clips. Just pry them out. Fold it back until you can see where the door harness comes through. Feed the wire one at a time between the retainer and the actual wiring clips. Find that wire when it comes through on the other side. Pull that through. Careful not to make too sharp an angle when you're pulling or to shape that against any other metals. Once that's through, start the other wire the same way.
Now that you have your mirror installed on the driver's side, repeat these steps on the passenger's side up until the wiring goes through the cab. Once the wiring has been run from the inside of the door through into the passenger compartment, peel your carpet up and remove this lower panel below the cup holder simply by prying it out and placing it to the side.
Peel your carpet up that your wire's underneath. You could see that our wires aren't going to be quite long enough, so we'll use the scraps from our old harness to extend these. You want to twist the ends of the wire together nice and tight, put it in a single barrel crimp connector. Crimp that end. A little tug, make sure it's on there nice and tight. Twist the other end of the wire. Put that end on the other side of the barrel connector. Crimp it down. Make sure that you have a good tight connection. We'll reach up under the driver's side of the carpet. Feed our wires through until they reach your hand under the carpet. Pull one through, then the other.
We have a ground bolt right here on the inside of the truck. You go ahead and take that out with a 10 millimeter socket and ratchet. Pick your ground wire, leave a little bit of slack. Cut the end off and strip the end of the wire. Twist the ends together.
Install our eyelet connector. The eyelet connector just crimps on so you got a nice tight crimp on there. Give it a little tug to make sure it's not coming off. Crimp the passenger side ground wire. Another eyelet crimp. Make sure that's not coming off.
Reinstall our ground bolt. We're going to take our wire, tape it to a sharp, straight pick. You don't want to make it too thick, but we want to make sure it's on there good and tight. I'm going to peel back the carpet a little bit, and just to the outside of our e-break cable. Send the wire down through the rubber boot. Move the pick and the rubber while holding the wire. Now, we can pull our wire through.
Make sure to leave enough slack that we can tuck it back under the carpet. Our crimp connector won't fit through, so we'll just lay it all back down under the carpet. In order to make the lights on our new tow mirrors work as running lamps or marker lights, we'll have to use the second of the white wires with the yellow tracer from the latched side of the connector. This is going to be the fourth one in from the left.
Install the double barrel crimp connector on to the wire with the leads from your mirror stacked one on top of the other. Install them into the other side of the double barrel connector. Crimp your connector with a pair of pliers. Close the safety latch over the top. After installing your wiring, turn the vehicle on and check for operation of your running lights. Push your carpet back into place. Reinstall the trim below the cup holder, the two clips in the front.
Reinstall the plastic connectors. Pull the weather shield in. Make sure your carpet is back in place. Install the front clips of the kick panel and then snap the lower portion into place. Repeat this step on the opposite side.
Reinstall the rubber wire loom on both sides. It’s maybe easier to install the loom on the inner edge if you use a hook pick. Push down on the clips and remove the connector from the cab of the truck. Even just removing it partially gives you enough room. Slide the boot back around the connector and snap it into place. Pop off the door lock bezel by pushing from the back.
Reinstall your two window switch connectors. Line up the tabs in the door panel. Slide your door panel into place. Pop the door lock bezel back into place. Reinstall your four door panel screws. Hold your screw in place for the interior handle, line it up and tighten it down.
Thanks for tuning in. We hope this video helped you out. Next time you need parts for your car, please visit 1AAuto.com. Also check out our other helpful how-to and diagnosis videos.