Replaces
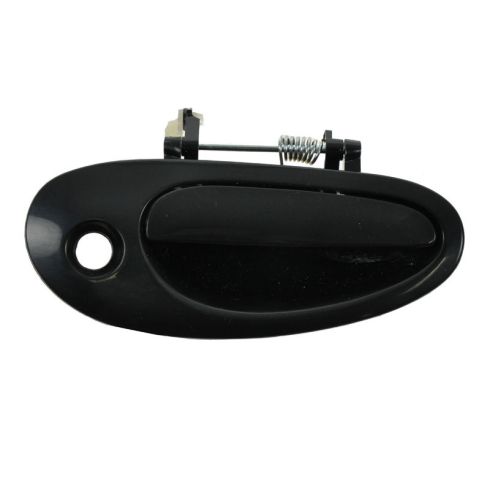
2005 Dodge Neon 4 Door Front Passenger Side without Keyless Entry Exterior Door Handle DIY Solutions BHS00631


BHS00631
This part doesn’t fit a . Select from parts that fit.
Specify your vehicle's year, make and model to guarantee fit.
This part doesn't fit a . Select from parts that fit.
Buy in the next and
Orders must be placed by 2pm ET
Recommended for your 2005 Dodge Neon
Frequently bought together
Specify your vehicle's year, make and model to guarantee fit.
This part doesn't fit a . Select from parts that fit.
Part Details
- Black
- Plastic
- Smooth
- Yes
Specifications
- Passenger Side
- without Keyless Entry
- 4 Door
- Front
Complete Repair in One Purchase - Stop searching for parts individually and complete your repair with a customized kit or set from DIY Solutions.
High-Quality Parts from Trusted Brands - DIY Solutions' kits and sets are selected from the best automotive brands and include hard-to-find and even obsolete parts you may need for your vehicle.
Guaranteed Fit - DIY Solutions ensures its selected parts are quality-tested to guarantee fit and function.
Paint To Match Note:
"Paint-to-match finish" refers to a smooth, paintable surface. This item is not painted. Paint offers better coverage and adhesion, but it is not necessary for installation.
Attention California Customers:
![]() WARNING: This product can expose you to chemicals including Lead and Lead Compounds, which are known to the State of California to cause cancer, and birth defects or other reproductive harm. For more information, go to www.P65Warnings.ca.gov.
WARNING: This product can expose you to chemicals including Lead and Lead Compounds, which are known to the State of California to cause cancer, and birth defects or other reproductive harm. For more information, go to www.P65Warnings.ca.gov.
Lifetime Warranty
This item is backed by our limited lifetime warranty. In the event that this item should fail due to manufacturing defects during intended use, we will replace the part free of charge. This warranty covers the cost of the part only.
FREE Shipping is standard on Orders shipped to the lower 48 States (Contiguous United States). Standard shipping charges apply to Hawaii, Alaska and US Territories. Shipping is not available to Canada.
Expedited is available on checkout to the United States, excluding Alaska, Hawaii and US Territories as well as P.O. Boxes and APO/FPO/DPO addresses. Final shipping costs are available at checkout.


Created on:
Tools used
- Pry off the trim piece inside the door pull with a flat blade screwdriver Pry off the trim piece inside the door handle with a flat blade screwdriver Remove the three Phillips screws at the bottom of the door panel Remove the Phillips head screw at the back corner of the door panel Pry out the door panel with a door panel clip tool or putty knife Lift the door panel up and off Disconnect the door lock wiring harness Disconnect the door lock rod from the door handle Disconnect the window switch wiring harnesses Carefully peel off the water shield
- Pry off the red clip from the door handle lock rod in the lock assembly Pry off the red clip from the door handle lock rod in the door handle Remove the two 8mm bolts from the door handle Slide the door handle up and remove it from the door Remove the door handle rod from the door handle Pry off the retaining clip from the lock Remove the lock from the door handle
- Insert the retaining clip into the door handle lock Press the lock into the door handle Insert the door handle rod into the door handle Insert the door handle into the door Tighten the two 8mm bolts to the door handle Clip the door lock rod into the door lock Clip the door lock rod into the lock assembly
- Put the water shield into place Connect the door lock wiring harness Connect the window switch wiring harnesses Lift the door panel into place Push in the door panel clips Insert the Phillips head screw to the back corner of the door panel Insert the three Phillips screws to the bottom of the door panel Push on the trim piece inside the door pull Push on the trim piece inside the door handle
Brought to you by 1AAuto.com, your source for quality replacement parts and the best service on the Internet.
Hi, I'm Mike from 1A Auto. I hope this how-to video helps you out, and next time you need parts for your vehicle, think of 1AAuto.com. Thanks.
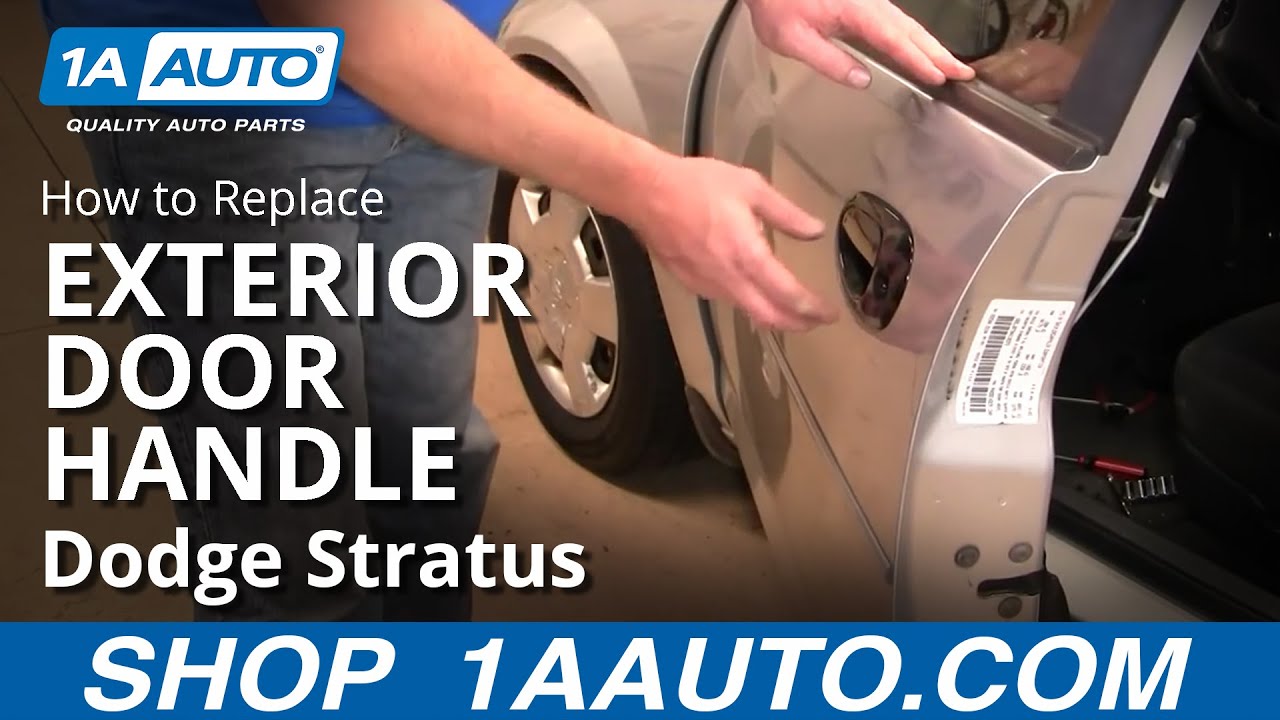
In this video, we're going to show you how to replace a front outside door handle on this 2004 Dodge Stratus, same as any '01 to '06. Tools you'll need for this repair include a small flat blade screwdriver, a Phillips screwdriver, a putty knife or door panel clip tool, and an 8mm socket with a ratchet and extension.
Use a small flat blade screwdriver, and down in the pull cup here, pry up a little trapdoor, there's a little Phillips screw in there. Then, in behind your door handle, there's another Phillips screw in there. Then there are three Phillips screws: one there, there, and then one on the back edge here. I'm just going to fast-forward as I use a Phillips screwdriver and remove six screws in all. This triangle here you can just pull out and off. Now all you need is a putty knife. You want to get it down in behind the door panel here, slide it down, and pull it out. Then start to pull the pins and then the door panel comes up. Right here is your lock harness. There's a little button, press on that to disconnect it. Then, on your latch rod, there's a clip. Reach in behind with my finger, pull that clip off, and then the rod comes up and off. Then, lastly, down here is your window harness. There's a button right in the middle. You really got to push that button, work the harness out, and then your door panel is off.
Once your door panel is off, you want to check these aqua clip pins here because there could be pins stuck inside of them. Use a pair of needle nosed pliers to pull the pins out. Reinstall them on the inside of your door panel. I'm showing this in fast motion here, but you want to carefully pull back your water shield. You want to avoid ripping it as this provides sound deadening as well as protection from water and stuff for the inside of your vehicle.
We're going to go inside the door here and then you can see. Let's see, you can't see, but there's a rod with a little red clip on it. Reach in, push the clip off, and pull the rod out. Then do the same thing: reach down, pull that clip off, and take that rod out. Now there's an 8mm bolt right there, and then one you go in at an angle and get right there. I've got an 8mm socket with an extension and a ratchet.
Here's our old handle and our new handle from 1A Auto. We sell both the smooth kind that you can paint to match to the car - as well as the textured kind.
You'll want to switch your latch rod and your lock rod. The latch rod is just like the bottom. Flip that clip off, pull it out, put it into your new handle, and clip the rod on. To help with this latch, take a small screwdriver and pry that clip out. Your latch comes right out.
Take your new handle and take your latch. Your new handle, you might need to pry out on this clip a little bit, get it to come out, clip it in, make sure you push the retainer all the way back in. Now it goes back in. As you're putting it in, make sure you push this rod back behind the window channel. Then you pretty much put it up and in and it clips in place. Now I'll just take my bolt with my extension and socket and a flashlight, shine it up in there and get it started. Same thing here, shine your light up underneath, put the bolt in, and get it started. Then, this rod, you're going to have to pull down a little bit on your mechanism, push the rod in, and then reach in and lock it on. I'll just take this and stick it back a little bit to make sure our door's unlocked. Put our water shield back in place and we're ready to put the door panel back on.
To put your door panel back on, first reconnect your power window switch. Make sure it clicks. Bring it close and reconnect your power door locks. Take this rod, put into the hole, slip the clip right around, and flip it on. Make sure your lock goes through. There is a larger locating tab, it goes into a big hole, once you've got that, make sure your pins go in. Cheat back, make sure all the pins go in correctly. Now it's just a matter of replacing all the Phillips screws. We'll speed up as we replace all those screws and those one down in the door cup, behind the door panel. There's also three at the bottom and then one at the back.
We hope this video helps you out. Brought to you by www.1AAuto.com, your source for quality replacement parts and the best service on the Internet. Please feel free to call us toll-free, 888-844-3393. We're the company that's here for you on the Internet and in person.
Tools used
- Pry off the trim piece inside the door pull with a flat blade screwdriver Pry off the trim piece inside the door handle with a flat blade screwdriver Remove the Phillips head screw inside the door pull Remove the Phillips head screw inside the door handle Remove the two Phillips screws at the bottom of the door panel Pry out the door panel with a door panel clip tool or putty knife Lift the door panel up and off Disconnect the latch cables from the door handle Disconnect the wiring harness Remove any remaining clips with a pair of bent-nose pliers Carefully peel off the water shield
- Remove the rubber plug on the door Remove the two 8mm bolts from the door handle Pull the handle back and out Disconnect the rod from the door handle
- Connect the rod to the door handle Push the door handle into place Tighten the two 8mm bolts to the door handle Push the rubber plug into the door Put the water shield into place
- Push any remaining clips into the door Connect the wiring harness Connect the latch cables to the door handle Lift the door panel into place Push in the door panel clips Insert the Phillips head screw inside the door pull Insert the Phillips head screw inside the door handle Insert the two Phillips screws to the bottom of the door panel Pry on the trim piece inside the door pull with a flat blade screwdriver Pry on the trim piece inside the door handle with a flat blade screwdriver
Brought to you by 1AAuto.com, your source for quality replacement parts and the best service on the Internet.
Hi, I'm Mike from 1A Auto. I hope this how-to video helps you out, and next time you need parts for your vehicle, think of 1AAuto.com. Thanks.
In this video, we're going to show you how to remove and reinstall a rear door handle on this 2004 Dodge Stratus. The same as any '01 to '06. On this vehicle the handle is actually not broken, but we do just remove it and put it back just to show you how it's done. Tools you'll need are a small flat blade screwdriver, a Phillips screwdriver, putty knife or a door panel clip tool, and an 8mm socket and ratchet with an extension.
To remove the rear door panel we're going to look inside the cup here, and you'll see a little trapdoor. Use a small flat blade screwdriver, pull that up and you can see there's a Phillips screw in there. Same thing here, another Phillips screw and then there are two Phillips screws on the bottom: one there, one there. Once the screws are out put your hand underneath, and then you want to go around the edge of the door panel. You'll get towards the clips and pull them out. Sometimes they can be very difficult to release. There's also a couple up top here.
Lift the door panel up. Behind there's a little clip here. Use your thumb, pull that off. Your harness for your windows is down here. There's a little tab. Push that tab and disconnect it. You may find a couple of your clips don't come with the door panel. Just pull them out and then reinstall them back into their spots on the door panel, and they're ready to go.
Next, you want to carefully peel back the water shield. It's a little difficult on these vehicles. I don't know what in the world they used for adhesive, but it sticks on there good. Carefully peel it back. Try to avoid ripping it as much as you can. Remove this little plug here. You just have to push it and pry it out. Now inside through each hole there is an 8mm bolt, a little difficult to see; a little difficult to film. Here the red arrow is pointing to that from 8mm bolt. We've got an 8mm socket, ratchet, and extension, kind of peek in there. A little tip here, if you put some glue on your socket so it'll stick to the head of the bolt, you'll prevent dropping them. If you do drop them, it's pretty easy to reach down into the door to retrieve them. On this one you want to go up and back some finding the bolt. Take your handle pull it out. Go back, bring the front out and slide it forward and out. Disconnect this rod. A lot of times what happens is they break right here or this rod gives out. Obviously mine's fine.
To reinstall, put it down there like that. Push it in. Then go back, up and in and clip it in place. If you do drop your bolts like you heard me do on the second one, with the handle out is the best time to look down and find them. Taking this one and starting it by hand correct. To get this rear one, what I did was I actually put a little bit of glue and put it in my socket, so that way my bolt doesn't fall out. This is pretty much the most challenging part here. I'm providing some light on this side. Feeding my socket in. Start the bolt. Tighten it up. Finish it up. Put our plug back in.
Fast-forward as I put the water shield back on. I did take this all the way off because, I dropped a bolt, but if you follow my tip of using a little bit of glue in the socket, you won't have to do that. To reinstall the door panel, take your power window harness and plug it in. Take your rod, put it into the door handle, flip the clip around. Put your panel up over your lock knob there. There's a large pin here that lines it up. We can cheat and look back here and make sure the pins are going in. Reinstall your screws. We'll fast-forward here as we reinstall the four screws: one in the door pull cup, one behind the door handle, and then the two at the bottom. Make sure you put the little trim pieces back in the one for the pull cup and the one for the door handle.
We hope this video helps you out. Brought to you by www.1AAuto.com, your source for quality replacement parts and the best service on the Internet. Please feel free to call us toll-free, 888-844-3393. We're the company that's here for you on the Internet and in person.

BHS00631
877-844-3393
Monday - Friday 8:00am - 9:30pm ET
Saturday - Sunday 8:00am - 4:30pm ET
Specify your vehicle's year, make and model to guarantee fit.
This part doesn't fit a . Select from parts that fit.


