Replaces


Part Details
Specifications
About TRQ:
TRQ is a trusted brand dedicated to making every repair a success story by combining premium parts with easy installation. Each TRQ part is engineered by a team of automotive experts to meet or exceed OEM standards, delivering enhanced performance and maximum longevity. With rigorous in-house testing, the brand ensures superior fit and function across every product line. TRQ also provides customers with best-in-class, step-by-step installation videos—so you can complete repairs with confidence, whether you're a first-time DIYer or an industry professional.
Attention California Customers:
 WARNING: This product can expose you to chemicals including Lead and Lead Compounds, which are known to the State of California to cause cancer, and birth defects or other reproductive harm. For more information, go to www.P65Warnings.ca.gov.
Lifetime Warranty
This item is backed by our limited lifetime warranty. In the event that this item should fail due to manufacturing defects during intended use, we will replace the part free of charge. This warranty covers the cost of the part only.
FREE Shipping is standard on orders shipped to the lower 48 States (Contiguous United States). Standard shipping charges apply to Hawaii and Alaska.
Shipping is not available to a P.O. Box, APO/FPO/DPO addresses, US Territories, or Canada for this item.
Expedited is available on checkout to the United States, excluding Alaska, Hawaii.
Final shipping costs are available at checkout.
Created on:
Tools used
Brought to you by 1AAuto.com, your source for quality replacement parts and the best service on the Internet.
Hi, I'm Don from 1A Auto. I hope this how-to video helps you out, and the next time you need a part for your vehicle, think of 1AAuto.com. Thanks.
Start off by loosening up these 22mm lug nut covers. We'll fast forward as Don does this. Once those are all loosened up, you can pull the hub cap free. Now, you want to loosen the lug nuts preliminarily, raise the vehicle and remove them the rest of the way, unless you have air powered tools.
You want to remove these two T55 Torx bolts. We'll fast forward as Don does this. Using a large C-clamp, just put it back behind the caliper here, and the other part right here on the brake pad, and just twist this in, and this going to push your caliper piston in and make it easier to pull the caliper off. Then, just remove the C-clamp, and lift your caliper up and off. Set it aside.
Now, using a flat blade screwdriver, just pry out your brake pad, and sometimes the pad is going to be stuck in there, you can use a flat blade screwdriver and hammer to pry it free. Now you want to remove these two 18mm bolts on your caliper bracket, and you can see, we use a piece of pipe for some extra leverage here. We'll just fast forward as he breaks the other one free and removes both of these bolts. Now, slide the rotor off. We'll fast-forward here as we just remove the clips that hold the ABS harness to the frame and steering spindle, and then there's a clip that holds the harness together, so just pull the clip back and disconnect it. Now, using a flat blade screwdriver and a hammer, just pry off your hub cap. You'll need to remove the center hub nut.
A few ways to do this: you can loosen this before you take your brakes apart, have somebody hold the brakes and do it that way, or you could use a large bar and put it between the lug studs to hold it, and then you could break the bar. If you have the benefit of air tools like we do you need an impact wrench to remove it. Then remove these tree 15mm bolts. You want to just use a 15mm wrench and another wrench for some extra leverage.
You just pry out, and once you've broken it free, you can just turn it out the rest of the way with the one wrench. We'll fast forward as Don does this to other two bolts and removes all three of them. Twist the hub nut back into place just a quarter of the way, and then hammer from the back of the hub to break it free. Then remove the hub nut and pull your hub out. On the left is the old hub; on the right is the new one from 1A Auto. You can see they're identical, and they'll fit exactly the same.
Put your backing plate on to your new hub, and then push the hub back into place. Then just put those bolts back in. You may need to hammer the first one to get started. We'll just fast-forward as Don replaces the other two and tightens up all three of those. Then you want to torque those three bolts to 75 foot-pounds each. Now, remove this clip if you left your old one in, and then feed your ABS harness back into place, putting the clips back where they belong and into those brackets. Then reconnect your harness and clip it back up into place.
Replace that washer and your hub nut, and just tighten it back up into place. Push your rotor back into place, and then twist on the lug nut, and this will just hold the rotor in place. Turn the wheel and put the caliper bracket back into place, and replace those two 18mm bolts. We'll fast-forward as Don does this and tightens both of those out. Now torque both of these to 75 foot-pounds.
Now replace your brake pads and use a hammer if necessary to lightly tap that into place. Grease up your caliper bolts. Put the caliper back into place, and slide those slide bolts back in. We'll just fast-forward as Don tightens those up. You want to tighten these to about 30 foot-pounds. Replace your wheel, replace those lug nuts, and tighten them preliminarily. Lower the vehicle and tighten them the rest of the way. Torque the lug nuts in a crossing pattern to 100 foot-pounds, and torque this hub nut to 125 foot-pounds. Put the cap back in place and put it back in. Take your hub cap and just tighten up those bolt caps. After doing work on your brakes, you want to pump the brake pedal until it firms out, and then try a stop test from 5 miles per hour and ten miles per hour. Then you're all set.
We hope this video helps you out. Brought to you by www.1AAuto.com, your source for quality replacement parts and the best service on the Internet. Please feel free to call us toll-free, 888-844-3393. We're the company that's here for you on the Internet and in person.
Tools used
Brought to you by 1AAuto.com your source for quality replacement parts and the best service on the internet.
Hi, I'm Mike Green, one of the owners of 1AAuto. I want to help you save time and money repairing and maintaining your vehicle. I'm going to use my 20+ years' experience restoring and repairing cars and trucks like this to show you the correct way to install parts from 1AAuto.com. The right parts installed correctly. That's going to save you time and money. Thank you and enjoy the video.
In this video, we'll be removing the hub on this 1999 Pontiac Grand AM. This is Part One of Two. Again, it's the removal of the hub. Removing the hub on this car is basically the same as just about GM car from about 1993 to present. Maybe tools will vary a little bit, but the basic procedure is the same. That's any GM, any Buick, Chevy, Pontiac or Olds, Saber Bonneville, Impala, all those vehicles.
Here are the tools you'll need. Keep in mind that sizes may differ by application. You may also need an axle puller or a gear puller if your hub is stuck together.
We'll start by lifting up the car and securing it. Obviously, if you're going to use a floor jack and jack stands, make sure that you follow safety instructions. I'm going to take off the wheel.
I got the wheel off. Now, I'm going to the other side and I'm going to grab the tire, turn the wheels all the way to the left. That gets usually better access to the back of the brake caliper, which is the next thing I'm going to take off.
I remove the brake caliper and its 13 millimeter bolts one on top and one on the bottom. I have the luxury of an impact wrench. Now we've unbolted the caliper and I'm just going to grab hold of it and pull it off. It makes a little better if you have a tie on the spring here. This probably ought to do it. Basically, you might be able to just take this one off here and stick it on there and stick it out of the way. Just secure it with a piece of string or something so that it doesn't fall down in your way. I found a nice piece of wire here. I'm just going to wrap it around the caliper here just so if it does fall, something holds onto it and it doesn't fall in.
Now we're going to remove the brake rotor.
We can usually get to one bolt. I'll show you that. With the right tools, we can get to the second bolts. Those three bolts now hold in the hub and you can see I had my wrench on the top one.
I like to do this one first; it's the hardest one to get to. You can see here I got a 3/8 wrench with an extension and I can get in there nicely. It's not coming, so I can show you a little trick for some extra torque. Take a nice big wrench, run the smaller wrench. The key is to be holding the wrench against the nut so it doesn't come off and strip the head of the nut. Here it comes. Alright, this is also where having coated the backs will come in handy. Got that one out.
Now these two, I can easily get to with anything half inch or impact. The other one, we'll have to get once you turn the full steering column around. We'll just grab hold of the other wheel and turn it this way. That will make it easier to get to the third one. See if I can get this one.
What you do is just use this little tip: Just pull evenly. Don't just try and jerk it because you could knock something off. Just pull harder and harder and harder and eventually it will come.
Now what I'll do is I'll go around the car to the other side. I'm just going to grab hold of the wheel and turn it. There are a couple things here. Since this car is ABS, disconnect this ABS sensor.
Then this clip. I can just reach in behind and pull it off. That goes obviously with the hub. Here is, I hope you can see it. Get these guys out of the way. Here is my third bolt. I put my wrench on. Excuse me. Again, it's just so easy to hook onto there. Actually, the bolts aren't.
Now, I have in the past on these past on these cars, you end up just can't get the bolt out. The head breaks off or strips. What you can do. I think you can see this well enough, is you can use the sawzall, and it's actually not that bad. With a good blade, in about a minute, you can cut through the hub and then the bolt and it comes off. You just punch the bolt out the other side. Then you'll have to go down to the hardware store and get a new bolt that's the right length in size. Fortunately, on this car, we didn't have to resort to that. Now remove those bolts and go the next step.
I haven't taken those bolts all the way out yet. I'm going to remove this large center bolt first. You're really going to need an impact wrench and a large socket. I've got a 34 millimeter socket on there.
Now I've got the bolts off of that and I've got it off and actually I'm lucky here because this hub just pulled off of the axle shaft. Let me put it back on here for a second. Hopefully, if you car's good, everything will pull apart. But if it doesn't just pull apart, you'll want either an axle puller or a gear puller that basically adhere to the lug nuts and then the shaft goes in and pushes right against the axle or it clamps onto the flange here. The same thing. The bolt goes in and pushes. It's either a gear puller or an axle puller. You don't want to use a hammer. You do want to bend this with a hammer, because you'll end up ruining your CV joints. You want to press that out. I can remove my old hub. Basically, there's a connector. I'm pushing the axle out of there. I can push this axle without worrying about it too much. But you don't want to bang on it.
Obviously, this is my old hub. Here's my new hub, nice and shiny. You can see everything's the same. It's got the same connector on it. Everything on the back side is all the same. Let's make sure we have the original bolts here. Slide it right in.
Remember to check out our other videos for the installation of this hub. Brought to you by www.1AAuto.com your source for quality replacement parts and the best service on the Internet. Feel free to call us toll-free 888-844-3393. The company that's here for you on the Internet and in person. Thank you.
Tools used
Brought to you by 1AAuto.com, your source for quality replacement parts and the best service on the internet.
Hi, I'm Mike Green. I'm one of the owners of 1A Auto. I want to help you save time and money repairing or maintaining your vehicle. I'm going to use my 20 plus years experience restoring and repairing cars and trucks like this to show you the correct way to install parts from 1AAuto.com. The right parts, installed correctly, that's going to save you time and money. Thank you and enjoy the video.
Okay, so part two, replacing and installing the hub on this '99 Pontiac Grand Am. This video will help you with just about any GM front-wheel drive car from about '93 to present. Maybe the parts are a little different, maybe the size of the wrench is a little different, but the procedure is about the same, and again we cover removing the hub in our other videos, same name, just part one.
Okay, here's a list of tools you're going to need. You are going to need 3/8'' drive tools because it's a little hard to reach one of the bolts in the hub, and you are going to need to use torque wrenches because you want to make sure you get these, these are all Driveline parts, so you want to make sure everything's put back together correctly.
This connector here needs to go in this way so we push that through. This bottom one is our easiest one, I'm just pushing the bolt through and pushing the hub on and getting this bolt started in. Obviously you want to make sure this plate's in the right place. Going to swap around here, and I'm going to get the bottom, the rear bottom bolt in, push it through, and thread it on. Then I'm going to go around to the other side and I'm going to turn the wheel and now I can get this top on in and through. Push on the hub so it's back against the steering knuckle that prevents you from cross turning anything. Okay, so now I've got my socket and 13 millimeter wrench and I'll get each one of them somewhat tight first then I'll tighten them up. These should be between 55 and 60 foot-pounds. This center hub nut should be between 75 and 85 foot-pounds. I did put my hub on and I tightened it with an impact wrench but then I loosened it up a half-turn or so, so it's not exactly tight. You actually have to wait until you put the tire on the ground to torque that up.
Now I'm going to torque my three hub mounting bolts and I'm torqueing them to 55 foot-pounds. In fact I can actually reach this one pretty well from the backside here, so I will. I can reach it but I can't see it. There it is. Okay, and now I'm going to connect my ABS sensor, take my harness from the hub, and I'm going to click it on to the bracket here which sounds easy but is just a little bit weird here. Okay, kind of clicked the wrong part on. There it is, clipped on and now I'm going to plug in the ABS harness from the car. So now I'll put the rotor back on. Now be careful not to touch the rotor with your dirty fingers. Then we're going to bring the brake caliper back down and gently take some force to press it back down on to the disc. Put those bolts back in. I'll put my two bolts back in, tighten those up, those are about 55 foot-pounds, going to put my wheel back on and then I'll lower it to the ground and go from there.
So what I'm doing here is before I put the wheel on, I'm just popping off this center cap, that way I'll be able to get through there. So I'll quickly run through, three bolts in the back of the hub, we torque those. ABS sensor is plugged in, brake caliper is on and torqued, and now I'm going to put the wheel on and the next thing you'll see is it down on the ground and we'll be torqueing up the lug nuts and the center bolt.
We've got the car on the ground; I'm going to go 85 pounds with this center nut as you can see. Then I'm going to back off to 75 pounds for the lug nuts, you want to do those in a star pattern. Put our center cap back on, and we're all set.
Brought to you by www.1AAuto.com, your source for quality replacement parts and the best service on the internet. Feel free to call us toll free (888)844-3393, the company that's here for you on the internet and in person. Thank you.
Tools used
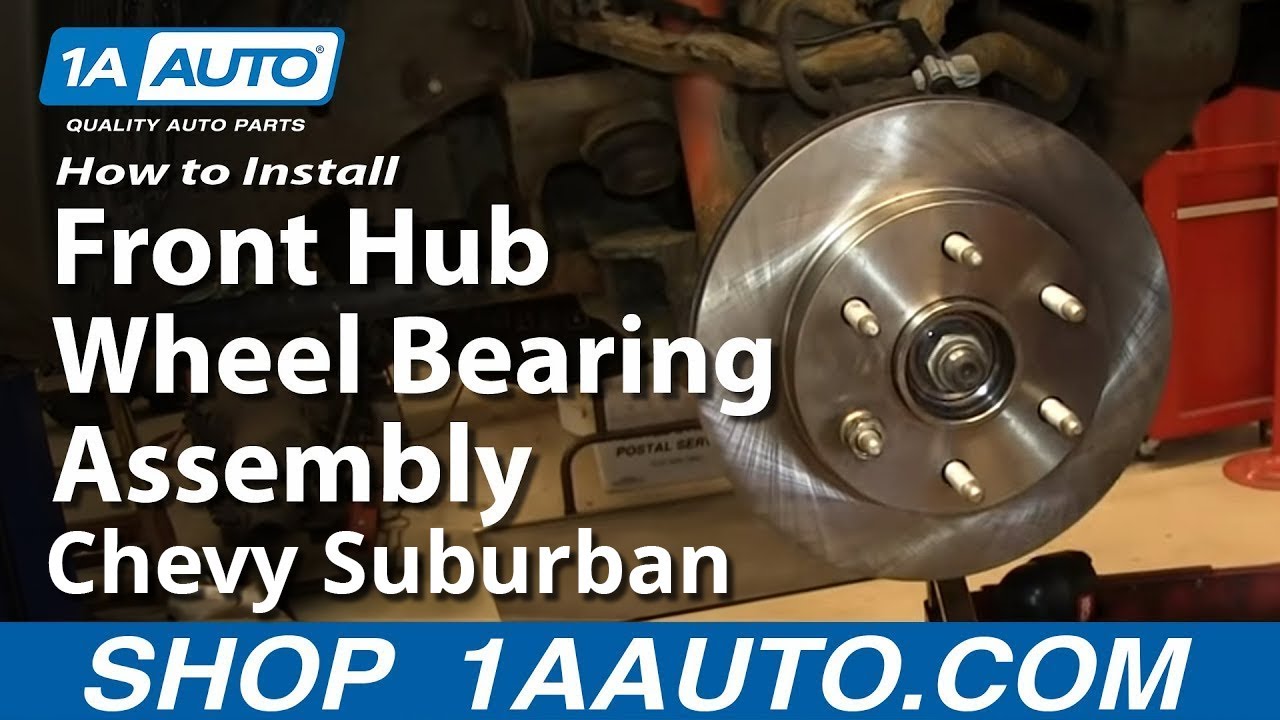
Brought to you by 1AAuto.com, your source for quality replacement parts and the best service on the internet. Hi, I'm Mike from 1AAuto. I hope this how to video helps you out, and next time you need parts for your vehicle, think of 1AAuto.com. In this video, I want to show you how to replace a front hub on this 2000 Olds Alero, this is a two door. Hub replacement is the same for any '99-'04 two or four door. Tools you need are jack and jack stands, 12, 13, 19, and a 35 millimeter socket. That 35 millimeter is one that a lot of people aren't going to have. You'll need a ratchet and a breaker bar or maybe a pipe for some extra leverage. Large c-clamp, wire brush, torque wrench, and possibly an axle puller.
Start off by removing your hub cap. If you don't have air tools, you'll want to loosen your lug nuts, then raise and support your vehicle, then remove the lug nuts and the wheel. Turn the wheel for easier access, back the caliper. If you went in behind your calipers are held on by two 12 millimeter bolts, one there and one there. This should come off for you easily. We'll fast forward here as I remove those bolts the rest of the way. In order to get the caliper off, you might need to reduce some pressure on the brakes. You put your c-clamp right against your brake pad there, and then on the caliper there. Now, you can turn and loose, the caliper comes right off, and now you can just put the caliper right up here. Now, you can take your pads right now. You could see that they have wear marks and these pads are still in pretty good shape, and then, just use your finger and kind of run up on the ... run your finger on the disks, and if you don't feel any really deep grooves, they're probably okay.
To get our disks off, we're going to remove this caliper bracket, which is two bolts here, then one over here. These bolts are 15 millimeters and you're going to want like a breaker bar or use a piece of pipe on a ratchet, so these will be tight. I'll just fast forward as I change over to a ratchet and remove those bolts the rest of the way. The bracket's off here. Rotor comes right off. On the backside, you've got your ABS connector. Just pull back on this little tab, unplug that, and then, you'll want to use Phillips screwdriver, and remove that. Now, your hub is held on by three bolts. One here at the top, one down here, and then there's one over on the opposite side. Using an impact wrench, you want to probably loosen this at the start. You can actually put your wheel back on here right now, lower down on the ground, then use a big breaker bar or something to remove it to 35 millimeter. Now, I'm using 3/8 inch drive tools and just makes it a little easier to get back in there. A longer bar, because generally these are pretty tough, and the 13 millimeter, it came off pretty easily. I'll just fast forward here as I loosen but I don't remove the three bolt yet.
Here in this picture, you can see I've put a axle press or puller onto my hub, so there's the two kind of hands that reach behind the hub and hold it while they ... the bolt through the middle pushes the axle through. Quite honestly, I've done a lot of these hubs, and usually, what you can do is take a hammer and just give that axle a quick whack and they'll break it free. This is the first one in about a hundred that I actually had to use the press on. I'll just speed up here as I remove the bolts the rest of the way. The bolt's out. Pull the hub. Now, you may have to push your axle back in order to get the parts, we're able to kind of push the axle to the side. That comes out. A new hub from 1AAuto. It's got the ABS pigtail and everything, just like the original. Fit it in. Make sure that that connect to those screw. I'm going to speed it up. Basically, you just push it on and you might need to twist it just a little bit just to get it to line up with the axle, and then push it back and start one of the bolts in, then start the other two bolts. I don't tight them up all the way. You definitely want to start all three bolts first, then tighten them up most of the way, and then we will hook up our ABS lead, and then you need to torque those bolts on. Then, you want to torque this to 65 foot pound and I'll start with the back one. I'll put this parts in place. I got this bolt torqued up, and then, my harness back in place and my connector reconnected. I'll fast forward as I just change the position of the wheel, and then torque those other two bolts again 65 foot pounds.
Put the rotor back on, and just to help me get it back again, I usually put a lug nut on. Before we but this bracket on, it has stainless steel slides. Use a wire brush and clean this out really well. The other thing to check before you put this back together is make sure that this slide back and forth, in and out pretty easily. Put this on. The bolts that hold the bracket, you also want to tighten to 65 foot pounds. Basically, you could see my old pads are still in pretty good shape. This is a wear indicator that's grooved right here and it's still there, there is no life left in the pads. On the rear pods, you always want to put ... there is a tab here and you always want to put that towards the back side as far as the rotation go. Push that pads in. This is your ... your piston's already been reset. Put the brake down real nice and easy and just tighten these two bolts in.
Now, these two bolts, you only want to do between 15 and 18 foot pounds. I'm going put my center nut on there, and I'm just going to tighten it up preliminarily. Let's just speed up here as I use an extension and then tighten that top one up. Speed through here as we straighten that out, remove that lug nut, put the wheel entire back on, and then we'll just preliminarily tighten those lug nuts with our impact wrench and torque them when we get them on the ground. We'll tighten the lug nuts between 90 and a 100 foot pound. Now, you want to torque this center nut to a 173 foot pounds, and last but not least, line up the valves in with the wheel cover, put it on, and use your 19 millimeter socket just to tighten the caps by hand. Any time you take your brakes part, make sure you pump them a lot of times, and then do test stops from 5 and 10 miles an hour before you road test the vehicle.
We hope this helps you out, brought to you by www.1AAuto.com, your source for quality replacement parts and the best service on the internet. Please feel free to call us toll-free, 888-844-3393. We're the company that's here for you on the internet and in person.

BHA84988