Replaces
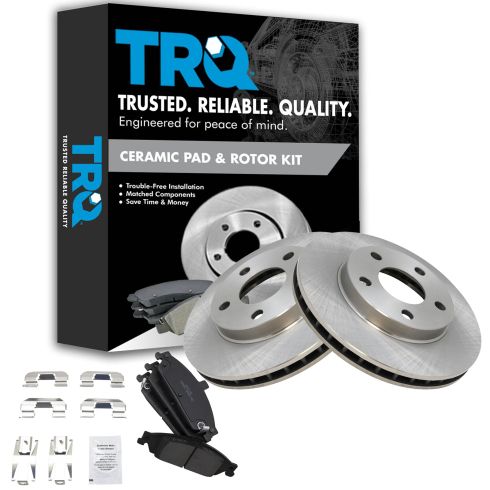
Chevrolet Pontiac Olds Front Ceramic Brake Pad & Rotor Kit TRQ BKA11002


BKA11002
This part doesn’t fit a . Select from parts that fit.
Specify your vehicle's year, make and model to guarantee fit.
This part doesn't fit a . Select from parts that fit.
Buy in the next and
Orders must be placed by 2pm ET
Frequently bought together
Specify your vehicle's year, make and model to guarantee fit.
This part doesn't fit a . Select from parts that fit.
Part Details
- (2) Front Brake Rotors
- (1) Front Ceramic Brake Pad Set
- Premium Posi
- 5 Lug
- Ceramic
- 10.94 in. (278mm)
- Vented
About TRQ:
TRQ is a trusted brand dedicated to making every repair a success story by combining premium parts with easy installation. Each TRQ part is engineered by a team of automotive experts to meet or exceed OEM standards, delivering enhanced performance and maximum longevity. With rigorous in-house testing, the brand ensures superior fit and function across every product line. TRQ also provides customers with best-in-class, step-by-step installation videos—so you can complete repairs with confidence, whether you're a first-time DIYer or an industry professional.
Product Features
TRQ brake kits are designed to restore your brake system to like-new performance. TRQ brake pads are positive molded, thermal scorched, chamfered, and utilize a multi-layer shim for enhanced performance and service life. TRQ rotors have a non-directional finish that reduces the break-in period for new rotors as well as reducing vibrations throughout the rotor’s lifecycle. All products are fit and road-tested in our Massachusetts R&D facility to ensure we deliver on our promise of Trusted Reliable Quality.
Attention California Customers:
![]() WARNING: This product can expose you to chemicals including Lead and Lead Compounds, which are known to the State of California to cause cancer, and birth defects or other reproductive harm. For more information, go to www.P65Warnings.ca.gov.
WARNING: This product can expose you to chemicals including Lead and Lead Compounds, which are known to the State of California to cause cancer, and birth defects or other reproductive harm. For more information, go to www.P65Warnings.ca.gov.
Lifetime Warranty
This item is backed by our limited lifetime warranty. In the event that this item should fail due to manufacturing defects during intended use, we will replace the part free of charge. This warranty covers the cost of the part only.
FREE Shipping is standard on orders shipped to the lower 48 States (Contiguous United States). Standard shipping charges apply to Hawaii and Alaska.
Shipping is not available to a P.O. Box, APO/FPO/DPO addresses, US Territories, or Canada for this item.
Expedited is available on checkout to the United States, excluding Alaska, Hawaii.
Final shipping costs are available at checkout.


Created on:
Tools used
- Remove hub cap or center cap if you have it. While your car is still on the ground, use your lug wrench to loosen your lug nuts. Jack up and secure your car with jack stands. Remove the lug nuts with your lug wrench. Remove the wheel and set aside.
- Use a screwdriver to force the pistons back in. Remove the two 12mm bolts to remove the calipers. Use a wire tie to fasten the caliper out of the way. Use your screwdriver to pry out your brake pads. Remove the two 15mm bolts on the caliper bracket to remove it. Remove the caliper bolt sleeves. Check their condition and clean them with a wire brush if necessary. Pull off the brake rotor. Hit the rotor with a rubber mallet or hammer if necessary. Take care not to damage the lug studs.
- Clean new rotor with brake cleaner. Insert your new pads into the brackets. Put your caliper bracket back on, and tighten the bolts to 55-60 ft lbs. Compress the caliper piston with a c-clamp to reset the pistons. Mount the caliper on the bracket and torque the bolts in to 20 ft lbs.
- Make sure to use a star pattern when putting your wheel lugs back on. Tighten to 75-85 ft lbs. Replace hubcap/center cap.
- Before driving the car again, start it up and pump the brakes a few times to get the pistons in the brakes in place. Test the brakes in your driveway before taking the car onto the road. Set your rotors by evenly braking from 30mph to 10mph, 50mph-30mph and finally 70mph to 40mph. This is best done on a straight back road without any traffic.
Brought to you by 1AAuto.com, your source for quality replacement parts and the best service on the internet. Hi, I'm Mike Green. I am one of the owners of 1A Auto. I want to help you save time and money repairing and maintaining your vehicle. I am going to use my 20 plus years experience restoring and repairing cars and trucks like this to show you the correct way to install parts from 1AAuto.com. The right parts installed correctly, that's going to save you time and money. Thank you and enjoy the video.
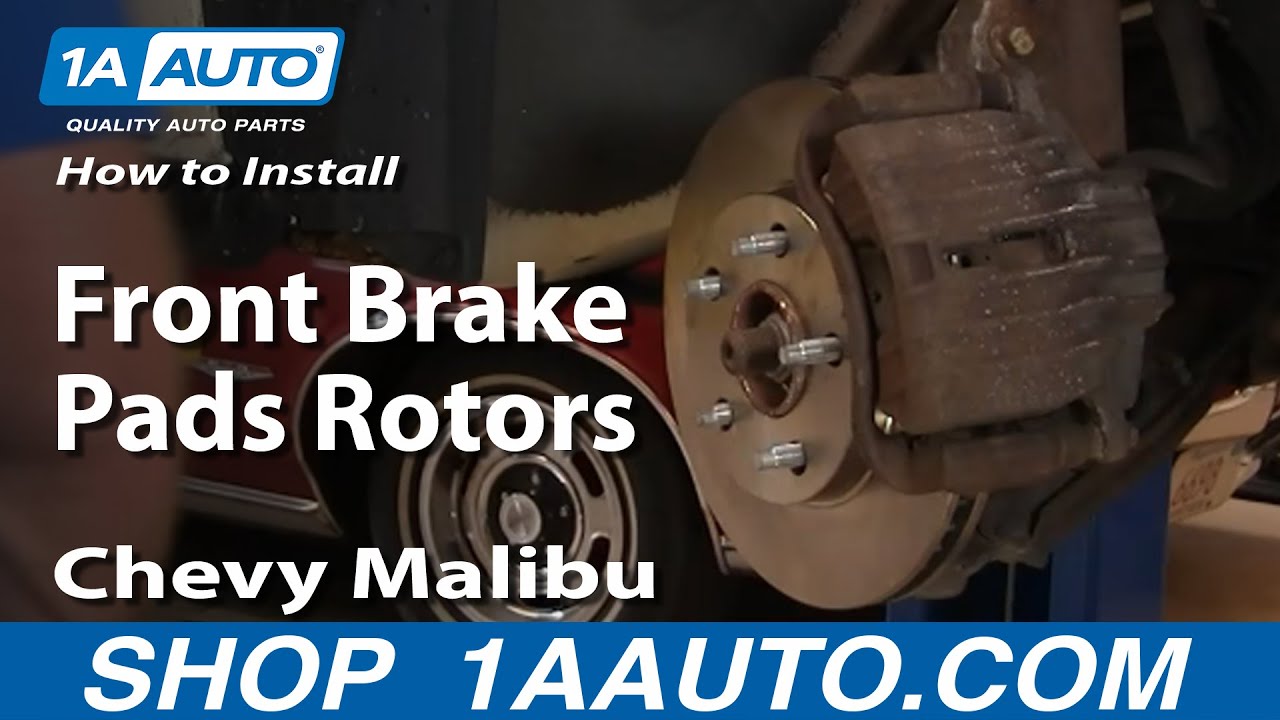
In this video we're going to replace pads and rotors, the front on this 01 Chevy Malibu. This is a pretty easy process. Pretty much regular tools. You'll need a lug nut wrench or your tire iron. You'll need some millimeter, probably metric sockets. I use the 1/2 inch on a couple of bolts which I didn't think was right. I'm pretty sure it wasn't. You'll probably need 12mm and maybe like a 15mm socket or if like on our car, your car has been worked on you will need some different sizes. Some brake parts cleaner or mineral spirits and a large C-clamp.
This car is a Malibu it's got the aluminum wheels, screwdriver right into this little key here. We're going to remove the wheel. If you are using hand tools, loosen the lug nuts while your tire is on the ground first then raise and secure the car. Follow the instructions on your jack and jack stands and I got the benefit of air tools so I am going to remove this wheel now. With my wheel off, I have now turned my wheels all the way to the right and you can see here's the brake caliper. Now, what you could do is you can check your brakes yourself. Just some light and right in here you can see that is your brake pad, okay. Actually on this car the pads look good on this side but don't let one side to be your deciding factor because now I am looking over here on the driver's side and you can see there's the pad on the driver's side. There is hardly anything left between the metal here and the rotor there. The driver's side definitely needs to be done and you should always do your brakes in pairs so we'll end up doing both sides. What you are going to want to do is you are going to want to loosen up or remove 4 bolts. The first 2 on this car, there are these inner ones here. These are actually 1/2 inch in size.
There is one there and there is one up here. That, when you remove those 2, this whole assembly will come off and you also want to remove these 2 here, these are 12mm. Those will just allow the caliper itself to come off with the bracket. I will remove those. Again, the inner ones are 1/2 inch and then these ones here are 12mm. I was kind of surprised by that but that is the way it is. Just so you would see it can be done. I am just going to use regular hand tools to get these apart. That's the inner one. Then up here, that is the upper one. Before I pick those all the way out, I am going to remove my upper ones. Once I got that loosened up, I basically just use my fingers. I just support the caliper a little bit. This will come out. If you do just want to change your pads, you could pull really hard on this caliper which forces the piston back in and now allows the caliper to come up and off because there is a little peg on your pads that hold the caliper on but I'm just going to remove these 2 inner bolts here. After removing those bolts all the way, the whole assembly comes up and off. Your pads are right inside here. Pull them out because that actually allows this whole assembly. This is your caliper. You want to hang it up here and the other pad will come out.
On this point the disc actually comes right off. New disc from 1A Auto. You could see it's all the same, same dimensions. I'm going to go right on there. What I like to do is just take 1 lug nut and put it on. It just makes things easier to go back together. You want to use some brake parts cleaner or mineral spirits and just wipe down the disc could mean the grease or playing it conservative that was in the packaging off. Now, you actually have to force this piston back into the caliper. You're going to need a large C-clamp. Now, we have the piston down with the caliper. Now you're going to stick your smaller 12mm bolts and bolt to your bracket back on here. You can just have it be hand tight. Here is our caliper and the inside side is the side with the cylinder here. You want to put these ones that have the wear tabs and these bumps here those go to the inside. My caliper's upside down so I am going to put my curve side down. Then, I am pushing this just right into their respective brackets. Push in. Then your outside ones don't have the little wear indicator on them. Let me just go down in and then push it into place.
Sometimes you got to start one side and force them into the other side. Now, assembly down on and I have already got my larger bolts kind of in place. I have got the top one started and now the bottom one. I got the bolt started and just a little, tighten them up. You want pull them tight, but not incredibly tight. You don't want to break the bolts or anything but probably about 55 to 60 foot pounds. Make sure our 12mm bolts are tightened here. This side is all set and now I am going to do the other side and then we'll put the tire back on. Now, with the car back on the ground. You are going to tighten your lug nuts and I am using a breaker bar. You want to tighten them to about 75 to 85 foot pounds. I just make it nice and tight and use a star pattern. Then, you put your cap back on. Now, when you road test the car what you want to do, first start it up, press the brakes 3 or 4 times. Then, put the car in gear. Make sure the brakes just hold the car still. Then, do like a back up, give yourself plenty of room. Do like a 5 or 10 mile an hour and stop. Make sure the brakes are the stopping the car and then go out on the road.
The first few times you press the brakes after you have done your front brakes. The brakes will not work that well so you want to pump them a few times and then be careful on the road test. We hope this helps you out, brought to you by www.1AAuto.com your source for quality replacement parts and the best service on the internet. Please feel free to call us toll free 888-844-3393. We're the company that is here for you on the internet and in person.
Tools used
- Remove the lug nut covers   Remove the hub cap Loosen the lug nuts with the vehicle on the ground Raise the vehicle with a floor jack Secure the vehicle on jack stands Remove the lug nuts Pull of the wheel
- Turn the rotor by hand or turn the steering wheel to turn the rotor Remove two 12mm bolts from the brake caliper Push the caliper pistons in using a large C-clamp on the brake pad Pull the caliper aside Pull the brake pads off by hand Clean the slides with a wire brush
- Check the thickness of the brake pads Check the brake pad wear indicator Check for gouges on both sides of the rotor
- Remove two 13mm bolts from the brake caliper bracket with a breaker bar or a ratchet and pipe Pull off the brake caliper bracket Pull the rotor off
- Slide the rotor on Thread one lug nut to hold the rotor in place Clean the brake pad slides with a wire brush Put the bracket back into place, start the 13mm bolts by hand Tighten the 13mm bolts to 65 foot-pounds of torque
- Install the new brake pads into the bracket with the tab on the rear side Put the caliper on Thread the 12mm bolts by hand Tighten the 12mm bolts to between 15-18 foot-pounds Unthread the place-holder lug nut
- Slide the wheel into place Start the lug nuts by hand Tighten the lug nuts preliminarily Lower the vehicle to the ground Tighten the lug nuts to between 90-100 foot-pounds in a crossing or star pattern Reattach the hub cap, aligning the valve stem Reattach the lug nut covers
- Pump your brakes repeatedly until they feel firm Test your brakes at 5 miles per hour and then 10 miles per hour Road test the vehicle
Brought to you by 1AAuto.com, your source for quality replacement parts and the best service on the Internet.
Hi, I'm Mike from 1A Auto. I hope this how-to video helps you out, and next time you need parts for your vehicle, think of 1AAuto.com. Thanks.
In this video, we're going to show you how to do a front brake job on this 2000 Olds Alero. This is a two-door and the process is same for any two-door or four-door car. The tools you'll need are jack and jack stands, 12, 13, and 19mm sockets, obviously you'll need a ratchet and you'll need either a breaker bar or a pipe for leverage, large C-clamp, wire brush and a Torque wrench.
Start off by removing your hub cab, if you don't have air tools, you'll want to loosen your lug nuts and then raise and support your vehicle and then remove the lug nuts and the wheel. Turn the wheel for easier access to the back of the caliper. Right in behind, your calipers are held in by two 12mm bolts: one there and one there. These should come apart pretty easily. We'll fast forward, here, as I remove those bolts the rest of the way. In order to get the caliper off, you might need to reduce some pressure on the brakes. You put your C-clamp right against your brake pad there and then on the caliper there. That, in turn, makes it nice and loose. The caliper comes right off. For now you can put your caliper right up here. Now, you can take your pads right out. You can see they have wear marks on them. These pads are in pretty good shape. Then just use your finger, you run the back of your finger on the disk and if you don't feel any really deep grooves, they are probably okay.
To get our disk off, we're going to remove this caliper bracket, which is two bolts here and then one down here. Okay, these bolts are 13mm and you're going to want a breaker bar or use a piece of pipe on a ratchet because these will be tight. They shouldn't be too bad though. Okay and I'll just fast forward as I change over to a ratchet and remove those bolts the rest of the way. To get the brackets off of here, the rotor comes right off.
Now, I'm going to show you reinstallation. You put the rotor right back on. You can there that that hub is new, that's actually what this vehicle needed, needed a new hub so we figured we'd just do a brake video while we do the hub. You see I put the disk on there and then I put a lug nut on just to hold it in place. Before we put this bracket on, it has stainless steel slide, use a wire brush and clean these out really well. Another thing you need to check before you put this back together is make sure that these slide back and forth, in and out very easily. Put these on. The bolts to hold the bracket you also want to tighten to 65 foot pounds.
You can see my old pads are still in pretty good shape. This is a wear indicator, this groove right here and since it's still there, there's plenty of life left in the pads. The rear pad, you always want to put . there is a tab here and you always want to put that towards the backside as far as the rotation. Now, push the pads in. Since your piston has already been reset, put that right down. It should fit nice and easy. Then start these two bolts in. Now these two bolts, you only want to do between 15 and 18 foot pounds. Just speed up here as I use an extension and then tighten that top one up. We'll speed through here as we straighten that out, remove that lug nut, put the wheel and tire back on and then we'll just preliminarily tighten those lug nuts with our impact wrench and torque them when we get them on the ground. Tighten the lug nuts between 90 and 100 foot pounds. Last but not least, line up the valve stem with the wheel cover, put it on and use your 19mm socket just to tighten the caps by hand. Last but not least, make sure you pump your brakes a bunch of times and then do a stop from five and ten miles an hour before you road test your vehicle and make sure everything is working correctly.
We hope this helps you out. Brought to you by www.1AAuto.com, your source for quality replacement parts and the best service on the Internet. Please feel free to call us toll-free, 888-844-3393. We're the company that's here for you on the Internet and in person.

BKA11002
877-844-3393
Monday - Friday 8:00am - 9:30pm ET
Saturday - Sunday 8:00am - 4:30pm ET
Specify your vehicle's year, make and model to guarantee fit.
This part doesn't fit a . Select from parts that fit.


