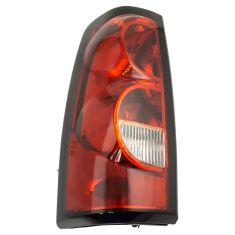
Replaces


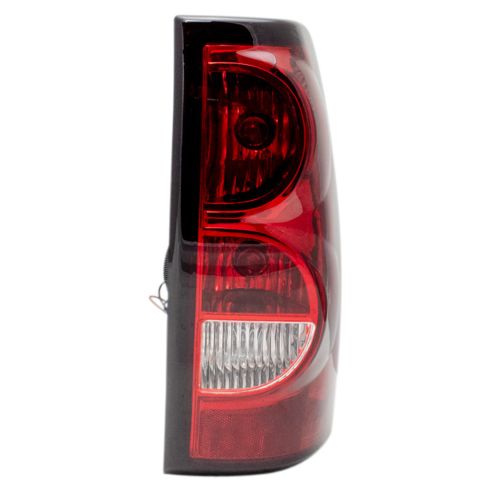

Recommended for your 2007 Chevrolet Silverado 3500 Classic
Part Details
Specifications
About TRQ:
TRQ is a trusted brand dedicated to making every repair a success story by combining premium parts with easy installation. Each TRQ part is engineered by a team of automotive experts to meet or exceed OEM standards, delivering enhanced performance and maximum longevity. With rigorous in-house testing, the brand ensures superior fit and function across every product line. TRQ also provides customers with best-in-class, step-by-step installation videos—so you can complete repairs with confidence, whether you're a first-time DIYer or an industry professional.
Assemblies may include halogen or incandescent test bulbs that should be replaced before installation.
Attention California Customers:
 WARNING: This product can expose you to chemicals including Chromium (Hexavalent Compounds), which is known to the State of California to cause cancer, and birth defects or other reproductive harm. For more information, go to www.P65Warnings.ca.gov
Lifetime Warranty
This item is backed by our limited lifetime warranty. In the event that this item should fail due to manufacturing defects during intended use, we will replace the part free of charge. This warranty covers the cost of the part only.
FREE Shipping is standard on orders shipped to the lower 48 States (Contiguous United States). Standard shipping charges apply to Hawaii and Alaska.
Shipping is not available to a P.O. Box, APO/FPO/DPO addresses, US Territories, or Canada for this item.
Expedited is available on checkout to the United States, excluding Alaska, Hawaii.
Final shipping costs are available at checkout.
Created on:
Tools used
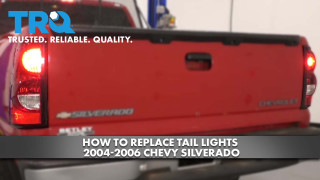
Hi, I'm Mike from 1A Auto, I hope this how-to video helps you out, and next time you need parts for your vehicle think of 1AAuto.com. Thanks.
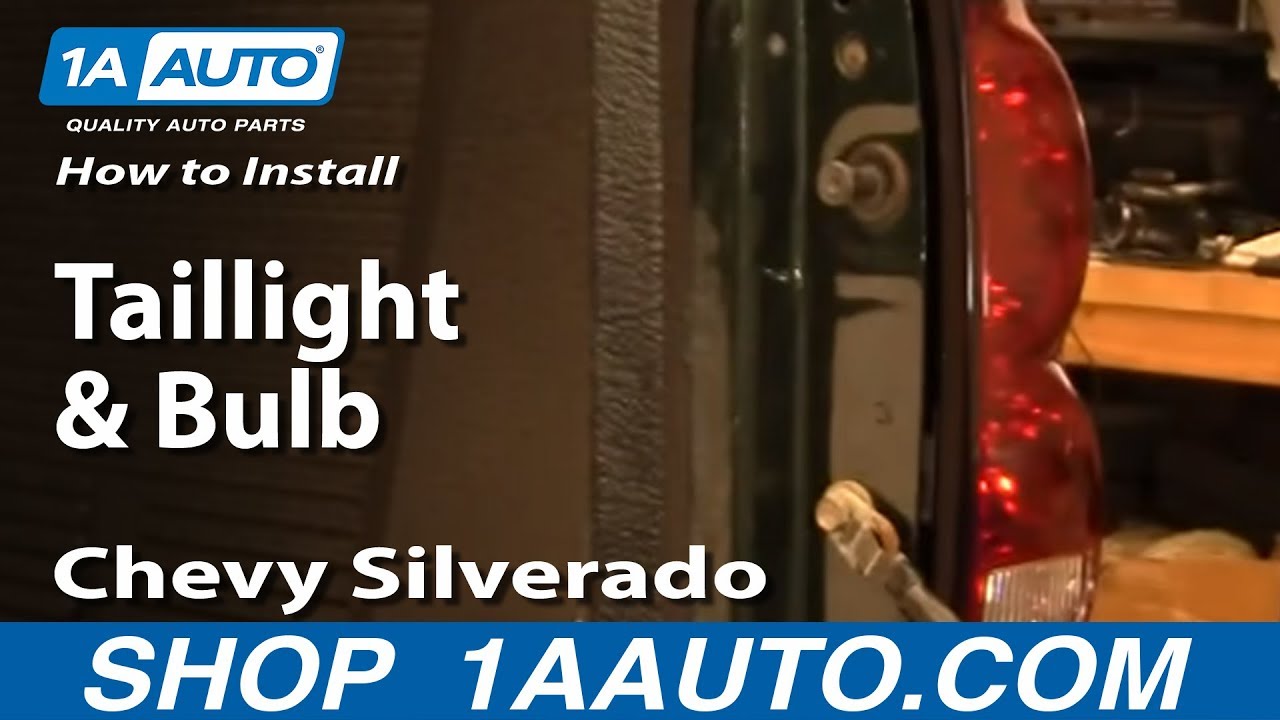
In this video I'm going to show you how to service a tail light. This is a 2005 Silverado, pretty much the same as any '04 to '07 Silverado. We're going to show you both replacing a new tail light. If you've broken or damaged your old one you can get a great replacement from 1AAuto.com, and we also show you servicing the bulbs. You'll need a Phillips screwdriver, and you'll probably need a hammer if your truck if from up North like ours was and the clips have rusted on the backside some.
Tail lights on these vehicles, I've been guilty of it, they're susceptible to damage. I carry a lot of wood in my truck, and I've been known to load it up with wood, throw a piece and accidentally hit the tail light and wipe it out. It's pretty easy. All you need is a Phillips screwdriver. There are two screws, one here and one right down here. I'm going to get some good force in here to get them started. Sometimes these screws can be a little difficult. Put your screwdriver in; give it a couple of taps with the hammer. If that doesn't work, try twisting a little bit counter clockwise, and tap with the hammer at the same time. You just want to make sure that you don't strip the contact area where the screwdriver goes in. You might hear some stuff fall apart, that's the other thing that happens with this light, is the mounting points actually break.
The light comes right out, and if you're just looking to change a bulb you just untwist, they come out. Just twist counter clockwise until they come out. Sometimes what you get happening is the clips rust away, and usually you can solve that by just pulling out on the tail light while you're unscrewing. If you get the screws going and you notice that they're unscrewing but they're not really coming out, you can hear some crackling and crunching inside, that's usually because the clips have rusted away and you need to pull on the light while you work the screw out. I'll show you on this one once I get it out, here.
You can see, there's the clip that's rusted away, that's totally gone on that one. Your tail light from 1A Auto. You can see, just like the original there two tabs on the light that go in the holes in the bed of the pickup. Just install it just like you took it out. Put those tabs in there.

LTA74585