Replaces


Recommended for your 1994 Chevrolet G10
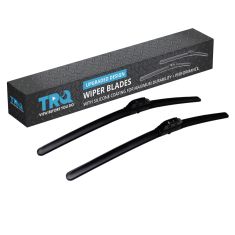
Frequently bought together
About TRQ:
TRQ is a trusted brand dedicated to making every repair a success story by combining premium parts with easy installation. Each TRQ part is engineered by a team of automotive experts to meet or exceed OEM standards, delivering enhanced performance and maximum longevity. With rigorous in-house testing, the brand ensures superior fit and function across every product line. TRQ also provides customers with best-in-class, step-by-step installation videos—so you can complete repairs with confidence, whether you're a first-time DIYer or an industry professional.
Returns: Parts with electrical components cannot be returned once installed.
Left Hand Drive:
All of our auto parts are intended for Left Hand Drive USDM vehicles. If your vehicle is Right Hand Drive, please ensure the part is correct for your specific vehicle.
Attention California Customers:
 WARNING: This product can expose you to chemicals including Di(2-ethylhexyl)phthalate (DEHP), which is known to the State of California to cause cancer, and birth defects or other reproductive harm. For more information, go to www.P65Warnings.ca.gov.
Lifetime Warranty
This item is backed by our limited lifetime warranty. In the event that this item should fail due to manufacturing defects during intended use, we will replace the part free of charge. This warranty covers the cost of the part only.
Returns: Parts with electrical components cannot be returned once installed.
FREE Shipping is standard on orders shipped to the lower 48 States (Contiguous United States). Standard shipping charges apply to Hawaii and Alaska.
Shipping is not available to a P.O. Box, APO/FPO/DPO addresses, US Territories, or Canada for this item.
Expedited is available on checkout to the United States, excluding Alaska, Hawaii.
Final shipping costs are available at checkout.
Created on:
Tools used
Brought to you by 1AAuto.com, your source for quality replacement parts and the best service on the Internet.
Hi, I'm Mike Green. I'm one of the owners of 1A Auto. I want to help you save time and money repairing or maintaining your vehicle. I'm going to use my 20-plus years experience restoring and repairing cars and trucks like this to show you the correct way to install parts from 1AAuto.com. The right parts installed correctly: that's going to save you time and money. Thank you and enjoy the video.
In this video, I'm going to show you how to replace the blower motor, the A/C and heater fan motor, on this 1986 Camaro IROC, same as pretty much any '82 to '92 Camaro or Firebird. The only tool you'll need is a 7mm socket with a ratchet and extension. You'll also need a flexible joint. You'll see how I use that.
The blower motor's located on the passenger side of the firewall. It's right here. You can see there's some wiring and different stuff around it. First thing I'm going to do is just clear out some of this stuff. There's a bracket right over here. It's held in by two 7mm bolts. I'm just going to remove those 7 mm bolts. Now, I'm going to unplug the ground here. You pinch a little tab, pull it off, and your lead for the motor. Pull this up and out of the way. Now, we can see in here, better, two of the bolts: one here, two and three. There's this hose. I'm just going to pinch it, and gently pull it out of the motor. You'll see another bolt down in there. There's one last one right down there. These three, up here, are easy to get to. For these two down there, you're going to need an extension and flexible joint.
Let's do the lower ones first. I've got a ratchet and extension. This flexible joint lets me get the extension down in there with a 7mm socket. Feed the ratchet down in there. Feel for the head of the bolt with your finger. Then, put the ratchet extension and socket down in there. With one hand, I'm holding it on to the head of the bolt. Obviously, with the other, I'm turning the wrench. This is probably the more difficult of the two. I'm actually going to lift this harness up. The angle's not as steep. I'm going to fast forward as I finish getting that bolt out. Then, I take off the flexible joint, and I'm able to get the other three bolts that hold the motor to the firewall off fairly easily. Once I have those five bolts out, then I basically just pull on the motor to break it free. After that, you need to remove another bolt, and I'll show you that, to remove another bracket.
There's a piece on here and then one more bolt here. Once you remove this piece, get that extra piece. That allows the fan to come up and out.
Here's the new fan from 1A Auto. I'm just going to feed it down in here past all the wiring and stuff. Put this down past this brace. To get it past that brace, just make sure the lower harness is not in your way. I've got the flat section facing down right now to get it past all this wiring. It's somewhat in. Take this piece. Just to note, I am holding it wrong right there. I do flip it around as I put it in, but it's a little tough to see. The larger or thicker section goes to the outside and more towards the bottom. This piece goes on just like that. I'm going to speed it up here as I . I don't quite tighten that one yet. Then, I start all the other three screws at the top of the motor into the firewall. Then I am able to reach down and start the screw that is closer to the engine of the vehicle. You can reach down by hand and start that one, but for the one that is closer to the outside of the vehicle or to the fender, I'll show you a little more detail on how to get that one going.
To get this last one in, what I did is, I took a little bit of glue, just a little bit, put it on the head of that screw so it will stay in there no matter what angle I have it at. I'm going to just narrate this because you can't really film it, because it's such closed quarters. What I basically ended up doing is "gluing" the screw in there into the socket, feeding it down in there. Then once I got it into place, I was able to twist it just a little bit, enough to hold it into place. Then I took the socket off, and I was able to reach my hand down in there barely enough and start the screw with my hand a little bit, and then, go back with the flexible joint and the socket. Quite honestly, I wouldn't think any less of anyone if they didn't get this screw in because it did take me about five tries. Really, the motor's not going to perform worse if you don't get that last screw in there. There's four other ones holding it. If you want to try it, and you're persistent like I am, and you get it in there, then all the power to you. We'll fast forward again as I just tighten up the rest of the bolts. Make sure you tighten up all five of the bolts that hold the motor on, then that bolt that holds the piece that allows you to pull the motor up and out, as well as put your ground strap back on with a 7mm bolt. Once your motor's all bolted correctly then make sure you reconnect that vapor hose. Then connect your ground and your main lead. Then bolt that resistor and bracket back up to the firewall.
We hope this video helps you out. Brought to you by www.1AAuto.com, your source for quality replacement parts and the best service on the Internet. Please feel free to call us toll-free, 888-844-3393. We're the company that's here for you on the Internet and in person.
Tools used
Brought to you by 1AAuto.com, your source for quality replacement parts and the best service on the Internet.
Hi, I'm Don from 1A Auto. I hope this how-to video helps you out, and the next time you need a part for your vehicle, think of 1AAuto.com. Thanks.
In this video, we're going to show you how to replace the blower motor on this 1996 Chevy Tahoe. The items you'll need include a new blower motor from 1AAuto.com, a flat blade screwdriver, 7mm socket and ratchet, Phillips bit, and pliers. Start off by opening your glove box, pushing in the sides, and pulling it down. Then unhook it and pull.
Next, you want to disconnect these two harnesses right here. So, using a pair of pliers, just push the tabs and pull them free. Next, you want to remove this cover, so pull the back flap up over the tab, and pull the cover down and out. Surrounding your blower motor, there's a series of 7mm bolts. You want to just go ahead and remove these and we'll fast-forward as Don does that.
Next, you want to remove this ground screw using a Phillip's bit. Just reach in there and remove it. Now, pull your blower motor free, and just pull it down and out. On the left is the old blower motor; on the right is the new one from 1A Auto. You can see they're identical, and they're going to fit exactly the same.
Push your new blower motor into place and line it up. Once you have it lined up, replace those 7mm bolts. Now, just replace that ground screw. You can see he starts off by just twisting it in by hand, and then tightens it up with his Phillips bit and ratchet. Now, replace that cover. Once it's pushed into place, reconnect those two harnesses. Now, take your glove box, put these two hooks onto these two bars, push in the sides, push it back into place, and you're all set.
We hope this video helps you out. Brought to you by www.1AAuto.com, your source for quality replacement parts and the best service on the Internet. Please feel free to call us toll-free, 888-844-3393. We're the company that's here for you on the Internet and in person.
Tools used
Hi, I'm Mike from 1AAuto. We've been selling auto parts for over 30 years! We're dedicated to delivering quality auto parts, expert customer service, and fast and free shipping, all backed by our 100% satisfaction guarantee. So visit us at 1AAuto.com, your trusted source for quality auto parts.
In this video, we're going to be working with our 1996 GMC Sierra K1500. We're going to show you how to remove and replace your vehicle's blower motor. Some of these are available as just the motor without the fan cage on it. We're going to show you how to swap the part over as well.
If you like this video, please click subscribe. We have a ton more information on this truck, as well as many other makes and models. If you need this part for your vehicle, you can follow the link down in the description over to 1AAuto.com.
Here are the items you'll need for this repair: 7mm socket, ratchet, socket extension, hammer
Open your glove box. Be sure that anything that's going to fall out or roll around on the floor has been removed. Press the back corners of the glove box together until they slide out. Lay the glove box down and pop it out of the hinges.
The blower motor cover is located here. You have two electrical connectors. The purple on at the bottom left, you can simply pop out toward you. The black connector at the top right has a little tab here where my thumb is, that you'll push down and release as well. Lift up the flap on the top side of the blower motor, pop out the one on the bottom as well. Bend the cover and sneak it out from behind the dash.
Using a seven millimeter socket and ratchet, as well as whatever extensions are necessary, remove the seven 7 millimeter bolts from the perimeter of the blower motor. Be sure to take that little ground tab with the last bolt. Pop that hose off of the H-Vac box, and remove your blower motor from the vehicle.
Now, our new blower motor does not come with the plastic fan cage like this one has here. If that's the case with yours, removing it is fairly simple. You just have to be careful. You don't really need a hammer as big as the one we have here. The only reason I'm using this is because of the depth of the head, so I can get in there and actually hit that center without the handle hitting the plastic and potentially break it. I'm just going to hold the fan firmly in one hand. Give that a couple of taps. Then, you can either try to slide it off by hand at this point - just a little bit of working it back and forth. With just a little bit of effort, that will come off.
If your blower motor had this cooling tube on it, just pop that out real quick. We'll need that on our new part as well. While our old motor may not be aesthetically pleasing, it's still in mechanically fine shape and works properly. We're just going to reassemble it the same way you would with a new part.
All we need to do is line up those splines on the fan and then you should just be able to work it back down. Don't push it down too far, make sure that it still spins freely. If your vehicle had the cooling hose, simply work that back into the opening on the back side of the motor. Spin it around the right way. You're ready to reinstall.
Reinstall your blower motor and fan assembly into the heater box. There's some little alignment pins on there you can set it on. Reinstall your cooling hose, then reinstall all of your seven millimeter screws. Remember that the topmost one has that grounding tab that we need to reinstall. Make sure that the tab sticks out from the volt at the 3:00 position. Once that's in, you can reinstall the remaining six 7 millimeter screws. Slide the blower motor cover back into place. Make sure you lock it back onto its tabs. Black connector goes on the top right, where the ground is. Purple connector goes onto the terminal at the bottom left. That comes from the blower motor.
Hook the bottom hinges of your glove box back into place. Push the tabs in and close your glove box.
Thanks for watching. Visit us at 1AAuto.com for quality auto parts, fast and free shipping, and the best customer service in the industry.

HMA84804