Replaces


Frequently bought together
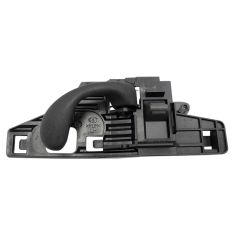
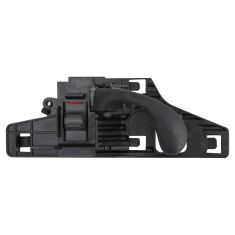
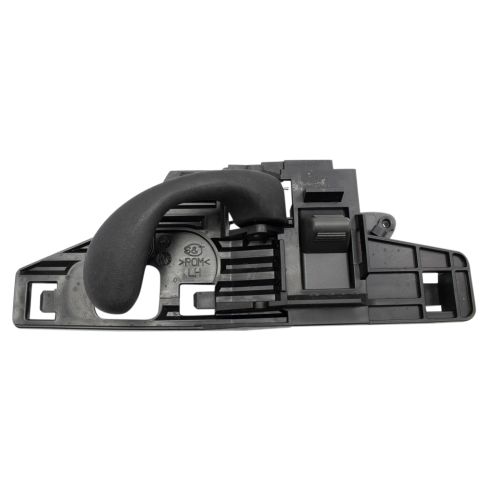
Part Details
About TRQ:
TRQ is a trusted brand dedicated to making every repair a success story by combining premium parts with easy installation. Each TRQ part is engineered by a team of automotive experts to meet or exceed OEM standards, delivering enhanced performance and maximum longevity. With rigorous in-house testing, the brand ensures superior fit and function across every product line. TRQ also provides customers with best-in-class, step-by-step installation videos—so you can complete repairs with confidence, whether you're a first-time DIYer or an industry professional.
Attention California Customers:
 WARNING: This product can expose you to chemicals including Lead and Lead Compounds, which are known to the State of California to cause cancer, and birth defects or other reproductive harm. For more information, go to www.P65Warnings.ca.gov.
Lifetime Warranty
This item is backed by our limited lifetime warranty. In the event that this item should fail due to manufacturing defects during intended use, we will replace the part free of charge. This warranty covers the cost of the part only.
FREE Shipping is standard on Orders shipped to the lower 48 States (Contiguous United States). Standard shipping charges apply to Hawaii, Alaska and US Territories. Shipping is not available to Canada.
Expedited is available on checkout to the United States, excluding Alaska, Hawaii and US Territories as well as P.O. Boxes and APO/FPO/DPO addresses. Final shipping costs are available at checkout.
Created on:
Tools used
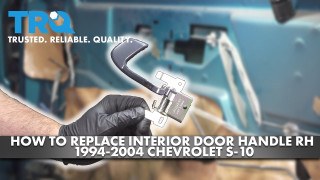
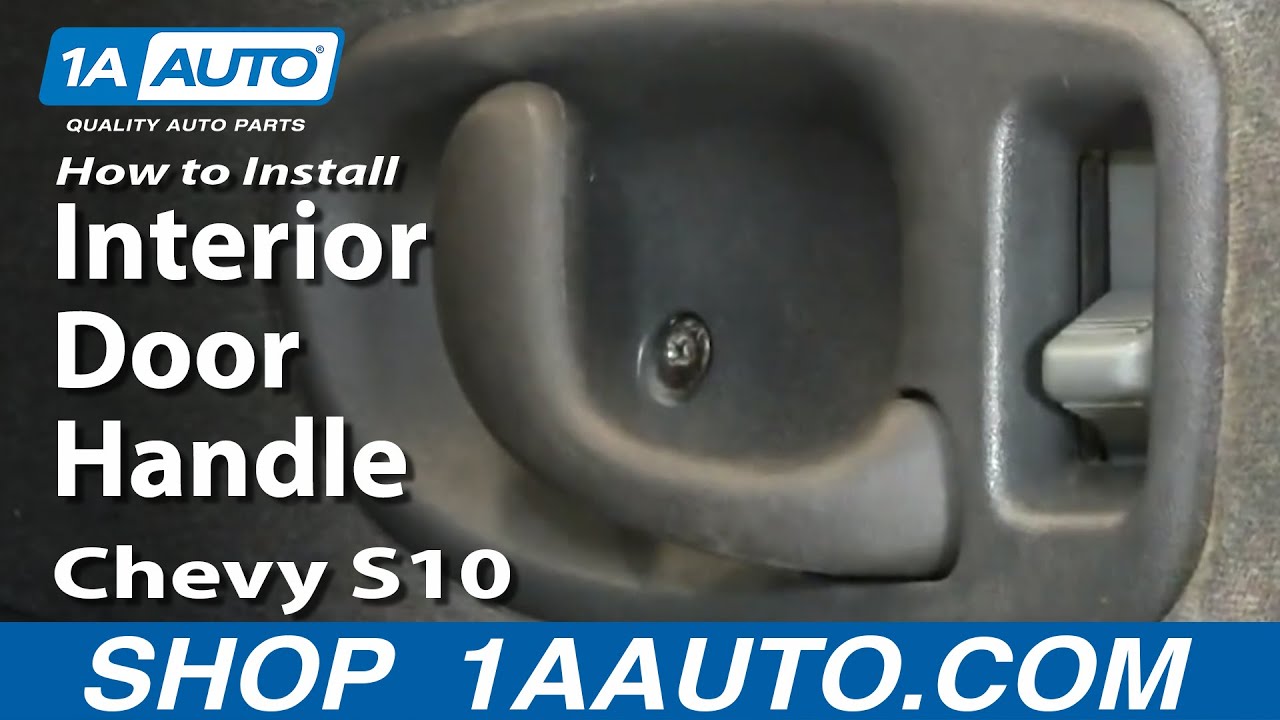
Brought to you by 1AAuto.com, your source for quality replacement parts, and the best service on the Internet. Hi, I'm Mike Green. I'm one of the owners of 1A Auto. I want to help you save time and money repairing and maintaining your vehicle. I'm going to use my 20 plus years experience, restoring and repairing cars and trucks like this, to show you the correct way to install parts from 1AAuto.com. The right parts, installed correctly ... that's going to save you time and money. Thank you and enjoy the video. In this video we'll be replacing an interior door handle on a 2001 S10 pickup, basically the same as any '98 to '04 S10, S15 pickups, Blazers, and Jimmy's.
The tools you'll need are a window crank removal tool. If you have manual windows, a Phillips screwdriver, door panel clip removal tool or a putty knife and a regular screwdriver, as I use, and a 7mm socket and driver. Replacing the handle itself is very easy. You do have to remove the door handle, which is what takes the most time. I'm going to run through removing the door handle quickly here. If you want a more detailed, slowed-down version of this, just do a search on our channel for S10 door panel. You can see this video in real time. You probably can pick up enough from this video to understand how to remove the door panel. It's fairly easy. Biggest part of it is when you separate the door panel from the door, make sure you don't break the plastic. Here you can see there are 3 screws ... one behind the door handle, and then these 2 underneath the door pull. You can see my jury rig method of removing the window crank. Here's the back of the panel, so you can see where all the pins or clips are.
This is the part where you want to be careful. Work your knife in there or your clip removal tool in, find the clips, and then pry with a screwdriver. Once you have all of those loose, then the door panel just lifts up and off. If you had power windows and door locks, at that point you would disconnect all the power windows and door locks. Now as for the interior door handle ... pretty simple. I'm actually disconnecting the clip on the door locks there. Then you basically take a screwdriver ... the door handle is just slid into place. I'm prying out on tab in the very front, and then just tapping it with a hammer. You can see I try it a couple different ways. You tap fairly hard, especially if you have a door handle that is broken. You're not much going to care about it, but it takes a pretty firm hit, and then you'll just see the door handle start to slide back. I'm changing the angle here a little bit. Just making sure that that rod's not getting caught up on anything. Now you should see ... basically what I'm doing is putting that screwdriver under there and turning it, just prying that out. Then I'll start tapping it with the hammer. It starts moving, and then it pulls out. Once you pull it out, you will need to disconnect the actual door handle latch rod, which basically you just kind of reach in behind. You can see that little white clip there. Reach in behind, pull that clip off with your finger. I think I actually reach in there with a screwdriver eventually. Then the rod will come out of the hole. Not the best camera angle. I apologize. There you can see. Then your door handle is free. You can install a new one, pretty much by reversing the same procedure. First I'm basically just positioning that clip the correct way so that I can put the rod down in, and then clip it on. Then you'll see I knock it sideways anyways, but the intent was there. You put the rod in, and you can see I push the clip where it's not supposed to go. Then I've go the clip, got the rod in, and clipped in place. I'm just putting that lock in place for now. Then change the angle here a little bit. Basically you just work the handle into the slots.
Once you got it ... it got hung up on this a little bit. But you'll see, once it gets in there, it slides forward nice and easy and locks into place. There it goes, and now just locking that lock clip on. You can see, for the door handle you actually really don't need ... well, I guess you do need a screwdriver and a hammer. Most of the tools that you use are for the door handle. You can see I just tested it there. Another thing to just check is there's a little clip on the door that keeps the rods in place right here. Just make sure you didn't accidentally pull one of those rods out of that clip before you put it back together. Then we'll go through quickly just putting the door panel back together. Once you've done that, you're all set. You can see replacing your interior door handle on an S10 ... pretty easy ... something that most people can do. Doesn't require any real special tools or anything. The biggest part of it is getting the door panel on and off. Probably takes you 20 or 25 minutes or so. Once I'm finished up with that, you'll be good to go with a nice, new door handle. Again, if you want to see the door panel installation and removal, we do have it on our other videos. Just go to our channel ... the 1AAuot channel ... and search for S10 door panel.
We hope this helps you out. This video was brought to you by 1AAuto.com, your source for quality replacement parts, and the best service on the Internet. Call us toll free 888-844-3393. We're the company that's here for you on the Internet, and in person. Thank you very much.
Tools used
Brought to you by 1AAuto.com, your source for quality replacement parts and the best service on the Internet.
Hi, I'm Mike from 1A Auto. I hope this how-to video helps you out, and next time you need parts for your vehicle, think of 1AAuto.com. Thanks.
In this video, we're going to show you how to replace an inside door handle. There's a plastic part on these that breaks quite often. It's not a difficult repair. We do this on this '03 Sonoma, pretty much the same as any '98 to '04. The tools you'll need are flat blade screwdrivers, both a regular and a small size; Phillips screwdrivers; and a door panel clip tool or a putty knife.
Start by prying out the front of your switch plate. Kind of push back and pull up, it should come out. You want to use a screwdriver, on this one there's a tab right here you push. Okay, this gray one you can probably put your screwdriver right down in here and pry out. Here there's a tab, and then here there's a tab. We'll speed it up here as I disconnect those connections.
On the middle one, I believe, I did have to use two screwdrivers. I used one to kind of hold the little locking tab, and the other one to pry up on the connector and pull it off. Right behind your door handle, there is a Phillips screw, remove that. Then this bezel pulls out and unclips. You can bring it off the door handle.
Okay, there are two 7mm bolts underneath your door pull: one there, and then one right up in there. Okay, we'll speed up as I remove those two bolts. If you have a door panel clip tool, use that. A household putty knife works just as well too. Put the tool in the bottom, between the door and the door panel, slide it, find a clip, and pull it. If your door panel has been apart before they'll come off pretty easy. Okay, there is one right up here as well. Okay and the door panel comes right off.
To remove this inside door handle. You want to put a screwdriver right under here and pry out. There's a little tooth kind of that's holding it. Then push the door handle back. Bring it out. These clips, you push down and then the rod comes out and then you can reach in behind and see the other clip. Push it out and that rod comes up and out. There's your door handle out.
You can see my original one is fine. A lot of times, they'll break here. The new handle from 1aauto is exactly the same. It's going to function the same. If you want to reinstall it, take your water shield here, and peel off your broken one. Install it here. I'm just going to flip this clip around, put my latch rod right down in, flip the clip back around, and lock it. Turn that around and put my lock rod in and flip that clip up and lock it. Put the handle in and slide it forward. Right here, just make sure that your rods are in these clips here.
To reinstall your door panel, just kind of get it in place. Make sure all your harnesses are through. Put it in up here and push the top. You want to push the top against the window and then down onto the door. Push the top on down. Okay, you might have to just kind of move it around a little bit, make sure the pins go in. Let's take our 7mm bolts and bolt them right up in there. Plug everything back in. The back kind of locks in first and the front goes down in.
We hope this video helps you out. Brought to you by www.1AAuto.com, your source for quality replacement parts and the best service on the Internet. Please feel free to call us toll-free, 888-844-3393. We're the company that's here for you on the Internet and in person.

DHA69344