Replaces


Frequently bought together
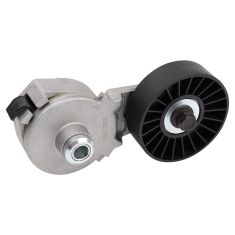
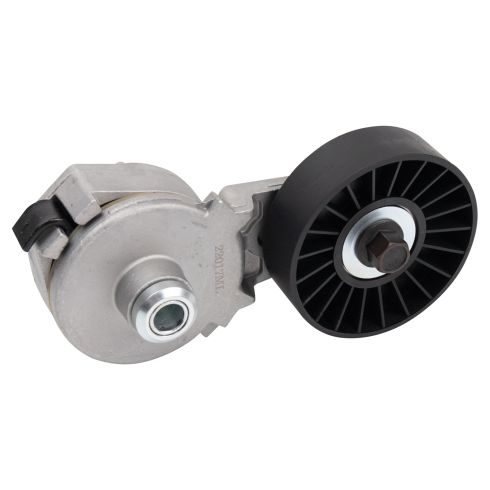
Part Details
About TRQ:
TRQ is a trusted brand dedicated to making every repair a success story by combining premium parts with easy installation. Each TRQ part is engineered by a team of automotive experts to meet or exceed OEM standards, delivering enhanced performance and maximum longevity. With rigorous in-house testing, the brand ensures superior fit and function across every product line. TRQ also provides customers with best-in-class, step-by-step installation videos—so you can complete repairs with confidence, whether you're a first-time DIYer or an industry professional.
Attention California Customers:
 WARNING: This product can expose you to chemicals including Lead and Lead Compounds, which are known to the State of California to cause cancer, and birth defects or other reproductive harm. For more information, go to www.P65Warnings.ca.gov.
Lifetime Warranty
This item is backed by our limited lifetime warranty. In the event that this item should fail due to manufacturing defects during intended use, we will replace the part free of charge. This warranty covers the cost of the part only.
FREE Shipping is standard on orders shipped to the lower 48 States (Contiguous United States). Standard shipping charges apply to Hawaii and Alaska.
Shipping is not available to a P.O. Box, APO/FPO/DPO addresses, US Territories, or Canada for this item.
Expedited is available on checkout to the United States, excluding Alaska, Hawaii.
Final shipping costs are available at checkout.
Created on:
Tools used
Hi, I'm Mike from 1AAuto. We've been selling auto parts for over 30 years! We're dedicated to delivering quality auto parts, expert customer service, and fast and free shipping, all backed by our 100% satisfaction guarantee. So visit us at 1AAuto.com, your trusted source for quality auto parts.
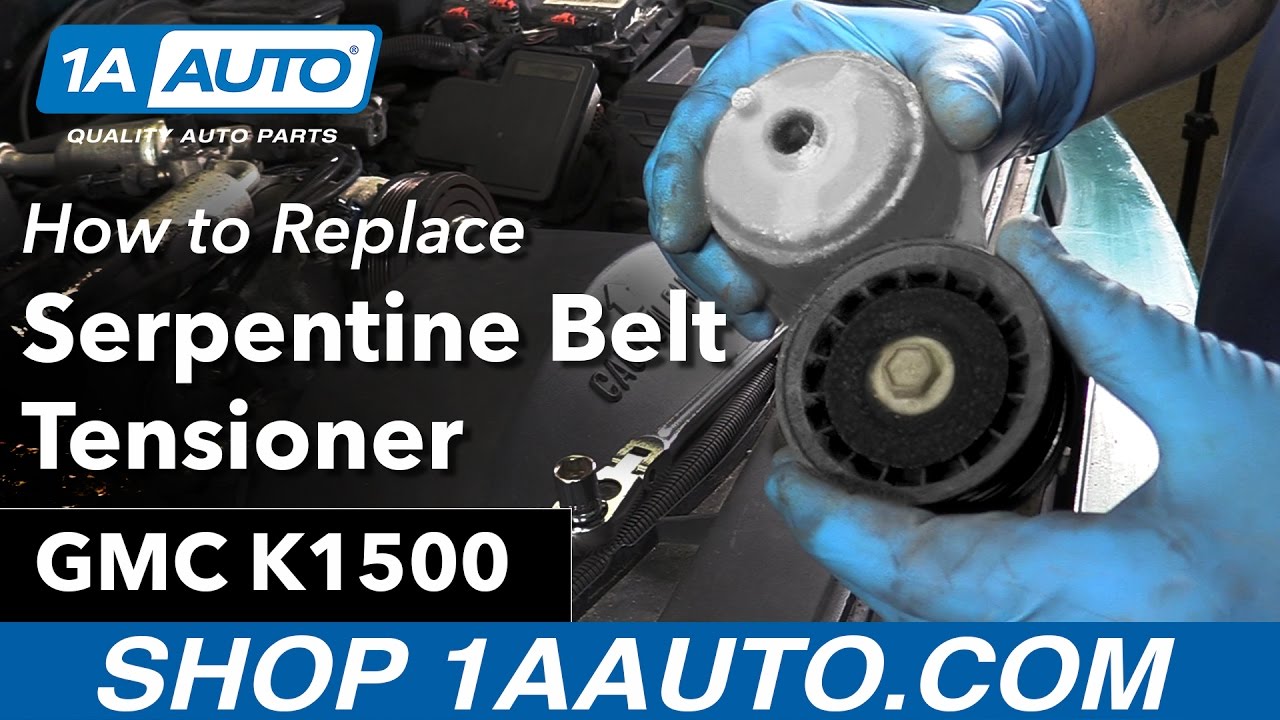
In this video, we're going to be working with our 1996 GMC Sierra K1500. We're going to show you how to remove and replace your vehicle's serpentine belt tensioner on the 5.7-liter V8.
If you like this video, please click "subscribe". We have a ton more information on this truck, as well as many other makes and models. If you ever need parts for your car, you can follow the link down in the description over to 1AAuto.com.
Here are the items you will need for this repair: 8 to 13mm sockets, 3/8 ratchet, socket extension, 8 to 13mm wrenches, torque wrench
Be sure your vehicle has a belt path diagram somewhere on the cowl or under the hood before removing the belt. If it's missing or unclear, be sure to draw it somewhere under the hood or take a good picture. Put the 3/8 drive of a ratchet into the square on your serpentine belt tensioner and turn it counterclockwise to release tension. Then simply pull the belt off of any one of the pulleys, slowly release the tension from the tensioner. Remove your ratchet, and take the belt off of the pulleys.
Remove the 13mm bolt in the center of the pivot for your serpentine belt tensioner. Remove the bolt. Pop the tensioner off of the front of the motor. Be very careful not to twist when doing this. You saw I just grabbed the end of the pulley and popped out because that little aluminum stud there will get broken off in here and not allow the new tensioner to sit in place so you have to drill it and that just adds a lot of work.
There is nothing wrong with our tensioner so we'll just reinstall it. The process to install a new one is exactly the same. Simply line it up, drop it into place, and start your 13mm bolt. Get that in as far as you can by hand before tightening it down with your 13mm socket and ratchet and torquing it. Torque this bolt to 37 foot-pounds.
Hook the serpentine belt around the crank pulley or harmonic balancer from the passenger side. Be sure that it seats fully into the grooves of the pulley and doesn't lay over the edge on either side. Wrap the driver's side of the belt around the water pump, under the power steering pump on the other side, and up and over the AC compressor. I already have the left side wrapped around the tensioner here just because that's where it falls. Then, from over the AC compressor under the idler pulley, reinstall the ratchet into the tensioner. Turn the ratchet counterclockwise to release the tension, and install your belt over the alternator. Take a second just to look around and make sure that your belt is seated and routed properly before releasing the tension and removing your ratchet.
Thanks for watching. Visit us at 1AAuto.com for quality auto parts, fast and free shipping, and the best customer service in the industry.
Tools used
Brought to you by 1AAuto.com, your source for quality replacement parts and the best service on the Internet.
Hi, I'm Mike from 1A Auto. I hope this how-to video helps you out, and next time you need parts for your vehicle, think of 1AAuto.com. Thanks.
In this video, we're going to show you how to replace the serpentine belt on this 2003 GMC Sonoma. It has the 4.3-liter. It's a pretty easy operation, you need a 3/8 drive ratchet handle as well as a 13mm socket.
Look at the top of the alternator. Right down here is your tensioner. I've got a 3/8 drive ratchet handle. There is a 3/8 square hole in the tensioner. Take your handle, push down. That takes the tension off the belt, and put the belt off. Slowly let your tensioner back, remove your handle. To proceed with removing the tensioner and reinstalling it, you don't have to take the belt off all the way, but I am going to show you how to take it off, and then also how to put it back on, just in case it comes off a couple pulleys or something. This just gives you some guidance on getting it back together if you need it.
Okay, here's our belt routing diagram. Always want to make sure you have this before you take the belt off, and then I can remove the belt. So, your tensioner right here, it's got a 13mm bolt right on the front, so I'm putting a ratchet and socket on it, and it's pretty tight to loosen. I'll speed it up here as I remove that bolt, and, as you can see, after you get it loose with the wrench, you can switch over to your hand and thread it out by hand. The tensioner will come right out.
Get your tensioner from 1AAuto, bolt goes through there. This pin on the tensioner. If you look down where it mounts, you can see the hole and then this smaller hole where that pin lines up into. Just drop the bolt through, put the bolt in. Make sure that tab goes into the indentation and start the bolt in. Speed it up again as I thread the bolt in mostly by hand, and then I'll switch over to my ratchet and socket to tighten it up. You probably want to tighten this to belt 25 to 30 foot-pounds.
Now, back to our belt routing diagram. What I'm going to do is take a loop and put it down around the crankshaft first, then come up and down around our power steering, up to our AC, and then over. What I'll do is I'll leave it off this idler pulley here so it'll just go right above that, and then we'll pull the tensioner over, and put it down onto that idler pulley. Then I take a loop and I'll put it right down through here, and then just kind of take my hand, put it up onto the crankshaft pulley, and then it's coming around the water pump here, and now I'm reaching down here and putting a loop down, and around the power steering pump which is down here on the right side as you're looking at the engine. Pretty tough to get your arm down in there. Then it comes up around to the AC compressor, and across the alternator. I think it came off my crankshaft, so I'm going to put my arm down in there and make sure it's down and around the crankshaft.
So, basically now, I have it routed around my tensioner there. It's not around this idler pulley yet. It's on my AC pulley, it's down there on my power steering pulley, and also down and around the crankshaft pulley. A little hard to see way down there. So, I take my 3/8 ratchet handle, put it into my tensioner again, push my tensioner down, and then take this and put it right down. I'll have to pull it a little bit because it's going to need to tighten it up around all the pulleys.
As I was trying to do this, I realized that it actually had come off the crankshaft pulley a little bit, so I'm reaching down in there, and I'm making sure it's on that crankshaft pulley correctly. So now I push that under there, and let it off. Okay, it's now under the idler pulley, around my tensioner, down and around my power steering pulley, up and around. The only thing I can't really show you is the crankshaft. You can see it down there, and maybe a little bit right down there. It's all in there correctly, though.
We hope this video helps you out. Brought to you by www.1AAuto.com, your source for quality replacement parts and the best service on the Internet. Please feel free to call us toll-free, 888-844-3393. We're the company that's here for you on the Internet and in person.

BPA03817