Replaces
This part doesn’t fit a . Select from parts that fit.
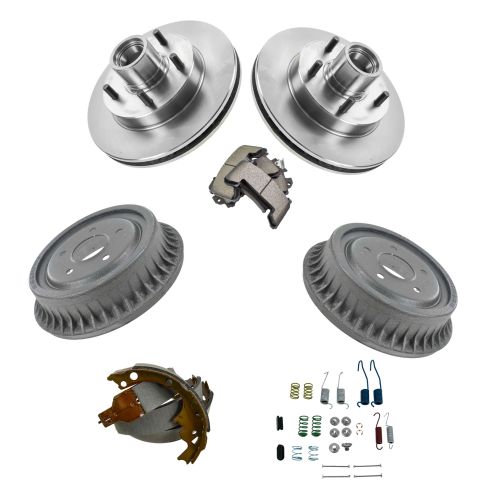
Part Details
Premium Positive Molded Brake Pads Features and Benefits
Complete Repair in One Purchase - Stop searching for parts individually and complete your repair with a customized kit or set from DIY Solutions.
High-Quality Parts from Trusted Brands - DIY Solutions' kits and sets are selected from the best automotive brands and include hard-to-find and even obsolete parts you may need for your vehicle.
Guaranteed Fit - DIY Solutions ensures its selected parts are quality-tested to guarantee fit and function.
Replacement Brake Kits Features & Benefits
Item Condition:
New
Attention California Customers:
 WARNING: Cancer and Reproductive Harm - www.P65Warnings.ca.gov.
Lifetime Warranty
This item is backed by our limited lifetime warranty. In the event that this item should fail due to manufacturing defects during intended use, we will replace the part free of charge. This warranty covers the cost of the part only.
FREE Shipping is standard on orders shipped to the lower 48 States (Contiguous United States). Standard shipping charges apply to Hawaii and Alaska.
Shipping is not available to a P.O. Box, APO/FPO/DPO addresses, US Territories, or Canada for this item.
Expedited is available on checkout to the United States, excluding Alaska, Hawaii.
Final shipping costs are available at checkout.


Created on:
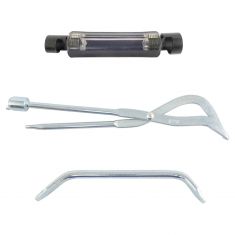
Tools used
Brought to you by 1AAuto.com, your source for quality replacement parts and the best service on the internet.
Hi. I'm Mike Green. I'm one of the owners of 1A Auto. I want to help you save time and money repairing and maintaining your vehicle. I'm going to use my 20-plus years experience restoring and repairing cars and trucks like this to show you the correct way to install parts from 1AAuto.com. The right parts installed correctly. That's going to save you time and money. Thank you and enjoy the video.
In this video we're going to show you have to replace the brake, the rear brake drums and shoes on this 2001 S-10 pickup. This is the same for any S-10 pickup or Blazer that has rear drum brakes.
Tools you'll need for the job are jack and jack stands, lug wrench or a 19 mm socket with a ratchet or a breaker bar, a large hammer, a pry bar or a large screwdriver, penetrating oil, brake spring tools or I actually use vise-grips and pliers can work, some white grease or some anti-seize grease and a small wire brush.
Start out using a 19 mm socket. Take off the lug nut covers and then remove your center cap. If you don't have air tools then start with your vehicle on the ground, take that cap off and then loosen the lug nuts. Then raise and support your vehicle and remove the lug nuts. Run a little faster here as I remove those lug nuts and then remove the wheel entire.
With the wheel off, my drum moves which is good. Use a little bit of penetrating just to make it a little easier. And then there's two little locking tabs on here. These are basically just when they put the vehicle together. They put these on here to hold the, hold the drum in place. You can just grab onto them with pliers. Break them. Pull them off.
I'm pretty lucky. It's nice and loose. If you get here and you're drum seems to be stuck on here what you want to do is take a big hammer and you want to hit right in here really hard. That will help pop this loose. Now you want to pull the drum off. This can be difficult. Shaking it back and forth. Turn it. Get it to there. Sometimes we'll use a screwdriver to pry on it a little bit. It's off.
Now you want to take this apart. They do make the correct tools that makes this easy, but most people don't have all the correct brake tools. I use a pair of vise-grips if I don't have what I need. Lock it onto the spring and carefully pull it and let it go to get the spring off. Then what I like to do is get the vise-grip off and I just put the spring right there and that way when I get my new ones I know which colors go on the front, back, etc. The next one is this one here. Again, lock onto it and pull and this one you want to pull. Take it off and put it down there. Take a screwdriver for this little spring under here we'll let it spring out. Take this lever and pull this lever right off.
Now the shoes are held on by these here. These are pins that go right through the backside and come out right here. So you want to hold back here. While holding the back of this with my finger and grab on and push and twist and that comes off and put it right back here. Pull this out. Pull this off. The same thing here. Pull the pin in the back and it comes off and out. At this point you can take your brake shoes off and there's a little arm that separates that there. That right in the middle. Bring your brake shoes down and then this arm right here is your emergency brake lever. This comes right off like that.
Here the red arrow is pointing to the wheel cylinder. You want to make sure you check this. Check each end of it. Make sure there's no brake fluid leaking out of it. If you see any leaks or detect any leaking, even if you just kind of see that some of the brake dust is moist around it, that indicates a leak and you'll want to replace it while you're, while you're at this step.
This spring was on this lever. It was on that end of that lever so I'll put that back on there for reference. Put it right back there.
Next we have to do is take these apart so I just go like that. I need this adjuster. Take that adjuster off. You need to make sure that this adjuster is nice and free. I'm actually going to screw it out some. This is a little wire brush. Just clean those threads off some. That's nice and clean. I'm going to put a dab of anti-seize on there and run that back together and put it all the way down in. Take that off. Just a little dab of the anti-seize on there. That's sure to stay nice and spin easily.
You can see I'm going to use a new hardware kit. I've matched up everything. As well as I matched up the correct new spring for the adjuster. Now I'm going to take my new shoes. The rear one is always the one with the larger pad. Put them down correctly here. Just put your adjuster into the rear shoe. And then this spring goes in so it doesn't hit the adjuster. You put that spring in basically just take the shoes and go like that.
You're going to take a little bit of that anti-seize and put it right on to those places where the shoe contacts. I'm going to put my shoes on. I'm going to take my emergency brake bracket and I'm going to feed that into that triangle slot right here. Spread those apart. Make sure that bracket goes in. There it goes. Now our shoes are in place.
First, I'm going to take my new pin and put it right through the back here. I'm going to turn my shoe and my new spring assembly. I'm going to grab that with the vise-grips and hold it against the shoe and push it on and twist. Make sure it locks in there well and is seated well. Now I'm going to take my adjusting arm and put it in with the new cup. Then push the pin in the back and let it find its way through here. Make sure it's all in, all together. New spring. Use the shorter spring on this side. It slips right in the cup. Push on. Turn. Now take this on there. Put it up on that pin there. Now pull your shoe out and this is your emergency brake separator. Put it in back in there. Push the shoe back in and lock it in place. Put the spring in, rotate it up. Grab hold of it tight and pull. You have to pull quite hard on it. You want to make sure that this is all pushed in. Take your other spring and put it in. Pull and put it up on. Make sure this is all seated well in there. Should be with those springs on. You want to put the small end up into that tab and push in. Nice new drum from 1A Auto. Put them on. They're going to be nice and loose. If you want take them off and with your adjuster turning it up. You can expand the shoes a little bit. And then keep adjusting until it goes on with a little bit of drag. Make sure you clean up all the old parts.
Here I'm going to speed it up. Put the tire on. Thread the lug nuts on by hand first. Then I'm going to use the impact wrench just to tighten them up preliminarily. Torque them to 100 foot pounds and then put the put the cap and lug nut caps back on. The rear brakes adjust by when you back up and press the brakes. They adjust a little bit, but you always want to test your brakes first before road testing.
We hope this helps you out. It was brought to you by www.1AAuto.com your source for quality replacement parts and the best service on the internet. Please feel free to call us toll free 888-844-3393. We are the company with you on the internet and in person.
Tools used
In this video I'm going to show you how to service the front wheel bearings in this 2001 Chevy S-10 pickup. Same as any S-10 pickup, or the Blazer, and this is a two wheel drive vehicle.
Tools you'll need for this job are jack and jack stands, 19mm socket and ratchet or a lug wrench, 3/8 Allen wrench, a combination wrench for some extra leverage on that Allen wrench, a wire brush or medium sandpaper to clean off some bolts, 27mm socket and ratchet, pliers, torque wrench, bearing grease, a hammer or a press, and race installation tools or large sockets.
For the next two minutes or so here, I'm going to show you taking apart the wheel and the breaks to get the rotor off. Here I'm just taking the caps off of the lug nuts, then removing that center cap, then removing the wheel. Here I'm actually removing the dust cap from the hub. Now removing the wheel. Now going through removing the breaks. The brakes are held on by two 3/8 Allen bolts. Use a large screwdriver to pry out and loosen up the caliper, it helps get it off easier. Use a wrench on the Allen wrench, it gives it a little more leverage if you hook that on there like that, and remove those bolts that hold the caliper in place. Now, to remove the rotor take a rag and wipe the grease out of here, and there is a cotter pin right here. Take a good pair of needle nose pliers, if you can bend it up and then pull it out that's a good thing. Sometimes what's easiest to do is just take the ends and bend them and break them off, that makes it easy to pull out. This one's coming out fairly easily. This truck has a 27mm bolt, and it's not uncommon to be able to put this on there and just undo it by hand. You don't tighten this bolt up significantly. Take the bolt off, now the bearing assembly, the washer comes off, along with my rotor. The bearing stays put for now. Take that out so that it doesn't fall out.
I need to clarify for you, you're going to see me working on the old rotor that I tool off the truck, and then you're going to see me working on a new rotor. I want this video to talk to if you have a good rotor, you need to take the bearings out, take the bearing races out, and then reinstall the bearing races and the bearings. I need to put new rotors on this truck because the old ones are worn out, so that's why you see me working on two different rotors. I show you how to remove the rear seal and the races using the old rotor, and then I show you how to reinstall the race in the old rotor using the old rotor and the old race, because my new rotor came with the races installed. Generally, when you replace just bearings, you replace the bearings and races. I show you how to do that with the old rotor.
We've got a seal in here, so what you want to do is take a pair of pliers, lay them across like that, take a screw driver, and carefully pop that seal right up and out. A little freeze frame here. I'll tell you, I admit I was shocked at how easily that came out. You didn't see the look on my face on the camera because my face isn't on the camera. Generally you'll have to work a little harder at pulling the seal out than that. Like I said, for some reason it kind of popped right out, but that's how you do it. You put your pliers or another screw driver across there and use that as a lever, and put your screw driver in underneath, and pry it up and out. Now, inside is your inner bearing. Again, take some paper towel and just try and excavate as much of the grease out as possible.
Next we need to remove the bearing race. The race is this surface here, and it can wear just like the bearing. From the back side you can see that there is a surface, if you put your fingernail in, you can see that there's a surface that you can grab onto. You want to turn your rotor over, and I'm going to use this crew driver to point it out, right down in here there is that back side of that race. What we want to use is an impact tool with a nice flat head, and rounded so it doesn't scratch the rotor. We put that tool right down on the back of that race, and you want to hit it on one side, then hit it on the other side. Hit it back in here. You want to keep hitting it on different sides so that you drive the race out uniformly, you don't want to try and drive one side out all at one time. Keep hitting it in different positions. Here is that race out.
Another freeze frame here. I drove the race out of the back side of the rotor. There's also a race on the front side of the rotor that you want to drive out. Now in this next scene I'm going to reinstall the old race in the old rotor, and I'm only doing this not because I'm reusing it, but I'm doing it to show you how to do it. The reason I'm using the old race on the old rotor is because the new rotors from 1A Auto that I reinstall on this truck come with the race installed already, so I didn't really think it was necessary to drive a new race out of a new rotor just to drive it back in.
To reinstall it I've got a race installation tool, this is the right tool to do it. You just want to drop the race down in there, then this tool should be basically the exact same size as the race, maybe a little smaller. Just make sure that you drive it straight down in. You need to have a metal tool to do this, because you need to make sure that it goes straight, and you need to make sure that you're hitting it nice and firm. Now once I make a nice solid sound with the hammer I know it's all the way seeded.
One last freeze frame here. Obviously you would also repeat that step for the front or the outer nearing race, and now you're going to see me working on a brand new rotor with hub. It's just picking up where this one left off with the rotor that I'm actually going to install on the truck.
Here's my new rotor and hub from 1A Auto, with the race installed. I'm going to take a good amount of wheel bearing grease and coat the inside of the hub. I'm going to put a light coat on the race itself. You don't want to have globs on the race; you just want to have a nice light coat on there. Now I'm going to take my bearing and I'm going to work grease right into the cracks where I can see the ends of the roller. On the front side I'm going to work it right into this crack here, then I'm going to coat the rollers outside, not quite so much, just a good coating. I'm going to take my finger and wipe out the inside here, I don't want any big globs of grease in there. Now drop the bearing right in. I'm going to take my seal and drop it on like that. You can use a piece of wood or something like that; I'm just using a larger block of metal, a larger bearing installer. Just make sure that that's nice and evenly installed. I'm going to take the rotor, keep it on the plastic, flip it over, and I'm going to take some grease and just like on the back side, just pack it in there a little bit. Let a light coating stay on the race itself, but not a lot.
Take some paper towels; wipe off your spindle here. You want to check for any ... run your finger on here with a little grease on it. I can see some markings here, but there's no real wear on the spindle. The two surfaces, one here where the inner bearing is, and here where the outer bearing is, there's no real wear on the spindle, so the bearings weren't spinning, which is good. Put the grease on the outer bearing; pack it into that crevice on the back. Put out rotor in place, notice I'm trying not to touch the rotor a lot with my greasy fingers. We've got our bearing in place. Clean the grease off out washer, put the washer on, put our bolt on. We're going to take our ratchet and we're going to pull it a little bit tight, and we're going to spin the rotor around a little bit. We're going to loosen this up, and then we're going to pull it tight again just barely, probably two or three foot pounds, not a lot. We're going to put out nut back on. We're going to pull it kind of tight, we're going to rotate the rotor a little bit, that seats the bearings. We're going to loosen this, then we're going to bring it so it's just starting to seat, then you pull it just a little bit, probably two or three foot pounds. This comes through, grab the end, bend it over, and then that's not going to come out.
We're going to put our dust cap back on and make sure that there's no harmful dust in it. From here on out I'm going to speed through putting the brakes back together. If you want to see this in regular speed, just check out our other videos, we have it in more detail there. There are two important last steps: torque the lug nuts, obviously, to a hundred foot pounds each, and then make sure whenever you take your brakes apart, make sure you pump your brakes before hand, and also do a test stop from five or ten miles an hour before you take your car out on the road.
Tools used
Tools used
Tools used
Brought to you by 1AAuto.com. Your source for quality replacement parts and the best service on the internet. This video is part two of a two part series. We will pick it up and replay a couple of scenes from the first video. We are showing you how to do a brake job, a front brake job, on this 2001 S-10, and this is a two-wheel drive truck. Here we'll go through just a quick review of the tools that you're going to need.
Now I'm going to take my seal and drop it on like that. You can use a piece of wood, or something like that. I'm just using a larger block of metal, a larger bearing installer. Just make sure that that's nice and evenly installed. Take our rotor, keep it on the plastic, flip it over. We're just going to take some grease and, just like on the back side, just kind of pack it in there a little bit. Let a light coating stay on the rings itself, but not a lot. Take some paper towels, wipe off your spindle here. You want to check for any - You can just run your finger on here with a little grease on it. I can see some markings here, but there's no real wear on the spindle. The two surfaces, one here where the inner bearing is, and here where the outer bearing is, there's no real wear on the spindle, so the bearings weren't spinning good. Take control with the grease on the outer bearing. Pack it into that crevice on the back.
Put our rotor in place. Notice I'm just trying not to touch the rotor a lot with my greasy fingers. We've got our bearing in place. Clean the ugly grease off of our washer. Put the washer on. Put our bolt on. We're putting it on there. We got to take our ratchet and we're going to pull it a little bit tight, and we're going to spin the rotor around a little bit. We're going to loosen this up and we're going to pull it tight again. Just barely, probably like two or three foot pounds, not a lot. Next, we'll put our nut back on. We're going to pull it kind of tight. We're going to just rotate the rotor a little bit that seats the bearings, and then you're going to loosen this. Then we're going to bring it so it's just starting to seat, and you pull it just a little bit, probably two or three foot pounds. Put this on through and then grab the end, bend it over, and it's not going to come off.
We're going to put our dust cap back on and make sure there's no harmful dust in it. Now use mineral spirits or break parts cleaner, make sure you don't have any grease on the rotor surface. Also do the inside. Now we're going to take our calipers and we're going to push these sleeves out. Wire brush them, make sure there's no deep grooves, or any grooves on them really. All we need to do is push this piston back in. As you can see, I've got a big C-clamp on there, using my old brake pad and push on the piston. As I tighten the C-clamp, the piston goes back into the caliper. This should do just - This will require a little bit of pressure, but it should do it pretty easily. That's the way you know that the caliper is still in good shape. Here's my inner pad, comes with a little clip. Install that into the hole, and then pull it down and on, like that. Make sure you don't get any grease or anything on the pad. Install your pad into the caliper. We've got some pretty good scale on these, so I'm just using a screwdriver, scraping it off first. Then I'll go back with the wire brush. Your outer pad. There's a wear tab on this inner pad. You want to make sure that wear tab goes to the bottom. Put the caliper right down on, it's going to grab hold of the pads.
We've got our caliper bolts all cleaned up. Use some medium grit sandpaper if you need to. You just want to make sure you get all the stuff off them. Then put a nice fine coating of anti-seize on here. You could also use some grease or something. We're also going to put it on these collars here. These should go in. I'm just going to fast-forward here as I put those bolts in with my 3/8 Allen wrench. Then I use my other larger combination wrench for some extra torque when I'm tightening them. These bolts should be tightened between 45 and 50 foot pounds. I use the wrench. Put it on the Allen wrench for some leverage and pull it pretty tight, and then straighten the wheels out so I can put the tires on. Keeping the speed going, I've installed the wheel and tire back on, put the lug nuts on by hand first, and then I'll use my impact wrench just to tighten them up preliminarily.
I'll torque these to 100 foot pounds using a star pattern. Speed up as I finish torqueing. When I say use a star pattern, I just trace the bolts in a pattern like a star. Basically, like you would draw a star, and then put the center cap on, and install the plastic lug covers. Use your socket just to tighten the lug covers up until they click. Very important, pump your brakes and then do a trial stop from 5 miles an hour before you road test your vehicle.
We hope this helps you out. Brought to you by www.1AAuto.com, your source for quality replacement parts and the best service on the internet. Please feel free to call us Toll Free, 888-844-3393. We're the company that's here for you on the internet, and in person.
Tools used
Brought to you by 1AAuto.com, your source for quality replacement parts and the best service on the internet. Hi, I'm Mike Green. I'm one of the owners of 1A Auto. I want to help you save time and money repairing and maintaining your vehicle. I'm going to use my 20 plus years experience restoring and repairing cars and trucks like this to show you the correct way to install parts from 1AAuto.com. The right parts installed correctly, that's going to save you time and money. Thank you, and enjoy the video.
This video is part one of a two part series. We're going to show you how to remove and replace the front brakes on this 2001 S10 pickup and this vehicle is a two wheel drive. In this video, we take you from removing the brakes to getting the new rotors ready for installation. Tools you'll need for this job are jack and jack stands, 19 mm socket and ratchet or your lug wrench, a 3/8ths Allen wrench, a combination wrench for some more leverage and you'll see what I mean, wire brush or some medium sandpaper to clean up some of the bolts, 27 mm socket and ratchet, pliers, a torque wrench, bearing grease and a hammer and block of wood to drive in the seal on the back of your rotor.
Okay, we'll speed up through the first step. Use your socket or your lug wrench and remove the lug nut caps and then remove the wheel center cap. If you don't have the benefit of air tools as I do here, you'll want to loosen your lug nuts while your tire's on the ground first, then raise and support the vehicle, remove the lug nuts and remove the wheel. Okay, so now a quick inspection of the brakes. You can see this pad actually looks pretty good up here. It's got pretty good life left on the outer. Little finger test of the rotor, pretty smooth on this side. Then looking at our inner pad, I'm turning the rotor right there, you can see this is the metal of the pad right here, its right against the rotor. Then you can see right down here the metal of the pad against the rotor and you can hear it.
If you feel on the backside, and I'll show you this after I take the disc off, there are significant grooves worn into this rotor. Next we'll remove the caliper and one thing I'm going to do is I'm going to use a large screwdriver to pry out here and then I'm going to remove two bolts; one here and then one right down here. Here is the body of our caliper and here is the caliper piston. Our brakes are so worn that our caliper piston is way out, so what I'm going to do is use a large screwdriver, put it in there, and I'm prying out. If you watch the piston, it actually starts moving back into the caliper. Looks like I've gotten them to move a little bit. This also helps you to get the calipers off, so you can see now that my pads are not right against the disc.
Next you'll want to remove the two caliper bolts with a 3/8ths Allen wrench inserted into the bolt. Then take a good sized wrench, put it onto the Allen wrench, give you some more leverage, start loosening up that bolt. I'm just going to fast forward here, because I use the Allen wrench and my other wrench for leverage and remove those two bolts that hold the calipers. With those two bolts out, the caliper comes off, our outside pad comes right out and our inside pad will come out. To remove the rotor, take a rag, wipe the grease out of here, and there is a cotter pin right here. If you're going to remove your rotor, then use a screwdriver and hammer and remove your dust cap. Ignore the wheel and tire that's still on there, this was just shot kind of out of order. Take a good pair of needle head pliers, if you can bend it up, pull it out. That's a good thing, sometimes what's easiest to do is just take the ends and bend them, break them off, and that makes it easy to pull out. This one's coming out fairly easily.
This truck has a 27 mm bolt and it's not uncommon to be able to put this on there and just undo it by hand. You don't tighten this bolt up significantly. Take the bolt off. The bearing assembly, the washer comes right off. Take off my rotor, the bearing stays put for now and we'll take that out so it doesn't fall out. Here's my new rotor and hub from 1A Auto with the race installed. I'm going to take a good amount of wheel bearing grease and coat the inside of the hub. I'm going to put a light coat on the race itself. You don't want to have globs on the race, you just want to have a nice, light coat on there. Then I'm going to take my bearing and I'm going to work grease right into the cracks where I can see the bends of the rollers. It's in the front side, we'll work it right into this crack right here and I'm going to kind of coat the roller; the roller's outside. Not quite so much, just a good coating. Then I'm going to take my finger and wipe out the inside here, don't want any big globs of grease in there.
Now drop my bearing right in. Now I'm going to take my seal and drop it all in like that. You can use a piece of wood or something like that, I'm just using a larger block of metal, larger bearing installer, just to make sure that's nice and evenly installed. I'll take the rotor, keep it from the plastic, flip it over, and then we're just going to take some grease and just like on the backside, pack it in there a little bit. Let a light coating stay on the race itself, but not a lot. We'll end this video here, and if you want to see the rest of putting this back together, reinstalling it, just search for the same video with part two.
We hope this helps you out, brought to you by www.1AAuto.com, your source for quality replacement parts and the best service on the internet. Please feel free to call us toll free, 888-844-3393. We're the company that's here for you on the internet and in person.
Tools used