Returns: Parts with electrical components cannot be returned once installed.
Attention California Customers:
WARNING: This product can expose you to chemicals including Lead and Lead Compounds, which are known to the State of California to cause cancer, and birth defects or other reproductive harm. For more information, go to www.P65Warnings.ca.gov.
Lifetime Warranty
This item is backed by our limited lifetime warranty. In the event that this item should fail due to manufacturing defects during intended use, we will replace the part free of charge. This warranty covers the cost of the part only.
Returns: Parts with electrical components cannot be returned once installed.
FREE Shipping is standard on Orders shipped to the lower 48 States (Contiguous United States). Standard shipping charges apply to Hawaii, Alaska and US Territories. Shipping is not available to Canada.
Expedited is available on checkout to the United States, excluding Alaska, Hawaii and US Territories as well as P.O. Boxes and APO/FPO/DPO addresses. Final shipping costs are available at checkout.
How to Replace Fan Control Switch 1995-99 GMC K1500
Created on:
Tools used
Socket Extensions
Flat Blade Screwdriver
5.5mm Socket
7mm Socket
Ratchet
1. Removing the Dash Panel
Tilt the steering column to the lowest position
Turn the key to the run position
Put the gear selector in the lower position
Pull out the dash panel
Disconnect the electrical connectors
2. Removing the HVAC Control Unit
Pop the control unit forward and out
Disconnect the wiring harnesses
3. Removing the Fan Control
Remove the 5.5mm bolts on the back of the control
Pry the control out
4. Installing the Fan Control
Snap the switch into place
Tighten the 5.5mm bolt
5. Installing the HVAC Control Unit
Connect the wiring harnesses to the control unit
Press the HVAC into place
6. Installing the Dash Panel
Connect the electrical connectors
Press the dash into place
Hi, I'm Mike from 1AAuto. We've been selling auto parts for over 30 years! We're dedicated to delivering quality auto parts, expert customer service, and fast and free shipping, all backed by our 100% satisfaction guarantee. So visit us at 1AAuto.com, your trusted source for quality auto parts.
In this video, we're going to be working with our 1996 GMC Sierra K1500. We're going to show you how to remove and replace your vehicle's fan speed control switch.
If you like this video, please click subscribe. We have a ton more information on this truck, as well as many other makes and models. If you need this part for your truck, you can follow the link down in the description over to 1AAuto.com.
Here are the items you'll need for this repair: 5.5mm and 7mm socket, ratchet, and socket extensions, flat blade screwdriver
Tilt your steering column to the lowest position. Turn the key to the run position. Our battery is disconnected. This will work either way. Put your foot on the brake and put the gear selector in the lowest position. You can then simply put your fingers behind the dash panel and carefully go around. Open the cup holder a little to get that clip out, and pop all the clips out. You got to scooch it forward and then pop that rear panel over the instrument cluster up, so you can move it around a little. We'll then disconnect all of the electrical connectors behind our dash.
Now this connector is a little tricky. You have this little “T” here on top of the push button. That needs to be depressed to just the right level to sneak it under. It's almost easier to use a flat blade screwdriver, pry it down and back. You can then push down and release the connector from the four-wheel drive selector buttons. Flip the panel out and release the headlight switch connector as well. You can now remove the entire dash panel from the vehicle.
The HVAC control unit simply pops forward and out. Disconnect the connectors. Simply pry up the tab on each side of this connector and then slide that out. Now this HVAC control unit can be replaced as an entire assembly. The only issue you're having is with the heater fan controls. You can simply use a five and a half millimeter socket and a ratchet to remove this bolt here. Simply pry back all of the little hooks securing the switch and slide it out.
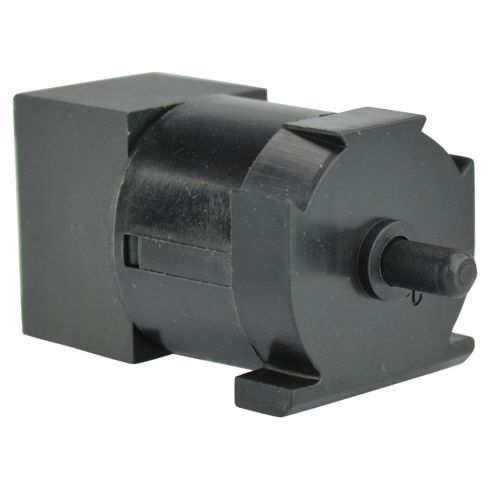
Here we have our old heater fan control switch that we remove from our vehicle and our new part from 1AAuto.com.
As you could see, these parts are exactly the same with the same connectors, same mounting pins, and the same pin for the dial on the front. If your heater fan control isn't functioning like it should, this new part from 1A Auto can save you from replacing the entire switch panel assembly and fix you up right. Snap the new switch into place. Reinstall the retainer on the back and tighten up your five and a half millimeter screw with the socket and ratchet.
Reinstall the electrical connections on the heater control panel. Line it up and lock it back into place. Reconnect the electrical connectors. Don't forget to do the headlight switch on the other side. Line the dash back up and pop all of the retainers back into place. Remember to pull the cup holder out because of that lip, and you're good to go.
Thanks for watching. Visit us at 1AAuto.com for quality auto parts, fast and free shipping, and the best customer service in the industry.
HCA41496
In Stock
Product Reviews
Loading reviews
Customer Q&A
No questions have been asked about this item.
Customer service
877-844-3393
Monday - Friday 8:00am - 9:30pm ET Saturday - Sunday 8:00am - 4:30pm ET
GMC is a registered trademark of General Motors Company. 1A Auto is not affiliated with or sponsored by GMC or General Motors Company.See all trademarks.
Enter Vehicle Year Make Model
Specify your vehicle's year, make and model to guarantee fit.
Year
Make
Model
Options
Drivetrain
This part doesn’t fit a . Select from parts that fit.