Replaces
This part doesn’t fit a . Select from parts that fit.
Frequently bought together
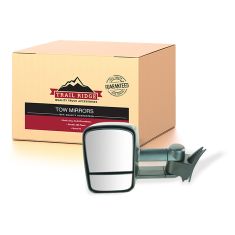
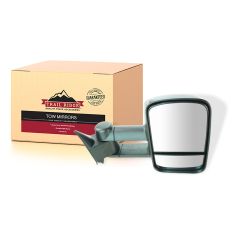
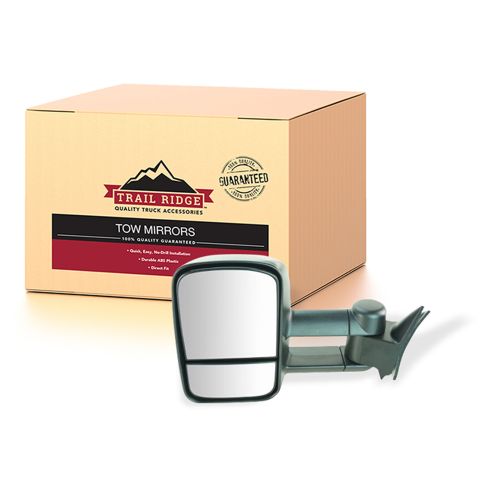
Part Details
Exact fit - To obtain proper fit and function confirm your vehicle has the exact mirror options listed.
Trusted Quality: Trail Ridge Truck Accessories are developed and built with a promise to provide high quality, durable parts for your truck; backed by the best warranty in the automotive industry. Manufactured from the highest quality materials and constructed to meet or exceed OEM standards. Every Trail Ridge part is rigorously tested ensuring superior fit, function, and durability. Quality, trusted value, and hassle-free installation backed by our 100% satisfaction guarantee.
Features and Benefits
Item Condition:
New
Attention California Customers:
 WARNING: This product can expose you to chemicals including Chromium (Hexavalent Compounds), which is known to the State of California to cause cancer, and birth defects or other reproductive harm. For more information, go to www.P65Warnings.ca.gov
Lifetime Warranty
This item is backed by our limited lifetime warranty. In the event that this item should fail due to manufacturing defects during intended use, we will replace the part free of charge. This warranty covers the cost of the part only.
FREE Shipping is standard on orders shipped to the lower 48 States (Contiguous United States). Standard shipping charges apply to Hawaii and Alaska.
Shipping is not available to a P.O. Box, APO/FPO/DPO addresses, US Territories, or Canada for this item.
Expedited is available on checkout to the United States, excluding Alaska, Hawaii.
Final shipping costs are available at checkout.


Created on:
Tools used
Brought to you by 1AAuto.com, your source for quality replacement parts and the best service on the Internet.
Hi, I'm Don from 1A Auto. I hope this how-to video helps you out, and the next time you need a part for your vehicle, think of 1AAuto.com. Thanks.
In this video, we're going to show you how to replace a side mirror on this 1996 Chevy Tahoe. We show you on the driver's side but the passenger's side is the same procedure. The items you'll need for this include new side mirrors from 1AAuto.com, a 10mm socket and ratchet with an extension and a flat blade screwdriver.
Start off by prying off this triangular panel. Then remove this foam. Using a flat blade screwdriver, just pry back on that tab and pull the harness free. Then you want to remove this 10mm nut, this 10mm nut, and this 10mm nut. We'll fast-forward as Don removes the three of those. Then pull your mirror free.
Up front is the old mirror, behind it is the new one from 1AAuto. You can see they're identical, and they're going to mount exactly the same. Feed your harness back into the door. Then push those studs through the door. Then replace those three 10mm nuts. You'll see he puts them into the socket, feeds them onto the stud, tightens those preliminary, does each of them, and then tightens them all up. Now, reconnect your harness. Reinsert that foam, and then push that triangular panel back into place. You're all set.
We hope this video helps you out. Brought to you by www.1AAuto.com, your source for quality replacement parts and the best service on the Internet. Please feel free to call us toll-free, 888-844-3393. We're the company that's here for you on the Internet and in person.
Tools used
So to start replacing the mirror, you're gonna need a nice plastic trim tool so you can get in between the door panel which I have removed. You don't necessarily need to do that, by the way. And this piece right here. All you would do is go right in between the two of them, lift this up and then pull away. And it should pop right up and free. You're gonna see a little hooky-doo there and one right there and that's just how it's gonna go back on sliding down nice and easy. Once you have that removed, you can use that same plastic trim tool and just get this foam out of here. I try not to ruin it because I'm gonna put it back in when I'm done.
At this point, we can see the wiring. Just lift that up to approximately where you can get to it and then you're gonna see this little tab right there. you would just wanna pull that away and separate the two pieces. Those look good. I'll set that down in there right now. Set this aside. Next you wanna remove your three mounting nuts. There's gonna be nuts that hold on to the studs that are part of the mirror. We'll take all three of those out of there and then we can draw the mirror out. To remove these, you can use something as simple as a ratchet with a socket or, of course, you can use a nice ratcheting wrench which you'll probably have to use because it's gonna be a kinda tight space right here. So I would just go with the ratchet wrench. Put that on there.
Come on, baby. There's one. Do the same to the rest. Before I go ahead and take this one off, I just wanna let you know that I started one of the top nuts on there just a teeny bit just to keep the mirror from falling down while I take off this last nut. There it is. So now I'm just gonna hold that mirror from the outside and I'm gonna remove this nut. And I'm just going to carefully draw it right out of the door. There it is, friends.
So we're gonna take our new mirror. We're gonna take this nice rubber pad. I'll slide this through there. And then of course, get it lined up. And then I like to just kinda press it in, get everything nice and situated. That looks great. Now let's go ahead and slide this through the door panel from the outside and have our nuts ready to start them all on. So I'm just coming up right and along here. And put the wiring through first. Now get those studs lined up. You wanna be very careful for the pane, of course. I have to come underneath my window louver. I'll just slide this in. There we are. All right. Starting those nuts. Okay. All three are started. Our wire is nice and out in the open. There's no way that it can get pinched anywhere. Let's go ahead and snug them up.
Okay. All three of those are nice and tight. I'm just gonna grab that mirror, give it a nice shake, make sure it's nice and secure and also make sure it's seated all the way along the door. This looks perfect. The next thing we're gonna do is connect in our wiring. Just gonna find that little harness. Just compare the two. This looks good. Slide it in. Perfect. Let's go ahead and tuck this down in there so it's nice and safe. Make sure there's no areas where anything could get caught on or put a tug on any wires. Now we're gonna put this back in here. That sits there perfect. Now it's gonna be time to get this little triangular piece on here. If you look right along there, that's gonna be the area that needs to run along the ridge of your door panel which, like I said, isn't necessarily on here now but you'll have to imagine it. Then this right here is gonna have to slide down over that. So you just come over the top of everything, look down, line everything up and then press down. That should lock in nice and secure. Give it a nice tug. Make sure it doesn't fall off. The next thing we wanna do is of course test the mirror to make sure it's functioning like it should. So I'm gonna set my switch to the left mirror because that's the one I replaced. Go left, right, down, up. This works perfectly. The next thing you'd wanna do of course is to set it to the height that you need it for optimal viewing purposes.