Replaces


Recommended for your 2008 Chevrolet Tahoe
Frequently bought together
Part Details
Specifications
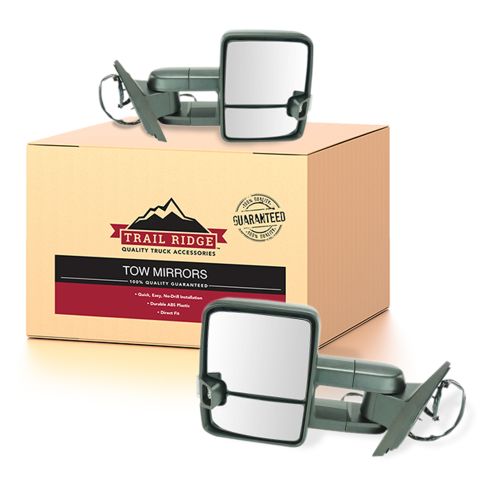
About Trail Ridge:
Trail Ridge Truck Accessories are developed and built with a promise to provide high quality, durable parts for your truck; backed by the best warranty in the automotive industry. Manufactured from the highest quality materials and constructed to meet or exceed OEM standards. Every Trail Ridge part is rigorously tested ensuring superior fit, function, and durability. Quality, trusted value, and hassle-free installation backed by our 100% satisfaction guarantee.
Upgraded Mirrors: These upgraded mirrors fit and function like the originals. Add-on mirror upgrades may require additional wiring for complete operation and installation.
Attention California Customers:
 WARNING: This product can expose you to chemicals including Chromium (Hexavalent Compounds), which is known to the State of California to cause cancer, and birth defects or other reproductive harm. For more information, go to www.P65Warnings.ca.gov
Lifetime Warranty
This item is backed by our limited lifetime warranty. In the event that this item should fail due to manufacturing defects during intended use, we will replace the part free of charge. This warranty covers the cost of the part only.
FREE Shipping is standard on orders shipped to the lower 48 States (Contiguous United States). Standard shipping charges apply to Hawaii and Alaska.
Shipping is not available to a P.O. Box, APO/FPO/DPO addresses, US Territories, or Canada for this item.
Expedited is available on checkout to the United States, excluding Alaska, Hawaii.
Final shipping costs are available at checkout.
Created on:
Tools used
Mike:
Hi, I'm Mike from 1AAuto. We've been selling auto parts for over 30 years.Sue:
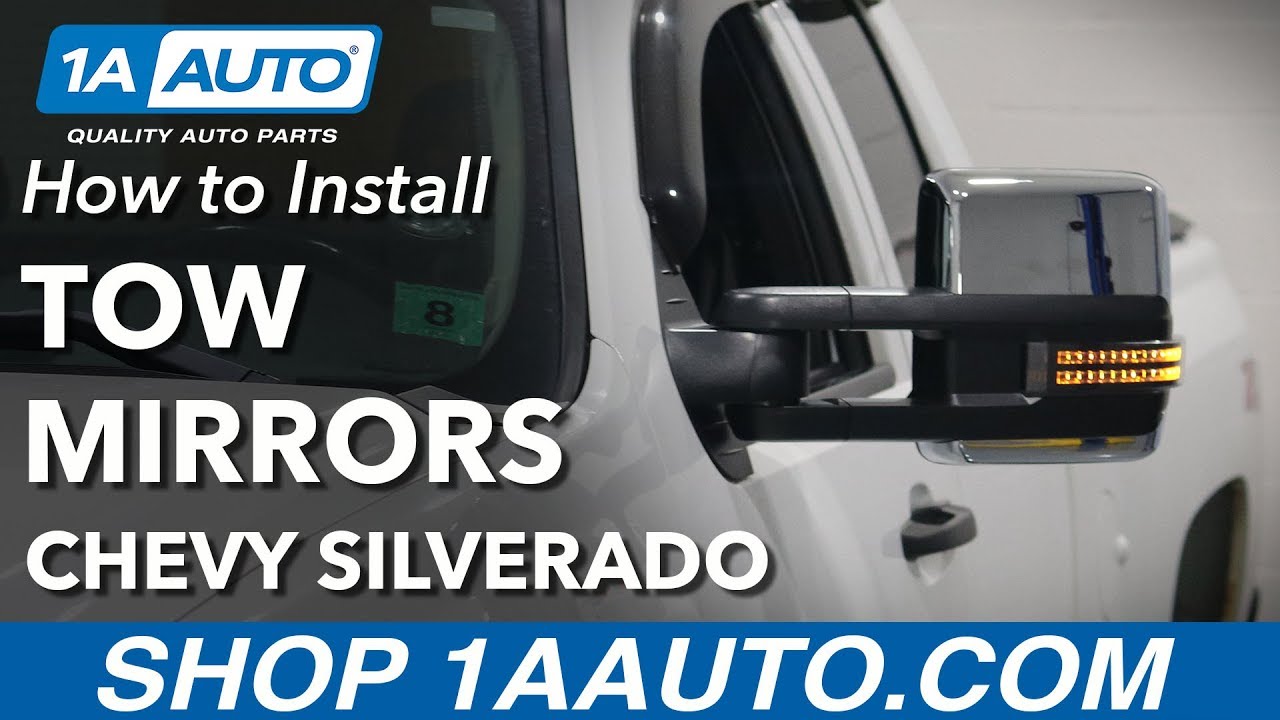
Hi, everyone. This is Sue from 1AAuto. Today, we're going to be installing these Trail Ridge tow mirrors on our 2011 Silverado. These mirrors come with backup spotlights, they extend, and they have the blinker inside of them. We're going to wire them up, and also show you the option package to go from black to chrome. If you need mirrors for your vehicle, click on the link in the description and head on over to 1AAuto.com.
We're going to replace these driver mirror and passenger mirror with upgraded Trail Ridge mirrors. These ones have been on for several years now, and they got kind of beat up. They never hooked up the backup light. We're going to show you how to hook up the backup spotlights, and wire them in for you.
We're going to use a trim tool and I'm going to pop off the cover first that protects the mounting bolts for the mirror. That's just a quick twist at the top. You can see the clips, where they go. We'll set that aside. I'm going to move straight from right to left over for you. This piece comes off the handle. Just give it a little pop, hopefully. There's your clip on the bottom, clip on the top.
I'm going to move down to the inner handle here in this little trap door. Going to pop that open. I like to use a little pocket screwdriver, seems to be a little bit easier. Then, the handle here. We've got another cover back here. Pop that free. The last thing is the door lock. Has a little notch. Going to pop that out. That doesn't come all the way out. It stays like that, because it's just a clip that pushes in when we readjust it on that rod.
There is five mounting bolts for this door panel. It's a 10mm socket. There's just one missing, so people have been in the door before. Not uncommon. I'm just going to loosen these up. Take these pieces out. Leave the bolts right into place, and I can set that aside. The inner door handle bolts. Like I said, they're all 10mm sockets. Then two on the door handle area. Going to pop up the main window switch here. This end guides in this way, so we're going to pop it in the rear. Then slide it out the front. Try not to ever break that clip.
We're just going to dis-unplug all the clips here. Sometimes it helps if you have a tool that you can push down, or if you can manipulate it. These are tabs. This one's a little different than the others. It helps if you have a door trim tool to guide it in there and pull up on that tab. Because it's going to go out this way. Now we're ready to pull up on the panel. Just going to tuck that in. There's also a harness right here. See the body clip right there, just going to push that through.
There's pop clips around the edge, so we can take a trim tool, or see if your fingers fit in. In this case, it's been off quite a few times. Now once all the clips are pushed out, go straight up. Then rest it. Now, this cable has, the housing broke, so last person in here, looks like they pure a wire tie in. We're just going to cut free that wire tie, and then slide the cable out of the handle.
With your cutting tools, just snap that wire. That tie out of the way. I'll see if I can get this harness out of the way for you. That normally, we'd clip in there, but that housing's cracked and broken. Now you're going to, see how that cable goes into the, that snaps in that way? The last person got real ingenious and drilled a hole here and a hole here, so that they could run this tie through and hold it in there steady. It seems to be working.
Now, we're going to remove the door insulation. The reason for that is, because the wires for this mirror run down through clips and into this. Normally, I could just pull this out and just run it through, but I'm going to be wiring this. I want you guys to get a full vision of what's going on here. Like I said, this door panel's been off several times. Probably from the last installation.
This is the factory harness right here. Comes with this plug. This one goes to the mirror. The aftermarket mirror that was installed a couple years ago, we're just going to pull it right through here. Undo the wire clips. Installation foam. Set that aside. This mirror has three mounting bolts. Those studs come through the door frame. It has three 10mm head nuts with washers on them. I'm going to use a 10mm socket, I'm just going to loosen these up. Going to leave the top one on to anchor it. I'm going to take the two bottom nuts off.
Before I start spinning that, I'm going to come out and support that. This door has a rain guard on it. It's not that tricky. Just got to slide it on and through. I'm going to pull the bottom part out first. See how it just kinda right up in there like that. Hold on to that, run the harness through. Now we're ready to install the new one.
I'm just going to hang it on out here. Fish those wires right through the hole. Now, I'm going to go through the top first. Guide those studs in. There you go. I luckily left my mounting nuts close by. Be kind of difficult to chase them and hold this mirror at the same time. Set them all.
Before I snug it, I like to take a feel and maybe look at, make sure the trim is all lined up properly. It does have a nice little guide pin here. I have marks from the original mirror mounting, so I'm going to go with all that. Then I can snug it right down. The harnesses come with these body clips in them, which is a nice little feature. Might have to move it around, just to get it in the right spot. Just needs to come down just a smidge. I can line that right up with the factory hole. Same with the bottom one. Going to run this right through this door protector jamb. Going to come right out the other side.
If you couldn't get it to pull all the way through, you could just loosen up these two mounting bolts, which are 10mm head. We're going to let that fall through. Normally, I would just throw the panel back on, but right now, we're going to leave this out, because we're going to show you how to wire up the actual harness, so that the reverse spotlight works.
When it comes to wiring these mirrors for these nice reverse backup lights on the mirrors, they come with this kit, with all the scotch clips, and what you need to purchase are two add-a-fuse connectors, and a couple butt connectors.
This is the end that's going to connect to the harness here for the mirror operation. This is going to be over here freely. At the ends, where they ship them to you, they have them precut down here. First thing I'm going to do is undo the door jamb factory harness. Now, these are plastic clips that lock into the body and the door. They're just little tabs, so I'm going to push in with my body tool. Then you can see the harness is exposed. I'm going to do the same on this side. That way when I fish this through the door jamb, you got something more to, easier hopefully, flexible to work with.
I took the head off a wire tie and I taped it to the harness, so this way, I have something firm to pull on and guide it through. I'm going to guide it through here, and hopefully feel it flex around. This is going to take some patience and time. In the end, it is worth it, because these lights on this mirror are pretty awesome.
I started to fish my wire through. What I did was I scrunched up this harness, to be as small as it could be, like this. I have a pair of long gooseneck needle nose. Without damaging the harness, I can feel it in there, and I just ran this through. All the way through. Right out to the other side. As you can see right there. Tip just runs through. Then I grab the wire, and I squeezed it, and I just pulled it right out. Just took my time, gently pulled the wire out. Then I ran the harness right through.
That is the way I did it. You can try a coat hanger, wire coat hanger, you just got to be careful not to scratch the other harness wires, because you don't want water damage in the future. I know it's a lot of wire, but we don't know the exact amount we're going to need, so I'll cut it at the other end, once I'm done and installation is, prepping is done for the installation.
It's going to go through the frame hole right here. You can't miss it, it's a big lovely factory harness that runs right through here. There's plenty of room, my hands go right through, as you can see. It's right here on the driver's side kick panel by the e-brake. I'm going to pull the wires right through. These wires do have to run out to the battery junction. You want to get as much of the wires pulled through as you can.
I like to keep the wire taut, I don't want it to loop over and pinch itself when I pull on it. This is really a small wire. It can actually break a wire internally. Then, it won't work, and you'll be chasing that around for some time. We're going to fish it right through here. Follow the other harnesses right it. I want it to be protected. I'm going to actually end up taping it on the existing harness that's here. If you have wire loom, I strongly suggest using it. You want to keep any wire that has power running through it coated, because if it rubs on a metal door, you'll short circuit out.
This is wire loom. I'm going to run that right down inside there. Open it up, it's a split system. You just push the wires in. Anywhere that I can't secure the wires, I'm going to leave that loom on there. I'm going to end up taping this right here with some electrical tape.
When putting this harness boot back on, the plastic connector, you want to see the rubber guide? You want to make sure that goes right up that. Then you're going to just wrap that rubber around the plastic. Maybe you can use a pair of needle nose to help pull it over. You're going to go follow this process all the way around, so that the seal is complete when you click it on the door.
Push them back in until you hear them both click. Now you have a nice sealed harness in the door jamb.
I'm going to fish the wires out into the engine cavity. Over here, there's a rubber where the boot, that has a cable going through it. To access that, I'm going to pop this cover off this little wire junction box. I'm going to pull this down out of the way. There's a tab here and a tab here, they're identical on both sides, at a pivot point. I'm just going to squeeze the tabs and slide it down. Then I'm going to lift it up. Paying attention that this is a wiring harness and you really want to treat it with a little gentle hand. Now, I have exposed the boot that I'm going to be using.
We're going to remove this bracket, so you have a better visual with the camera, of seeing the boot that I'm going to locate to pull the cable harness through. Now I'm going to guide my harness through the rubber boot in the firewall. Now, I'm out the engine compartment, and I can see where my wire had been pulled right through. Now I'm going to finish pulling it through here. You can use a coat hanger, or, that boot is pretty accessible. Always helps to have someone help you too.
I took the liberty to inside, I took my harness and I laid it out straight, so that I wouldn't bind or catch anything. I'm going to take a look in two seconds, I'm going to go back in there, make sure I'm not wrapping around the brake pedal. It looks good in there. Nice, and it's almost going all the way through. This is where I'd like to use some more wire loom, or join it to some of the stuff that the factory had already installed. We're only going to go up to this fuse junction box. Not going to need this whole harness.
Like I said earlier, you don't know how much you're going to need for the door. Use the harness that it comes with for the full length, then cut it just to the length you need.
Reattach the water boot to the firewall, just by poking it in place there, snapping it in. Making sure I have enough wire left inside here, because we're going to attach this underneath to a harness that's going to go from the passenger side, and running over here, so that I can connect it here, for the feed.
I'm going to put this junction box back in place by putting the two round ears on the bottom right in that slot there, and just pushing forward and clicking. Now I'm going to put the cover back on. It gives pretty good self-description, this goes on the top, and the round piece goes on the bottom. This prong is going to go right inside there, and it's going to just snap right into place.
I'm just looking for a good place to run this. You want it to be free of anything. The e-brake pedal, your brake pedal. To do the passenger mirror and door panel, it's the same identical way as the driver's side. I've run my wires from my new mirror just like I did on the driver's side. I used some wire loom, I wire tied it secured, ran it through the door jamb, and I'm going to be running it across over to the driver's side. First, I'm going to put the door panel on and show you where to attach this to the new mirror.
This is the new mirror harness. You have a brown blue with a white tracer, that comes with the harness. Connect those two together if they haven't already been connected from the factory. Then, your red and white tracer and black and white tracer are going to connect to the yellow and orange side of the mirror harness. Guide the pins right up, see where the lock goes, slide it in, clicks. This'll be going into the actual harness from the factory. You see orange and white, you have orange and white wires with this. You know that's going to be the harness. Match it up. Snap it in.
Now we're getting ready to put the door panel on. Now I'm going to reinstall the inside passenger handle cable. You're going to put it through the aluminum notch there. Pull it tight and run it up through that little slot. Then click it in place, pushing. Now I can run the wires up through the switch hole, and I'm ready to mount. Making sure everything's in place. Make sure all the bolt holes line up.
This harness goes down inside here. You put the little piton, opposite hole. This one goes here. Connects. Not as many as the driver's side, because the driver's side has the mirror control and the four window control.
I previously installed the foam before I put the panel on. I'm going to line up each clip, all three clips, and snap it into place. Now, we're going to reinstall the inner handle. The forward handle, with our two bolts with the 10mm socket. Then we're going to install our door handle bolts, and then the two inner bolts by the armrest.
Now I'm going to install the door lock plastic sleeve. I'm going to put it down as far as I can. Two guide spots. Threaded rod's going to go inside there. Bring it up, so that you get the proper depth. Right before it thrusts and hits there, I'm just going to snap it in. Now I can put the trim on the passenger side handle. Put it in the right way. Guide it. Just snap it in. Then I'm going to put the armrest/handle one in. Last one is the inner door handle. This little guide right there, so it's in the back, and then the two clips.
Now that I've pulled the wire through the door jamb, and I'm running it along up underneath this plastic cover for the blower motor, right by the passenger foot, and it runs into the center. I'm just, I tape it up, so I ran it up and through there, out of the way, and up and out onto the driver side.
Here is my full harness that I installed from the driver's door, out to the junction box in the engine compartment. I'm going to cut these and that way, now I can splice these two wires together, to make a junction, and all red wires together to make a junction. On this case, I'm going to end up peeling these back, each one back, and using a waterproof butt connector, install that. Then I'm going to crimp that, need a crimping tool. This is a waterproof butt connector, because it's already got heat-shrink wrapped around it. I'm going to use my little torch and I'm going to melt those connectors together, when it comes time. That'll make a good seal. Then I'm going to end up cleaning it up with electrical tape, tying things up with cable ties. Making sure it's free from anyone kicking it.
Now, with all my wires connected, I can go install the fuse installers in the harness out by the junction block. I do that last, because I don't want any exposed wire once I plug it into the fuse box. I'm going to let those hang and come back and fix those after.
Now I'm in the engine compartment, where I'd run the wires up through that firewall earlier. I'm going to open up my junction box out here in the engine. There's a luck tag, gives you an arrow. Just pull on it, and pull up. Easier said than done. Pull up.
There's a description inside. There's a diesel and a gas, this is a gas engine, so we're going to be using this panel over here for description. I've already taken the liberty to look it over and there's an open fuse here that runs to the trailer wires, which will already be hardwired to factory for the backup lights. Then the other section for directionals is wired for the trailer. This vehicle doesn't have a trailer hitch on it. I can safely use those two plugs in this fuse box.
I have gotten my fuse taps, and I've set them aside. I'm going to make sure I got plenty of harness that I can electrical tape it to another loom, wire loom, or fill it with wire loom. I'm going to give it a safe cut right about here, and discard this wire.
Now I can join the fuse tap wire harness to the actual harness. Before I do any heat shrinking or finalizing, I'm going to plug everything in and make sure it works. Good news is, it's all working the way it's supposed to.
I'm going to unplug it now that we know it works, everything's good. You just want to heat it up, and the shrink wrap will melt right around it. There should be a glue inside here, so that helps seal it from water. Fish the wire loom down on the harness. Now I can reinstall the cover.
Got to be a little careful with an open flame. Inside a vehicle, and in the engine compartment. I think I have faith you already know that. Now, with everything connected and ready to go, I'm going to take my time, I'm going to tie it up with electrical tape, and some wire ties, and make sure it's clear of everything and anything. You won't even know I was here.
Now I'm going to put the driver's door panel back on. I'm just going to, once again, I like to clean this up a little, and to tape this in there. Make sure it's not hitting anything. I connected, make sure you connect your new mirror connector harness together. The mirror harness is the factory ... This is the harness from the factory. Those two connect together. The yellow and orange connect to the black and red wire that you ran through the door. This door panel's the exact same way as the passenger.
Now that we have our mirrors installed, the owner wants chrome covers. We're going to take off the black that it's shipped with, and we're going to install the chrome covers. On this design, there's a couple ways to do it. You could remove the glass, and then you take four screws out of the trim panel, and then you remove the plastic clips on the side. We found if we remove the black plastic, it's more flexible. We go in, and pop it, that comes right out. To install the bottom piece, you just reverse the process. Line those pins up on the top. Snap it up in.
Put it in here, and work my way around. Snap that black piece off. I'm going to put the bottom pins in. Snap right in. Now you're ready to go. Mike:
Thanks for watching. Visit us at 1AAuto.com for quality auto parts, fast and free shipping, and the best customer service in the industry.
Tools used
Brought to you by 1AAuto.com, your source for quality replacement parts and the best service on the Internet.
Hi, I'm Mike from 1A Auto. I hope this how-to video helps you out, and next time you need parts for your vehicle, think of 1AAuto.com. Thanks!
In this video, we're going to show you how to replace a mirror. This is an '07 Yukon Denali, pretty much the same for Denali, as well as the SLT and the Chevy LTZ series, both the SUVs and the trucks. We'll be showing you on the passenger side, but the driver side is the same procedure. You'll need a new mirror from 1AAuto.com. We sell a wide range of replacements painted, chrome, power, power-heated and then you'll need a small and regular-sized flat blade screwdriver, 10mm socket with a ratchet extension, and a door panel clip tool, or a putty knife.
Disconnect the battery. You want to open up the driver's door. The hood release lever has a safety latch. Move it to the right, and then lift the hood up. The battery is near the rear of the engine compartment on the passenger side with a 10mm nut on top of the negative battery cable. We'll loosen that 10mm nut, pull the battery cable up and off, and then put it to the side so it won't contact the terminal again.
There's a little square clip on the door lock that you want to pry out with a small flat blade screwdriver. Then use a small flat blade screwdriver to pry that panel out. Then there's a little panel in behind the door handle that you pry out. This is the same for either front door, and then you'll see there's a 10mm bolt there and two behind the door pull. Use the small flat blade screwdriver, pry out that square clip, pull that up and off, and then use a rag to help protect the paint and pry out the triangle that's at the top of the door. It pulls straight off, and then use a 10mm socket and ratchet with an extension and remove the three bolts. Use a screwdriver and a rag just to protect the door panel. Pry up on the switch panel, work your finger underneath, and pull it straight up. You pull it some, and then pry up in the front. The clips are located right at the front and right at the rear, and the harnesses are all connected with a connector that has this little tab that you press. Pull the connector down and out. You need to release the clips that hold the panel in. I've got a door panel clip tool and a rag again to protect the paint.
Work the panel clip tool underneath and around the clip, and then I'm going to put the screwdriver between the clip and a rag and pry out on the clip tool. You can hear it pop the clip out and I'll just repeat that. I usually try and get the first four on the back side and once you get those, then you can usually work your hand underneath to a point where you can feel where the clip is, and then pull firmly, and you'll release the clips. If your door panel has never been removed before, you'll need to remove the water shield from the door panel. There's a black clip, you can see there, that I'm trying to pry out. There are usually three or four of these on each panel, so you try and pull the clips out, or you can pull on the water shield and either pull the clip out of the same time or pull the water shield from around clip. Again, there's usually three or four of these on each panel. If your door panel has already been off though, a lot of times, they've already been removed. Now, pull the door panel up and out, and it's connected with the door handle cable. Looking in behind, there are couple of tabs that hold the handle cable in to the clip. Release the tabs, and then you can pull the cable out, and then out in the ball like that, and your door panel is separated.
You want to pull the harness that's connected to the mirror. There are three clips that clip the harness to the door. You can try and pull them off. You can see here, I'm actually pulling the tape from the clip. You see the white clip in the door, and then I'm not able to get the harness out. Remove this insulator, and there are a couple of more clips in behind there. Speed it up here. I just use a pair of needle-nose pliers and remove those clips. 10mm socket and ratchet with extension, there are three nuts that hold the mirror on, and I'll just fast-forward here as I remove those. Now here, I'm finishing up taking that last nut off. Then there's actually a clip that holds the mirror in. You can see, a good strike on the top breaks the clip free, and then you just have to work your harness out.
To install your new mirror, put it over in place, feed the connectors through, and the harness through. Make sure it mounts correctly and the mirror pad is on there correctly. Start the three 10mm nuts that hold it. I'll fast-forward here as we put those in and then tighten up. Clip the harness back into place, and pull it through the water shield correctly.
To reinstall, there are two larger clips at the bottom that you put into the door, and it will support the door panel while you reinstall the cable. Insert the ball of the cable into the handle, and then move it around and clip it into place. Make sure that you pull up all the harnesses through the opening. Then you lift the door panel up and push it back and down onto the window ledge clip. The entire top of the door goes in the clip, and then once you have the window ledge secured, then lock in the clips all the way around. Make sure you pull the door lock up and put the door lock knob back in. Slide it down on there, and then push the clip. Put the mirror insulator back in place. I like to load bolts into the socket and then put them into place. I'll just fast-forward here as I put all three of them in and tighten them up. Put the triangle back in place, the panel behind the door handle, and the panel behind the door pull. All the harnesses are color-coded and they only plug in one way. Re-plug those in, and then put the switch panel back in place. Reconnect your battery, then you should be all good to go. Put the negative battery cable back on the post, and 10mm socket and ratchet, and extension, and tighten it up.
Thanks for tuning in. We hope this video helped you out. Next time you need parts for your car, please visit 1AAuto.com. Also check out our other helpful how-to and diagnosis videos.
Tools used
Tools used
Tools used
Hi, I'm Mike from 1A Auto. We've been selling auto parts for over 30 years.
What's up guys? I'm Andy from 1A Auto. Today I'm going to show you how to install these manual tow mirrors on this 2008 Chevy Silverado work truck. If you need these parts or other parts for your vehicle, click the link in the description and head over to 1aauto.com.
Open the door. We're going to remove this window crank. We need a window crank removal tool. We're going to position the window crank in this up position right here. Take the tool. If you want to put it in the same location that it was, you could mark it before you take this off. We can get this. Just slide this down. There's a little pin, little clip you have to remove. Just push it down and then it slides right off.
Take this lock button off. I'm just going to use a pick tool. Just get in behind here, slide that little lock piece off and slide the button off. Next underneath here I'm going to take a trim tool. Just slide under here. You can use a pick also. Get underneath there. Slide this cover off.
Next we're going to take this cover off. Take my pick tool or trim tool, slide that cover off. The clip right there, clip right there. We're going to use a 10 millimeter socket, extension, and a ratchet. And there's three bolts, one bolt here and two bolts there. Take those out. Might have to hold this handle up a little bit to get this bolt out. Take that bolt out. Oops. Just use a magnet, take that bolt out.
Next we're going to take this trim piece off. Just use my trim tool behind here and pry. There's just clips that hold this on, three clips hold that on. Next I'm going to use a trim tool. I'm going to pop. There's clips holding the door panel on. Just go around the perimeter of the door panel. Pop it off. Oops. Those are all popped off. You should be able to release right there.
We're going to need to release the handle cable right here. There is two ears on the bottom of this door panel, so you can put it in service position so that you can leave it there while you're working. With the door panel hanging on the lower pins so that the door panel is in service position, we can access all three of the nuts that hold the mirror on so we can take that off at this point.
I'm just going to take my window crank. I am going to lower the window so that it's easier for me to grab the mirror while I'm working on it. I'll take a 10 millimeter socket, loosen up these nuts. Before I take this all the way out, I'm going to support the mirror. Take that nut off.
There's a tab in here that needs to be pinched. I'm just going to take some needle nose pliers, get in there and pinch the tab. Squeeze that nut off and I can grab the mirror. Just slide it up, just like that. Here's where that tab is. Just took the needle nose pliers and just squeezed that, right there.
Here's our old mirror. Here's our new manual telescoping tow mirror from 1aauto.com. As you can see, it telescopes in and out. The mounting bracket is the same. It comes with the gasket and also the nuts. On the front side the mirror is a lot bigger and it telescopes out a lot further than the original. Get yours at 1aauto.com. You'll be ready to rock and roll.
Now I'm going to take these nuts off the new mirror before we slide it on. If there was a gasket on the inside of the door panel or the outside of the door panel, take the gasket off. It's the gasket on the new one. Line the studs up with the holes. Take and start the nut on the top. Once you get that started, then you can let go of the mirror. Get the other nuts on. There's no wires so you don't have to worry about feeding any wires.
Now I'll take my 10 millimeter socket, extension, and ratchet and just snug these up. If you need to, when you want to adjust these, you're just going to use your hand because they are manual mirrors. Just push down whichever direction you want to go. Same with the bottom. The bottom moves as well, just like that. And then also, you can telescope it out.
We can take the door panel, and make sure this lock rod goes through that, all right there. That's good right there. Get this little door pin in the hole on this side. That's in position. Make sure the rest is there. Once that's all, all the pins are lined up, can start pushing it on.
I'll reattach this. If you had a foam insulator, you would put that in there. Now this vehicle doesn't have one. Align these pins up. Lock that in place. We're going to take these two bolts right underneath the handle, use our 10 millimeter socket, extension, and ratchet. Just get that one started and then I'll get the other one started. Snug it up. Then I'll snug up the other one. And down below here, underneath the handle, get this bolt in. Tighten it down. Snug it down.
Take these two covers. This one's going to go down below. There's a little pin right there that goes through that hole so you know which direction it goes. Put that in position. Lock it in place. This one is going to go in this position. There's a pin, a little slot there. Lock that in place.
Now I'm going to install the new crank handle. Remember this washer is going to go in the back side. Just put this into position. Put it on the same way that you took off the old handle. Get it lined up. Make sure it's locked in place. And it's good to go.
We'll take this lock button. Make sure this lock rod is all the way up. Take the button, slide it into position, and then push down on the lock part. Make sure it works properly. And you're all set.
Thanks for watching. Visit us at 1aauto.com for quality auto parts, fast and free shipping, and the best customer service in the industry.
Tools used
Hi, I'm Mike from 1A Auto, we've been selling auto parts for over 30 years.
What's up guys, I'm Andy from 1A Auto. Today I'm going to show you how to remove and reinstall manual mirrors on this 2008 Chevy Silverado work truck. If you need these parts or other parts for your vehicle, click the link in the description and head over to 1AAuto.com.
Open the door. We're going to remove this window crank. We need a window crank removal tool. So we're going to position the window crank in this up position right here. Take the tool, if you want to put it in the same location that it was, you could mark it before you take this off. And then we can put this, just slide this down, there's a little pin, a little clip you have to remove. Just push it down and then it slides right off. To take this lock button off I'm just going to use a pick tool. Just get in behind here, slide that little lock piece off, then slide the button off.
Next, underneath here, we're going to take a trim tool, just slide under here, you can use a pick also. Get underneath there, slide this cover off. Next we're going to take this cover off. Take my pick tool, or trim tool, slide that cover off, there's a clip right there, clip right there. We're going to use a 10 mm socket, extension and a ratchet. There's three bolts, one bolt here and two bolts there. Take those out. Might have to hold this handle up a little bit to get this bolt out. Take that bolt out. Oops, just use a magnet to take that bolt out. Next we're going to take this trim piece off. Just use my trim tool, get behind here and pry. It's just clips that hold this on. Three clips hold that on.
Next I'm going to use a trim tool. Going to pop those clips holding the door panel on. Just go around the perimeter of the door panel and pop it off. Once those are all popped off you should be able to release, right there. You're going to need to release the handle cable, right here. There is two ears on the bottom of this door panel so you can put it in service position so you can leave it there while you're working. With the door panel hanging on the lower pins, so that the door panel is in service position we can access all three of the nuts that hold the mirror, so we can take that off at this point.
Just going to take my window crank, I am going to lower the window so that it's easier for me to grab the mirror while I am working on it. Then I'll take a 10 mm socket, loosen up these nuts. Before I take this all the way out, I'm going to support the mirror. Take that nut off. There's a tab in here that needs to be pinched. Just going to take some needle nose pliers, get in there, pinch the tab. Squeeze that nut off. I can grab the mirror, just slide it out. Just like that. Here's where that tab is. Just took needle nose pliers and just squeeze that right there.
So to reinstall this mirror with the gasket on the mirror side, there're no wires so we don't have to worry about running wires. We're just going to line up the holes. Line up the studs with the holes, put it back in position. I'll get the nut started. Once the first one is started then I can let go of the mirror, get the other nut started. Now I'll take a 10 mm socket, extension and ratchet just to snug these nuts down just like that. We can take the door panel and make sure this lock rod goes through that hole right there, and that's good right there. Get this little door pin in the hole on this side, that's in position. Make sure the rest is there. Once that's all, all the pins are lined up, you can start pushing it on.
I'll reattach this. If you had a foam insulator you would put that in there now. This vehicle doesn't have one. Then you line these pins up. Lock that in place. We're going to take these two bolts right underneath the handle, use our 10 mm socket, extension and ratchet. Let's get that one started and then I'll get the other one started. Snug it up, then I'll snug up the other one. Then down below here underneath the handle, get this bolt in. We can tighten it down. Snug it down. Take these two covers. This one's going to go down below. There's a little pin right there that goes through that hole so you know which direction it goes. Get that in position. Lock it in place. This one is going to go in this position. There's a pin, a little slot there. Lock that in place.
Now I'm going to install the new handle. Remember this washer is going to go on the back side. We'll just put this into position. Put it on the same way that you took off the old handle. Get it lined up, make sure it's locked in place and it's good to go. We'll take this lock button, make sure this lock rod is all the way up. Take the button and slide it into position and then push down on the lock part. Make sure it works properly and you're all set.
Thanks for watching. Visit us as 1AAuto.com for quality auto parts, fast and free shipping and the best customer service in the industry.

TR00067


