Replaces


Frequently bought together
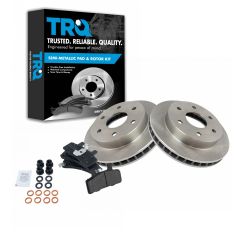
Part Details
About TRQ:
TRQ is a trusted brand dedicated to making every repair a success story by combining premium parts with easy installation. Each TRQ part is engineered by a team of automotive experts to meet or exceed OEM standards, delivering enhanced performance and maximum longevity. With rigorous in-house testing, the brand ensures superior fit and function across every product line. TRQ also provides customers with best-in-class, step-by-step installation videos—so you can complete repairs with confidence, whether you're a first-time DIYer or an industry professional.
Product Features
TRQ brake kits are designed to restore your brake system to like-new performance. TRQ brake pads are positive molded, thermal scorched, chamfered, and utilize a multi-layer shim for enhanced performance and service life. TRQ rotors have a non-directional finish that reduces the break-in period for new rotors as well as reducing vibrations throughout the rotor’s lifecycle. All products are fit and road-tested in our Massachusetts R&D facility to ensure we deliver on our promise of Trusted Reliable Quality.
Attention California Customers:
 WARNING: This product can expose you to chemicals including Lead and Lead Compounds, which are known to the State of California to cause cancer, and birth defects or other reproductive harm. For more information, go to www.P65Warnings.ca.gov.
Lifetime Warranty
This item is backed by our limited lifetime warranty. In the event that this item should fail due to manufacturing defects during intended use, we will replace the part free of charge. This warranty covers the cost of the part only.
FREE Shipping is standard on orders shipped to the lower 48 States (Contiguous United States). Standard shipping charges apply to Hawaii and Alaska.
Shipping is not available to a P.O. Box, APO/FPO/DPO addresses, US Territories, or Canada for this item.
Expedited is available on checkout to the United States, excluding Alaska, Hawaii.
Final shipping costs are available at checkout.
Created on:
Tools used
Brought to you by 1AAuto.com-- your source for quality replacement parts and the best service on the internet.
Hi, I'm Mike Green. I'm one of the owners of 1 A Auto. I want to help you save time and money, repairing and maintaining your vehicle. I'm going to use my 20 plus years' experience, restoring and repairing cars and trucks like this, to show you the correct way to install parts from 1 aauto.com. The right parts, installed correctly, that's going to save you time and money. Thank you and enjoy the video.
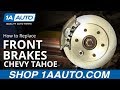
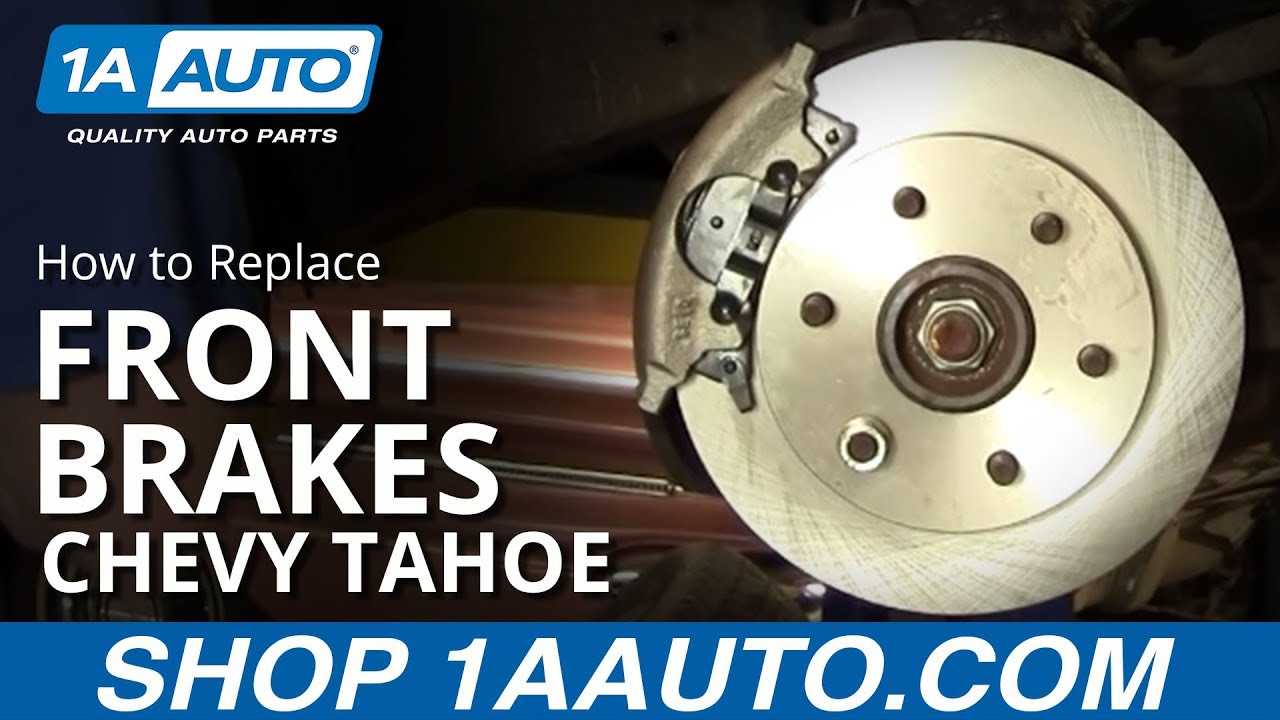
In this video, we're going to be doing a front brake job on this 1996 Chevy Tahoe. We show you obviously, the passenger side and the drivers side is going to be the same. Always replace your brakes in pairs. This is the same for the Tahoe, Suburban, and also the CK Pickups, Chevy and GMC alike. Tools you'll need are: jack and jack stands, a 22millimeter socket with a ratchet, or your tire iron, a 3/8 Allen wrench, combination wrench, a large hammer, wire brush, grease, as well as a torque wrench.
Start by removing your wheel. If you have a center cap or the lug covers, take them off carefully and then, if you don't have the benefit of air tools or impact tools as I do, you'll want to start with your vehicle on the ground, loosen the lug nuts, then raise it up, secure it and remove the lug nuts and the wheel. You can see our outer pad is actually getting a little bit thin, and on the front side, the disc is in pretty good shape, if you run your finger on it. On the back side there is a pretty good groove, we'll see what that's all about when we take it off. You want to take a large screwdriver or a pry bar and what happens is that as your brakes wear, the piston, right here, comes out of your caliper. To get your brakes apart, it helps if you force that piston back in. I'm taking a screwdriver and prying out on the caliper, and you can see that that forces the piston back in. With a good sized screwdriver, you can actually reset your pistons, pretty much all the way.
We want to remove the calipers, and back here, there are two 3/8s Allen bolts, one here and one right down here. I've got my 3/8s Allen wrench, I'm going to put it in, make sure it goes into the bolt as far as possible, then I'm going to use a regular crescent wrench on there for some extra leverage. Pull, ok, same thing for the top. I'm going to fast forward here as I finish removing those two bolts. Once you've got the bolts back out, your caliper comes off. You see your pads, the inside one just pulls right out. On the other one, put a screwdriver right in here, twist it and it comes right out. On your caliper, the bolts go through these sleeves, and those sleeves should slide pretty nice and easily. If they don't, you can use an extension and force them out, go easy though, you don't want to push too hard and have them fly right out, like that. You want to inspect these and see how worn they are. You can wire brush these, if there's some build up on them, you can wire brush these and reinstall them with a little bit of grease. This one was really difficult, this one here, I'm pushing much easier and takes a lot less to force it out.
If you want to better reset the pistons on your caliper, what you can do is put your old pad back in, take a C clamp, put it in place, tighten the clamp up, you will force that piston in the rest of the way. To remove the rotor, be very careful not to hit your studs, and if want to, you can put the lug nuts back on, that will help protect the studs from getting damaged. Usually a good hit breaks it loose. You can see on the backside, there's quite a bit of uneven wear. We will replace these rotors. New rotor from 1 A Auto, going on, in place. I like to put a lug nut right on, just to hold things where they should be.
You'll notice I'm working with new calipers. The owner of this vehicle wanted a new set put on the truck. Not always necessary, but make sure you reset the pistons, also check those sleeves, like I showed you earlier in the video, make sure the sleeves that the bolts go through are sliding nicely in the caliper. Take your inside pad, put it down in and press it in. Your outer pad, kind of slide it right down in. Just going to make sure these two shafts are back in at their starting point, looks like they're out a little bit.
I'm going to hit fast forward here. Put the bolts through, you might have to move the calipers a little back and forth to get them started. Use your Allen wrench to start them most of the way until you get them seeded. With an Allen wrench of this size, I'm basically pull it as tight as I can with that, should be about 25 to 30 foot pounds. Now you can remove that lug nut you have holding the disc on. Put your wheel on, start all your lug nuts by hand, then use a wrench to torque them, or tighten them preliminarily. Set the vehicle back down on the ground, and torque your lug nuts to 100 to 120 foot pounds. Put your cap back on, just use a socket to secure those caps. Very lastly and most importantly, make sure you pump your brakes and get a good firm brake pedal before you road test your vehicle.
We hope this helps you out, brought to you by www.1AAuto.com-- your source for quality replacement parts and the best service on the internet. Please feel free to call us toll free at 888-844-3393. We're the company that's here for you on the internet and in person.
Tools used
Brought to you by 1AAuto.com, your source for quality replacement parts and the best service on the Internet.
In this video, we're going to show you how to replace the front brake calipers on this 1996 Chevy Tahoe, same as most Chevy and GMC trucks and SUVs from this time period, basically '88 to '98.
Calipers can need to be replaced because they start leaking or because they get sticky and you can't service the sleeves that the calipers slide on. The tools you'll need are jack and jack stands, 22mm socket and ratchet or your tire iron, 3/8 Allen wrench, an additional combination wrench, an 11mm wrench and then a tube, a small bottle and some extra brake fluid.
Start by removing your wheel, if you have a center cap or the lug covers take them off carefully and then if you don't have the benefit of air tools or impact tools as I do, you'll want to start with your vehicle on the ground, loosen the lug nuts, then raise it up, secure it and remove the lug nuts and the wheel. You're going to want to loosen this 11mm bolt that holds the line into the caliper. You want to take a large screwdriver or a pry bar, and it helps if you kind of force that piston back in, so I'm taking a screwdriver and prying out on the caliper.
Now we want to remove the calipers and back here there are two 3/8 inch Allen bolts, one here and then one right down here. I've got my 3/8 inch Allen wrench, I'm going to put it in, and make sure it goes into the bolt as far as possible. Then, I'm going to use a regular crescent wrench and put that on there for some extra leverage and then pull. Same thing for the top. I'm going to fast forward here as I just finish removing those two bolts .Once you've got those bolts backed out, then your caliper comes off. Take our 11mm socket, and you want to have a catch pan or something underneath because you are going to get brake fluid coming out of here.
Remove your bolts, make sure both of these copper washers come off. Now take your new caliper, put it right up here. You want to take your bolt, put one of the new crush washers on it, the bolt goes through from the same side as where your line bends to then you want to put the line, oops, you want to .obviously you put the other crush washer on the other side. A little clarification here: the new caliper should come with new copper crush washers so you put one onto the bolt then put the bolt through the line and then put a crush washer on the bolt on the other side so that you have a washer in between the bolt head and the line and then a washer between the line and the caliper. Put the line on and you want the line pointing to where that bleeder valve is. The bolt should go in nice and easy. Tighten it up just a little bit so that it stops leaking.
Now use a paper towel or a rag to wipe away the excess fluid. If you're going to be putting the same rotors back on, make sure you use some brakes part cleaner or mineral spirits and clean off the rotors. Your caliper can start leaking at any time so you don't always need to replace the brakes but as you can see here we're doing everything at once so that's why you're noticing new rotors and pads and everything. If you want to see the whole procedure of replacing your rotors and pads, just check out our other videos for doing the front brake job on this truck.
Take your inside pad, put it down in. Press it in. Your outer pad, take it and you just slide it and put it down and in. I'm just going to make sure these two shafts are back in at their starting points. It looks like they're set up out a little bit. Put this right on. I'm just going to hit fast forward here, put the bolts through, you might have to move the calipers just a little bit back and forth, get them started and then, use your Allen wrench to start them most of the way until you get them seeded. Generally, what I do is with an Allen wrench of this size, I basically pull it as tight as I can with that; it should be about 25 to 30 foot pounds.
Once you replace your caliper or calipers, pump your brakes and try to get as much pressure into the lines as possible. Be sure to check your brake fluid before you bleed as well periodically while you are bleeding. We've got plenty in there right now. Here's your bleeder valve, take this little cap off, put a wrench on, 10mm, counterclockwise is open, clockwise is closed. I'm going to put this, got a little bit of brake fluid in the bottom of a small bottle, put the hose on there. I've got an assistant in the car, I'm going to tell him to step on the brakes and then I'll loosen this up and then they'll let go of the brakes and I'll tighten it back up. Okay, hit the brakes. You watch the air come out. Let off. Hit the brakes. I can see some fluid coming out. Let off. Hit the brakes. Let off. Now repeat that for the other side. Now after you bleed them, stand on the brakes. Have your assistant put pressure on the brakes, check the backside, make sure you're not leaking at all. Make sure you top off your brake fluid now.
Now we're going to speed through putting the wheel and tire back on. Make sure you do torque them, torque the lug nuts to 100 to 110 foot pounds and always after you do work on your brakes just make sure that you pump them and make sure that they're working before you go out and road test. Just do a stop from 5 miles an hour and 10 miles an hour to make sure everything is in good order.
We hope this helps you out. Brought to you by www.1AAuto.com, your source for quality replacement parts and the best service on the Internet. Please feel free to call us toll-free, 888-844-3393. We're the company that's here for you on the Internet and in person.

BKA10486