Replaces


Recommended for your 2002 GMC Savana 2500 Van
Part Details
Specifications
About TRQ:
TRQ is a trusted brand dedicated to making every repair a success story by combining premium parts with easy installation. Each TRQ part is engineered by a team of automotive experts to meet or exceed OEM standards, delivering enhanced performance and maximum longevity. With rigorous in-house testing, the brand ensures superior fit and function across every product line. TRQ also provides customers with best-in-class, step-by-step installation videos—so you can complete repairs with confidence, whether you're a first-time DIYer or an industry professional.
Product Features
Returns: Parts with electrical components cannot be returned once installed.
Attention California Customers:
 WARNING: This product can expose you to chemicals including Lead and Lead Compounds, which are known to the State of California to cause cancer, and birth defects or other reproductive harm. For more information, go to www.P65Warnings.ca.gov.
Lifetime Warranty
This item is backed by our limited lifetime warranty. In the event that this item should fail due to manufacturing defects during intended use, we will replace the part free of charge. This warranty covers the cost of the part only.
Returns: Parts with electrical components cannot be returned once installed.
FREE Shipping is standard on orders shipped to the lower 48 States (Contiguous United States). Standard shipping charges apply to Hawaii and Alaska.
Shipping is not available to a P.O. Box, APO/FPO/DPO addresses, US Territories, or Canada for this item.
Expedited is available on checkout to the United States, excluding Alaska, Hawaii.
Final shipping costs are available at checkout.
Created on:
Tools used
Brought to you by 1AAuto.com, your source for quality replacement parts and the best service on the Internet.
Hi, I'm Don from 1A Auto. I hope this how-to video helps you out, and the next time you need a part for your vehicle, think of 1AAuto.com. Thanks.
In this video, we're going to show you how to replace the alternator on this 2002 Chevy Suburban with a 5.3-liter V8 engine and 130 amp alternator. It's the same part and similar process on these Suburbans from 2000 to 2002. The items you'll need for this includes a new alternator from 1AAuto.com, a 10mm and 15mm socket, a ratchet, a flat blade screwdriver, pliers, a pry bar, an 8mm wrench, and a hammer.
To start off, you want to disconnect your negative battery cable. Use your 8mm wrench and just loosen that up. Then it just pulls free, and set it aside. Next, you want to loosen up this hose clamp here, and then loosen up the hose clamp right over here. Now, you can pull this intake hose forward and pry this part free, and lift it up. Now, using your pair of pliers, just push that clip and disconnect that lower hose, and set this intake-set aside. Now, using a 15mm socket and ratchet, put it on the tensioner and just pull the tensioner up, and pull that belt off your alternator, and then carefully release the tension on the ratchet. Pry up this tab, disconnect your alternator harness, pull back this rubber boot, and remove this 10mm nut. That wire just pulls free.
Now, remove these two 15mm bolts. We'll fast-forward as Don does that. Using your pry bar, just pry the alternator up and out. Once you do one side, just repeat the process on the other side of the alternator. On the left is the old alternator; on the right is the new one from 1A Auto. You can see they're identical, and they're going to fit exactly the same.
Put your new alternator down into place, and then pry it until you can line up those holes, and then push your first bolt in. The first one's going to be a little more difficult than the second one will be, because you're still trying to line everything up. Just use a hammer to help knock that bolt in. Once you get to about this point right here, you're all set. The second bolt is going to be a lot easier to put in. Now we'll just fast-forward as Don tightens those up with the 15mm socket and ratchet.
Reconnect the harness to your alternator. Put this wire back into place, replace that 10mm nut, and then put that boot back over it. Again, use your 15mm socket and ratchet on the tensioner, and then pull your belt back up and on to the alternator. Now, take this upper intake assembly and push it back down into place. Then push it back onto the engine. Re-clip that lower hose, and then reconnect this hose, and tighten up those two hose clamps. Now replace your negative battery cable and tighten it up with your 8mm wrench, and you're all set.
We hope this video helps you out. Brought to you by www.1AAuto.com, your source for quality replacement parts and the best service on the Internet. Please feel free to call us toll-free, 888-844-3393. We're the company that's here for you on the Internet and in person.
Tools used
Brought to you by 1AAuto.com, your source for quality replacement parts and the best service on the Internet. Hi, I'm Mike Green. I'm one of the owners of 1AAuto. I want to help you save time and money repairing and maintaining your vehicle. I'm going to use my 20-plus years' experience restoring and repairing cars and trucks like this to show you the correct way to install parts from 1AAuto.com. The right parts installed correctly - that's going to save you time and money. Thank you, and enjoy the video.
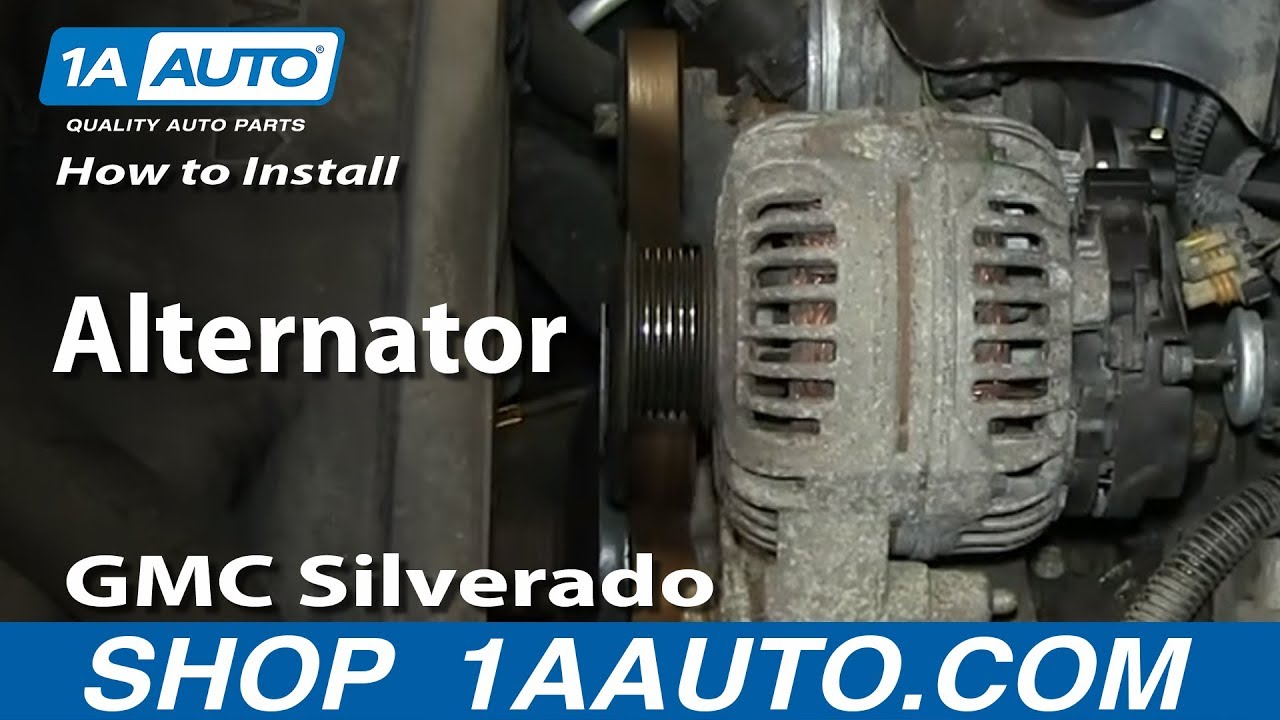
In this video we're going to show you alternator replacement on this 2002 GMC Sierra. This is very similar for many GM, GMC, and Chevy trucks and SUVs from '99 to '06. The tools you'll need are 8, 10, and 15 mm sockets, a ratchet, and a screwdriver.
To figure out which alternator you have, you want to find in your glove box this tag. On this vehicle - it's kind of hard to see, but the code is KG8. That is a 130 amp alternator. The other common code is a K68, which is a 105 amp. Generally a standard vehicle has a 105 amp. If your vehicle has the towing package, you'll have the 130 amp.
Use an 8 mm wrench to disconnect the negative battery cable. Remove the intake hose by removing and loosening two clamps - one there and one there. We're going to speed up through this part here. Use your screwdriver to pry out and break the rubber loose from the plastic. Maybe twist it a little bit as well. Then pull it from the throttle body. Also, there's a little clip that holds the radiator hose in. Pry that out with your screwdriver as well. Use an 8 mm socket and ratchet to remove this top cover. You pull up and forward. Here's a connector here. Pull - I'm just using my finger to pry the tab back and pull that out. This is a 10 mm nut to remove back here.
Now you can see your tensioner is right here. So what you're going to do is take a 15 mm socket ratchet, put the socket on there, and then move the ratchet clockwise, and that takes the tension off. You can pull the belt either off of your tensioner, or I'm actually over here pulling it off of the idler pulley in the middle, and then slowly release this back. It's going to have to go back further than the original point. Now get your wrench back off. There's two 15 mm bolts to remove right here.
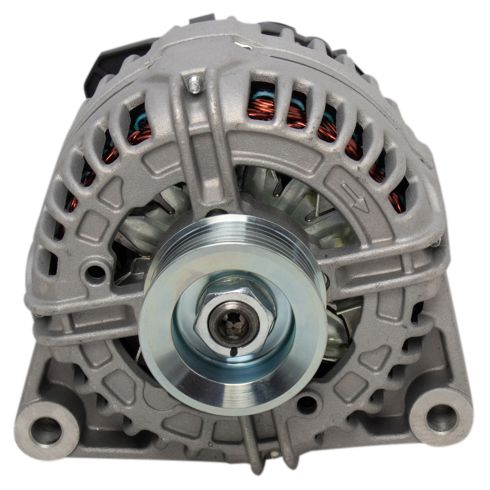
Just use your screwdriver to pry up and get the alternator free. Pry up on the other side. And the alternator comes up and out. So we have my original and my new alternator from 1A Auto and you can see everything is exactly the same. This post is the same. It has this same connection here, everything is going to bolt in exactly the same.
My original alternator is working fine in this truck, so I'm just going to reinstall the original, just kind of a video test. For installation I'm going to use a little bit of penetrating oil on the mounting points, just so the alternator slides in there easily. For reinstallation make sure that is out of the way and then slide it back down in. I'm going to tighten it as much as I can as possible. You never want to use a hammer to pound it in. You can use a rubber mallet if you need a little persuasion. Put that bolt in. Both bolts are in.
Then start them going. We'll tighten them up. When you tighten these bolts up you want to be firm, probably between 30 and 40 foot-lbs. They don't have to be overly tight, though. Plug in that lead. And the 10 mm bolt for the battery lead. Tighten that up. You want to be snug with this. You don't have to be extremely tight. Put your engine cover back on. Slide it back and press down on the bolt. Walk it around a little bit until you find the spot. And just tighten this up a little bit till it's firm. So first I went down around the crank pulley, up around the water pump to the back side of the belt, then around to the power steering pump. So now I have this part that I can hold, to put onto the alternator. I'm going to set it there for a second.
I'll take my socket, put it on my 15 mm bolt on my tensioner, and while I pull this way on the tensioner, take the belt and pull it up and onto the alternator.
The tensioner takes over and I'm going to push it on a little more onto my idler pulley here. Make sure that's pretty well centered. After you have the belt on, just do a quick check. Make sure it's on all the pulleys. Look way down at the crank pulley and make sure that its' on correctly down there, and also obviously over here - the alternator - and the power steering pulley. Everything looks good.
We're going to fast forward through this section, which is putting that tube back in and pushing the rubber onto the plastic, tightening up the clamps, and reinstalling that little clip that held the radiator hose to it. Now we'll reconnect the negative battery cable. Just make sure you get that nice and tight.
We hope this helps you out. Brought to you by www.1AAuto.com, your source for quality replacement parts and the best service on the Internet. Please feel free to call us toll free: 888-844-3393. We're the company that's there for you on the Internet and in person.

ALA94410