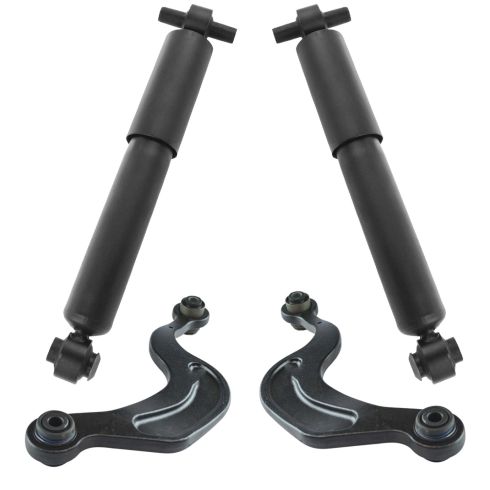
TRQ suspension kits are manufactured using premium raw materials and coatings for extended service life. Each TRQ suspension component is designed to be a direct, maintenance-free replacement to the stock unit. To extend the life of your steering and suspension components, TRQ recommends replacing components in pairs, sets, or kits. All products are fit and road-tested in our Massachusetts R&D facility to ensure we deliver on our promise of Trusted Reliable Quality.
Product Features
Application Specific Design: No modifications necessary
Anti-Corrosion Coated: Enhanced surface life
Pre-greased: No additional maintenance required
Kitted for Restored Performance: Improved road-feel and handling
Our direct fit gas-charged shock absorbers help restore your vehicle's handling and ride quality to just like new.
Our steering and suspension components are pre-greased and sealed for long life and do not require the extra maintenance typically required by greaseable versions.
Item Condition:New
Attention California Customers:
WARNING: This product can expose you to chemicals including Chromium (Hexavalent Compounds), which is known to the State of California to cause cancer, and birth defects or other reproductive harm. For more information, go to www.P65Warnings.ca.gov
Lifetime Warranty
This item is backed by our limited lifetime warranty. In the event this item should fail due to manufacturing defects during intended use, we will replace the part free of charge. This warranty covers the cost of the part only.
FREE Shipping is standard on orders shipped to the lower 48 States (Contiguous United States). Standard shipping charges apply to Hawaii and Alaska.
Shipping is not available to a P.O. Box, APO/FPO/DPO addresses, US Territories, or Canada for this item.
Expedited is available on checkout to the United States, excluding Alaska, Hawaii.
Final shipping costs are available at checkout.
How to Replace Rear Shock Absorbers 2007-16 GMC Acadia
How To Replace Rear Shocks 2009-17 Chevy Traverse
How To Replace Rear Shock 2007-16 GMC Acadia
How To Replace Rear Rearward Control Arm 2007-16 GMC Acadia
Created on:
Tools used
21mm Socket
21mm wrench
Torque Wrench
18mm Wrench
Jack Stands
18mm Socket
Floor Jack
1/2 Inch Breaker Bar
22mm Socket
1. Removing the Wheel
Use a 22mm socket and breaker bar to break the lug nuts loose
Raise and support the vehicle
Remove the lug nuts
Remove the wheel
2. Removing the Old Shock Absorber
Use an 21mm socket and ratchet to loosen the lower nut up
Remove the nut
Raise the control arm with a jack
Remove the bolt
Use the 18mm wrench to remove the upper nut
Hold the bolt with a 15mm wrench
Remove the nut and the bolt
Pull the shock absorber off the car (using a pry bar, if necessary)
3. Reinstalling the New Shock Absorber
Line up the new shock
Insert the shock into the upper bracket (use a hammer if necessary)
Insert the bolt and thread on the nut by hand
Line up the bottom of the shock and insert the washer between the shock and control arm
Insert the bottom bolt and the nut
Snug up the top and bottom nuts and bolts
Torque the bottom bolt to 74 ft-lbs
Remove the jack from the control arm
Torque it to 52 ft-lbs
4. Reinstalling the Wheel
Line up the wheel
Thread the lug nuts on by hand
Lower the car
Torque the lug nuts in a star pattern to 140 ft-lbs
Hi. I'm Mike from 1A Auto. We've been selling auto parts for over 30 years.
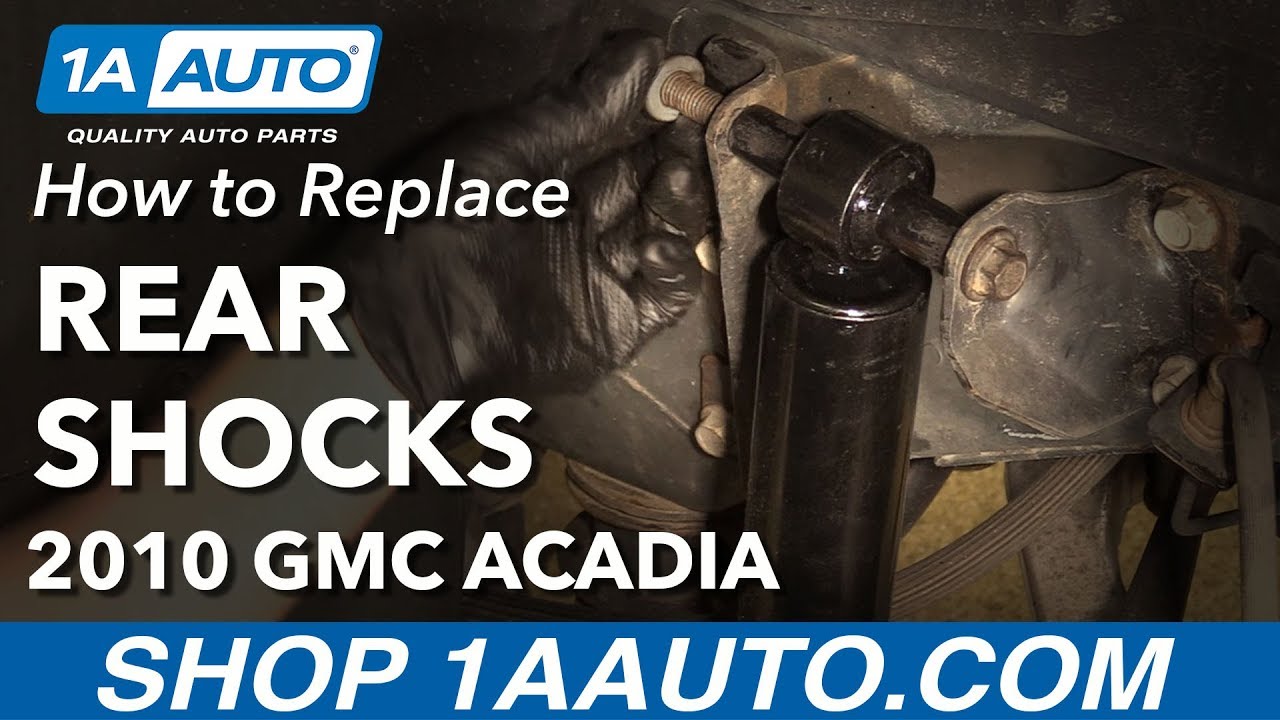
In this video, we're going to be removing and replacing rear shocks in a 2010 GMC Acadia. If you need this part or other parts for your vehicle, click the link in the description and head over to 1AAuto.com.
Take the tire off. We're going to use a 22 mm socket and a breaker bar. You can use a 7/8, also. I'm just going to break all the lug nuts free. Raise and support the vehicle. We're using a two-post lift, but you can also do this with a jack and jack stands. Take the lug nuts off. We use our socket to twist them out. Take the wheel off.
So, here's the shock and, as you can see, all this stuff on here. This is all oil and dirt that's been because the shock is leaking.
I'm going to take this 21 mm nut off and this bolt. We're going to loosen it up with a 21 mm wrench and a socket and a ratchet. All right. We're going to loosen this nut. We're not going to take it off completely. I'm going to leave it right there.
Now, you can support underneath the control arm. We're going to use a screw jack. You could just use a floor jack if you're working on the ground. I'm just going to bring this up a little bit so that our shock is loose. Now, our shock bolt is loose. You can unscrew the nut, take the nut off and the washer, and then our bolt should come right up. Maybe a little bit more. Just like that.
Now, I can lower this back down. If you're working on the ground, you could leave it the way it is, but we have to lower the vehicle down to gain access to the upper shock bolts. I'm going to use and 18 mm wrench on this 18 mm nut, and then a 15 mm ratchet wrench on the bolt side. If your bolt's really rusty, you can use some penetrating oil. Ours doesn't look too bad. Pull the nut off, pull the bolt straight through, and take a medium pry bar and get in behind here and just pull it straight out. And there it is.
This is our old part. This is our old shock. This is our new shock from 1AAuto.com. As you can see, all the oil leaked out of this one, and that's what keeps the shock's ability to do its job. So, this one is not performing up to optimum level. As you can see, the design is very similar. Slight differences like this upper dust shield is metal, whereas the old one was plastic. It still has the same configuration up top, same down below. There is a washer that can go on this side. If you're doing the other side, you can put it on that side. It comes with this tie on here. You can take that off. You can do it in the car or take it off before you put it on. Get your part at 1AAuto.com, and you'll be ready to rock and roll.
All right. We're going to install our new shock in the back. It's a little tight right here. So, we can either loosen up some of these bolts and get it lined in, or you can take a little hammer and give it a little tap. Pull the brake line out of the way a little bit. Take the nut and stick the nut on.
Then, we're going to support our lower control arm again. If you were doing this on the ground, you could have left this supported before. Bring it up to the level of the shock. And then, take our bolt, and then that special washer is going to go in-between. It's got a angle side to it that's going to go towards the control arm, so stick that in first. Line our bolt up. I'm going to have to go up a little bit more. That's lined up. I'm going to take our washer, set the washer on, and then the nut and tighten that up.
Now, we're going to snug up this bolt with a 21 mm socket and a 21 mm wrench and ratchet. Now, we're going to torque the bolt to 74 foot-pounds. Now, we'll lower our lower control arm. Right.
Now, we're going to tighten this bolt and nut down on the 18 mm nut with a wrench and a ratchet wrench. 15 on the bolt side.
Now, we're going to tighten this bolt and nut down to 52 foot-pounds. Install our wheel. Put the lug nuts on.
Now, we're going to torque the lug nuts down to 140 foot-pounds. You're going to want to torque them in a star pattern so that the wheel will go flush to the rotor evenly.
Thanks for watching. Visit us at 1AAuto.com for quality auto parts, fast and free shipping, and the best customer service in the industry.
Tools used
Torque Wrench
15mm Socket
18mm Wrench
Pry Bar
Jack Stands
21mm Socket
21mm wrench
Socket Driver
Wheel Chocks
Ratchet
Floor Jack
Swivel
3/8 Inch Impact Gun
22mm Socket
Tools used
21mm Socket
Torque Wrench
15mm Socket
13/16 Inch Wrench
18mm Wrench
Air Compressor
Drill
Ratchet
Floor Jack
1/2 Inch Impact Gun
22mm Socket
Remove the wheel, I'm gonna use a 22-millimeter socket. Take the wheel off. So I want to support the lower control arm. I am going to use a screw jack just to take the tension off the shock. You can use a floor jack or even a jack stand. Now I can use a 13/16-inch wrench or a 21-millimeter wrench, put it on the nut right here, and then a 21-millimeter socket, take this bolt out, and this bolt. All right. So that's separated down there. Now, before I take this bolt out here, I'm just going to loosen up these two bolts for this bracket. I don't have to take the bolts out completely, just loosen them. Use a 15-millimeter socket. That's good. Now I'll take that bolt out. Then take a 15-millimeter socket and an 18-millimeter wrench and loosen this up. Take that bolt out. You can slide that bolt out, watch the brake hose. I'm going to slide that out. And to loosen that bracket up, that just makes sliding this out and the new one back in a lot easier.
Before we install the shock, you just want to exercise the shock, just compress it and let it expand. It's going to get the fluid to go through the system and do its thing properly and then it'll be all set to put in the vehicle. And take the shock and the bolt, slide it in position, watch out for that brake hose. Just like that and get this started up here. And before I tighten that all up, let's put the lower bolt in. Now, there is this washer that is domed up a little bit, now that's going to go right in this position here on the control arm. And you can take the bolt, slide it through. If you have to move the control arm up a little bit, you can move it up. And take the washer and the nut, get that started. Now we'll tighten this and torque this to 52 foot-pounds. I'll just snug these two bolts up. Now I can lower the screw jack. Now put the tire back on. Now we'll torque these lug nuts to 140 foot-pounds in a star pattern, that way it tightens the wheel down evenly. And I'll just go around again, double-check.
Tools used
Torque Wrench
Socket Extensions
Jack Stands
10mm Wrench
Pick
21mm Socket
21mm wrench
Socket Driver
Wheel Chocks
10mm Socket
Ratchet
Floor Jack
Swivel
1/2 Inch Impact Gun
22mm Socket
Marker / Writing Utensil
Remove the wheel, I'm gonna use a 22-millimeter socket. Take the wheel off. So that this wire doesn't break, I'm going to disconnect this wire right here, just use this pick tool. Just slide this out, right there. You can disconnect these retainers, just slide these off. That'll give me more slack. Just let that hang, that's good. I'll take a 21-millimeter wrench. There's a nut right here, put it on that nut. And then 21-millimeter socket, take this bolt and loosen it up.
Just make sure you don't get too close to the rotor because once this bolt comes out, it is going to tip forward. There's the nut, it's a nut and a washer. Then you could push on the rotor a little bit. Try to pull this bolt out and just slide that out. Before I loosen up this cam nut right here, I am going to mark it. Just take a marker that you can use. That way, at least, the alignment's closer when you're done. You're still going to need to get an alignment done anyway, but at least it'll be close. All right, that's good.
Now I'm going to use a 21-millimeter socket to take this nut off. And then on the backside of the stud, you could use a 21-millimeter on the nut on that side but sometimes it's better just to use a 10-millimeter, put it on the end of the stud, prevent it from spinning, and loosen this up. Take this nut off and take this cam washer off. Then just hold the arm and then try to pull the stud and nut the rest of the way through. If you have to, you can use an air hammer. Sometimes that's all it takes. All right, and it slides out. You can grab the arm and just slide it out. There you go.
Now take the new arm and just slide it back in position. This wire is going to go around on that side. And take this bolt and stud, slide that back in position. And take that cam washer, slide that back on, put the nut back on. And with the 10-millimeter wrench on the backside, you can snug this up. Now just make sure your line lines up where you marked it. Then you can tighten that down a little bit more. Try to put this arm in position where it would be if the vehicle is on the ground. Generally right there is good. That's good.
Then you can tighten this nut to 103 foot-pounds. Make sure you have that 10-millimeter wrench on the other side. It's good. I'm going to take this bolt, line this up here. Once you get that in a little bit, then grab this arm, push this in a little bit as you try to slide this down. You can get the bolt to come through a little bit, then you can get this lined up just like that. Maybe a little more. There you go. And then just hold this arm while you hammer the rest of the way in. There you go.
Take the washer and the nut, put it on the end of the bolt. Make sure the wires aren't in the way when you go to tighten this down. And then put the wrench on here, then snug this down. It is recommended that you replace this bolt when doing this job. I'm going to use a 21 and I'm going to torque this with the wrench over here to 74 foot-pounds. And then the second pass you're going to go 90 degrees so you can put an angle meter on here, or if you don't have one, just do the best you can. All right.
And for the ABS wire, the wheel speed sensor wire, the clip was broken on the old one. So we're just going to use a wire tie and just trim it off. And then take these other clips. I'm just going to slide onto the bottom just like that. There you go. Now put the tire back on. Now, I'll torque these lug nuts to 140 foot-pounds in a star pattern. That way it tightens the wheel down evenly. And I'll just go around again, double check.
PSA64853
In Stock
Product Reviews
Loading reviews
5.00/ 5.01
1review
5 Stars
4 Stars
3 Stars
2 Stars
1 Star
1
0
0
0
0
Ryan
January 3, 2023
Worked perfectly
Customer Q&A
No questions have been asked about this item.
Customer service
877-844-3393
Monday - Friday 8:00am - 9:30pm ET Saturday - Sunday 8:00am - 4:30pm ET