Brought to you by 1AAuto.com, your source for quality replacement parts and the best service on the Internet.
Hi, I'm Mike from 1A Auto. I hope this how-to video helps you out, and next time you need parts for your vehicle, think of 1AAuto.com. Thanks.
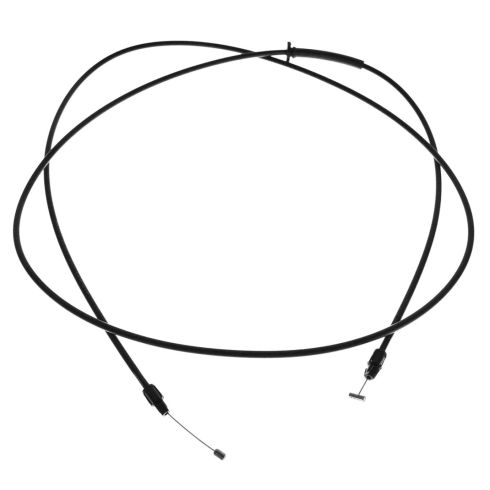
In this video, we're going to show you how to replace the hood release cable on this 2003 Chevy Monte Carlo. It's the same part and similar process on these Monte Carlos from 2000 to 2005. The items you'll need for this include a new hood release cable from 1AAuto.com, 7mm socket and ratchet, flat blade screwdriver, pliers, wire, and penetrating oil.
Now, if your hood release cable breaks, you want to just go in from underneath the hood latch and just push the cable towards the driver's side. That'll pop the hood, as you can see. Now reach underneath, push the lever, and open the hood up. Then you need to remove this panel. To do that, you need to remove these three clips. To remove them, you just pry up the center. That pulls out and then just pry out the bottom. Then lift the panel up and out.
Next, push the tabs on the clip on the cable and pull it from the latch. Then unclip it from the latch. It pulls free. Using a flat blade screwdriver, just pry these clips open. Just pull the cables free from those clips. Now push these tabs underneath your dash panel, pull this panel down, and then remove these two 7mm bolts. We'll fast-forward as Mike does that. Pull off this panel for your fuse box, and then pull down this lower panel. To disconnect the harness, just pull out on the tab and pull the harness free.
Now, remove these two 7mm bolts that hold your hood release handle in place. Then pull the handle back and free. On the other end of the cable, you want to just tie some wire to it, and you do want to have a decent length of wire because it is going to have to run the entire course of the hood release cable. Push the grommet on your hood release cable through and into the car. Then just start feeding the cable into the car. Then go from the other side and just pull the cable through.
During this process, you want to have somebody on the end watching the wire to make sure it doesn't get caught on anything. If you get a little bit of resistance, just pull on it. If you get a lot of resistance, stop. We should have stopped right there and you can see the wire broke. Luckily it went through most of the areas, but it did get caught up on our mass airflow sensor.
Take your old hood release cable, pull it from the handle, push the tabs on this part, and pull it through. Now you can just push this into your new handle. To re-clip it, you just push it down into that hole. However, you don't have to do that right now.
Okay, so now, ideally you'd have your wire pulled through and you'd tie your wire onto your new cable and make sure it's nice and secure. You can see how this is kind of out, what you want to do actually is just remove the cable from your handle and that actually allows that to push down in and that just makes it a little easier to feed through. Again, you take your wire and wrap it around, and then, while you're feeding it up in there, have somebody pull it through. I'm just going to feed it up through the boot for now and then pull it through.
Now just the cable out, and you want a decent amount of slack here. All right, once you have it under here, you actually want to tie it off just to the cable here. Then feed it down in. It's a little easier to get it back on these A/C lines. The gaps a little bigger back there. As you're feeding, pull up here, you might have to reach down in so you can pull the wire straight through the hole, and get the cable going forward. It might help to take the clips off for your headlight and pull it out.
Now, you can see what you need to do here. Just pull this right through. Then again, just keep feeding. Untie the wire from the hood release cable. Put this in. We'll just fast-forward as Mike re-clips the hood release cable, puts the headlight back in place, and then pushes those two clips back down.
Then just re-clip this clip for the hood release cable. Now, take your hood release latch, push the cable back down into that hole, put it up into place, and replace those two 7mm bolts. Then replace the panel and the two 7mm bolts that hold that in place.
Now push this panel back up into place until it re-clips. Replace this fuse panel. Then just spray your latch with some penetrating oil to help loosen it up. You can see it moves a lot freer and easier. We'll fast-forward as Mike puts that panel back down into place and replaces those clips. You just push the bottom in first then the center to lock them.
Now to test the hood latch, just push it down with a screwdriver until it locks, then pull the hood release handle. You can see it worked. Now test it again with the hood down and it still works. You're all set.
We hope this video helps you out. Brought to you by www.1AAuto.com, your source for quality replacement parts and the best service on the Internet. Please feel free to call us toll-free, 888-844-3393. We're the company that's here for you on the Internet and in person.