Replaces


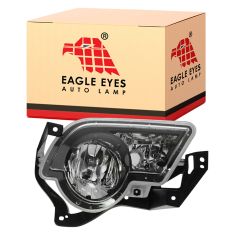
Recommended for your 2005 Chevrolet Avalanche 1500
Assemblies may include halogen or incandescent test bulbs that should be replaced before installation.
Attention California Customers:
 WARNING: This product can expose you to chemicals including Chromium (Hexavalent Compounds), which is known to the State of California to cause cancer, and birth defects or other reproductive harm. For more information, go to www.P65Warnings.ca.gov
This item is backed by our limited lifetime warranty. In the event this item should fail due to manufacturing defects during intended use, we will replace the part free of charge. This warranty covers the cost of the part only.
The bulbs are for testing and not covered under our warranty. Our warranty applies to the light assembly only.
FREE Shipping is standard on orders shipped to the lower 48 States (Contiguous United States). Standard shipping charges apply to Hawaii and Alaska.
Shipping is not available to a P.O. Box, APO/FPO/DPO addresses, US Territories, or Canada for this item.
Expedited is available on checkout to the United States, excluding Alaska, Hawaii.
Final shipping costs are available at checkout.
Created on:
Tools used
Hi, I'm Mike from 1AAuto. We've been selling auto parts for over 30 years! We're dedicated to delivering quality auto parts, expert customer service, and fast and free shipping, all backed by our 100% satisfaction guarantee. We've created thousands of videos to help you install our parts with confidence. That saves you time and money, so visit us at 1AAuto.com, your trusted source for quality auto parts.
The fog lights, as you can see this one, can get hit by rocks a lot, and this one's even broken free of its mounting. In order to get your old light down, if it's in one piece, or to get your new light up, you need to remove this bracket—which is one 10mm bolt here and two 15mm bolts here. And I'm just going to use some rust penetrant and spray the back side before I remove them.
So I loosened the small one, and I've removed the two big ones. I'm just going to let it kind of hang out of the way. And by looking at our new fog light, you can see to remove it, there's four mounting holes, or there's four mounting locations. There's 7mm bolts that hold it at the top, at the basically the four corners. And so those bolts underneath, and underneath you can see, two are very easy to see there and there, and then two are more difficult to point out, but they're on that sides.
You'll want a 7mm socket with an extension and a ratchet, and remove those bolts. If your lights are broken like ours are, just going to remove the bulbs from the back side and then, if you can, ours are so broken right from their mounting points. Actually, get that out. Here's that one bolt I just took out, and the other bolts are just easier to get through right through the opening.
Here's the original fog light from our vehicle, and new fog light from 1A Auto. As happens a lot on these, this bracket is broken. Even the ear on the fog light's broken, as well as the fog light is all stone chipped and faded. New part from 1A Auto: It's going to install just like the original.
It's going to go in. Whether or not you have the bulbs may differ. You can always use your original bulbs, but new part from 1A Auto. It's going to go in just like the original, and it will work and function just like the original.
You gently kind of pull down on this, and feed your new light up into place. Then I'll start in the 7mm bolts to hold it. Put the driving light bulb in, and then there is a little shipping protector on here. You can just peel off, get in and lock it in, and then reconnect our fog light. And now we'll put this bracket back in place.
Tighten these up first, and then just adjust it back to where it was. Tighten up the 10mm bolt. Your old broken original lights, nice new light in there mounted firm.
If you want to adjust your fog lights, on the back here is a Phillips screw. Clockwise will go down, counterclockwise will adjust the beam higher.
Thanks for watching. Visit us at 1AAuto.com for quality auto parts, fast and free shipping, and the best customer service in the industry.

GM506-B000L