Replaces


Recommended for your 2007 Saab 9-7X
Frequently bought together
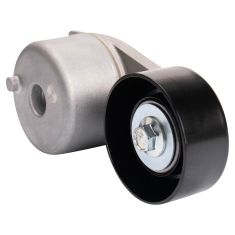
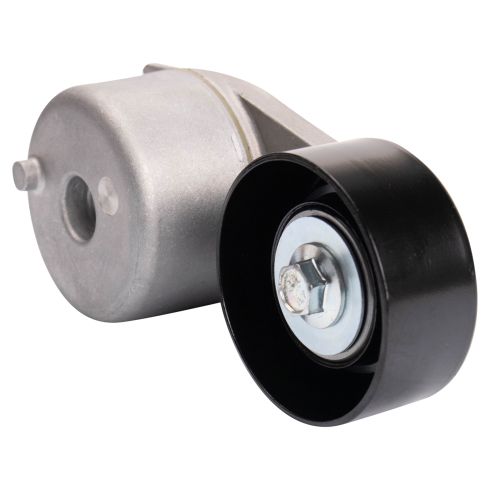
Part Details
Specifications
About TRQ:
TRQ is a trusted brand dedicated to making every repair a success story by combining premium parts with easy installation. Each TRQ part is engineered by a team of automotive experts to meet or exceed OEM standards, delivering enhanced performance and maximum longevity. With rigorous in-house testing, the brand ensures superior fit and function across every product line. TRQ also provides customers with best-in-class, step-by-step installation videos—so you can complete repairs with confidence, whether you're a first-time DIYer or an industry professional.
Attention California Customers:
 WARNING: This product can expose you to chemicals including Lead and Lead Compounds, which are known to the State of California to cause cancer, and birth defects or other reproductive harm. For more information, go to www.P65Warnings.ca.gov.
Lifetime Warranty
This item is backed by our limited lifetime warranty. In the event that this item should fail due to manufacturing defects during intended use, we will replace the part free of charge. This warranty covers the cost of the part only.
FREE Shipping is standard on orders shipped to the lower 48 States (Contiguous United States). Standard shipping charges apply to Hawaii and Alaska.
Shipping is not available to a P.O. Box, APO/FPO/DPO addresses, US Territories, or Canada for this item.
Expedited is available on checkout to the United States, excluding Alaska, Hawaii.
Final shipping costs are available at checkout.
Created on:
Tools used
Brought to you by 1AAuto.com, your source for quality replacement parts and the best service on the Internet.
Hi, I'm Mike Green. I'm one of the owners of 1A Auto. I want to help you save time and money repairing or maintaining your vehicle. I'm going to use my 20-plus years experience restoring and repairing cars and trucks like this to show you the correct way to install parts from 1AAuto.com. The right parts installed correctly: that's going to save you time and money. Thank you and enjoy the video.
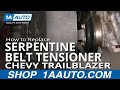
In this video, we're going to show you how to remove and replace the serpentine belt tensioner on this 2004 Chevy Trailblazer with the 4.2 liter inline 6. Tools you'll need are a 3/8 inch drive ratchet with a long handle or a pipe for some extra leverage, and a 15mm socket and ratchet.
First thing you want to note is how the Serpentine belt is on your vehicle. You see it goes across up there to the alternator and down to an idler pulley, then down around the A/C pulley way down there, then up and around the water pump and fan. Then it wraps back down and around the crank and back up to the tensioner right there. We're going to place the camera over here. What you want is a ratchet with a 3/8 inch drive end on it. There's a square hole in our tensioner here. Here's a shot of it from the other angle of my ratchet in my tensioner. You're going to take your ratchet and you're going want to push it clockwise. As I push down on the tensioner that loosens the belt.
I can remove it up here from the alternator and slowly let my wrench back, being careful not to pinch my hand in anything. Now my belt can come off. Now you want a 15mm socket and a ratchet down on the bolt. You probably can't see hardly anything I'm doing except for my arm. We're just going to fast forward through removing that bolt. Now with your tensioner, if it's your pulley, the bearing in your pulley, you can actually replace it by removing that 13mm bolt and putting it back in. My tensioner is actually, even though it's a little dirty, it's in fine shape, so I'm just going to reinstall it. You can see it's got a locating tab right here.
Essentially what I'm doing here, because you can't really tell, because all's you're looking at is my elbow, is I'm reaching down in there and I feel for the hole where the bolt goes into. Then I just basically push that bolt into that hole and start turning it until it grabs. Once I know the bolt's in, then, I push the tensioner towards the engine and get that locating tab into the right spot. It's kind of in and the bolt's started, and I know I've got the locating tab in. I'll just fast forward through this. First, tighten up that bolt by hand, then tighten it up with the wrench. It probably should be tightened to about 35 to 40 foot-pounds. Check the condition of your belt. Ours is in pretty good shape. See there's a little bit of cracking on the ribs, but that's not too big of a deal.
You want to check the whole length. Where they sometimes can get bad is where they're joined together, and if it's getting bad there you'll know it because you'll see it. I don't see it, so this one's okay. If you do need a new belt, we carry them at 1AAuto.com. I can't really film putting this on too well, but I'll try and put it together in detail as best I can. I'm putting a loop down and around the crank pulley, which is the largest pulley at the bottom of the engine. Loop it down there, then I'll bring it back up and over my water pump right here on top, and then way down and around my A/C pulley, which is a smaller pulley at the bottom of the engine, then up and around my idler pulley here, on this side around my tensioner pulley, and then around my power steering pulley.
Now, basically, I have the whole thing routed except for having it on the alternator. Here's my belt. I take a piece of pipe actually, you can see the top of the camera there, put it on to my ratchet that's in my tensioner, and that just gives me a lot more leverage. Pull my tensioner over, put the belt onto my alternator there, let the tension back, take out the pipe, take out the wrench, and make sure everything is routed correctly, and it appears to be, and we're all set.
We hope this helps you out. Brought to you by www.1AAuto.com, your source for quality replacement parts and the best service on the Internet. Please feel free to call us toll-free, 888-844-3393. We're the company that's here for you on the Internet and in person.
Tools used
Brought to you by 1AAuto.com, your source for quality replacement parts and the best service on the Internet.
Hi, I'm Mike from 1A Auto. I hope this how-to video helps you out, and next time you need parts for your vehicle, think of 1AAuto.com. Thanks.
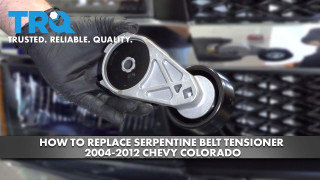
In this video we're going to show you how to replace a serpentine belt on this Chevy Colorado. This vehicle has a 3.5 liter, 5 cylinder. It's pretty much the same for that engine, as well as the 4 cylinder. With your engine off . actually, if you notice some squeaking from your belt, shut the engine off. If you can grab hold of the belt and move it more than about 1/4", then that's evidence that your tensioner is starting to go bad. Tools you'll need are a 3/8"� drive ratchet handle and a piece of pipe for some extra leverage, as well as a 15mm socket or wrench.
So the serpentine belt, you can see right down in here. Your tensioner is right down here. You're going to either find a square hole, right out in the center of the pulley, or in this one it's right here kind of in the center of the tensioner body. What we're going to do is take a 3/8"� drive flex handle. It kind of gives us the best way to get in there. You can see the flex handle goes right into that square hole. We'll work it right in there.
First, I want to make sure I press that flex handle in there well. Then I'm going to take a piece of pipe. That just let's me get a whole lot more leverage on my tensioner. Pull the tensioner back, and then pull the belt off. I realized after, when I was editing this, it wasn't really clear what I was doing there. With the handle, the 3/8 handle that I put in the tensioner, and that pipe, I am basically turning the tensioner clockwise, which takes tension off the belt, and then I can take the belt off the pulleys.
Hopefully you can see here. Down below on that tensioner again, there's a 15mm bolt. I'll put my wrench on there and remove it. I'm just going to do you a little favor here and fast forward as I just use my 15mm socket and ratchet and remove the bolt that holds the tensioner on. The tensioner and bolt come right out.
Here's a new tensioner from 1A Auto. Just put the bolt right in. There is a tab here you have to line up. I'm putting it down in. Putting it in can be sometimes the most fun part. Get the bolt in there, and get it nice and close to the engine. I'll get the bolt started first. Get the bolt started. Make sure the tensioner flips up into place correctly. Hold the tensioner kind of with my knuckle while I start the bolt in. Tighten it right up with that 15mm bolt, to about 35 to 40 foot-pounds.
On these vehicles, you have a diagram right here that helps you put your belt on. Okay, so I've got the belt pulled up here. But it's routed correctly. It goes down that tensioner pulley, then around the crank pulley down there, comes back up to this fan pulley, goes back down to the A/C pulley, back up to the idler pulley, then the alternator pulley, and over. This allows me having it here like this. It allows me to hold onto it with this hand and then get my wrench and pipe and take the tension off the belt. With the longest handle I have, I take it and pull it. I'm going to put my piece of pipe on it, on the other side of this hose, and pull it as far as I can. Take my belt and pull it tight. Wrap it around my power steering pump, and then carefully let my wrench go, and do a visual check. So just do a quick inspection. It's on here correctly, down around the crank, and comes up. It's on my A/C correctly, and up on the alternator. Everything looks good.
We hope this video helps you out. Brought to you by www.1AAuto.com, your source for quality replacement parts and the best service on the Internet. Please feel free to call us toll-free, 888-844-3393. We're the company that's here for you on the Internet and in person.
Tools used
Brought to you by 1AAuto.com, your source for quality replacement parts and the best service on the Internet.
Hi, I'm Mike from 1A Auto. I hope this how-to video helps you out, and next time you need parts for your vehicle, think of 1AAuto.com. Thanks.
In this video, we're going to show you how to replace the serpentine belt tensioner on this 2003 GMC Envoy XL with the 5.3-liter V8 engine. The items you'll need for this include a 15mm socket and ratchet, an 8mm wrench, a T30 Torx bit, and a flat blade screwdriver.
Use an 8mm wrench to disconnect the negative battery cable. Start off by loosening this hose clamp and this hose clamp, then remove this T30 bolt up here. We'll just fast-forward as Mike does that. Now pull this hose free. Then lift that air intake hose up and out.
Next, you want to locate your serpentine belt diagram, which is located right here on the shroud. You just want to refer to this as you're trying to put the belt back in place. Make sure that you have one of these before messing with the belt. Then, using a 15mm socket and ratchet, or 15mm wrench and another wrench for extra leverage, just push down on the tensioner and pull the belt up and over that center pulley.
Carefully relieve the tension on the tensioner. Pull your belt off your tensioner and then remove these three 15mm bolts. We'll just fast-forward as Mike does that. When you remove the last bolt the tensioner will pull free.
Lower your new tensioner back down with the top bolt in place. Then just line it up and hand tighten the bolt. Replace the other two bolts by hand. Then tighten them all up. Now pull the belt back up, over the alternator, and over the tensioner. At the same time, you want to make sure that the belt is on each of the pulleys correctly. Then just double check with your belt diagram that the belt's in the right order and on each of the pulleys.
Put your wrench, or socket and ratchet, onto the tensioner, and pull back on the tensioner. Just push your belt underneath that center pulley. Carefully release the tension, and make sure your belt is on all the pulleys correctly.
Feed your air intake hose back down into place. Make sure it's pushed on all the way. Then push this end back into place. Then tighten up those two hose clamps. Now tighten up the T30 bolt. Reconnect your negative battery cable.
We hope this video helps you out. Brought to you by www.1AAuto.com, your source for quality replacement parts and the best service on the Internet. Please feel free to call us toll-free, 888-844-3393. We're the company that's here for you on the Internet and in person.

BPA03794