Replaces


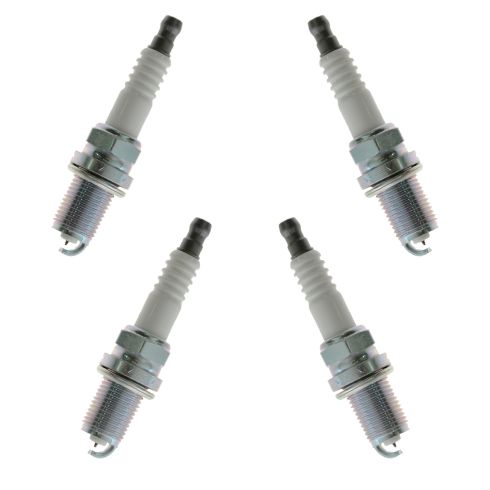


Frequently bought together
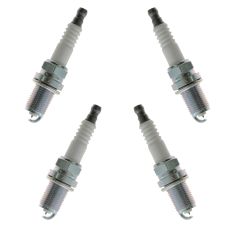
Part Details
Specifications
Returns: Parts with electrical components cannot be returned once installed.
Lifetime Warranty
This item is backed by our limited lifetime warranty. In the event this item should fail due to manufacturing defects during intended use, we will replace the part free of charge. This warranty covers the cost of the part only.
Returns: Parts with electrical components cannot be returned once installed.
FREE Shipping is standard on Orders shipped to the lower 48 States (Contiguous United States). Standard shipping charges apply to Hawaii, Alaska and US Territories. Shipping is not available to Canada.
Expedited is available on checkout to the United States, excluding Alaska, Hawaii and US Territories as well as P.O. Boxes and APO/FPO/DPO addresses. Final shipping costs are available at checkout.

Created on:
Tools used
Tools used
Brought to you by 1AAuto.com, your source for quality replacement parts and the best service on the Internet.
Hi, I'm Mike from 1A Auto. I hope this how-to video helps you out, and next time you need parts for your vehicle, think of 1AAuto.com. Thanks.
In this video, we're going to show you how to replace your worn out spark plugs in this 1998 Toyota Camry 4-cylinder. These spark plugs are going to fit a lot of different vehicles, and this procedure is going to be pretty much the same for any engine.
You'll need a new set of spark plugs from 1AAuto.com, a 5/8 spark plug socket. That's the one with the rubber insulation in the bottom to grip onto the porcelain here, make it easier to remove and install the plug, a long extension capable of getting down into the spark plug tubes into the motor, a ratchet, and a torque wrench.
Open the hood and secure the hood prop. On the top of your motor you'll see these four rubber boots. If you remove those, beneath each one is the connection to your spark plug. Down inside that tube there is the spark plug itself.
I like to do the spark plugs one at a time, moving down the motor. That way there's no risk of confusing the wires. We'll start with number one, which is on the passenger side here. Pull up and remove the boot. We're going to use a 5/8 spark plug socket for this. The difference between a spark plug socket and a regular socket is you can see that little rubber bushing in the bottom of the socket itself. That's going to hold the porcelain on the plug making it easier to remove and install. We'll also use a long extension and a ratchet. Set it down and rotate it until you feel it grab the spark plug, remove the spark plug.
After removing your spark plugs, an important step is checking the condition of the plugs you removed. You can see that ours has some light brown ash-like deposit on the tips, and while this may look very concerning, it's usually a result of various fuel or oil additives. All it means is that your cars spark plugs aren't liking the specific brand of fuel you use, or you're possibly getting an oil leak into the combustion chamber. If you don't notice a loss of oil in the vehicle, a blue smoke, or a burning oil smell while driving, then you may consider changing the brand of fuel you use most often in your vehicle. Otherwise, if you have symptoms of oil burn, like loss of oil, a blueish smoke coming from the tail pipe, or a burning oil smell, you'll want to check the rings of the pistons as well as the seals and valve guides in the head, which can cause oil leaks into the cylinder. While our number one spark plug had only light ashy buildup on it, you can see that our number four spark plug has a much heavier, darker buildup.
When we removed the plug, it was actually wet with oil, meaning that it's more likely that our oil additives are what is causing the ashy buildup, as opposed to being a fuel additive, which is also a possible cause. The simple way to check is to do a compression test to ensure that our rings are okay and controlling the oil appropriately, as well as removing our valve cover and checking the condition of our valve seals.
To give you an idea, here's the new spark plug we'll be installing in our vehicle. You can see that we have a nice clean electrode, both in the center and on the outside, nice clean threads, bright white porcelain insulator below the center electrode. A normally worn spark plug, meaning that the engine is operating properly and the spark plug is the correct heat range, will darken slightly, become possibly a light brown or gray color throughout here, as well as maybe some yellowing or graying of the white porcelain insulator at the bottom. The center electrode, while flush with the outside ones now, will become slightly shorter, will be free of any kind of deposit, be it dark from fuel or oil, free of any wetness from fuel or oil, and free of tan or white buildups from fuel additives, oil additives, or possibly the engine running to lean or too hot.
You can see all the spark plugs are identical. One important thing to check here is this number 11 on the porcelain of our new plug and the 11 at the end of the number on our old plug. It tells us that they are both the same heat range, which is very important for an engine. You can see we have the same threads, same connector at the top here, and the same two outer one inner electrode setup. If your old spark plugs are worn out, causing your engine to run rough or showing some concerns of the plug being improper or the engine not running right, then these new spark plugs from 1A Auto are going to go in direct fit, just like your original equipment, and fix you up right.
Install your new spark plug into your spark plug socket, bring it down as far as you can by hand. Once you can't turn it by hand, use a torque wrench and tighten the plug to 13 foot-pounds. Now, the tricky thing about the rubber bushing inside of that spark plug socket is to remove it. You may have to walk around the top of the extension before you can pull it out without leaving the socket stuck to the plug. Reinstall the plug wire until it clicks into place, repeat this process on the remaining three cylinders. Remove the hood prop, close your hood, and you're ready to go.
Thanks for tuning in. We hope this video helped you out. Next time you need parts for your car, please visit 1AAuto.com. Also check out our other helpful how-to and diagnosis videos.
Tools used
Hi, I’m Mike from 1A Auto. We’ve been selling auto parts for over 30 years!
Open the hood, we have to pull the release inside the car. It's just inside, right around your left knee on the driver's side. You need to release the secondary or safety release. Just feel around for it. This one is right here, squeeze up. Going to remove these two top nuts that hold on the appearance cover. They are 10 millimeter, so I'm using a 10 millimeter socket, ratchet and extension. They should just thread off real easily. Here's our appearance cover. It's got some foam inside that's just for noise. Just keeps the noise down from the valve train.
Here are your four coil packs. One for each cylinder. They're held into the valve cover with a 10 millimeter bolt. One for each. Underneath these is your spark plugs. Once these are removed, you can change your spark plugs and then reinstall the coil pack. Push down on the lock and remove the connector. These can be brittle. Sometimes they break, the lock does. This procedure will be the same for the other three. Use a ratchet, extension, and 10 millimeter socket to remove this 10 millimeter bolt. Put this bolt aside.
Now, I need to move the coil. May have to wiggle it because there is a seal in here and just break it free. As it's free, it should come right up. There's our coil pack. Use this special spark plug socket. It's got a rubber O-ring in there to hold the spark plug as we move it from the engine. This is one is a 5/8. Put on our extension, longer ratchet. Feed it down in there, you'll feel it sit onto spark plug. Break it free. Should take the ratchet off once it gets loose, just spin it out. You actually see this spark plug is covered with oil because our valve cover gasket has been leaking. Going to replace this spark plug after I clean up the spark plug openings, and then we'll replace the valve cover gasket.
This original spark plug. See it is all worn out. The brand new one we have from 1aauto.com is nice and fresh. The gap is small. Once we put all four of these in the vehicle, the car will be tuned up and it'll run great. I'm just going to take a rag and just carefully down here. Soak up as much as the oil as I can. I'm not going to worry about it too, too much. Any oil that make it into the cylinder will just get burned up anyways, but I do want to dry it up as much as I can before putting in the new spark plug.
Took our new spark plug, it's no need to gap this. It's pre-gapped. Put it into the socket. See it's held in with that rubber piece, so you can put it in without it falling out and take it by hand. You find the threads, put in it in by hand first, make sure it doesn't cross thread. That's just starting to touch the gasket. Take a torque wrench, set to 14 foot-pounds and tighten this down. All you're doing is crushing the crush gasket, so right there the spark plug is torqued in place. Sometimes that happens, the socket will stay on the plug, and you just kind of wiggle it a little bit.
Spark plug sockets have quite a grip to them. Sometimes if you don't have an extension that fits perfect into the socket, it can get stuck, so you just wiggle it around and break it free. It'll come right out. Just repeat these steps for the other three spark plugs and coils. Reinstall the coil, we'll line up the opening with the mounting hole. Move the harness out of the way, so I won't get pinched. We'll push right over the spark plug, reinstall the bolt. Once it gets tight, I'm just going to stop. Put the connector back in.
Now, we're going to reinstall the plastic engine cover. Wiped it down with a rag to clean some of the dirt off of it, make it look a little nicer. Get it lined up over those studs. It'll sit right down, reinstall the nuts. Actually, just do these hand tight. They don't need to be super tight. Job is complete.
Thanks for watching. Visit us at 1AAuto.com for quality auto parts, fast and free shipping, and the best customer service in the industry.
Tools used
Brought to you by 1AAuto.com, your source for quality replacement parts and the best service on the internet. Hi, I'm Mike from 1A Auto. I hope this how-to video helps you out, and next time you need parts for your vehicle think of 1AAuto.com. Thanks.
In this video, I'm going to show you how to replace spark plugs on this VW Passat. This vehicle has the 1.8T engine, which is basically the same engine for a lot of the different VWs and Audis. The tools you'll need are a large flat-blade screwdriver, a 5/8 sparkplug socket, and then a ratchet and extension for that socket. As you'll see in this video, my socket is old and warn, so I use a magnet to make up for that, as well as I also use some gasket material just to glue the plug into the socket when I'm reinstalling it. You want to remove this cover here. There are three little clips. Use the large screwdriver. Turn 90 degrees. Let them pop up. 90 degrees Then you tap them a little bit. 90 degrees. It will pop up.
This cover comes right up and off. Each coil has a little plug on it. You just push on that tab and pull the harness off. Obviously, if you're doing all four you do that for each one. Just move the coil a little bit. Pull it right up and out. Now, it helps to have a sparkplug socket. Mine is a little old and warn, so what I actually do is just take basically a piece of paper towel and just stuff it in a little bit. These sockets are designed to actually grab onto the sparkplug, but since mine is as old as it is it doesn't actually do that anymore. The paper towel just helps it accomplish its mission. You just put that right down in. This sparkplug seems nice and loose. It didn't work. The other option is to take a magnet and pull it up and out. I'm going to reinstall the plug. I put a little gasket material in there, so that the plug pretty much stays in there even upside down. This just gives me a couple seconds to put the plug right down in. I'm just looking, making sure there's equal space right around here to make sure that I put the plug in nice and straight. Then, you want to tighten these two about 20 to 25 foot pounds.
A new coil from 1A Auto; it's just like the original. Go down in. Put it in nice and straight. Just press it right down in and reconnect it. It's a direct fit. Then, repeat for the rest of them. Just place your cover back on. Basically, just use your oil filter or your oil fill as a separating point. Large screwdriver. Press those down and turn them 90 degrees.
We hope this helps you out. Brought to you by www.1AAuto.com, your source for quality replacement part and the best service on the internet. Please feel free to call us toll-free, 888-844-3393. We're the company that's here for you on the internet and in person.
Tools used
Hi, I’m Mike from 1A Auto. We’ve been selling auto parts for over 30 years!
Disconnect the negative battery terminal, it's a 10 millimeter nut.
Remove the plastic engine cover, two 10 millimeter nuts on the top. Cover should just slip off, let me put that aside. These are your four ignition coil packs, right on top of the engine. To remove them, well this tab is broken, but if the tab is not broken you push the tab in, pull it out. Push the lock in and pull it off.
To remove the coil pack, loosen the 10 millimeter bolt that's holding it into the head. This procedure's the same for the other three coils. Pull it straight up, and it'll come right off the spark plug. Repeat the procedure for the other three coils.
Use a five-eighths spark plug socket to remove the spark plugs.
Here's our old spark plug. Here's our old spark plug from our vehicle, and our new one from 1AAuto.com. Same size, same design, this one's actually not too bad, but the new one will fit great and work great in your vehicle. Procedure will be the same for all four spark plugs.
You want to use a spark plug socket, because it has a rubber piece inside here to hold the electrode in. That way, as you're installing it, the spark plug doesn't fall out. And then thread it in by hand to make sure you don't cross set it. Torque for these spark plugs is 14 foot-pounds.
Install the new coil, and put it down over the spark plug. Until that gets tight, I'm just going to stop. Reconnect the modular connectors. Reinstall the plastic engine cover. The spark plugs and coils have been changed.
Thanks for watching. Visit us at 1AAuto.com for quality auto parts, fast and free shipping, and the best customer service in the industry.
Tools used
Hi, folks. We've got these NGK spark plugs. You can buy them at 1AAuto.com. We're going to put a fresh set into our 2008 Outback with a single overhead cam 25 in it, so if you need tune up parts or any other parts for your vehicle, visit 1AAuto.com.
We've been selling parts for over 30 years. You'll get the best service on the internet, and fast and free shipping. Open the hood. Go under here, release lever. There's a little indicator, a little pictograph of a car. Release lever for the hood is here. Lift up on the hood, find the safety. It's right here about the grill, so push it to the passenger side, and just put the prop right up. You put your hood in the service position by lifting it up, and if you follow down here, you put the prop rod in this extra little hole here on the hood. Let that sit there, and now your hood is opened higher and you've got some more space to work.
If you're working on your Subaru here, the coil pack is right here with the plug wires running off of it. These two wires run down to the passenger side. There's cylinder number three and number one, and you can follow them down to the cylinder head, and that's where you'll find your spark plugs. If you follow the other two wires across, these are cylinder four and two. Again, those will go down into the cylinder head. We'll start here on the driver's side in the rear cylinder. This will be cylinder number four.
I'm just going to reach down. You don't want to pull the plug boot out by the wire. It's got these nice little rubber tabs here, you can grab onto it and pull it out. It might have a little bit of a suction to them. You've got to give it a good tug. Work it around a little bit. Lift it up. You want to do these one at a time so you don't mix them up. Lift this up here, put it aside. I'm going to use this 5/8 spark plug socket. This is special because it does have a rubber insert that holds the spark plug so when I take it out, it doesn't fall on me. 5/8 fits these, and I've got a combination of extensions. You're just going to have to find the right combination that fits in there.
Now, I can take this little extension off and maneuver it into place, and then I can stick this little shorter extension on here. We'll push it over the spark plug, so I can feel it's on there. Take the ratchet. It's pretty tight in here. Might have to work at it a little bit. It should come pretty easily. It shouldn't be torqued in here too terribly tight.
Start to loosen it up with the ratchet, and when you feel it get loose enough, you can reach in here with your fingers, take it out the rest of the way. I'm going to take this little short extension out so I can get it off. Just slide it out of here. So you can see that socket holds the spark plug in place. Just take it out.
Here we've got our old spark plug we pulled from our vehicle. See it does have some wear in it, a little bit of oil. That's pretty normal. The car probably does need valve cover gaskets, but I'm not going to worry too much about that right now. Here's our brand new one from 1AAuto.com. You can see if you match these up, they're the same length so they'll fit in the cylinder correctly, and the same type of crush gasket here. The original was NGK, the new ones are NGK's, so these will bolt right in and work great for you.
We'll put our new spark plug into the socket. It holds it in place. Go down in here. These don't need to be gapped. They're pre-gapped. Carefully slide it into the cylinder head. Make sure you thread it down in by hand. I need that little extra extension. You don't want to cross thread these, so make sure you feel them go in nicely. I like to thread them all the way down ‘til I can't thread them anymore with my hand, and then I'll tighten them.
The torque on these is 15 foot-pounds. You just need to crush the little sealing gasket that's on the end of them. If you can't get a torque wrench in here, you probably can't, it's pretty tight, so let me just get the ratchet in here to line up. I'm going to thread it down, and when I feel it get tight, I'll go about a half turn more, and that should be enough to seat that gasket. You don't want to over-tighten these. You don't need to kill them when you're putting them in. That's tight, and then I'll just go a little bit more, right there.
You can reinstall the plug wire and boot. At this point, if you want to change these, you can do that. Additionally, if you want to add a little bit of dielectric grease here and on the end, feel free. We're just going to install them as is. These ones are in pretty good shape. Feed that into the opening. It should seat itself right on the spark plug, just make sure it pushes down. It'll kind of snap into place, and it goes back into this little carrier here, and we'll do the front cylinder.
This one here, we'll do the same exact as the rear one, and we'll just start by pulling off the boot.
To get to the spark plugs on this side, the passenger side, so we're going to remove the air box to give us access. We'll start over here at the intake duct. This has some push clips here, so I'll use a push clip tool to pry them out. Just pop them up. Do the same for both, and this will pull right out and lift up. Put that aside.
We've got to loosen this hose clamp. You're going to need to use a flat bladed screw driver or I'm going to use an 8 millimeter socket. I think using the socket ratchet is easier, but if you don't have access to it, just use a flat bladed screw driver. Loosen it up, slide it off, and unplug the mass air flow meter here. Push in the lock, pull it out. You might have to hold onto the box. You don't need to remove it from this air box. You can just unplug it.
So there's a stud with a nut here holding in the air box. I'm going to loosen that up with a ratcheting wrench that's a 10 millimeter. If it's loose enough, I'll take it off with my fingers, if I can get my fingers in here. It's still kind of tight. It's a little bit rusty, so I'll keep taking it off. I'll try not to drop it. Put that aside so we don't lose it.
There's a 10 millimeter bolt down here. I'm going to use a 10 millimeter socket and a long extension. I'm just going to take it all the way out, make it a little bit easier. Pull the air box up and out. It sometimes might be... This one wasn't clipped, but it should be clipped on this power steering line here. If it is, just pop it out. Maneuver it out of the engine compartment. Try not to pull any hoses out with it.
We'll start on this rear cylinder here. Reach down, this will be just like the driver's side. Pull on these rubber flaps. You don't want to pull on the spark plug wire. Just kind of work the boot out. Put this aside, and just move this connector out of the way.
We'll put our spark plug socket and extension down into the opening. This wire is in the way. Just kind of maneuver it in there. I'll get the other little extension. Just use a combination of extensions that works for you. Make sure it's seated on the spark plug. It feels like it is. Use a ratchet to remove it. Slide it out of there. It's getting tight, we'll go just a little bit more to seat the gasket. You're all set.
Reinstall the spark plug boot. Make sure it's seated, and we'll move onto the next one. You do the same for the front cylinder. Reinstall the boot and the wire.
We'll reinstall the air box. I'm just going to feed it back into the fender well here. You have to maneuver it around some hoses and wires. Make sure we don't break this air flow sensor wire. Put that stud in the opening there. Make sure you don't lose your hose clamp here. Make sure you put the bolt part where you can reach it, so usually like that. Align this up here. Push it over. This will help you get it in place. This power steering line clips into this hook right here. Put this bolt down into here. Tighten it up. Once I feel it get tight, stop.
I'll reinstall this nut here. A little tricky because my hand wants to push the air box away as I'm trying to thread it on. Let's get it started. Just thread it on as far as it will go, and then I'll use my ratcheting wrench to finish it up. I'll just get it tight, just snug it up. You don't have to over-tighten it. Once you feel it get tight, you can stop.
Then, we'll find our mass air flow meter plug. It's very important you don't forget to plug this back in. It'll click when it locks in place. Tighten up our hose clamp. Once you feel it get tight, stop.
These little push clips, they've got a little rubber grommet on them. I'm just going to take it off. Just simply slide it off, and I'll push it back in where it originally went. This will make it easier to reinstall with these already in here. You've got to push them in place. Do the same for the other one. This part will fit into the air box. We'll slide it in. Line it up on the radiator support. Put the push clips in. The job is complete.
Thanks for watching. Visit us at 1AAuto.com for quality auto parts, fast and free shipping, and the best customer service in the industry.

NGETK00060