Replaces


Frequently bought together
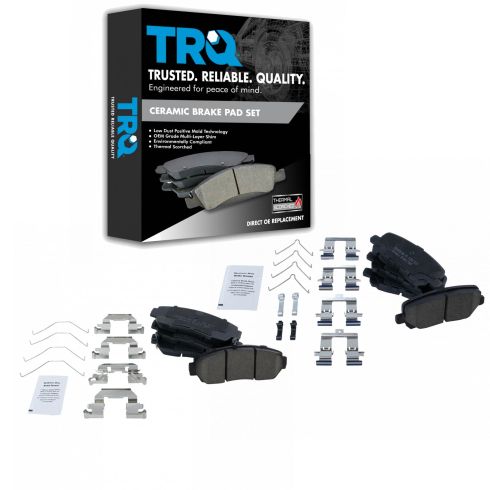
Part Details
About TRQ:
TRQ is a trusted brand dedicated to making every repair a success story by combining premium parts with easy installation. Each TRQ part is engineered by a team of automotive experts to meet or exceed OEM standards, delivering enhanced performance and maximum longevity. With rigorous in-house testing, the brand ensures superior fit and function across every product line. TRQ also provides customers with best-in-class, step-by-step installation videos—so you can complete repairs with confidence, whether you're a first-time DIYer or an industry professional.
TRQ brake pads are manufactured using premium raw materials and design standards to restore original performance. TRQ brake pads are positive molded and utilize a multi-layer shim for enhanced performance and service life. TRQ’s combination of materials and design ensures a low dust and low noise braking experience. TRQ recommends replacing your brake rotors when you replace your brake pads to ensure even wear of components and improved braking comfort. All products are fit and road-tested in our Massachusetts R&D facility to ensure we deliver on our promise of Trusted Reliable Quality.
Attention California Customers:
 WARNING: This product can expose you to chemicals including Lead and Lead Compounds, which are known to the State of California to cause cancer, and birth defects or other reproductive harm. For more information, go to www.P65Warnings.ca.gov.
Lifetime Warranty
This item is backed by our limited lifetime warranty. In the event that this item should fail due to manufacturing defects during intended use, we will replace the part free of charge. This warranty covers the cost of the part only.
FREE Shipping is standard on orders shipped to the lower 48 States (Contiguous United States). Standard shipping charges apply to Hawaii and Alaska.
Shipping is not available to a P.O. Box, APO/FPO/DPO addresses, US Territories, or Canada for this item.
Expedited is available on checkout to the United States, excluding Alaska, Hawaii.
Final shipping costs are available at checkout.
Created on:
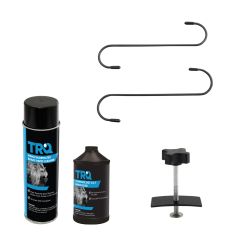
Tools used
Hi, I'm Mike from 1A Auto. We've been selling auto parts for over 30 years. We're dedicated to delivering quality auto parts, expert customer service, fast and free shipping, all backed by our 100% satisfaction guarantee. Visit us at 1AAuto.com, your trusted source for quality auto parts.
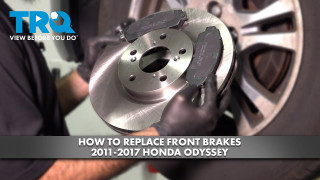
Today we have a 2014 Honda Odyssey that we are going to be doing front brakes on, and the very first thing that we want to do is get these five lug nuts loose while the car is still on the ground. Once they're loose, then we'll jack up the car. We'll use a 22mm socket and a 1/2" drive ratchet to get them loose. You can raise and support your vehicle with a jack and jack stands in the driveway or in a garage.
In our case, we have a lift, so we're going to be using the lift to make it a little easier to film.With all five lug nuts loosened on the ground, we should be able to just spin them off by hand using the 22mm socket that we cracked them loose with. Now we can pull the wheel off of the Honda.
We're going to take the caliper off now. There's 14mm bolts on the top and the bottom. This caliper is a little different than most because it actually has a slide bolt that will sometimes turn with the 14mm. Right here is a 14mm bolt. If we turn it with the wrench, you'll see the inside caliper slide is actually turning with it. What we have to do is take a 19mm wrench just like that, and then we'll be able to loosen the 14mm. There we go. Once you crack is loose, you should be able to just spin it out by hand just like that.
Now we'll do the same for the top. 19mm on the slide. Once we've cracked it loose, we'll just spin it out by hand. Now we're going to take the caliper off of the caliper bracket. It's sort of stuck on there at the moment, so what I like to do is I'll hang on the caliper a little bit. This compresses the piston on the inside. That makes it much easier to slip right off. You can see this one has dual pistons. We are going to take this now and hang it up here because you don't ever want to leave a caliper hanging by the caliper hose because it will damage the hose. We'll hang it right up there and out of the way.
You'll see that the brake pads have these little clips on them. These clips just make the pads push out and separate from the rotor so that they don't drag on the rotor. All they do is pop right out just like that. You can use a flat screwdriver if they're stuck in there, but they pop out just like that. At that point, you can pull the brake pads right out like so. Now we need to take off the caliper bracket, which is this item right here. It has two 19mm bolts, one on the bottom, one on the top. These bolts are usually quite tight, so while you can take them off with a wrench, it's a little easier if you use a 19mm socket and a long 1/2" drive ratchet. I'm going to go ahead and crack those loose. We'll do the top one. Once they're loose, you should be able to spin them right out by hand. Then you can remove the caliper bracket right off of the knuckle.
Now we want to take off the rotor. The rotor is held on with one Phillips screw, but typically Honda rotors are held on really tightly. Even when we take the screw out, we're still going to have to use these two holes and thread a couple of bolts into them. That will pull the rotor off of the hub.
We're going to start by removing this screw. Now ours is actually just spinning right out with the screwdriver, which is nice on a newer vehicle, but if your vehicle has any age to it or if it's in a rusty climate, these things are always stuck. When they're stuck, you can use an impact driver. This basically is like a screwdriver that you pop into the screw. Then you hit the end of it with a hammer and it forces the screwdriver into the screwdriver and it spins it at the same time. They're really cheap to buy, and this is one of the greatest helping tools that you can have when you're doing brake rotors.
Now that we have the screw out, we're going to thread two bolts into here, and it's going to pull this rotor off of the hub. These bolts are M8 by 1.25 thread pitch. We just grabbed a couple from our bucket of bolts, and we're going to thread them right in. Here's just a couple of bolts that we found in a bucket of stuff that we had. You can go to your hardware store and grab these if you don't have them. In our case, they're M8 by 1.25, as I said before. You just thread them right in. These bolts happen to be a 13mm, but if you buy them at a hardware store, it might be a different size. You can see, as you thread them in evenly, it's pulling the rotor off of the hub. It's actually a pretty great design because, in our area, all of the rotors are always rusted under the hub, and not all rotors have these, so you have to hit them with a hammer or something like that. This makes the job a whole lot easier. We'll just keep going back and forth until the rotor is completely off.
Of course our bolts aren't long enough, so we're going to have to get a longer set of bolts for this. It looks like about a 1-1/2" bolt is not long enough. We just found a longer bolt. I only have one of them so I'm going to have to do one side at a time most likely. Look at that, our rotor actually decided to come off so we don't even need this. There we go.
You can see, it basically rusts all around here and then all around the center. That's what holds the rotor on. You can see all the rust behind it. This rust builds up and it basically locks the rotor onto the hub. Using those two bolts is the best way to get it off. As we know, the rust builds up around here, so we're going to use an abrasive pad to just go around the edge of the hub and clean it up. That way, when we put the new rotor on, it will just slide right on.
We're going to do the same for the middle right around here. You can see all the rust and dust coming off of it. Now we're going to spray it with a little bit of brake cleaner to get all the dust off. Now we're going to take a little brake grease and just go around the edge. Hopefully, next time that somebody does brakes, they'll thank me for doing this because the rotor will come off a little easier. We'll go around the center where the rotor always sticks, and then we'll just go around the edge. Hopefully this will prevent a little bit of rust for the next person that does these brakes.
Now we're going to put the new brake rotor on the hub. You can see the marks where the old bolts were used to pull the rotor off the hub. Then you'll see the hole where the bolt goes. You want to make sure you line up all of those. It looks like it goes just like this. As you can see, it slid right on right over the center and everything. That's because we cleaned it all up. Now we're going to thread the screw right into the hole. Make sure to hold the rotor flat. Then we'll just tighten it up with a Phillips-head screwdriver.
You can see that the rotor has some greasy fingerprints on it and it has some oil from when it was shipped to prevent the rust. What we're going to do is use some brake cleaner and a cloth to wipe off the rotor. That way, when we get the new pads on there, it will seat really nice and evenly with no junk in between. We'll do it to that outer part of the rotor, and then we'll go and we'll spray the inside of the rotor as well. This is the brake caliper bracket. We want to clean it really well before we put it back on the car. These pieces right here are brake pad slides. These are replaceable if yours are damaged in any way. Usually they're made out of stainless and they hold up really well, so they often outlast the car. You can see, they snap right into place.
We're going to just clean them. You can use brake cleaner and a wire brush to clean them. Or, if you happen to have a parts washing tank like we do, that makes it a little easier as well. Now that we've cleaned all the major dust off of the caliper bracket, we're going to slide it back on and put the two 19mm bolts through the knuckle and into the caliper bracket. Now we're going to put the 19mm socket back on there with the 1/2" driver ratchet. Then we're going to tighten them up.
Here we have the old pad and the new pad. The old pad has this metal protector plate on it, so we're going to take that off and we're going to put it on this new pad. Just clips right on. You want to make sure the squeaker goes at the top on the inside pad. What we're going to do first, though, is we're going to put a little anti-seize on the bottom and the top. That will allow the pad to slide in the caliper bracket nice and smooth.
We're going to do the same for the front pad. We'll put a little anti-seize around the edge. You don't want to go overboard with this stuff because you don't want to get it on the pad itself. You just want to make sure that it will slide. We'll get it in here just like that. Now we'll do the outer pad with a little anti-seize. Slide it right in.
Now we want to compress these pistons back into the caliper, so we're going to release the caliper from its bungee cord home. Can set it right here. We're going to put an old brake pad right in here and then use a c-clamp to compress these pistons, because we need to push them back into the caliper. Get the caliper set up here. Then we'll just slowly turn the clamp in until both pistons are bottomed out. Now we can take the c-clamp off, and the old brake pad.
This process is a little bit tricky because these clips want to push the brake pads out, so you have to basically put the clips in, hold the brake pads in, and then slide the caliper over them. We're going to do it just like this. We'll put the pins in. Making sure to hold the pads in place, we'll put the other clip in. Then we'll take the caliper. Make sure you don't bind up the hose. I almost put the hose into a s-shape. Then you can slide the caliper over the pads. Now we're going to take the two caliper bolts, which are 14mm, we're going to slide them into the caliper and start threading them in by hand. You always want to start every bolt by hand because you don't want to crossthread it.
Now that they're both in by hand, we can go in with our 14mm wrench and we'll tighten up the caliper. Again, it looks like this 19mm slider bolt is turning with the other bolt, so we'll get our 19mm and then we'll make sure that the 14mm is tight. We'll do the same for the bottom.
We can now put the wheel back on the hub. Just line up all the lug nuts, push it into place, and then put the lug nuts one at a time by hand. Now we're going to tighten these by hand with our 22mm socket and 1/2" ratchet. Now we're going to lower the vehicle. With the Honda back on the ground, we can now take our 22mm socket and torque wrench and we can torque these to 94 foot pounds. You always want to do a crisscross pattern so that it torques down evenly. Now we're going to get in the vehicle and pump the pedal. You'll notice that it goes almost to the floor the first time. Now it's nice and firm.
Thanks for watching. Visit us at 1AAuto.com for quality auto parts, fast and free shipping, and the best customer service in the industry.
Tools used
Hi, I'm Mike from 1AAuto. We've been selling auto parts for over 30 years! We're dedicated to delivering quality auto parts, expert customer service, fast and free shipping, all backed by our 100% satisfaction guarantee. Visit us at 1AAuto.com, your trusted source for quality auto parts.
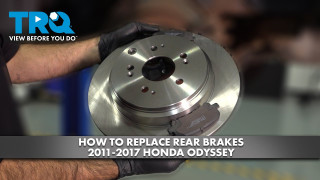
The first step in doing a brake job is to remove the wheel. And to remove the wheel, we want to crack these lug nuts loose before we jack it up and that way. It will make it a little easier on us with the car in the air. We'll use a 22 mm socket and a 1/2 inch drive ratchet to get them loose. You can use your jack and jack stands to raise this vehicle off the ground in a driveway or garage. In our case, we happen to have a vehicle lift to make the video shooting a little easier, so we're going to go ahead and use that. We can now take our deep 22 mm socket and we can remove each of the lug nuts just by spinning them off. You probably won't need to use a ratchet for this, because once you've got them loose, they usually spin off pretty easily. Now we can take the wheel off of the vehicle.
We're now going to remove the caliper from the caliper bracket and there's two bolts. There's one on the top, and one on the bottom. And they're both 12mm bolts. So, we're going to use a 12 mm wrench to remove them. Once you crack them loose, you should be able to just spin it right out with your fingers. There's one, and we'll do the bottom one just like that. We'll spin it right out.
Now, to get the caliper off, it's a little bit sticky on there, so what I like to do is hang off of it a little bit and that pushes the piston back into the caliper and then it will slide right off. At this point, we need to come up with a bungee cord that we can hang this from. Maybe from the shock tower and that will prevent us from damaging the brake hose back here. You never want to hang the caliper from the brake hose, because you can easily damage the brake hose. All right. Here's our bungee cord and we're just going to snake the bungee cord right through here and hang the caliper right from the shock.
Now we can pull the pads out and have a look at them. You can use a flat tip screwdriver to get them out. These ones, you can see, they're probably halfway worn out. We're actually replacing this because it has a pretty bad brake pulsation. Now we're going to remove the brake caliper bracket and that is a 17mm bolt right here and a 17mm bolt right here. I'm going to just try and use a wrench. These bolts are usually pretty tight, but with a little muscling, you should be able to get them off. There's the lower bolt. A lot of the time, these will just spin out really easily. You can certainly use a 17mm socket and take this off a little faster. All right. There's the second bolt.
This is the caliper bracket and we need to clean the mud and the dirt and the brake dust off of it. You can use brake cleaner and a wire brush to clean all the slides out here. We have a parts washing tank, so I'm actually just going to use the parts washing tank. But, ideally, you just want to clean off all the mud, make sure it's a nice, clean environment for your brake pads to live in.
The next thing that we have to do is pull this Phillips-head screw out of the rotor and the Phillips-head screws right here are usually stuck really hard, unless the car is new. So, we're going to give it a shot. Oh wow. This one actually came out ridiculously easily, which is unheard of. Usually if these things are stuck, you need to use a impact driver, which is just a screwdriver that you put into the screw and then you whack it with a hammer and it puts extra force on it and it turns it at the same time and that makes pulling these brake rotor bolts out really, really easy. Far easier than using a screwdriver, because a screwdriver will end up stripping the bolt out. Some miracle happened with us today and we got the bolt out with just a regular screwdriver. But, if the car was 10 years older, you would definitely need some sort of impact driver for it.
Honda puts these bolt holes in their rotors so that you can put bolts in them and when you put bolts in them. It actually pries the rotor off of the hub. These bolts are M8 x 1.25 thread pitch. And you just screw them in and as you tighten them in, it pushes against the hub and it pulls it off. You can see it coming away from the hub right here. However, the other thing you have to watch out for here is the parking brake. So, the parking brake is inside this drum and a lot of the time, the parking brake will be too far out and it will grab on to the rotor as you're trying to pull it off. So, we'll give it a shot and it looks like ours came right off. However, if it didn't, what you can do is you can pull this out with a flat-tip screwdriver, like so.
This is just a rubber plug to keep water out of the rear parking brake. And what you do is you have to find the adjuster wheel on the parking brake and then you use a flat-tip screwdriver to adjust it, and when you adjust the parking brake adjuster, it will bring the brake shoes in and it will allow you to pull the rotor off. I'm going to take the rotor off and I'll show you how it works.
You'll see that the rotor has a hole in it now, that had the rubber plug. And what you do is you insert a flat-tip screwdriver through that hole and you can actually turn this adjuster wheel by prying on it. Going like this will actually loosen up the brakes, and that will allow you to pull the brake rotor off of the parking brake. Going like this will loosen up the parking brake. It will bring them very close together, and then you can slide the rotor off.
Here we have our old rotor and our old pads, and we have our new rotor and new pads. You can see they essentially look identical. This one had a pretty bad pulsation, probably caused by the vehicle sitting for a little while and then having some rust marks on the rotor. You can see the pads are identical as well. Comes with a squeaker, just like the old one. They look the same, fit the same, and obviously work the same. And the new rotor also has all the right spots. It has the holes to pull the rotor off of the hub. It has the bolt hole right here to bolt it onto the hub and obviously, the same bolt pattern. These parts should look and work and fit just like the originals.
All right. Here we have our new rotor and what we want to do is make sure that this bolt hole and these little marks where the other bolt holes were all line up with the new rotor. So, what we'll do is we'll find that spot. Looks like it's like this. Yep. And we'll slide it on.
If you go like this, you can actually hear the parking brake shoes just barely touching the insides of the rotor, so we may need to adjust them down a little bit. With a new rotor, it looks like the new rotor is not worn out, which is good, so we're going to adjust them down a little bit and give them a little more distance between the rotor and the shoes so that we can have a properly working parking brake with no drag. We're going to pull that off. You can do this with the rotor installed, but I just have the rotor off so I can show you how this works. You basically take a flat screwdriver and you can pry down on this adjuster wheel. You can see the gap right here is getting smaller as I spin this. And that means that the parking brake shoes are coming closer together and giving a little bit more space under the rotor. We're going to set it maybe about there and we'll put the rotor back on, obviously finding the right position for it once again. Like that. It's definitely a little bit better. We'll probably give it a couple more clicks and we'll do it from right here. This is how you would normally do it.
All right. So, now it's very lightly touching and that's exactly what you want. You want it to spin freely, but also just barely hear the brake shoes touching the rotor, so it's free to move but still just barely there. All right. Now we're going to put our Phillips-head screw into the rotor and tighten it up. You want to hold the rotor flat as you tighten it and we want to put our rubber cap back in this little hole here. It's a little easier when you're not wearing rubber gloves. Flat-tip screwdriver will probably help. There we are.
You'll see that we have all kinds of greasy fingerprints and some shipping grease all over the rotor. We don't want to get that stuck in the pads, so what we're going to do is spray it with some brake cleaner and wipe it off with a clean rag. That way it will be a nice, clean surface for the pads to ride on when we get it all put together. We're going to do the same for the back side.
Here's our brake caliper. We cleaned all the mud off of it. You want to make sure your sliders move freely. Ours actually work really well. If they don't, you can grab the boot and pull it out. When you pull this out, if yours are stuck in there, you're going to want to clean them out with some brake cleaner, maybe even a wire brush and then put a really thin coat of grease on the slider and then push it back in.
If you put too much grease in it, it will actually prevent the slider from collapsing all the way, and you don't want that to happen because that will wear out your brake pads unevenly. We know that ours are in good shape. They slide perfectly, so we're going to put them back on with our 17mm bolts. I'll do the top one first as always, start it by hand. And we'll do the lower one. And then we can tighten them up with our wrench or a socket and ratchet, whatever your preference is. I'm using a wrench because it happens to be in my hand.
Now we're going to put a little anti-seize on the edge of the brake pad, so that it slides into the caliper nice and smooth. We'll put it right here, just on the top and the bottom. You don't want to get it on the actual brake pad surface, because then you'll obviously have poorly working brake pads. Then you can slide them right in to their new home in the caliper, just like that. You put the squeaky one on the back side and then the one without the squeaker on the outer side.
Now we're going to use a C-clamp to compress the piston in the caliper. We can do this with it still hanging. We just need to put the piston back into the caliper so that we can slide the caliper over the new pads. This is easy as just turning this and you can turn it right back out again like so. And pull your C-clamp off and at that point, you can take off your bungee cord and set that aside. You don't want to accidentally leave it attached to your shock. It looks like the boot in this caliper is actually poking out a bit, so I'm going to poke the boot back into place. There we go.
All right. Now we can slide the whole thing right onto the brake caliper bracket and we can install our two bolts. All right. Here's our two 12mm bolts. We're going to screw them in by hand and then use our 12 mm wrench to tighten them up.
Whenever you do a brake job, you always want to pump the brake pedal at the end of the repair and that's because there's all this extra space between the piston and the caliper and the brake pads and when you push the brake pedal down, it basically forces the piston all the way out and that's basically its new home. Right now it's all the way backed into the caliper and that's basically its innermost point. So, what it does is when you push the pedal down, the piston comes out and it basically takes up all that free space. You only need to do it a couple times, because then it finds its new normal and at that point, your pedal becomes a much firmer feel.
If you forgot to pump your brake pedal after doing a brake job, it would take a few full presses of the pedal to get all of the pistons out to their new normal and it would actually end up scaring you quite a bit and may even cause an accident, because you'll end up having basically no brakes for the first couple of pumps of the pedal. As soon as you get the pedal pumped up, then everything becomes normal, and you can drive around and stop a whole lot safer than before.
At this point, we can put our wheel back on. We'll lift it up, pretend we're really strong and slide it on the car. Then, you can start threading your lug nuts on one at a time. I always like to do the top one first and then I'll push the wheel in and do the bottom. If you get the bottom one in, it makes the other three pretty easy. Just like that. Because now the lugs are sticking out. We can now begin tightening up these 22 mm lug nuts. We'll use a ratchet to get them snugged up. You want to get them snug while the car is still in the air and then once it's on the ground, you can torque them to the proper specifications. All right. It's now time to lower the vehicle back down to the ground. We'll come back over here with our 22 mm socket and our torque wrench and we'll torque this to 94 foot-pounds.
Thanks for watching. Visit us at 1AAuto.com for quality auto parts, fast and free shipping, and the best customer service in the industry.

BFA13041