Replaces


Recommended for your 1998 Dodge Ram 1500 Truck
Frequently bought together
Part Details
Specifications
About TRQ:
TRQ is a trusted brand dedicated to making every repair a success story by combining premium parts with easy installation. Each TRQ part is engineered by a team of automotive experts to meet or exceed OEM standards, delivering enhanced performance and maximum longevity. With rigorous in-house testing, the brand ensures superior fit and function across every product line. TRQ also provides customers with best-in-class, step-by-step installation videos—so you can complete repairs with confidence, whether you're a first-time DIYer or an industry professional.
Product Features
TRQ suspension kits are manufactured using premium raw materials and coatings for extended service life. Each TRQ suspension component is designed to be a direct, maintenance-free replacement to the stock unit. To extend the life of your steering and suspension components, TRQ recommends replacing components in pairs, sets, or kits. All products are fit and road-tested in our Massachusetts R&D facility to ensure we deliver on our promise of Trusted Reliable Quality.
Install Tip: When replacing steering components, have a professional alignment performed afterwards. This ensures proper tracking and even tire wear.
Our steering and suspension components are pre-greased and sealed for long life and do not require the extra maintenance typically required by greaseable versions.
Attention California Customers:
 WARNING: This product can expose you to chemicals including Lead and Lead Compounds, which are known to the State of California to cause cancer, and birth defects or other reproductive harm. For more information, go to www.P65Warnings.ca.gov.
Lifetime Warranty
This item is backed by our limited lifetime warranty. In the event that this item should fail due to manufacturing defects during intended use, we will replace the part free of charge. This warranty covers the cost of the part only.
FREE Shipping is standard on orders shipped to the lower 48 States (Contiguous United States). Standard shipping charges apply to Hawaii and Alaska.
Shipping is not available to a P.O. Box, APO/FPO/DPO addresses, US Territories, or Canada for this item.
Expedited is available on checkout to the United States, excluding Alaska, Hawaii.
Final shipping costs are available at checkout.
Created on:
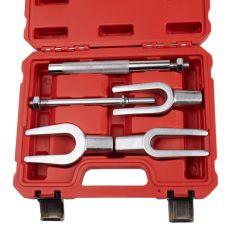
Tools used
Brought to you by 1AAuto.com, your source for quality replacement parts and the best service on the Internet.
Hi, I'm Mike from 1A Auto. I hope this how-to video helps you out, and next time you need parts for your vehicle, think of 1AAuto.com. Thanks.
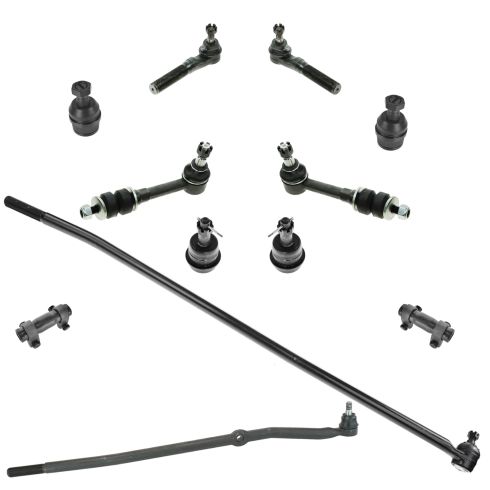
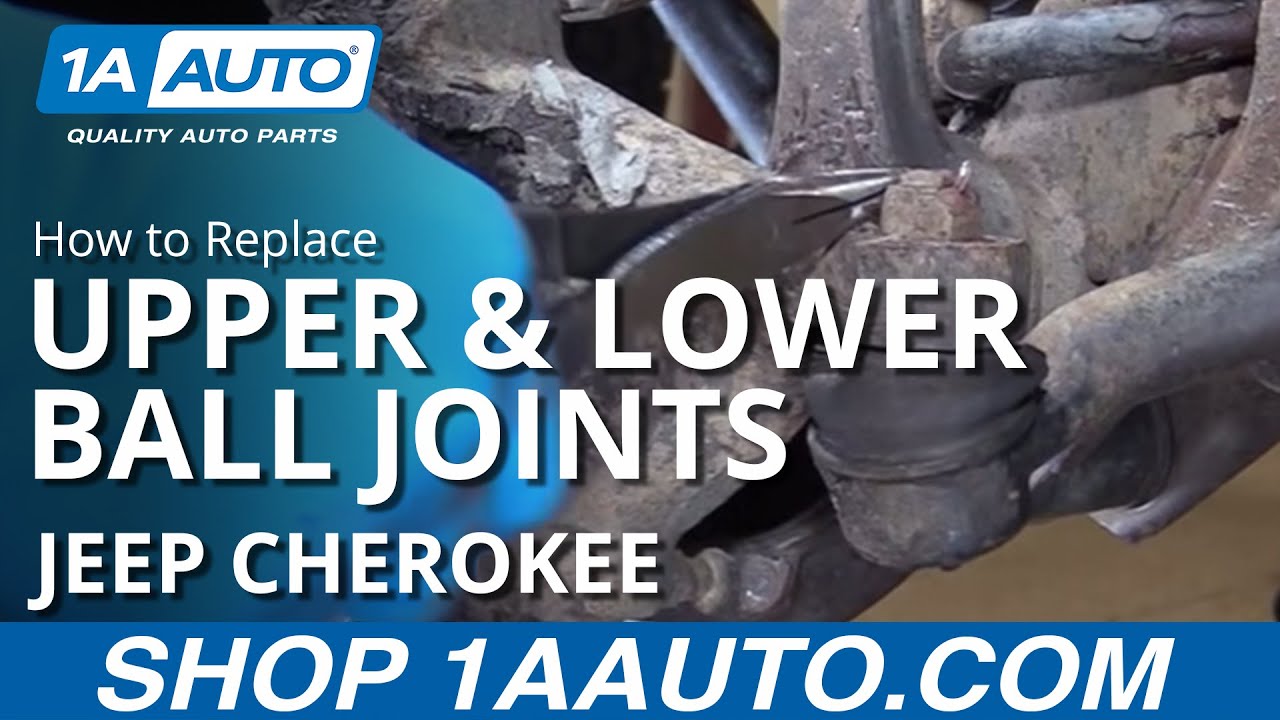
In this video, we're going to show you how to replace the upper and lower ball joints in a 1996 Jeep Cherokee. This video will be useful from 1992 to 2001 and very similar to any other jeep that uses a Dana 30 front axle.
The items you'll need for this repair include a new set of upper and lower ball joints from 1AAuto.com, 13, 19, 22, and 36 millimeter sockets, a ratchet and breaker bar, a 7 millimeter wrench, torque wrench, ball joint press, pry bar, needle nose pliers, a hammer and pickle fork, a pick tool, a small punch, a grease gun, a bungee cord, and your favorite penetrating oil.
Using a 19 millimeter socket and breaker bar, crack the lug nuts loose. Straighten out the cotter pin with a pair of needle nose pliers, and move it from the axle. Remove the cap and washer from the axle nut. Using the 36 millimeter socket and breaker bar, break the axle nut loose. These are usually on pretty tight, so you may need to put some force behind it. Remove the axle nut from the end of the axle shaft.
While we're using a lift to make it easier to show you, this job can also be done at home on a jack and jack stands. With the vehicle raised and supported, you can finish removing the rest of the lug nuts and the wheel. Using a 13 millimeter socket and ratchet, remove the two bolts securing the caliper to the spindle. Remove the caliper and pads from the spindle.
You may need a small pry bar or a large flat screwdriver to remove the caliper. Once the caliper is removed, use a bungee cord, mechanics wire, or zip ties to hang the caliper up and out of the way. Remove the rotor.
We're going to spray some penetrating oil around the contact points of the hub, as well as the exposed portions of the stud. Remove the three 13 millimeter 12-point bolts securing the wheel hub to the spindle. We're going to use a 12-point 13 millimeter socket, a breaker bar, and if you need to, you can use a pipe for a little extra leverage.
We'll break the bolts loose with the breaker bar, and finish removing them with a socket and ratchet. If you have a nut and washer as opposed to a flange nut on your axle, you can use a small pick to pull the washer out so it doesn't fall off when you remove the hub. Tap the axle in to be sure that the splines are free of the hub. Then with a hammer tap the hub out of the spindle. Remove the dust shield as well.
Using a pair of needle nose pliers, remove the cotter pin for the tire rod. With the end brakes off, you can always pull them through in the other direction. Using a 19 millimeter socket and ratchet, remove the castle nut from the tire rod.
Since this is a steel spindle, we can hit the edge of the spindle to release the stud. Remove the cotter pins from the upper and lower ball joints with a pair of needle nose pliers. Our cotter pin broke off flush with the bolt, so we're going to use a small punch and a hammer to try and tap it through. Be careful not to put the punch in too far, as it could break off in the hole and is much more difficult to remove than the cotter pin. Once the loop is through the castle nut, grab it with a pair of needle nose, and finish removing it.
Straighten out the cotter pin for the upper ball joint. Remove it from the ball joint stud. Put a pair of needle nose pliers into the loop on the other side of the ball joint. Ours broke, so we'll try to pull them from the back side. Again, our cotter pins have broken, so we'll tap them out with a punch and a hammer.
Carefully remove the axle shaft from the housing. Be sure to place it somewhere where the splines won't be damaged. Once you've broken through the cotter pin, you can finish removing the nut with a 22 millimeter socket and ratchet. Our axle fluid started leaking out of the tube here, so we took a rubber glove, wadded some paper towels into it, tied the end off, and stuck it into the end of the axle tube to keep the fluid in there while we work.
Using a 28 millimeter socket and a breaker bar, remove the nut from the lower ball joint. Using the pickle fork between the upper ball joint and the spindle, separate your spindle from the axle. If it still isn't coming out with the pickle fork wedged in, you may have to hit the bottom in order to release the spindle from the axle.
Set up your ball joint press to push the upper ball joint up. Using a 22 millimeter socket and ratchet, press the ball joint out of the axle. Sometimes it may be necessary to change the configuration of your press to push the ball joint the rest of the way out. Set up your ball joint press to press the lower joint down into the cup.
Here we have our old ball joints that we removed from the vehicle and our new ball joints from 1AAuto.com. As you can see, the ball joints are exactly the same. Our new lower ball joint comes with a snap ring to make sure that it stays in there more secure. They are both greaseable and serviceable joints, and they come with new castle nuts and new cotter pins. The ball joints on your front axle allow the vehicle's front spindle to turn as you steer the wheel. They develop in and out play over time or become jammed up, making it difficult to steer. They can also create popping and banging noises while going over bumps, as well as throw off the alignment of the vehicle.
If your old ball joints have excessive play and are creating a popping or banging sound over bumps, or while turning, as well as creating alignment issues on the front end of your vehicle, then these new ball joints from 1A Auto are going to go in direct fit just like your original equipment and fix you up right.
Insert the upper ball joint into the spindle. Sometimes it's safer to remove the rubber boot until after it's been installed. Set up your ball joint press. Using a 22 millimeter socket and ratchet, press your ball joint into the spindle. Bring the ball joint down until it bottoms out into its slot on the axle. Once the ball joint is set into the axle, reinstall the boot. Remove the boot from the lower ball joint, set it into the axle, and set up your press to install.
Reinstall the boot onto the bottom of the lower ball joint. Reinstall the spindle onto the ball joints. Start the nut onto the lower ball joint first. Bring that up as far as it will go then start the top. Using a 32 millimeter socket and ratchet, tighten up the lower ball joint nut. Tighten the upper ball joint nut with a 22 millimeter socket and ratchet. Torque the upper ball joint nut to 75 foot-pounds and the lower ball joint nut to 80 foot-pounds.
Install the bottom cotter pin with the longer leg facing down. Bend it over the bottom of the stud and cut the shorter leg off. Send the cotter pin through the upper ball joint with the longer leg facing down. Bend the longer leg onto the stud. Cut the shorter one off. With the upper ball joint greased fitting in, tighten that down with a seven millimeter wrench. Add grease to the ball joint until you see the boot swell, but do not allow the boot to pop off of the joint. Remove whatever you're using to stop the flow of axle fluid, and quickly insert your axle.
You'll have to lift up on the center portion in order to get it to set back into the differential. Once it's lined up, rotate it, and fully insert it into the axle tube. Line up the spindle. Reinstall your tie rod. Start the nut. Tighten it down with a 19 millimeter socket and ratchet. Torque the tire rod nut to 35 foot-pounds. Install the cotter pin into the tie rod. Always use a new cotter pin. With the long leg facing out, bend that leg over the top of the stud. Cut the lower one short.
Reinstall the dust shield. Line up the hub onto the splines. Set it into place, and start your three 12-point 13 millimeter bolts. Tighten down the wheel hub bolts with a 13 millimeter 12-point socket. Be sure that the hub installs back into the spindle nice and straight. Torque the hub bolts to 75 foot-pounds.
Reinstall your rotor onto the hub. Remove your caliper from wherever you secured it. Reinstall it onto the rotor. Reinstall the two 13 millimeter bolts. Secure your caliper to the spindle. Torque the caliper mounting bolts to 20 foot-pounds.
Reinstall the wheel onto the hub. Start your lug nuts by hand. Torque the lug nuts to 110 foot-pounds in a cross pattern. Using the 38 millimeter socket and the torque wrench, torque your axle nut to 175 foot-pounds. Install this cap onto the axle nut in a way that allows you to insert a new cotter pin. The pair of needle nose pliers. Then both ears of the cotter pin to opposite sides of the nut.
Thanks for tuning in. We hope this video helped you out. Next time you need parts for your car, please visit 1AAuto.com. Also check out our other helpful how-to and diagnosis videos.
Tools used
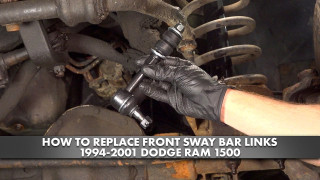
Hey friends, it's Len here at 1A Auto. Today we're working on our 1996 Dodge Ram 1,500 and I want to show you something very basic, replacing front sway bar links. It's going to be super easy. I can do it and you can do it too, and as always if you need this or any other part, you can always check us out at 1aauto.com, thanks.
So one of the first things we're going to do is take off this cotter pin. You can probably do the majority of this without actually having to take off the wheel. It's a little easier with the wheel off, and of course for video purposes it's much easier with the wheel off. If you can't get this cotter pin out, no big deal. Just cut it, break it, do whatever you got to do. There we are. We're going to remove this castle nut right here and this nut up here, and we should be able to get the sway bar link out.
So we're going to take this off right here. 17 millimeter. The same thing for up there. 17 millimeter, ratchet, airgun, whatever you got to do. Using an air gun, of course, make sure you're wearing hand protection and eye protection. There we are. The nut's still in there. put it on a second there. Get it off of there. Set this aside. Nut's on there. There it is. Set that aside. Hammer. We're going to try to bonk this through. Once you get it through this side, it'll come down this side. There we are. Doin' it right. We just got to get it all the way out of there. Let's see. Of course there's grease. Kind of is what it is. That bushing off of there. We don't need that. Cool. Let's take apart the other side at the same time. At that point, the bar will be able to move around and we'll be able to get this out much easier.
All right, so we went over and we did the same thing to the other side. Got it so the sway bar link's ready to come out. Now we can wiggle this bar around a little bit and that's nice because it's going to give us the amount that we need to be able to get this out. Just going to grab a pry bar, just walk this around a little bit and there's our sway bar link. Let's do a quick product comparison and we'll move along.
So here we are friends, a quick product comparison for you. Over here you have your original sway bar link out of the front of a 1996 Dodge Ram 1,500. We just took it out. And over here you have your brand new quality 1A Auto part. Both these parts are created equal. You've got the same overall length, which is very important. You don't want one that's way higher or longer than the other one way or the other. Okay. This comes with a brand new nut right here. Very important. It's got a sealed boot. That's great because it's going to keep the moisture out of there for you. Down this end, take this off of here, you have a neoprene locking nut. Super important. You want to make sure that this doesn't loosen up when you're going down the road. Brand new washers, there's two of them, and of course the brand new bushings as well.
As you could tell, this comes with everything you need to go ahead and mount it into the vehicle. Even a brand new cotter pin. Thank you 1A. I don't see any reason why this wouldn't be a quality part to install into the vehicle, so I'm going to go ahead and do it. And as always, if you need this or any other part, you can always check us out at 1aauto.com. Thanks
We'll take off this neoprene locking nut, one of the bushings and one of the washers. So those all right where we can grab onto them. Okay. Now this is important. The way that these bushings go, there's two sides. There's one with a little flappy thing right there, and then one that's rounded. This little flappy piton goes up inside here, or if you were looking at it from underneath, essentially this goes into the hole. Okay. Just right up in there. So you want to make sure that that faces towards the mounting area on the differential. Just like this. Get this nut off of here. Just going to bring this in. See if I can grab my pry bar. Pull down on this nice and easy. I'm just going to keep wiggling it around. There it is. Take our castle nut. That's the slotted nut, kind of looks a little bit like the top of a castle, that goes on the part with the sway bar. Okay. Grab our bushing, got a little piton. Just going to go in there. Okay.
Washer, they're kind of curved. This curves upward right here, and inward right there. They're not flat. I Don't know if you can see there. The curved up part faces up, it's going to go up like this. So the roundedness fits right in there. Very nice. Neoprene locking bolt, neoprene locking nut. That right on there. Awesome. We're going to do the same to the other side of the vehicle real quick, and then we'll go ahead and snug these down.
All right, so now what we're going to do is we're going to hold the sway bar link right along this edge right here. They made a nice area for you to grab onto with your pliers. I'm going to use a 16 millimeter. Tighten this up. When we tighten this, you don't want to go down until this rubber is completely flattened. You just want it so that this washer is touching and it's kind of squeezing it just a teeny weeny bit. Not very much. Little bit more. Check. Sure, feels good under there. That's perfect. Okay. So you see how much this is the squishing? It's not very much. I didn't crush it, so the washer is all the way down on here. It's not about that. It's just about making sure that it's tight enough so that the sway bar link can't move up and down, but not so tight that you're squeezing these so much that they're ready to blow right out of there.
Because then driving down the road, 100,000 miles, however long it takes, it's going to be a lot of pressure on these things and they're just going to give out over time. So the less amount of pressure on them, the better. We're just going to put this in. There we are. See if we can find where the slot is in the sway bar link. Looks like we're pretty close. Right there. Cool. It's a nice big cotter pin. I really didn't want it to come out. You're just going to bring this all the way down. There we are. Bring this over. Just like that. We know it's nice and tight. It's locked in, that and that right there can not come loose because it's got a dotter pin. This one can't come loose because it's got the neoprene lock in there. Let's move ahead and do the same to the other side.
Thanks for watching. Visit 1aauto.com, your place for DIY auto repairs, for great parts, great service, and more content.
Tools used
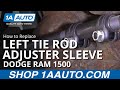
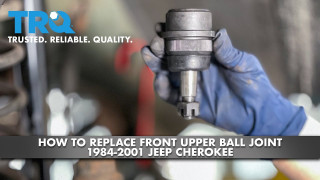
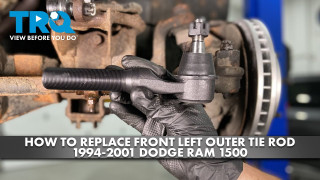
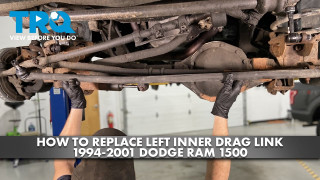
Hey friends, it's Lenny here at 1A Auto. Today we're going to be working on our 1996 Dodge Ram 1500 and we're going to be replacing a tie rod sleeve. It's going to be super easy. I can do it, and you can do it too. And as always if you need this or any other part, you can check us out at 1aauto.com. Thanks.
So we're underneath the vehicle here. We have our left front outer tie rod end, which is this unit right here. It's approximately this long. Okay. You have your sleeve unit and then you have this right here that comes all the way across over to here. This would be your left front inner tie rod end. Okay.
A lot of times what happens is, it's exactly what this one looks like. You get a lot of rust and corrosion inside here. This should be where the sleeve is and all these threads right here on your tie rods should be inside here. This whole sleeve is a completely threaded unit and it threads on to this part and right here. When they get rotted and they look like this, the odds that the threads on the tie rods and the threads on the inside of this sleeve being good is just so minimal, because all they're doing is sitting there collecting rust and rot.
And when you're dealing with steering and suspension, you want to make sure that you're being as safe as possible and you have as strong material as possible, because last thing you want is bad threads on either of these two pieces and this pulling right out. Because you're driving down the road, your wheels are going nice and straight. Next thing you know, there's no threads holding this in, except for just the tightness of this, and it just slides right out. And I don't want to think of any worst case scenarios, but I'm sure you can.
And to avoid that, what I would recommend in this case is you replace this whole unit. Okay? Left front outer tie rod end, sleeve, and the inner tie rod end all the way down to here. All right. If you're not going to do that and for some reason you want to risk it, and you do you booboo, what you would do. Loosen this nut right here all the way to the end or even take it all the way off. Same thing with this one. These will rattle around, digga, digga, digga, right.
You're going to take some nice big Channellock pliers, whatever you've got, and you're going to turn this, and you're going to turn it and turn it. Keep twisting it until these right here separate all the way out. Okay? At that point you would take your new tie rod end. You start it into the sleeve a little bit. Start the sleeve on this just a teeny bit. Put your tie rod end up inside the knuckle. Just kind of nut it for a couple of minutes. Then you're going to take this and you're going to turn it, turn it, turn it till it comes all the way in, till it's approximately where this is now. A good idea before you start taking anything apart is to measure from one end all the way down to the other end. And that way there you have an idea of how long you want this to be.
Of course you're going to bring it down to an alignment shop after you're done this, because all you have to be off is just one little half a turn and that's going to have your wheels going God knows where. All right. So with that said, we don't know what kind of condition these threads are in, in here. I'm going to go with probably very bad where I can't even get the rot off of them. So we're just going to replace this whole unit. Okay? You know how to replace this if you wanted to. Like I said, loosen it, loosen it, do do do, take this off, put on your new tie rod, snug it all up, get it to about the same length and take your rest the way that you're going to do it.
For me personally. Boom, boom, boom. One unit. Measure it up. Put your new one together right on the floor. Have it about the same length. You put a nut there, you put a nut here, you tighten these puppies up, and you're good to go down the road to your alignment shop.
All right, so I'm just going to put a little bit of penetrant in here. And what I'm going to do is I'm just going to take this apart just so I can show you what I was talking about. Because that way there you'll have a visual, and usually when people see things they can understand them a little better. So we get this sprayed. We're going to let it sit. We're going to take this out right here and this out right here. So we're going to loosen this and loosen this. 15 millimeter. There we are. That's nice and loose.
Generally speaking, when you're replacing a tie rod, whether it's the inner or the outer or both, you always replace the sleeve. So if you get an outer tie rod, get yourself a sleeve. You get an inner tie rod, get yourself a sleeve. Get an inner and an outer tie rod, sleeve. Okay.
These are loose. Let's grab a measuring tape. We'll get a rough estimate of how long this is. So when we put our new parts together, we'll know exactly the length that we need it. Okay, so it looks like we're at approximately 52 and a quarter inches from right here to the same thing on the inner tie rod end. Same exact spot, right there. Hold this up here. Yep. 52 and a quarter. Write that down or remember it or carve it into a rock. Whatever you want to do. I'm going to write it down real quick.
So we're just going to grab this with our pliers here. You're going to need as much leverage as you can possibly get. We're just going to see. Yeah, right. This is why I said you got to replace these things. Let's try though. Give it the old college try.
Oh yeah. The threads in there really aren't looking very good. So you can see the threads right in there where they're all rusted up.
Holy cow. Okay. So it's pretty obvious that this isn't going to be coming off. We can see the threads on the inside of the tie rod ends. Where they go into the sleeves, they're in very poor condition. And there just really isn't any purpose of taking this apart. So what we're going to do is I'm going to take it apart from the vehicle. I'll bring it over to the bench. And I'll put together a new assembly, and I'll show you how to take apart each piece as it goes with new parts. It'll just be much better for the video. So we'll just get our cotter pin out of here. That's out of here. These are very rotted, so I'm not even going to try to pop them out of there.
Cool. Grab our socket. Should be here. Let's see if this will go on. Might be a little bit bigger. I got 21. Grab my air hose. Safety glasses on, of course. Let's see if we can get this on here.
Here we are. Is there a nut in there? It's going to take it. I'm going to go just like this. Get my socket off of there. I'm going to leave this on here for now because we're going to grab our hammer. We're going to give this a loving bonk, and the tie rod end should come down, and then that's going to keep it from falling down and potentially hurting us.
So here we are. I'm going to grab a little bit of penetrant spray. Let that do its job. Now we're going to bonk right here. I'm going to be careful not to hit my rotor. And if I was keeping this outer tie rod end, which I'm not, I would be careful for hitting the boot.
There we are. You can see the stud. The nut did its job, saved this from coming down and potentially hurting us. Let's move along.
I'm just going to get this cotter pin out of here. I'm just going to go ahead and cut this off. I'm going to get out the rest of this cotter pin real quick. This is what's left to it. We'll dispose of that. Now we're going to take off this nut right here. Just going to grab my socket. 21, safety glasses on. There's our nut. Just going to put this back on here a few threads. Come on, let me get it on there. It's perfect.
We have a couple options at this point. If you're going to be reusing this inner tie rod end right here, you don't want to bonk right here. If you're going to be replacing it and you really don't care what condition it's in, go ahead and give it a couple loving bonks and try to drive it through. Here we are. I can move around quite a bit. The nut did his job. We'll take that back off of there and we can get this out of here.
Okay. Slide that. This whole unit right out of here. Here we are. Okay, so now you're imagining that this is up inside the vehicle, right? This is our old piece. Obviously I can't get it apart so I'm just going to show you with the new.
Here's your outer tie rod end. This is where it connects to the knuckle. You've got your nut and everything like that, right? This is our sleeve. The adjustment sleeve. This is that inner tie rod end where it goes down and connects into the rest of the steering. All right.
What you would normally do with it in the vehicle, if you were just replacing one piece at a time, okay. If you're replacing both, then you just tear them right out. Just like we kind of did. The two nuts. Take the whole thing out, measure it, put your new piece together, throw it in.
One piece at a time. This is what you do. Loosen up these nuts like what we did here. Then you turn this sleeve. Whether you have to use your nice long pliers like we tried doing here to get it apart, or if you can do it by hand because it's brand new like this one, I guess you go that way. But anyway, to get to the point, just take your sleeve and you just turn it, turn it, turn it.
So when you take this apart, you're going to want to be careful because this arm right here or inner tie rod end, will come swinging down. All right. This one right here might try a little bit, but it really can't go far. It's not super long.
Here we are. So right now, if this was in the vehicle, this inner tie rod end would've just swung down. Okay, and this one was pretty close, ready to come off. At this point, there's your outer tie rod end. You'd replace this with a brand new one or replace this with a brand new one. Of course, no matter what you do, you're going to replace this. This is your sleeve and it's threaded all the way through.
Okay, friends, a quick product comparison for you. Over here we have our tie rod adjustment sleeve out of our 1996 Dodge Ram 1500, and over here you have your brand new quality 1A Auto part. These parts are created equal. You can hold it up right up against each other. You'll notice you have the same length, you've got brand new clamps right here, brand new locking nuts, and you have Grade 8 bolts. Those are the strongest bolts you can get. With all that said, I don't see any reason why this wouldn't be a quality part to install into the vehicle. So I'm going to go ahead and do it. And as always, if you need this or any other part, you can check us out at 1aauto.com. Thanks.
Okay friends, we've got our inner tie rod end. We're going to go right up like this and put it in through the hole. I'm going to take our castle nut and here we are. We're not going to tighten it yet. Bet you're wondering what this is. Just a little tool that I got just to go like this and that's going to keep this from moving around.
All right, so we're going to tighten this up. We're going to use our 21 millimeter socket. Okay. Once you know that you have it nice and snug, you're going to try to find where the slot is on the stud itself and line it up with the slots in the nut. This one right here, this lock goes this direction. So I'm going to bring this a little further.
There we are. We'll grab our cotter pin and we can move along. Let me take our cotter pin. Let's go right down through here. Make sure that's all the way down inside the slot. Take your cutters, grab it, bend it over. There's no way that this nut can come loose on its own.
Okay, so let's say that you're doing all these tie rods, right? You're doing the inner and the outer here or even you're just doing one, but anyway, you start putting one all the way in here. That looks pretty good. It's nice and deep. Now you're going to take this one and we're going to try to get this one on here, right. We're going to spin it in and spin it in.
The problem with doing it this way is your tie rods are going to be out of time. Let's see what I can show you. Get it up on there. Try to get the teeth where you can see them, almost there. Okay, so if one of your tie rods, like this one right here, this one comes up to there. You can see where the threads are just barely starting to come up to where this bolt is. And this one, the threads are all the way up here. That means that your tie rods are out of time. The person that's going to be doing your alignment after this, they're going to have to loosen these back up, try to adjust this, right? And this tie rod is going to be adjusted in way further than the inner tie rod. And this could be a vice versa situation where you might have this one screwed in further.
That's called timing your tie rods. You need to time your tie rods. And that's done with this adjustments sleeve. So that's what I'm going to show you. What we're going to do is we're just going to take this all completely back apart and start right from ground zero. And yeah, you could do this with this up inside the vehicle, all connected in. It's a little bit harder that way. And for the purpose of this video, I can demonstrate what I'm talking about without actually having it in the vehicle or connected in. So I'm just going to do it that way.
It'll be easier for you to see. See these things, they're all coming apart just randomly. When you do this, and you turn this so it comes all the way off, theoretically, not theoretically, but what should happen is, is when this is loose, it should be ready to come off of this side at the same time. That would mean that it's screwed into both tie rods the same exact amount.
Okay. It's all apart. You got your outer, you got your sleeve, you got your inner. Something that's always good to do. You're going to use a little bit of copper Never-Seez right there, and right there. Okay? That's just going to help this be able to move around for a long, long time. It's going to be great for the alignment person when they go to help you out and do your alignment.
So now we're just going to take the sleeve and start it on just a teensiest bit. Just one turn and that's it. Outer tie rod end, we're going to do the same thing. Just try to turn it on. Just one turn. The hardest part's just getting them lined up.
Okay, that's one turn. Now to continue, you're just going to hold your tie rod so it can't spin. You can even put it back into the vehicle. Whatever you want to do. And as I turn this, it's actually drawing both these tie rods in at the same exact time. That means that they're going to be timed well.
Let's keep turning this until the length of this to here is 52 and a quarter inches. That's what the original bar was measured at, so that's what I'm going to go with, with this one. Any alignment shop can do the rest. It's like we're getting pretty close. Just keep bringing it in here. It should be quite a bit. Perfect. 52 and a quarter. Okay, so now what you do, put this up in here and tighten up these.
You can tell we're pretty close because it lined right up. I didn't have to move the knuckle around or anything. Perfect. We'll tighten that up in a minute. Let's take a look at this stuff. These right here, the sleeve actually has grooves. Grab that in a second. Right here where the bolt goes through. So you can't spin this and expect it to just kind of like line up because it doesn't. It needs to be perfectly lined up with that screw. And the important reason why they did that was just so when you're tightening, it's going to put the squeeze right here. All right.
If you could spin this, some people might try to put it all the way up here and then how's it going to squeeze solid metal to try to tighten it? It can't. It's impossible. Okay, let's put this back in here. We'll grab our nut and we'll continue.
Okay, so we're just going to tighten this up to 65 foot-pounds. I'm just going to hit it one more time. There we are. Just going to take a peak.
We need the slots on the nut to line up with the hole for the cotter pin that goes through the stud. This looks like it's a quite a bit past it. It's about lined up with this part of the castle. So what you need to do now, is you need to continue tightening. You do not loosen it to get to the next hole, you tighten to the next hole.
Grab my ratchet here. Grab our cotter pin that came with it. Take that, put it right through there.
You can do whatever you want with this cotter pin. You can put it off to one side, both sides, up top. You do you booboo. As long as it's bent over and there's no way that it can come off and this not can come off on its own, you're doing all right. Let's continue.
So we're going to hold the backside, or the bolt side, with our 17 millimeter wrench. We're going to tighten up the the nut side with our 18 millimeter socket. This does have a torque spec, so get it so it feels like it's pretty snug. I like to put these so they're facing straight out. But of course that will change once the alignment's done because if they need to go out a little bit, this will need to get turned, in which case the nuts will be in their corresponding spots.
So to start, this is where I go. Okay. That's pretty bottomed out. Let's grab our torque wrench. I've got that set to 40 foot-pounds. There we are. Then do this one. Perfect. So both of those are nice and tight. 40 foot-pounds.
Let's continue.
Thanks for watching. Visit 1aauto.com, your place for DIY auto repairs, for great parts, great service, and more content.

PSA70028