Hi, I'm Mike from 1AAuto. We've been selling auto parts for over 30 years! We're dedicated to delivering quality auto parts, expert customer service, and fast and free shipping, all backed by our 100% satisfaction guarantee. So visit us at 1AAuto.com, your trusted source for quality auto parts.
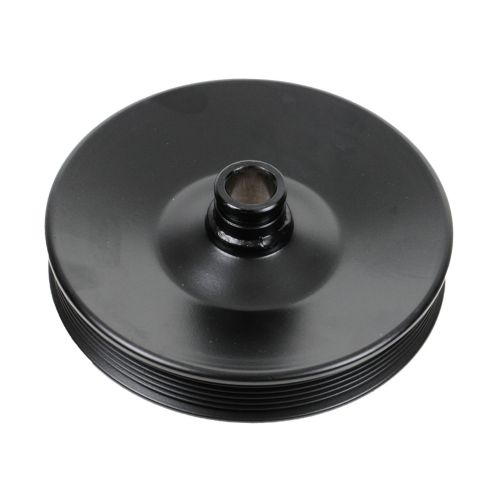
In this video, we're going to be working with our 1996 GMC Sierra K1500 5.7-liter V8. We're going to show you how to remove and replace the power steering pulley. We did use the power steering pulley puller tool in order to remove it, and when trying to use our pulley installer, ours was a little off, so we ended up making one out of some parts we took off the truck and we'll show you how to do that.
If you like this video, please click subscribe. We have a ton more information on this and many other vehicles. If you ever need parts for your car, you can follow the link down in the description over to 1AAuto.com.
Here are the items you'll need for this procedure: 8 to 21mm sockets, wrenches, ratchet, socket extensions, power steering puller
Remove the negative post from your battery using a five sixteenths or an eight millimeter wrench. Be very careful. This wrench isn't long enough, but if you have a longer one, you may be able to hit the positive battery terminal with it, and you want to be very careful you don't do that. Remove the terminal and isolate it from the battery. You'll need to disconnect the positive side of the battery. We removed it entirely, so we had some more room to show you guys what was going on.
Pull the harness coming from the battery and over to the ECU, out of the top of the fan shroud. Just move it off to the side for now. We'll then remove the three 10mm bolts along the top of the fan shroud. We'll then use a 10mm socket, ratchet and a long extension to get. It looks like there were two 10-mm bolts on each side. However, we've only got one so remove one from each side of our fan shroud. You can then remove the upper radiator shroud from the vehicle.
Use a 3/8" drive, breaker bar, or ratchet to release the tension from the tensioner and remove your serpentine belt.
We'll do this with a 14mm socket and ratchet. To remove the power steering pump pulley, you'll need a power steering pump pulley puller tool, which we have here. It's actually a few separate pieces. We'll show you how they go together and how to remove the pulley with them. The fan on this truck is staggered so the blades are not equidistant from each other. The largest gap is here, so we'll rotate that in front of our power steering pump pulley so it doesn't interfere.
Install the shaft of the puller into the whole in the center of the power steering pump pulley. Get that down as far as you can and then loosen the nut here. Make sure that it's still on the threads even when it's bottomed out. We'll then take these two half-moon style clamps, and place the wider end around the pulley with the skinnier end around our puller and this sleeve will go over them and hold them together.
You can now turn the center and hold the nut or vice versa until that walks into place. We'll use a 21mm wrench to hold the nut and a 17mm to drive the shaft, in which will pull the nut with our clamp and sleeve on it out, bringing the pulley off of the shaft. Ours is really pressed on there tight, so we're using a ratchet and a socket just to get a little more leverage on it. It will eventually pop off, and we can remove all of this from our vehicle.
We purchased a power steering pulley puller and installer tool set, but the problem is the threads on our installer tool either don't work, or the threads inside of our power steering pump shaft are damaged.
We whipped up a tool with some things we found already in the engine of our truck, and we'll show you what we made. Now our alternator bracket is off since we're doing our cylinder heads. However, if yours is still attached, this process will still work. You'll simply use a 14mm socket and ratchet to remove this nut, which would secure the bracket on. Then you'll use either a pair of vice grips or preferably an E8 inverted torque socket and ratchet to remove the stud from the front of the head.
Once again, since we have our head apart, some of these pieces are already off, but we also used the nut that holds down the ground on a thermostat housing cover. We'll place the thermostat housing cover nut onto the back of the stud that we removed from our head. We'll then take the nut that we removed from this stud and install it backwards as far down as we can.
Then we're going to use the spacer that I had lying around the shop. You could also use a large washer. You want to make sure it's a nice thick one. We'll toss that on there. There's a trolley, so when we tighten down this nut, it won't rotate this. It will just push it in and push our pulley on.
We're just going to apply a thin coat of brake grease onto the shaft here to try to make our pulley go on just a little bit easier. Line up the pulley onto the shaft and install the stud. You want to get that in as tight as you can to start. Run in our 14mm nut into the spacer which is going to help center our pulley. We'll then use one 14mm wrench to hold the stud and the pump shaft in place and another 14mm wrench to tighten down the nut on the installer.
Reinstall the stud into the bank two cylinder head with you E8 inverted torque socket and ratchet. Make sure it bottoms out.
Reinstall the serpentine belt around the crank shaft. The right side, the driver side of the belt will go up and over the water pump, down and under the power steering pulley, up and over the AC compressor, under the idler pulley at the top and the passenger side will come up over the tensioner. Hold the tensioner with the drive of a 3/8th ratchet and rotate it counterclockwise to release the tension, so you can slide it over the alternator pulley.
Ensure that the belt is routed correctly. Release the tension and remove your ratchet.
Reinstall the upper fan shroud. If you remember, ours was missing two bolts. We'll only be reinstalling five. Yours should have seven. Don't forget to route the power wire back over from your battery.
Reconnect your negative battery terminal and tighten it back down with an 8mm socket and ratchet or an 8mm wrench.
Thanks for watching. Visit us at 1AAuto.com for quality auto parts, fast and free shipping, and the best customer service in the industry.