Replaces
This part doesn’t fit a . Select from parts that fit.
Frequently bought together
Complete Repair in One Purchase - Stop searching for parts individually and complete your repair with a customized kit or set from DIY Solutions.
High-Quality Parts from Trusted Brands - DIY Solutions' kits and sets are selected from the best automotive brands and include hard-to-find and even obsolete parts you may need for your vehicle.
Guaranteed Fit - DIY Solutions ensures its selected parts are quality-tested to guarantee fit and function.
Item Condition:
New
Attention California Customers:
 WARNING: Cancer and Reproductive Harm - www.P65Warnings.ca.gov.
Lifetime Warranty
This item is backed by our limited lifetime warranty. In the event that this item should fail due to manufacturing defects during intended use, we will replace the part free of charge. This warranty covers the cost of the part only.
FREE Shipping is standard on Orders shipped to the lower 48 States (Contiguous United States). Standard shipping charges apply to Hawaii, Alaska and US Territories. Shipping is not available to Canada.
Expedited is available on checkout to the United States, excluding Alaska, Hawaii and US Territories as well as P.O. Boxes and APO/FPO/DPO addresses. Final shipping costs are available at checkout.


Created on:
Tools used
Hi, I’m Mike from 1A Auto. We’ve been selling auto parts for over 30 years!
If you need to change the air filter on this car, it’s right here in the air box. Two snap-like clips here. Pop them up. Top of the box will just lift up.
It's sitting on some pins in the back, just slide it up. This air filter's in good shape. We’re just going to show you how to change it. Just pull it out.
It’s pretty clean and pretty new. There are these three little openings here at the rear of the box, top of the air box snaps into. Just want to make sure you grab those when we put this back together.
Even though the air filter's nice and clean, we see that there's a bunch and leaves and stuff that have fallen in here. We're going to take a vacuum and just vacuum that out.
With that vacuumed out, take our air filter, it goes with the rubber seal to the top. Slide it in place. Sit it right in there. Then we'll line up those pins in the back. Make sure it's locked in. Those clips out. Push those down. Cover's on there nice and tight.
Thanks for watching. Visit us at 1AAuto.com for quality auto parts, fast and free shipping, and the best customer service in the industry.
Tools used
Brought to you by 1AAuto.com, your source for quality replacement parts and the best service on the Internet.
Hi, I'm Mike from 1A Auto. I hope this how-to video helps you out, and next time you need parts for your vehicle, think of 1AAuto.com. Thanks.
In this video, we're gonna show you how to replace the air filter in this 2003 Nissan Frontier, same as a 2001 to 2004 Frontier. No tools are needed.
Now, here's your air intake box. You'll see that there are these three clips around the box. All you have to do is flip the tab on the bottom up. Then on these ones you want to flip it down. Once you do that, you just push there, take the box back and up, and then you can just pull your air filter out.
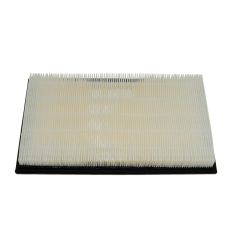
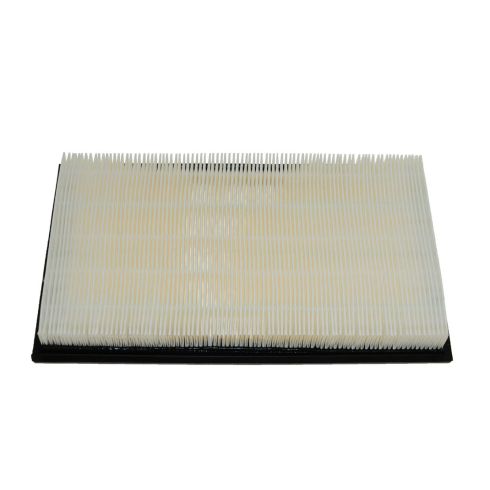
You can see here, the old air filter on the right and the new air filter from 1A Auto on the left. They'll fit exactly the same.
Now, you want to lift that box back up, put your air filter down into place, push the top of the air intake box down. Just put those clips back into place and then you're all set.
We hope this video helps you out. Brought to you by www.1AAuto.com, your source for quality replacement parts and the best service on the Internet. Please feel free to call us toll-free, 888-844-3393. We're the company that's here for you on the Internet and in person.
Tools used
Brought to you by 1AAuto.com, your source for quality replacement parts and the best service on the Internet.
Hi, I'm Mike from 1A Auto. I hope this how-to video helps you out, and next time you need parts for your vehicle, think of 1AAuto.com. Thanks.
In this video, we're going to show you how to replace an engine air filter on this 2003 Subaru Outback Wagon. It's a pretty easy operation. The only tool you'll need is a 10mm wrench.
To service your air filter, first you'll want to remove the two bolts at the corners here. I'm going to correct myself a little bit. You actually only need to take the rear bolt off, the one I'm working on right now. That's the only one that's required. You don't need to take that one that's closer to the front of the vehicle off.
Now, there are three clasps, just pull back with your thumb. You might want to use a screwdriver on this one. Pull this back, up, and bring the air filter up and out after that. You might want to use a vacuum and go in here and just vacuum this out a little bit.
Put your new filter in, slide it right in. Make sure it seats all the way around in there. Pull this forward, and lock your clasps back on. Then replace your bolts. Fast-forward here again. Again, I'm showing you replacing both those bolts, but you only need to replace the one that's further back towards the back of the vehicle, closer to the driver's side.
We hope this video helps you out. Brought to you by www.1AAuto.com, your source for quality replacement parts and the best service on the Internet. Please feel free to call us toll-free, 888-844-3393. We're the company that's here for you on the Internet and in person.
Tools used
Brought to you by 1AAuto.com, your source for quality replacement parts and the best service on the Internet.
Hi, I'm Don from 1A Auto. I hope this how-to video helps you out, and the next time you need a part for your vehicle, think of 1AAuto.com. Thanks.
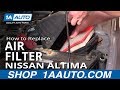
In this video, we're going to show you how to replace the air filter on this 2000 Nissan Altima. It's the same part and process on these Altimas from 1993 to 2001. The only items you'll need for this is a new air filter, and we recommend using a vacuum as well.
This is your air intake box. It's held on by these four clips. To remove these, all you do is you push down on those two, and up on these two. Then your air intake box lifts up, and you can pull your air filter out.
On your left is your old one; on the right is the new one from 1A Auto. You can see they're identical, and will fit exactly the same. We recommend vacuuming out the air intake box before putting in a new air filter. You just put your new air filter into place, put the top of your air intake box down, and re-clip those four clips. Then you're all set.
We hope this video helps you out. Brought to you by www.1AAuto.com, your source for quality replacement parts and the best service on the Internet. Please feel free to call us toll-free, 888-844-3393. We're the company that's here for you on the Internet and in person.
Tools used
Brought to you by 1AAuto.com, your source for quality replacement parts and the best service on the Internet.
Hi, I'm Mike from 1A Auto. I hope this how-to video helps you out, and next time you need parts for your vehicle, think of 1AAuto.com. Thanks.
Filter replacement is pretty easy, actually, really easy. Right here behind the battery on the driver's side of the engine compartment there are just two clips. Pull them up and then this little item comes up and the air cleaner pulls out of it.
The air cleaner goes right down in. Make sure it's seated correctly. You don't want to push it through or anything. It just seats down in. Put it right down in, and push it against right there and put the clips back in.
We hope this video helps you out. Brought to you by www.1AAuto.com, your source for quality replacement parts and the best service on the Internet. Please feel free to call us toll-free, 888-844-3393. We're the company that's here for you on the Internet and in person.
Tools used
Brought to you by 1AAuto.com, your source for quality replacement parts and the best service on the Internet.
Hi, I'm Mike from 1A Auto. I hope this how-to video helps you out, and next time you need parts for your vehicle, think of 1AAuto.com. Thanks.
The air cleaner is right here behind the battery. There are four clasps. You can lift up on these two, down on this one back here, and then there's another one kind of hidden back in here a little bit. Push down on it as well, and just lift up and pull out your filter. This filter looks like it's actually been recently replaced.
Put the filter back in. Make sure it's seated down correctly. You might want to push the air box that way a little bit. Get it seated down. Make sure none of your clasps are in the way. Push these two down. Bring this one up and on, and this one back here up and on.
We hope this video helps you out. Brought to you by www.1AAuto.com, your source for quality replacement parts and the best service on the Internet. Please feel free to call us toll-free, 888-844-3393. We're the company that's here for you on the Internet and in person.
Tools used
Brought to you by 1AAuto.com, your source for quality replacement parts and the best service on the Internet.
Hi, I'm Mike from 1A Auto. I hope this how-to video helps you out, and next time you need parts for your vehicle, think of 1AAuto.com. Thanks.
Your engine air filter is right here on the driver side of the engine compartment. You can see two clips there, and then there is another clip here. On this vehicle, there's the remains of a clip here, but it has been broken. This is pretty easy and self-explanatory, but not everybody is an expert so that's why we need these videos.
Take these clips and you pull up. Push down on this one in the back, and you push down on the side of the one over here. Pull the clips up. Lift up this box and your air cleaner comes out.
New air cleaner. You probably want to take a vacuum. There is usually some leaves, and sand, and stuff, so clean this out. Take your new air cleaner, insert it, and make sure it's seated down correctly. You want to push this air box towards the engine a little bit, make sure this corner goes over the filter element. Everything goes down. Push down and reset these clips. Reach in here, reset this clip, and then the fourth clip over here.
We hope this video helps you out. Brought to you by www.1AAuto.com, your source for quality replacement parts and the best service on the Internet. Please feel free to call us toll-free, 888-844-3393. We're the company that's here for you on the Internet and in person.
Tools used
Brought to you by 1AAuto.com, your source for quality replacement parts and the best service on the Internet.
Hi, I'm Mike from 1A Auto. I hope this how-to video helps you out, and next time you need parts for your vehicle, think of 1AAuto.com. Thanks.
In this video, we show you how to service the air filter on this 2005 Nissan Maxima. It's pretty much the same as any '04 to '08 Maxima. The only tool you'll need is a flat blade screwdriver.
The air box is right here on the driver's side. Using a flat blade screwdriver, loosen up this clamp here. Then there are two clamps you just push with your finger. Ok, take those off and then you can lift your air box up this way a little bit. Pull that off a little. Then pull the top of your air box up, then off, and then you can put it on its back like that. Pull the air filter, and this one is really well used and ugly.
Ok, new air filter from 1A Auto. You can go with paper style or with the K&N style. The benefit of the K&N is it's a lifetime warranty and it provides a little better flow for your engine. Put the filter down there. There's three tabs on this side of your filter box. They go into loops on the lower part of the box. You kind of have to tilt it up a little bit. Push in, push it down, and bring it close up and on. There's a little indent in the fender here so you can get your finger down in it. Make sure this inlet hose is on and tighten your clamp back up.
We hope this video helps you out. Brought to you by www.1AAuto.com, your source for quality replacement parts and the best service on the Internet. Please feel free to call us toll-free, 888-844-3393. We're the company that's here for you on the Internet and in person.
Tools used
Brought to you by 1AAuto.com, your source for quality replacement parts and the best service on the Internet.
Hi, I'm Mike from 1A Auto. I hope this how-to video helps you out, and next time you need parts for your vehicle, think of 1AAuto.com. Thanks.
The air cleaner is right here behind the battery. There are four clasps. You can lift up on these two, down on this one back here, and then there's another one kind of hidden back in here a little bit. Push down on it as well, and just lift up and pull out your filter. This filter looks like it's actually been recently replaced.
Put the filter back in. Make sure it's seated down correctly. You might want to push the air box that way a little bit. Get it seated down. Make sure none of your clasps are in the way. Push these two down. Bring this one up and on, and this one back here up and on.
We hope this video helps you out. Brought to you by www.1AAuto.com, your source for quality replacement parts and the best service on the Internet. Please feel free to call us toll-free, 888-844-3393. We're the company that's here for you on the Internet and in person.