Replaces


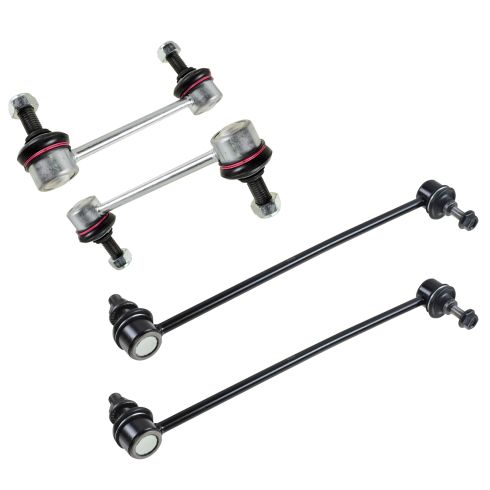
Recommended for your 2005 Volvo S80
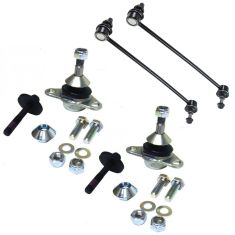
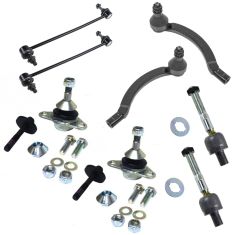
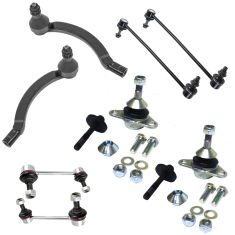
Part Details
Specifications
About TRQ:
TRQ is a trusted brand dedicated to making every repair a success story by combining premium parts with easy installation. Each TRQ part is engineered by a team of automotive experts to meet or exceed OEM standards, delivering enhanced performance and maximum longevity. With rigorous in-house testing, the brand ensures superior fit and function across every product line. TRQ also provides customers with best-in-class, step-by-step installation videos—so you can complete repairs with confidence, whether you're a first-time DIYer or an industry professional.
Our steering and suspension components are pre-greased and sealed for long life and do not require the extra maintenance typically required by greaseable versions.
Attention California Customers:
 WARNING: This product can expose you to chemicals including Lead and Lead Compounds, which are known to the State of California to cause cancer, and birth defects or other reproductive harm. For more information, go to www.P65Warnings.ca.gov.
Lifetime Warranty
This item is backed by our limited lifetime warranty. In the event that this item should fail due to manufacturing defects during intended use, we will replace the part free of charge. This warranty covers the cost of the part only.
FREE Shipping is standard on orders shipped to the lower 48 States (Contiguous United States). Standard shipping charges apply to Hawaii and Alaska.
Shipping is not available to a P.O. Box, APO/FPO/DPO addresses, US Territories, or Canada for this item.
Expedited is available on checkout to the United States, excluding Alaska, Hawaii.
Final shipping costs are available at checkout.
Created on:
Tools used
Hi, I'm Mike from 1A Auto. We've been selling auto parts for over 30 years.
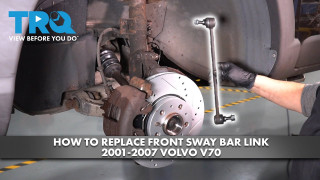
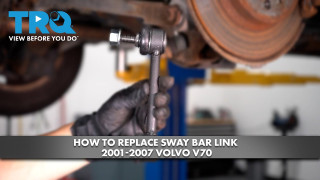
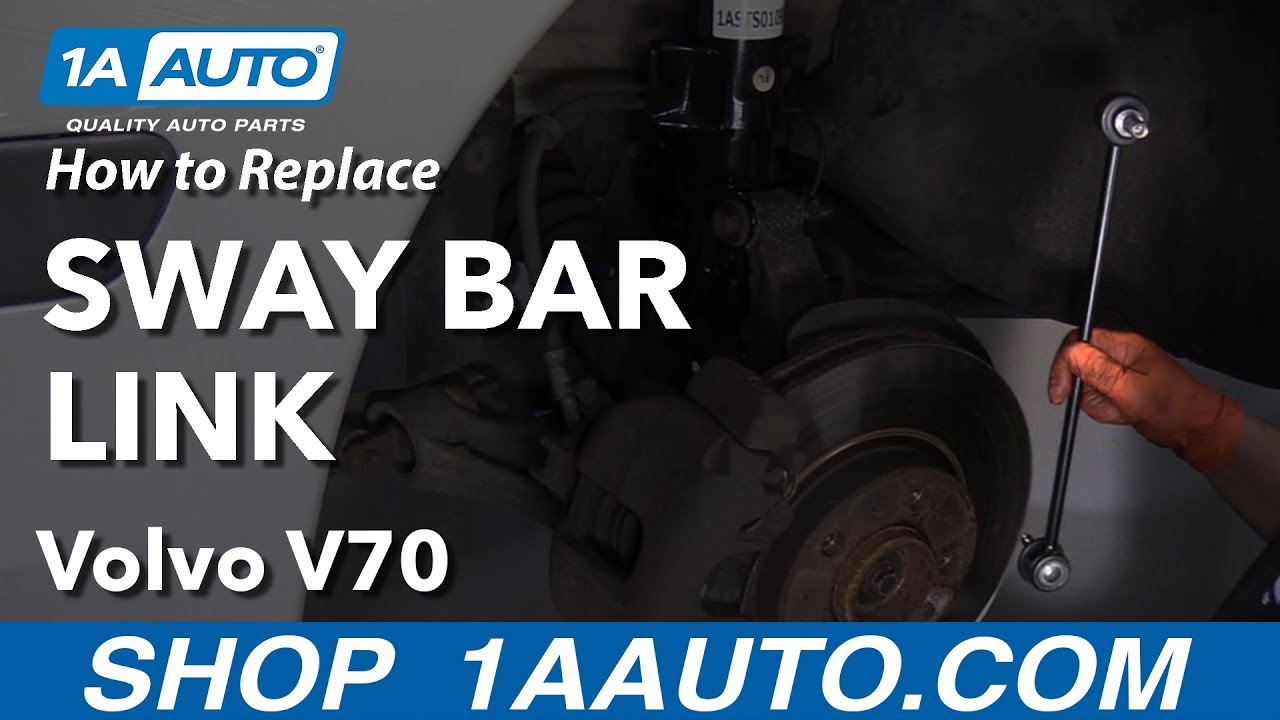
Hey, everyone. Sue here, at 1A Auto. Today, we're going to show you on our '03 Volvo V70 how to do the front sway bar links. If you need this part or any other part for your car, click on the link below and head on over to 1aauto.com.
First thing we're going to do is remove the tire. I have weight on the tire of the vehicle still, so I can break the lug nuts free. This is a 19mm. I'm just going to break them free. Then we raise the vehicle up.
Now that the car is up in the air, I can remove the lug studs. This is what a European car does. There're not lug nuts because there's no studs on the hub, so it's a whole post. When you get to your last one, usually it's better to have both hands ready to grab the tire. I don't—like this one's frozen on there, but normally, the wheel will fall right off. So, just keep one of the lug studs partially threaded in and you break it free.
First thing we want to do is spray everything down. It is an '03—it's New England—so we're just going to hope that this helps with the removal. The sway bar link is an 18mm, and more than likely, it's going to spin in place. So, the Torx piece in the middle, here, is a T40—so we're going to have to hold that. I'm going to be going opposite on both ways. I'm going to pry up on this—on the nut—to break it free, and hopefully hold it still with my ratchet.
I can take that sway bar link nut right off and then push the link right out. Now we're going to raise the vehicle so we can get to the bottom. The nut on the lower part of the sway bar link is a 15mm wrench and the Torx bit is a T30. So, we're going to just pull opposite of each other. There is your front sway bar link.
Here we have the new sway bar link for our '03 Volvo through 1A Auto, and here's the one I took out. They're identical in length. They're both a sealed unit—non-greasable. There are two different-sized studs on these. The lower one is a smaller stud. They come with a locking nut, and the upper side is the thicker stud. They both come with new lock nuts with actual—looks like it has actual coating in there for locking—threadlock. So, if you need this part or any other part for your car, click on the link below and head on over to 1aauto.com.
Now we're going to install the new sway bar links. I'm going to fish it up through; make sure I go on the inside of the ABS cable, and there's that bracket in the back that holds the flex hose steel line. Just fish itself through—right through there. It's definitely easier if you put the top on first, so you can guide it all through. Now for the bottom. It doesn't line up. So, I have to use a pry bar. I'm just going to pull down on the sway bar itself so that the link can fall right in—just like that. Now I can put the nut on the bottom.
Now we're going to tighten the lower part of the sway bar link. The nut is a 15mm, but the inside is an Allen head, now—not a Torx bit. And it's an Allen 5—5mm. You put your wrench on and then take your Allen head, and just that—going the wrong way. My god. Here we go.
I did not find any torque specs for this, so I'm just going to snug it and know that that's lock nut, and that's on nice and tight. On the top part of the sway bar link it is an 18mm nut, so 18mm socket, 18mm wrench, but the center is an Allen—still the 5mm. I'm just going to use the wrench until the center bolt stud starts to spin. There is, like I said, no torque specs that I could find. I am truly just going to tighten that like that.
Before I install my wheel on my European car, I'm going to use the wheel stud pin set that 1A Auto supplies. It is, comes with two sets—a 12 by 1.5 or a 14 by 1.25. In this case, our Volvo is a 14 by 1.25.
I'm just going to put two of them in there. I'm not going to use all four. That way, when I pull the tire up, it has something to rest on. Anyone that's ever worked on a European car knows the frustration of trying to hold the wheel up and thread in a lug stud.
The neat thing about this is how it works. I just need to line up two of those studs. Now I can just walk away. It's the great part—getting my lug nuts—studs, I mean. And I can just take my time threading them in by hand, and it's not going to fall off.
Now that I've got three of the lug studs in there, I'm just going to tighten down—hand tighten tool so that the wheel is flat against the hub. Now I can remove my helping guide pins. You can just back those up. I think it's a must for your toolbox. These things are crazy awesome and it stops any frustrations. Now that I have them all hand tight, I can lower the vehicle down; put some slight weight on them and torque them.
Now we're going to torque the wheel. I've got the weight of the vehicle on the tire, and the torque for this Volvo is 103 foot-pounds. Like usual, I'm going to do everything in a star pattern. Okay, let's double check. Now that the repairs are done on the driver side, repeat the process on the passenger side.
Thanks for watching. Visit us at 1aauto.com for quality auto parts, fast and free shipping and the best customer service in the industry.
Tools used
Hey friends, it's Len here at 1A Auto. Today we're working on our 2004 Volvo XC90 and we're going to be doing front sway bar links. It's going to be very simple. I can do it. You can do it too. If you need these or any other parts, you can always check us out at 1aauto.com thanks.
Okay friends, so just a quick note, we're going to be doing a lot of videos and replacing parts on this particular vehicle. So if you happen to notice in the video that you're watching, all of a sudden the part just is brand new and it wasn't brand new before odds are we cut out, we were doing another job, we replaced that part, we cut back in and we're just showing you the stuff that you need to know to be able to do your particular replacement.
Okay friends, so now what we're going to do is we're going to loosen up the wheel. I've got my vehicle supported from the ground, but the wheel is still touching so that it can't spin while I do this. I'm just going to use my 19 millimeter. I have a a thin wall socket on there so it can squeeze in between the rim and the lug nut. I'm just going to break it free. It's a tight one. That's the reason for doing it while it's still on the ground. If you tried doing this up in the air, the wheel of course is going to spin.
Okay, so I've got three out of my five lug bolts out. This is what they look like right here. They screw directly into the wheel bearing. So once you take off this one right here and then you go to take this one off, there's going to be nothing holding this wheel on, so you need to pay attention to that. I'm just going to take this one lug here, lug bolt, put it in a couple threads and that's just so the wheel won't be able to come off and potentially hurt me. Push my wheel up against, just grab it. I'm holding the wheel so it can't fall down at this point and we'll just grab it off and set it aside safely.
So here we go, friends. Let's go ahead and take this nut off right here. We're going to use our 19 millimeter socket. I'm going to use a half inch air gun. It's going to make it much easier than trying to turn it with a ratchet. I've got my safety glasses and my hand protection of course. This loosened up quite a bit. What I'm going to do now is I'm going to try and get back here and I'm going to see if I can get some locking pliers in to hold the stud because as I try to turn the nut, it's just spinning the stud. I'm not sure if these will get in here. I like to have these as tight as possible. Odds are, it's still going to spin. I'll probably have to readjust it, but... Looks like it is started a little bit more
So I just grabbed different locking pliers here. Just going to see if I can get this as tight as possible. A little bit at a time apparently. That's just the way it wants to go. I don't even think I can get these things tighter than they are. If you wanted to, you could try to apply a little bit of heat. The problem with that is that you don't want to apply heat to the strut itself. So I mean, if you're over here blasting away trying to heat up this nut, I mean I guess if you came across the edge here and you were nowhere near this part, you might be able to get away with it. It's just risky business, because inside here is pressurized gas. So I'm going to try everything I can without heat first and we'll see what we have to do when we have to do it.
It really doesn't seem like anything good is happening at this point. I'm going to try to tighten this up, which might seem like it's counterintuitive, but once I get it tight and then re-blast it out, hopefully just the speed and the inertia and everything moving, it'll pull its way right off. Just give it another blast with this stuff. So I'm going on now. And nothing's happening. Okay.
So I just applied a little bit of heat. I tried to go right along the edge here and just try to catch the edge of the nut. Once again, like I said, I was trying not to hit up against the strut itself. It's a pressurized gas unit. So we got that nut off of there. Get our tool off of here. Bonk, bonk. There's our lovely sway bar link end there. What was given us all the trouble is when we were trying to squeeze on here, it was just literally spinning in the grips. It's very common.
So I'm going to be preemptive with the heat on this one, because I know that the upper side needed a little heat, and I have nothing to worry about here as far as my heat's concerned. The abs wire and everything is super far from this area. The closest thing we have is just the axle boot. So I'm not going to heat going in this direction. I'm trying to spray that way. It's going to go right over here and there's literally nothing around here that I have to worry about except for maybe the bellows boot, but that's pretty far away. The nut on the lower side of this, that we're doing right now, is actually a 17 millimeter, which is different than the upper nut. I don't know why Volvo did that. I'm sure they have their own reasons. I'm no engineer. Just lowly old Len. Let's see if we can get this to come off. Get our safety glasses on. Okay, it's getting loose. Locking pliers in here. Hooray. Here we are. Got that sway bar link out of the way.
Here we are friends, a quick product comparison for you. Over here we have our front sway bar link out of our 2004 Volvo XC90. We just removed it, and over here we have our brand new quality 1A Auto part. This comes with brand new nuts. These are locking nuts. The studs come in the exact same as the originals. Where up on top, the studs a little thicker and on the lower part, the stud is skinnier. That's why we had a bigger nut and a smaller nut. It's important to take note that the length of them is the same. That's super important. Obviously you don't want to have one that only kind of goes that far. Anyway, it comes with brand new boots. Like I said, brand new nuts. It comes with everything you need to mount. I don't see any reason why this wouldn't be a quality part to install into the vehicle, so I'm going to go ahead and do it. If you need this or any other part, you can always check us out at 1aauto.com. Thanks.
Okay, so we've got our sway bar link. We'll put it up in here, like this. This is the smaller side, the side with a small stud. Okay. You can get that started. Now we're going to blast this on with a 15 millimeter socket. We've got our 15 on our half inch gun with some safety glasses. Tight. All right, so it's important to make sure that we have our ABS wire going along the outside of your sway bar link. You don't want it heading towards the inside there and getting all pressed in there and whatever. So if you notice it doesn't really want to line up very well, you can just do something as simple as taking your pry bar, go up against the sway bar and then anywhere you can find to pry up against. And you don't even need to really go very far. Just like that. It's lined up so it's straight. I'm going to take my 18 millimeter socket. Let's see if I can get it on here. There we are.
Now I'm just going to blast it on. Of course not. We're going to try it one more time. I'm going to try it a little bit more gusto, and I'll leave it so it's just barely on there. Then I'm going to blast it. And that's a no. Okay. So I put some locking pliers on here. I'm going to be careful not to damage my brand new boot, and we're just going to go ahead and try to blast this on. There we are. So now that we finished up that job, what you would do is you'd go over to the other side of the vehicle, assuming you're doing the same thing on the other side, repeat the same procedure, easy peasy. Grab your wheels, put them on, torque them down, down the road you go. Easy peasy.
Okay, so now to make it easier to get the wheel up on here where we don't have the lug studs that are sticking out and you put your wheel up on and it just kind of holds the wheel nice and easy for you. You don't have to stand there and hold it forever. Volvo decided to make it fun and interesting and make you work your muscles a little bit. Well, 1A Auto sells this awesome tool and basically all these are is they're going to give you a lug stud. So when you're putting your wheel on, you just slide your wheel right over this and it's going to kind of hold it there so you don't have to sit there and try to muscle it the whole time while you try to line up the holes and put your lug stud in or lug bolt. So I'm going to set that aside. I'm going to grab my wheel, bring it right over.
Hold on to one of my lug nuts. Just going to bring this up. Slide it right over that. Boy oh boy that made it easy. So now we would just take our lug bolt. Put our wheel up against there. Start this in, hopefully. I should've grabbed one of my sockets. That would've made my life a little easier here. There we are. And even though I was holding the wheel steady that whole time, I didn't have to have my whole body holding it, trying to line it up while I'm staring into the hole and put this through. Thank you 1A Auto. So we'll just start all these lug nuts in and then we'll bottom them out, torque them down.
Okay. We've got all the lug nuts bottomed out. Now we'll just bring the vehicle back down so the wheel is touching the ground, but without full force of the vehicle's weight on the wheel. And then we'll torque down these lug nuts. So here we are friends. We've got our torque wrench out. It's set to 103 foot pounds. I have my thin wall, 19 millimeter socket because there's limited space to get in between these lug bolts and the wheel. When we tighten these down, we're going to go in a star pattern. Here, here, here, here, here, and then if we decided to go around again, we'll do the same thing. But anyway, the reason for going in star is essentially, so as we're going around, if the wheels cantered a little bit, it won't get stuck that way and maybe the torque wrench thinks it's torquing it down to 103 like it's supposed to be, but it's a little bit cocked off to the side. Then you drive it down the road, hit a bump or whatever, everything starts loosening up. Your lug bolts come out. Long story short, just tighten them in a star pattern.
There we are. I always like to go around twice. It doesn't cost me anything. It doesn't hurt me any, and it's a small price to pay for safety. Okay, all torqued up. Great job everybody.
Thanks for watching. Visit 1aauto.com for quality auto parts shipped to your door, the place for DIY auto repair. And if you enjoyed this video, please click the subscribe button.
Tools used
Hey friends, it's Len here at 1A Auto. Today we're working on our 2004 Volvo XC90. This one's the all wheel drive version and we're going to be replacing a rear sway bar link. It's going to be super easy. I can do it. You can do it too. As always, if you need this part or any other part, you can always check us out at 1AAuto.Com. Thanks.
Okay friends. Here's our rear sway bar link. I removed the wheel just for purpose of the video, but to do the job itself, you don't have to have the wheel off. I just wanted to mention that. To take it off, it's going to be super simple. We've got a nut here and a nut located right down here. Once those are off, you just pull the studs out of either the sway bar or out of the control arm. It's going to slide right out. We'll spray this down with some penetrant first. We'll let it do its job for a second and then we'll go ahead and take off these nuts.
We're going to use our 18 millimeter socket to try to take off these nuts. What could happen is once this loosens up, the stud might want to spin inside here and it's going to become an issue. At that point we'll have to switch over to a different set of tools, but let's give this a try first and we'll deal with what may happen if it does happen.
Okay, so it is happening of course. As we're trying to remove the nuts, we're just spinning the whole shaft because on the inside of the sway bar link it's just a ball and socket. What we're going to have to do is we're going to have to grab a Torx bit socket that fits inside the stud right there and then an 18 millimeter wrench. We'll hold the Torx bit socket still with a ratchet probably and then unscrew the 18 millimeter nuts with a wrench. For the Torx bit, which is basically a star, you're going to use a T40. I'm going to grab my ratchet, put that on here. We've got our wrench. I'm going to start with a lower one because it's easier for me to get to. I'm going to put the wrench so it's ready to reverse or turn it counterclockwise. I'm going to put the ratchet so it's on forward and it's going to hold the stud in the opposite direction. Right now the nut's coming right off the stud, which is exactly what we want. Get that off of there.
There's our nut, not that it matters, we're going to replace it. Come up here to the top one. Get our wrench on there and our tool. Awesome. Get that nut off of there, grab our sway bar link, twist it, turn it and pull it right out of there. Easy peasy.
Here we are friends, a quick product comparison for you over here. We have our rear sway bar link out of our 2004 Volvo XC90, all wheel drive version. And over here we have our brand new quality 1A Auto part. Both these parts are created equal. You've got the same length, super important. You've got two mounting studs, also important. One of the awesome things about our sway bar link, is you've got this area right here which just makes it so you can get a wrench on there and hold it so the stud can't turn. This one on the other hand, not so much. You have to grab your Torx bit socket, hold it in there, which is fine, but in that instance you can't use a, like maybe an air gun to zip these off. If they were really frozen on, they're doing the wrench trick might've been a little bit of an issue.
Like I said before, same length, same studs, pretty neat little addition there and of course we've got sealed and pre-greased boots, brand new. It also comes with the mounting hardware, which is basically just two brand new nuts. Just throw that over there. They screw right on there. The whole form is oblong, that's how they lock, so they're self locking nuts. You don't need to use thread locker on those. With that said, I don't see any reason why this wouldn't be a quality part to install onto the vehicle so I'm going to go ahead and do it. As always, if you need this or any other part, you can always check us out at 1AAuto.com. Thanks.
We've got our brand new quality 1A Auto sway bar link here. We're just going to go ahead and install it. It's going to be super easy. We're going to come right up and in. I'm going to start with trying to get the top one in first. What's going to cause the biggest issue is just the the e-brake cable right here, but it's not too big of a deal. You just kind of push it out of the way and the stud should slide right through. To make sure it doesn't slide back out on its own somehow while we're trying to maneuver the bottom in, we'll just start that nut and we'll get this one in. The studs move around fairly easily so if it's not lining up perfectly, just move your stud around.
There we are, brand new nut, get this on here. The mounting on the backside there that I showed you, that's an 18 millimeter and the nut itself is an 18 millimeter. Do whatever you got to do to tighten it up. You can use your 18 millimeter on your air gun or you can just go ahead and use your ratchet and a wrench. You do you Booboo. We'll go with a ratchet and wrench for now. I'm just going to hold this side and I'm going to use my ratcheting wrench on this side. That's tight. We'll do the same to the upper one. Just try it and get it so it's going to hold that. Tight and tight. Both mounting points of the sway bar link are tight. You're all set.
Thanks for watching. Visit 1AAuto.com, your place for DIY auto repairs, for great parts, great service and more content.

PSA55799