Replaces


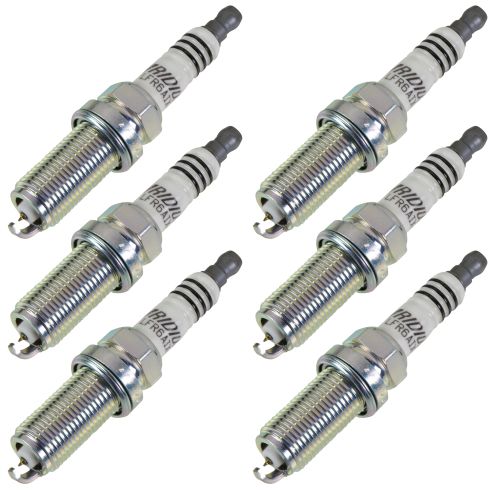

Recommended for your 2010 BMW 528i xDrive
Part Details
Returns: Parts with electrical components cannot be returned once installed.
Lifetime Warranty
This item is backed by our limited lifetime warranty. In the event this item should fail due to manufacturing defects during intended use, we will replace the part free of charge. This warranty covers the cost of the part only.
Returns: Parts with electrical components cannot be returned once installed.
FREE Shipping is standard on Orders shipped to the lower 48 States (Contiguous United States). Standard shipping charges apply to Hawaii, Alaska and US Territories. Shipping is not available to Canada.
Expedited is available on checkout to the United States, excluding Alaska, Hawaii and US Territories as well as P.O. Boxes and APO/FPO/DPO addresses. Final shipping costs are available at checkout.
Created on:
Tools used
Hi, folks. We've got these NGK spark plugs. You can buy them at 1AAuto.com. We're going to put a fresh set into our 2008 Outback with a single overhead cam 25 in it, so if you need tune up parts or any other parts for your vehicle, visit 1AAuto.com.
We've been selling parts for over 30 years. You'll get the best service on the internet, and fast and free shipping. Open the hood. Go under here, release lever. There's a little indicator, a little pictograph of a car. Release lever for the hood is here. Lift up on the hood, find the safety. It's right here about the grill, so push it to the passenger side, and just put the prop right up. You put your hood in the service position by lifting it up, and if you follow down here, you put the prop rod in this extra little hole here on the hood. Let that sit there, and now your hood is opened higher and you've got some more space to work.
If you're working on your Subaru here, the coil pack is right here with the plug wires running off of it. These two wires run down to the passenger side. There's cylinder number three and number one, and you can follow them down to the cylinder head, and that's where you'll find your spark plugs. If you follow the other two wires across, these are cylinder four and two. Again, those will go down into the cylinder head. We'll start here on the driver's side in the rear cylinder. This will be cylinder number four.
I'm just going to reach down. You don't want to pull the plug boot out by the wire. It's got these nice little rubber tabs here, you can grab onto it and pull it out. It might have a little bit of a suction to them. You've got to give it a good tug. Work it around a little bit. Lift it up. You want to do these one at a time so you don't mix them up. Lift this up here, put it aside. I'm going to use this 5/8 spark plug socket. This is special because it does have a rubber insert that holds the spark plug so when I take it out, it doesn't fall on me. 5/8 fits these, and I've got a combination of extensions. You're just going to have to find the right combination that fits in there.
Now, I can take this little extension off and maneuver it into place, and then I can stick this little shorter extension on here. We'll push it over the spark plug, so I can feel it's on there. Take the ratchet. It's pretty tight in here. Might have to work at it a little bit. It should come pretty easily. It shouldn't be torqued in here too terribly tight.
Start to loosen it up with the ratchet, and when you feel it get loose enough, you can reach in here with your fingers, take it out the rest of the way. I'm going to take this little short extension out so I can get it off. Just slide it out of here. So you can see that socket holds the spark plug in place. Just take it out.
Here we've got our old spark plug we pulled from our vehicle. See it does have some wear in it, a little bit of oil. That's pretty normal. The car probably does need valve cover gaskets, but I'm not going to worry too much about that right now. Here's our brand new one from 1AAuto.com. You can see if you match these up, they're the same length so they'll fit in the cylinder correctly, and the same type of crush gasket here. The original was NGK, the new ones are NGK's, so these will bolt right in and work great for you.
We'll put our new spark plug into the socket. It holds it in place. Go down in here. These don't need to be gapped. They're pre-gapped. Carefully slide it into the cylinder head. Make sure you thread it down in by hand. I need that little extra extension. You don't want to cross thread these, so make sure you feel them go in nicely. I like to thread them all the way down ‘til I can't thread them anymore with my hand, and then I'll tighten them.
The torque on these is 15 foot-pounds. You just need to crush the little sealing gasket that's on the end of them. If you can't get a torque wrench in here, you probably can't, it's pretty tight, so let me just get the ratchet in here to line up. I'm going to thread it down, and when I feel it get tight, I'll go about a half turn more, and that should be enough to seat that gasket. You don't want to over-tighten these. You don't need to kill them when you're putting them in. That's tight, and then I'll just go a little bit more, right there.
You can reinstall the plug wire and boot. At this point, if you want to change these, you can do that. Additionally, if you want to add a little bit of dielectric grease here and on the end, feel free. We're just going to install them as is. These ones are in pretty good shape. Feed that into the opening. It should seat itself right on the spark plug, just make sure it pushes down. It'll kind of snap into place, and it goes back into this little carrier here, and we'll do the front cylinder.
This one here, we'll do the same exact as the rear one, and we'll just start by pulling off the boot.
To get to the spark plugs on this side, the passenger side, so we're going to remove the air box to give us access. We'll start over here at the intake duct. This has some push clips here, so I'll use a push clip tool to pry them out. Just pop them up. Do the same for both, and this will pull right out and lift up. Put that aside.
We've got to loosen this hose clamp. You're going to need to use a flat bladed screw driver or I'm going to use an 8 millimeter socket. I think using the socket ratchet is easier, but if you don't have access to it, just use a flat bladed screw driver. Loosen it up, slide it off, and unplug the mass air flow meter here. Push in the lock, pull it out. You might have to hold onto the box. You don't need to remove it from this air box. You can just unplug it.
So there's a stud with a nut here holding in the air box. I'm going to loosen that up with a ratcheting wrench that's a 10 millimeter. If it's loose enough, I'll take it off with my fingers, if I can get my fingers in here. It's still kind of tight. It's a little bit rusty, so I'll keep taking it off. I'll try not to drop it. Put that aside so we don't lose it.
There's a 10 millimeter bolt down here. I'm going to use a 10 millimeter socket and a long extension. I'm just going to take it all the way out, make it a little bit easier. Pull the air box up and out. It sometimes might be... This one wasn't clipped, but it should be clipped on this power steering line here. If it is, just pop it out. Maneuver it out of the engine compartment. Try not to pull any hoses out with it.
We'll start on this rear cylinder here. Reach down, this will be just like the driver's side. Pull on these rubber flaps. You don't want to pull on the spark plug wire. Just kind of work the boot out. Put this aside, and just move this connector out of the way.
We'll put our spark plug socket and extension down into the opening. This wire is in the way. Just kind of maneuver it in there. I'll get the other little extension. Just use a combination of extensions that works for you. Make sure it's seated on the spark plug. It feels like it is. Use a ratchet to remove it. Slide it out of there. It's getting tight, we'll go just a little bit more to seat the gasket. You're all set.
Reinstall the spark plug boot. Make sure it's seated, and we'll move onto the next one. You do the same for the front cylinder. Reinstall the boot and the wire.
We'll reinstall the air box. I'm just going to feed it back into the fender well here. You have to maneuver it around some hoses and wires. Make sure we don't break this air flow sensor wire. Put that stud in the opening there. Make sure you don't lose your hose clamp here. Make sure you put the bolt part where you can reach it, so usually like that. Align this up here. Push it over. This will help you get it in place. This power steering line clips into this hook right here. Put this bolt down into here. Tighten it up. Once I feel it get tight, stop.
I'll reinstall this nut here. A little tricky because my hand wants to push the air box away as I'm trying to thread it on. Let's get it started. Just thread it on as far as it will go, and then I'll use my ratcheting wrench to finish it up. I'll just get it tight, just snug it up. You don't have to over-tighten it. Once you feel it get tight, you can stop.
Then, we'll find our mass air flow meter plug. It's very important you don't forget to plug this back in. It'll click when it locks in place. Tighten up our hose clamp. Once you feel it get tight, stop.
These little push clips, they've got a little rubber grommet on them. I'm just going to take it off. Just simply slide it off, and I'll push it back in where it originally went. This will make it easier to reinstall with these already in here. You've got to push them in place. Do the same for the other one. This part will fit into the air box. We'll slide it in. Line it up on the radiator support. Put the push clips in. The job is complete.
Thanks for watching. Visit us at 1AAuto.com for quality auto parts, fast and free shipping, and the best customer service in the industry.
Tools used
Hi, I’m Mike from 1A Auto. We’ve been selling auto parts for over 30 years!
Disconnect the negative battery terminal, it's a 10 millimeter nut.
Remove the plastic engine cover, two 10 millimeter nuts on the top. Cover should just slip off, let me put that aside. These are your four ignition coil packs, right on top of the engine. To remove them, well this tab is broken, but if the tab is not broken you push the tab in, pull it out. Push the lock in and pull it off.
To remove the coil pack, loosen the 10 millimeter bolt that's holding it into the head. This procedure's the same for the other three coils. Pull it straight up, and it'll come right off the spark plug. Repeat the procedure for the other three coils.
Use a five-eighths spark plug socket to remove the spark plugs.
Here's our old spark plug. Here's our old spark plug from our vehicle, and our new one from 1AAuto.com. Same size, same design, this one's actually not too bad, but the new one will fit great and work great in your vehicle. Procedure will be the same for all four spark plugs.
You want to use a spark plug socket, because it has a rubber piece inside here to hold the electrode in. That way, as you're installing it, the spark plug doesn't fall out. And then thread it in by hand to make sure you don't cross set it. Torque for these spark plugs is 14 foot-pounds.
Install the new coil, and put it down over the spark plug. Until that gets tight, I'm just going to stop. Reconnect the modular connectors. Reinstall the plastic engine cover. The spark plugs and coils have been changed.
Thanks for watching. Visit us at 1AAuto.com for quality auto parts, fast and free shipping, and the best customer service in the industry.
Tools used
Hey friends, it's Len here from 1A Auto. Today we're going to be working on our 2006 Toyota 4Runner and I want to show you how to replace some spark plugs. If you need these or any other part, check us out, 1aauto.com, thanks.
Okay, friends. So now that we've got the hood up, we're going to take a look at this cover, this has to come off. You're going to notice a 10 millimeter right here and a 10 millimeter nut there. You can use a ratchet, you can use your electric device, whenever you've got. Just remove the nut, looks like that, nothing too special. This one, same as the first. We'll set it aside. Now grab your cover, lift it straight up like this, and then you're going to draw it towards you. You're going to notice you've got a little hooky do there and there and those just kind of sit right on this rubber and that rubber.
All right, so next, let's pop these little clips right here. We're going to take our air filter box, set it aside. If you haven't checked your air filter, now's a perfect time. Just lift it up, take a peak, it looks pretty good. I'll set it back in. So now we have a fairly clear view of our coils and everything. Now set this this way. You've got coils here one, two, three, coming down the line here, right? And then of course on the other side of the engine, you're going to be looking at the same thing. An exception of just the upper intake part's going to kind of be blocking some of it. Might be a little harder to see, but it's definitely doable.
So as we look at this, I'm just going to show you how to get off one of these coils real quick. We can squeeze this little tab right where my thumb is and you can see the lock lifting up. Give your harness a little wiggle. If it doesn't want to break free, just grab my pocket screwdriver here. Let's see if I can give it a little push. Help it along. Awesome. Take a look at your electrical connector. Just make sure you don't have any funny colors in there. If you see any rainbow colors inside an electrical connection, it's probably not a good thing. You want nice, beautiful metal. This looks great. I'm just going to tap it a little bit. It looks like there's quite a bit of sand and dirt around here. So we'll set that aside though.
So now we're looking at our coil bolts here. As you can tell it's fairly rusted. It should be a 10 millimeter. So I'm just going to try to scrape off the majority of this extra crud. Now we'll see about getting a 10 millimeter socket on there and see if we can get this to loosen up. Okay. So I've got my nice a long ratchet here. I grabbed an extension and I've got my 10 millimeter socket down there. Just going to see if I can break this free. Feels like a no.
Okay. So when you have a bolt that's stripped out on the head like that and you just can't your socket to want to grab onto it, get yourself one of these types of sockets. It's called a twisty socket. It has like rifling on the inside. And what you need to do is you put it over the head of the bolt that's stripped, you give it a couple of loving bonks with your hammer. And as it goes on, it's going to twist, twist, twist, and lock in. And then as you continue with a ratchet and you try to turn it, it's going to continue trying to lock into that bolt, grip it and pull up at the same time. So it's just going to continue to grip, grip, grip until it finally breaks free.
So let's give this socket a try. I'm just going to go right on here. Grab my little hammer, a couple of loving bonks, see if this works. Oh yeah. So this socket works great for getting the bolts out. Something you've got to think about is getting the bolt back in. Generally speaking, what you would want to do is replace it, obviously. I mean, if the head's no good to the point that you can't get it out, more than likely you just need to replace it because how are you going to tighten it up? So we'll just set this aside.
At our coil here. Give it a little twist, lift it straight up. This boot should come with it and here's your coil. Okay, so now that we have our coil out, we want to make sure that the tube's nice and clear. I'm just going to spray a little compressed air inside there. Can see debris coming out. Last thing you want is anything getting down inside your cylinder because you didn't clean that out. Use my spark plug socket, slide it right down in here and I just want to show you why I said spark plug socket, not just a regular five eighths socket. If you look down deep inside there, you're going to notice that there's a little rubber like I don't know, little rubber piton inside there I guess we'll say. And that just holds onto the tip of the spark plug and keeps the socket from wobbling around and potentially cracking the ceramic of the spark plug.
If you use just a regular plain old five eighths socket, you're not going to have anything holding that socket still and you might crack your spark plug, which might not be a big deal if you're just taking out the old spark plug. But when it comes time to put it in a brand new one, you're going to want to make sure you have something good on there and you don't want to ruin a brand new spark plug. Put that in there with our extension. I've got my three eights ratchet. Okay. So here's our spark plug. So if you look at the tip of your spark plug or the inside end of it, I guess, because I would say that the outer portion's the tip. But anyway, the inner portion, you can see that it's worn at an angle. This spark plug's definitely worn and it needs to be replaced. All right.
Generally speaking, it should be nice and flat going across the top. If it was a platinum, you'd see like flat across the top and then a little iddy biddy tip coming up. If it was a double platinum, you'd have a tip coming up from the bottom there, and then of course one coming from this electrode area there. But that's what that looks like.
Okay. So I just want to show you on your spark plug real quick. The original one we took out of here, the gap is definitely, it's very bad. The gap on the spark plugs is supposed to be 0.043 so we've got a little spark plug gap or here and that just pretty much tells you what size you're dealing with. The closest one that I can get up to as a 0.044 so this technically should be a little bit bigger than the gap that the vehicle requires. But I can take my gapping tool and wobble it all around. I can even go a 0.08 and it almost fits in there like super close. So as you could tell, the gap on that is really bad. So your spark is going to have to jump all the way from down there across to here. It has a long way of jumping. And so you're going to have a weaker spark and you're going to have poor fuel economy with something like this, probably even notice a running condition.
Going to grab our 1A Auto one here. I'm going to find my little spot again. You've got the 0.044, that's super close to 0.043, just try to stick it in there. It looks like it's just about to squeeze in. I would say that that's perfect. Okay. You want to check all your plugs with a spark plug gapper. Sometimes what happens during shipping is maybe a box gets dropped or something like that. And if a box gets dropped and this gets peened down you're going to have a running issue, obviously. Okay, so just grab yourself a spark plug gapper, your spark plug gap on this should be 0.043. Make sure that it's 0.043 in between the electrode and the top area right there. And then you're clear for an install.
Okay, so we're going to take our five eighths spark plug socket. We've got our brand new quality 1A Auto part. Slide it right in here. By the way, we sell these sockets, the five eighths spark plug socket. I'm just going to slowly put it down inside this hole. Start screwing it in. So I'm just turning this in by hand. We're going to make sure we bottom it out and then we're going to grab the torque specification for it and we can continue. Okay, that's bottomed out. Let's grab the torx spec. So now we're going to torque down our spark plug to 14 foot-pounds, which is not very much by the way. That's it right there. I'm just going to double check it. Awesome. Okay, so we have our 1A Auto coil here.
We're going to use a little bit of dielectric grease. This is a special kind of grease that allows electricity or current to flow through it. I like to put it on here along the edge right there, and then I like to go right up along here. Now it's good. The reason why I put it down here is so that it will slide onto that spark plug. Nice and easy. I like to put it up here, so hopefully it'll help keep moisture out of there. Just gives the rubber a little extra. Carefully slide this right down in, bottom it out.
We're going to grab our bolt. We went and grabbed a brand new one. There's our old, as you can tell, this one's meh. Put it over there. Grab this. Start it right into the hole there. We're going to tighten this up now, almost there. All right, that's nice and snug. Perfect. Grab your electrical connector. We already checked it out so we know that's in great condition. We're going to slide it right onto the coil and we're going to listen for a click. I heard it. Let's give it a tug. It's definitely not coming off. Awesome. Let's move along.
Okay, so now that we've got this one done, we're going to do the same thing to all the rest of this and then we'll do the same to the other side. All right, so let's get our air filter back on here. You're going to notice you have these little pitons and they're going to go into the hooky dos back there. So just slide it in rear first, make sure you get it in. We've got our clips here. There's one, there's two. Give it a shake and a pull. Obviously this side's latched in, but a lot of times what happens is as you could miss on the rear, and even though this is latched in, I'll show you what can happen. You think you have it latched in. Oh yeah, this is great. Awesome, right? You're going to have a lot of dirty air getting sucked into there, so let's avoid that. Make sure you got it on. Awesome.
We're going to go over the other side of the engine. When you come on this side, you're going to notice it's kind of like a little bit more of a jumbled mess and you might notice a couple of things in your way as you're trying to do this stuff. So you've got one coil down here, right, with your bolt, you've got the center coil right there, and then you've got another one all the way back over here. Okay. You can see my thing, it's right there. More than likely what you're going to have to do is take off this bolt right here and then the lower one down there and get this right out of the way. Okay.
It's just a metal bar. It's easy peasy. You've got a little clamp right here, you just squeeze it with your fingers and that hose is going to be able to move right out of the way and you'll be able to get all these coils right out of here, easy peasy, just like the other side. And then of course you can get to your spark plugs if needed. So we've got our little hooky dos on the cover here. And then the rubbers right there as I showed you before, I go just like this so I can see, slide them on there. We're going to bring this down nice and easy. We're going to line up the studs with the holes. Perfect. We've got our two nuts. They're both the same. We'll snug these up. Give it a little tug. That feels good. Make sure you have all your tools and parts out from underneath the hood and down the road, you go.
Thanks for watching. Visit 1aauto.com for quality auto parts shipped to your door, the place for DIY auto repair. And if you enjoyed this video, please click the subscribe button.
Tools used
Hey friends, it's Len here at 1A Auto. Today I'm working on 2007 Toyota FJ Cruiser. I'm going to be doing some spark plugs. It's going to be a very easy job. I want to be the guy that shows you how to do it. If you need these or any other part, you can always check us out at 1AAuto.com. Thanks.
So here we are friends. We're under the hood. All we're going to do, unclip this, unclip this, get this out of the way. This is our air filter by the way. We can take a peek. Looks pretty great. I could show you how to replace that if you need. I just did.
There we are. So here we are. You've got some coils under here. Underneath these are the spark plugs. To disconnect the coils, there's a little tab right here. Give it a little squeeze. I squeeze it. I twist it. I pull it. I check it. I don't see any funny colors. No rainbows. Green's bad obviously. Blue's bad under there. Rust, no good. This looks really great. Let's set it aside.
So right here's a 10 mm, so you can use whatever you want. I don't recommend using an airgun for anything like this. I'll just use a ratchet. It's easy enough. Break her free. There's our bolt. We'll set that aside. Put our ratchet aside. Grab the coil. Give it a nice little twist. This right here, it's just a little boot. Should be right up on there just like that.
So now it's time to go ahead and remove the spark plug. We're going to use a 5/8 socket, an extension, and a ratchet. You can get any tool you need to do this job at 1AAuto.com by the way. We sell everything you'll need, including the parts. Just going to get this completely out of here. I'll show you what it looks like. Oh, okay I'm exhausted. Go for some cookies, some milk, and a nap.
So there's our spark plug. As you can tell, it's looking pretty nasty. I would say it's definitely time to go ahead and replace that. Let's go ahead and compare it to a new one.
We have our original plugs that we just pulled out of our 2007 Toyota FJ Cruiser. Over here we have our brand new quality 1A Auto part. What you want to do is you want to compare the two of them next to each other. Make sure that the length of the threaded area is the same. If your new one's like this and your old one's like that, you're going to have a big issue. Vice versa, doesn't matter. Even if it's just the tiniest bit, you want to make sure that they're both exactly the same, okay. Also you want to check the top, make sure that the ceramic area's the same. Comes up to the same height. It's very important. We'll set this aside.
Your new spark plug from 1A Auto comes with a brand new crush washer on it, which is also very important. It's got an electrode in there. Creates the spark for you. And these are NGK, which is one of the best quality spark plugs you can get. I don't see any reason why this wouldn't be a great spark plug to go ahead and put into this vehicle, so I'm going to do it. If you need this or any other part, you can always check us out at 1AAuto.com.
So one thing that's very important to do when you get new spark plugs, you want to make sure you check the gap on it. I know they're brand new. They should come where they're supposed to be gapped to, mistakes happen. Maybe it got dropped along the way. The electrode area got bounced down. So just grab a little gapper, the gap on these should be between .040 and .043. I'm going to take a gapper, just going to stick it in here. A little bit of gap, that's the .040. Feels pretty great. If it was to the point where I could take something, let's see if I can find something here. Well this one doesn't go small enough. But anyway, let's say I had quite a bit of movement there. Right. Let me show you on the old plug. Let me grab the old plug.
So I've got my new plug and my old plug. Just wanted to show you. We've got our gap on the new plug, .043. This fits in nice and snug. Set that aside so it can't fall down. This is our old plug. I'm going to do the same thing, .043. I haven't moved it. That's how worn this is. You can pretty much see the gap. I could almost probably fit another .043 in-between there with it. So this plug's very worn. It's a good thing we're doing a tune up on this, or replacing the spark plugs I should say.
So with that said, let's move along. I'm not sure if you can see the difference in the gap there? It's huge. That means the old plugs were very worn. The spark had to jump quite a bit, so you were losing fuel economy that way.
So right along here is the crush washer I was mentioning before. So when you tighten it down, it might feel like it bottoms out. But you have to make sure that you keep tightening a little bit there and crush down that washer, okay. Super important. Now do you need to use a 1/2 in long breaker bar to try to tighten it down from this far out? No. But you do have to make sure that it's snug, okay. So I'm going to take my ratchet off of it, get it on my socket. It doesn't fall off a 5/8 socket like I told you before. If I can get it on there. Okay.
Now at that point, I can tell that I just bottomed out the crush washer to the engine. Tell it just by feeling it. It got a little stiff. I'm just going to go a little bit. Now if feels like it's getting even stiffer. That feels pretty good. I didn't go ahead and put any real pressure on it and come out here with a big, long ratchet and try to keep turning. You know what I mean? That feel good.
You don't want to-
Okay, we're going to torque down the spark plug to 13 foot pounds. There we are. See that one more time. There we go. We'll do the same to all the spark plugs as we continue.
We've got our brand new coil. I like to use a little bit of dielectric grease, specialty grease that allows electric current to travel through it. Put a little bit here. Little bit there. Little bit along here, okay. You can go right along there if you want. That's where your electrical connector is going to be. It'll help keep moisture out of there. You don't want any corrosion in there.
Bring this down into its hole. I can feel it touching up against the top of the spark plug. I'm just going to keep going. All right there. The gasket's going to hit up against the engine right there. And grab our bolt. Start it in here. Okay. Bottomed out a little bit. I like it. My socket off of there. We've got our connector. We're going to push it in, we're going to listen for a click. There it is. We'll give it a little tug. It's holding in strong. It's not coming off.
If for some reason you grabbed it and it does just, let's see if I can even get it to do it? Let's say you've pushed it on, well whatever it's going to just lock back in. It just want's to be locked. But anyway, you push it on, it's supposed to be locked. You give it a tug, it comes right off, there could be something wrong with your lock right there. You need to make sure it's locked. This one works so good, that it just wanted to lock back in on its own again. Am I going to go through taking it off again, nah. I'll move along. I know this one's clipped in. We'll move along to the next one. We'll do the rest on this side and we'll go over to that side.
Okay feels pretty good. All new. Looking great. Take our air filter, it's going to slide right in here, the air filter housing. Clip in on the front. Lock these puppies in. Give her a little shake, make sure the back doesn't come unclipped. Feels good. Let's move alone to the driver's side of the vehicle.
So this side's the messy side. We've got all sorts of stuff that might be in the way. This bracket right here, more likely going to be in the way. We've got a 12 mm right here. A 12 mm located on the bottom. You'll remove a pair of those. Take this bracket out and set it aside.
These hoses and things, they can move around. Just come right out right here. Let's see, slides right out of these little clips. Gives you some room. You're going to remove your 10. Unclip your coil, well unclip your coil, then remove your 10. Pull the coil out of there. Take out the spark plug. Put in your new spark plug, new coil. Off you go. Do the same for the other two. We'll put the bracket back on. Easy peasy.
Well we've got this coil ready to come out. It's the center one. It's the reason why I told you we've got to take off that bracket. You can turn it any way you want. And it just won't come out of here. Okay. Turn it around if you want. Try whatever you want to do. Does not come out. So we're going to remove this 12, bottom 12, and then it should give us plenty of room to move along.
A little bonk. Leave that on there for a little bit. Come down here. If I can grab this bottom bolt. Just use the socket for something to hold onto here. Get the bolt out of here. I'll show you what it looks like. Lower bolt. Put that aside so I can't lose it. Holding the bracket, come on baby. There it is. Got our bracket out of here. That's the way it sits. Curvy ends down. Second bolt. Easy peasy. Now let's see if we can get this coil out of here. Cool. Let's go ahead and replace it.
This hose right here is in the way of getting out this coil. It's pretty easy to take care of. There's a little squeezie clamp right back there. You can do it by hand. There's one right here. Do it by hand. You want to give it a little squeeze. Not much tension there. Pull the clamp down. I'm going to take my hose, pull it right off. Take a peek at it. It's pretty cracked. I'm going to see about trying to replace that at some point. For the purpose of this video, I'm not going to worry about it yet. I'm going to squeeze that back one, give my hose a tug. There's our hose. I'll set this aside. Now we have a clear view of our coil back there. We can get to this easy peasy at this point.
We're going to go ahead and install our hose now. I've got all coils in. Give the clamp a little squeeze. It's easy. Just slide it in. Love it. Give this one a squeeze. Slide it up. Line it back up with the way it came off. I liked it there, it was there for a long time. It want's to stay there.
We got our bracket and with the little bump coming out on the lower end. It wasn't like this. It was like this, the rusty end was down. And grab one bolt. I'm going to start in on the top because it's easier to reach. Not going to tighten it down until I get the other bolt started. I'm just going to use my socket, it gives me a little something to grab onto. Start it in the whole down here. Okay. At this point, I can go ahead and tighten this up if I want. And I do want to. Grab my ratchet. All right. I'll get this one so it's close. Jsut easier to do this than with the ratchet. Cool. Let's tighten these puppies up. Have my ratchet in the on position. Feels pretty good. I don't want to break my plastic intake. This one down here, this is just using our 12 mm socket that we used to take them off obviously. Feels great. Bracket's nice and tight. Hose is on there. Want to make sure that we push our hoses that we might have pushed off of these clamps back in. Everything's secured. Perfect.
We'll get all our tools out of here and we'll spark it up. All right friends, here we go. Let's get ready to start this up.
Feels like it's purring like a kitten. RPMs are good. I don't feel any shutter inside the vehicle. No misfire. No check engine light. I'd say we're good to go.
So let's say you're inside your vehicle just after you completed your work. Right, you started it up. Everything felt fine for a second. Maybe your check engine light came on or maybe you're inside the vehicle and you can feel a shuttering a little bit. Shaking. Your RPMs jumping around. You could have a misfire. At that point, you could have one of your coils, maybe wasn't plugged in all the way. Okay. So that would be the first thing that I would check. I would just grab all my coil wires, give them a little squeeze. Maybe it didn't clip in. It's possible. Human error. Okay. If all those were good, you can try starting it up again, double check it. If it's still doing the same thing, you might have a spark plug issue. Okay.
If you have a spark plug issue, it could be something as simple as a cracked plug. Can happen in shipping. Maybe you used the wrong socket. You used a 16 mm instead of the 5/8 spark plug socket you should be using. Anything can happen.
If your check engine light's on, of course you can pull a scanner out or go some place that has a scanner and have it checked. That'll give you a proper diagnosis of what to start looking for. But those would be where I would start.
So with all that said, this engine ran perfectly for me. So I don't have anything to worry about. So you can always check us out for any parts or instructional videos. Thanks.
Thanks for watching. Visit 1AAuto.com for quality auto parts shipped to your door. The place for DIY auto repair. And if you enjoyed this video, please click the subscribe button.

NGETK00045

