Replaces
Replaces 2003-09 Toyota 4Runner Lexus GX470 5 Piece Air Suspension Kit TRQ PAA71210
$594.95
Replaces Toyota Lexus 8 Piece Ignition Coil Set Delphi DEERK00037
$531.95
Replaces Toyota Lexus Front 6 Piece Drivetrain Kit TRQ PSA78558
$469.95
Replaces 2003-09 Toyota 4Runner Lexus GX470 3 Piece Air Suspension Kit TRQ PAA80075
$454.95
Replaces Toyota Lexus Front 4 Piece Drivetrain Kit TRQ CSA64083
$374.95
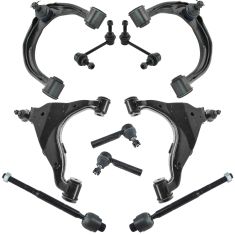
Replaces Toyota 4Runner Lexus GX470 Front & Rear 14 Piece Steering & Suspension Kit TRQ PSA43286
$374.95
Replaces 2003-09 Toyota 4Runner Lexus GX470 Front 10 Piece Steering & Suspension Kit TRQ PSA59529
$364.95
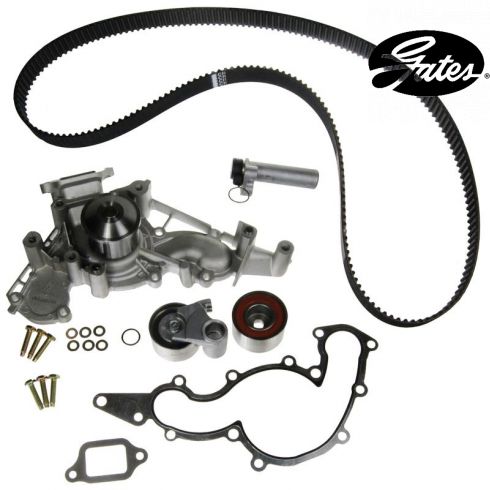
This timing belt component kit, tensioner with water pump is just what you need to keep your vehicle in good running order.
Our timing belt sets come from a company that is committed to supplying components that are engineered and manufactured under strict quality control procedures. They are leaders in timing component quality which provides you with the highest quality parts available on the market.
This high quality, water pump and timing belt kit, contains the following pieces and has the following specifications:
Most car manufacturers recommend changing your timing belt between 50,000 and 70,000 miles (consult your owner's manual to see what your specific manufacturer suggests).
These parts are authentic Gates brand products that are supplied and packaged by Gates. Some of the components included in this kit may be sourced by Gates from other high quality suppliers such as Aisin, GMB, Koyo & other OEM suppliers. These parts are subjected to the very same testing and quality standards as all Gates products.
Attention California Customers:
 WARNING: This product can expose you to chemicals including 1,3-Butadiene, which is known to the State of California to cause cancer, and birth defects or other reproductive harm. For more information, go to www.P65Warnings.ca.gov.
Lifetime Warranty
This item is backed by our limited lifetime warranty. In the event this item should fail due to manufacturing defects during intended use, we will replace the part free of charge. This warranty covers the cost of the part only.
FREE Shipping is standard on orders shipped to the lower 48 States (Contiguous United States). Standard shipping charges apply to Hawaii and Alaska.
Shipping is not available to a P.O. Box, APO/FPO/DPO addresses, US Territories, or Canada for this item.
Expedited is available on checkout to the United States, excluding Alaska, Hawaii.
Final shipping costs are available at checkout.


Created on:
Tools used
Brought to you by 1AAuto.com, your source for quality replacement parts and the best service on the Internet.
Okay, so we're picking up from Part 1. In Part 1, we showed you basically how to remove the radiator, fan and pretty much everything off the front of the engine and now we're picking up here. We now need to position the engine correctly so we can take the timing belt off.
You want to use a 22mm socket and rotate the engine so that this mark right here is lined up with the zero; this mark right here, the red, actually that little indentation, is lined up with that timing mark right there; and the same thing on this side, the red is lined up with that timing mark. Next we want to loosen the bolt on our crank pulley. This is a 22mm; the best way is with an impact wrench. You need a special tool if you don't have an impact wrench. But really, you want to have either an impact wrench or a friend with an impact wrench because it is the easiest way to get it off there. Once it's loosened, put it back on a little bit. Next, you are going to remove the harmonic balancer with a harmonic balancer puller. Here's a picture of it. I didn't do a very good job of showing it in the video so I just wanted to show it to you here. You bolt the bracket on. There are bolts inset down into the harmonic balancer; if you stick your finger in there you'll feel them. You bolt it in with two bolts. Make sure that you put them in enough. They probably need to go in about five or six turns. If you look on the back of the balancer you will actually see the bolts coming back out on the other side. Then the large threaded bolt goes in the middle with the pointed tip between. It sets into the harmonic balancer bolt. You thread that in and as you tighten it, it will pull the balancer off. Actually, on this vehicle it didn't take much to get the balancer off at all. Once the balancer's off, there are four 10mm bolts that hold the shield that goes right around the crank. Just another reminder, as you're taking stuff apart lay it out neatly and basically kind of in order of how you take it off with all the hardware, it just makes it easier to put it back together. Now remove the crank sensor ring and put it with the harmonic balancer.
We are already familiar with the timing marks on the cam sprockets on the top. Down on the crank you'll see a white dot on that gear. That white dot is an alignment mark as well. Don't confuse it with the threaded hole; you want the white dot there.
Our new belt has three marks on it: CR, so that gets aligned with that dot on the crank; and then right cam which is the right cam, or R-CAM is the right cam, or the passenger side cam; and L-CAM is the driver's side cam. Right here is my tensioner; it's held on by a couple of 12mm bolts. The timing belt can come off of that tensioner. You can pull the timing belt off. Just one note as I pull the timing belt off: notice that cam wire, that cam position wire, or crank position wire, is inside the belt.
I am going to remove the idler pulleys and the tensioner pulley. The tensioner side is a 13mm or you can just use the Allen wrench and remove the whole assembly, and then the idler side is a 14mm. Now we're going to undo the bolts for the water pump. There are two stud/bolts that are 12mm that you have to use a wrench on and then five other bolts for the water pump; and yes, as you can see, I did do it out of order a little bit because the pulleys are still on there; but you remove those bolts and then you are ready to take the water pump off.
Now you are going to pull the water pump off. Go carefully. If you pull on it or use a screwdriver and pry it a little bit and it moves but doesn't seem to be coming off, just make sure you did get all the bolts. They are sometimes a little hard to see but it has some protrusions and stuff on it and eventually you should be able to shake it, pull it and it comes off. I am showing this not in fast motion, just real time. The gasket is a combination of metal and a rubber adhered to it. What you want to do, is pull it off carefully because you want that rubber basically to come off all in one piece. You can see here that I am really working it slowly and pulling the rubber off in all the little places. That just makes it easier; you don't have to scrape as much stuff off to prepare it. Here, I'm using a razor blade holder and a nice fresh razor blade, and scraping off any residue and dirt. You don't have to worry too much about dirt, you don't want to get dirt all over the place but this is kind of an open area of the engine. It doesn't get into the engine or anything like that so if you get a little dirt here and there, it's not going to be the end of the world, but the better you prepare this surface, the better it will seal and you won't have to worry about any leaks in your engine.
The kit from 1AAuto comes with a brand new gasket. You do not RTV this gasket. You can see it's an aluminum gasket with a rubber seal around it. We are going to put that like so. Here's an O-ring. Pull the old one off, the kit comes with a new O-ring. Here's the new water pump. Make sure nothing gets stuck in behind. Fast forward as I slide it on there. There is a little wire hanging down from one of the cam sensors on the, as I'm looking at it, on the right side. You'll see me kind of fiddle with it here. You just have to push that wire up and out of the way before the water pump slides all the way in. Keeping the speed going, I'm just installing all the fasteners for the water pump and kind of hand tightening them at first, using my fingers and then using the extension and socket. When you go to tighten them, you want to tighten them evenly. To do that, basically just alternate, so if you do a top one, do a bottom one afterwards, if you do a side one, do the other side after. Then at the end, you will want to use a torque wrench. These fasteners, you basically want to torque to 17 foot-pounds. Next, reinstall the little plastic block-off plate.
Make sure you install your spacer when you install the tensioner. We will speed it up again here as we just thread that bolt in and then tighten it up with the 3/8 inch Allen wrench. Just a quick test to make sure that pivots nice and freely. Now I will install a new idler pulley that comes in the kit and fast forward through getting that on and tightening it up. At this point, we are ready to put in our timing belt. I've got the belt lined up on my crankshaft. I've got my left cam lined up over here and I'm going to pull my right cam back just a little bit. I've got my mark line there and I'm going to lightly just pull my left cam and get some tension. I just rotated that just a little bit. I'm pulling on my left cam here just a little. Now I am just shoving my belt around the crank pulley here, around the crank shaft pulley here. Pull it off just a little bit. I pushed it on, and push it on down here. I'm on and lined up there; I'm on and lined up there. My crank pulley is on the mark. A very good sign after everything is installed. At zero, my timing mark is lined up and my timing mark is lined up.
We hope this helps you out. Brought to you by www.1AAuto.com, your source for quality replacement parts and the best service on the Internet. Please feel free to call us toll-free, 888-844-3393. We're the company that's here for you on the Internet and in person.
Tools used
Brought to you by 1AAuto.com, your source for quality replacement parts and the best service on the Internet. This is Part 3 of replacing the timing belt in this 2002 Toyota Tundra. This is basically reassembling the front of the engine, putting the radiator and everything back in, and filling it with coolant, and making sure it's good to go. A brief look at the tools you'll need. Also in the beginning of the video you'll see how I make a tool to hold the harmonic balancer so you can tighten the bolt. We left off Part 2 ... had put the harmonic balancer pulley back on with a bolt, cranked the crank shaft around twice which turned the cam shafts once, and made sure that when the timing belt was at the zero ... back at zero, top dead center ... that the alignment marks for the cam shaft pulleys were lining up as well.
Now we'll head into torqueing the harmonic balancer bolt. Here is my special tool. It's a 2x4, just over 2 feet long with a large hole and two smaller holes. I'm going to bolt it in and show you how it works. Okay, now you can see what I've done. I've taken my harmonic balancer puller bolts and bolted the 2x4 to the harmonic balancer. This nice big hole is where I'm going to access the bolt with an extension. I've got a couple washers on here. You want to make sure that the bolts go through and hold enough and they're tight, pulling the board tight against the pulley here, but also that they're not coming though the back side and interfering. Then the board will hold itself against the frame there. Okay, two quick notes. The bolts I used to bolt the 2x 4 on are the bolts from the harmonic balancer puller. The other note is you can see that my timing mark is now way beyond zero degree. You do need to turn your balancer so that the 2x4 could be bolted on there. There are some items at the bottom that will interfere with it, so you have to have it in this position in order to bolt the board on there.
Put my torque wrench in there. Now you just unbolt that and we're all set. On this vehicle, that bolt should be torqued to 181 foot pounds. Now your belt tensioner needs to go back on here. Now that that belt tensioner goes back on ... So as I'm tightening these bolts for the tensioner ... basically note for all the bolts on the front end of the motor ... if it's a 10 mm, you want to tighten it between 10 and 12 foot pounds. 12 mm bolts you want to tighten between 15 and 20 foot pounds, and 14 mm bolts between 25 and 30 foot pounds. Here I lift up the alternator and slide it on to the stud at the front of the engine, start the bolt down below, and then start the nut on the top of the alternator. And now tighten that nut and the bolt holding the alternator up with a 14 mm socket and ratchet. Let's put our false water pump bracket back into place here. Make sure the wiring stays out of the way. Just a little close up. There's a large 14 mm bolt that goes in down low, right there, as I tighten it by hand. A 14 mm nut goes on right there, and then there's a 12 mm nut and a 12 mm bolt that goes in down low. You do leave a hole open that's right near the center of the engine, right between the pump and the serpentine belt tensioner. And speed it up as we tighten up those fasteners. Two reminders again: you're going to leave one hole seemingly open. It gets filled with a bolt when we put on the front cover. Then also be careful not to pinch any wiring in behind this part, especially down lower. Now reach down, pull the power steering pump back up and put it on to the stud that comes out of the front of the engine. Kind of pull it up and it will slide on.
Again, you can easily access the nut and two bolts just by turning the pulley, reaching through the holes, and then tighten them up, once again, to right around 30 foot pounds. Now I'll put the center plastic cover on with two long 12 mm bolts. These bolts do help hold the water pump in, so you want to make sure that you torque them to 17 foot pounds. Now we're going to put the right-hand, or passenger's side, timing chain cover on. There is a little tab down on the lower part that goes underneath the center cover. Make sure that that tab goes in, and then make sure that it goes on to the stud that protrudes out from the engine. Then put the three bolts and the nut on and tighten them lightly, about 7 to 10 or 12 foot-pounds, just firm, not extremely tight. Now you feed that left hand, or driver's side, cover in from the top, underneath the large set of wires. Then feed the crank sensor wire through. Again this one has a little tab down at the bottom, so make sure that's underneath the false water pump. Then I'm starting the bolts using my wrench to hand-tighten them. And then again tighten them firm, not too tight. Now here I can take the wire, pull it up, put the grommet on. Make sure the grommet is nice and firm, and reconnect the wire and put the wiring harnesses all back into their little clips that hold them in place. Here on the rectangular opening I have a little bit of sealant on there. You can use gasket sealant or RTV. I also have some sealant on the manifold itself. Make sure - there's another thing - I have some oil around the O ring just to make sure it slides in nicely, and also make sure the O ring is not twisted at all. Put the bolts in and feed it in. Get the bolts going and then tighten the bolts uniformly so that it presses straight in.
And like the other water pump bolts, these bolts should be tightened 17 to 20 foot pounds. Here I'm installing the oil cooler tube, the one that run from the top to bottom. One tip: put it on to the fittings, and then also get the nut and bolt that hold the brackets. Get those started before you put the clamps on. Remember there are three clamps. There are two at the top, and then one down low at the bottom. And again, tighten up the 10 mm nut and the 10 mm bolt down lower that hold this to the front of the engine. Here I'm putting on the idler pulley and the tensioner pulley. Just a note: you didn't really even have to remove the tensioner pulley, but I did just because I was falling away. I remembered to do it on a different vehicle. Put these on, and then tighten them up to anywhere between 25 and 30 foot pound. Now lift the AC compressor back into place. Obviously we're up underneath the vehicle now. Start the rear bolt first. Then I start the long bolt in front. Tighten those two up. And then I do the top one from the top. Now I'm going to put that reinforcement bracket back in there. Tip here: the 12 mm bolt in and start it first, and then start the 12 mm nut afterwards. Then tighten them up. Unfortunately I didn't get a good shot of it here, but obviously you need to tighten the top bolt up, and then there's a little bracket that screws down onto the top of the AC compressor. Put that Phillips screw in and tighten it. Then make sure you reconnect your AC compressor.
Now here we're going to put the fan pulley back on. Then put the fan back on and start the four nuts that hold it in place. As far as re-tightening the fan, holding it with your hand and tightening is enough to get it going. And then what I suggest is a rubber door stop. You can stick it down between the crank pulley and fan pulley, and that hold in place. You don't need to get it extremely tight. These bolts should be between 15 and 16 foot pounds. Here's our belt we're routing diagram, always very useful. Now we're just going to route the belt like the diagram tells us, which is basically you put a loop down around the crank shaft, up and around the water pump, around the AC compressor, across over the idler pulley - actually you leave it off the idle pulley at first - over around the power steering pump, alternator, and up towards the tensioner. Not sure how well you can see. My belt is routed on everything except basically the tensioner and the idler pulley so I'm going to take the tensioner, pull it down; get the belt correctly on the tensioner, and then pull the tensioner way down, and pull the belt up on to the idler pulley. Let the tensioner off. Check, make sure. It looks like everything is routed correctly. I'm going to take my fan shroud, put it down into place carefully. The fan is offset this way a little bit so the smaller side of the shroud goes to that side. Now I'll put the radiator down in. You just need to be careful. Look down in there as you slide it in. A couple things get in the way. There are some hoses and tubes and a wiring harness. Then is slides down in. There are a couple of tabs that support it. I'll show you right here the tabs that go into the radiator support area.
Now here we're going the put the fan shroud into place. Just make sure that the fan shroud and radiator, nothing is bound, nothing is caught, no wires or anything are pinched. Then we'll start the four bolts into our radiator, as well as the four bolts that hold the shroud. The ones that are on the radiator are the 12 mm bolts. The shroud is held on by 10 mm bolts. Then we'll tighten those up. And again, you want to tighten them firm, but do not over-tighten them. Put the passenger's side, or lower radiator hose in. Push it on the engine. Use a pair of pliers to put the clamp back in place. Put the upper radiator hose in place. Push it down on the engine side first, and then push it onto the radiator. And then again a pair of pliers, and put both clamps back into place. Reconnect the overflow tube. And we're going to speed through. Put the air duct back on. Make sure you tighten up those two Phillips screws that hold the big clamps in place, and as well as, put the clamp back on that holds the hose to the top of the air duct and your trim or engine identification panel on the top with the 10 mm nuts. We're going to make sure we hook our sensor back up. There's a hose that may have come off on the valve cover there. Then down lower make sure those hoses are back in the clamp and it's securely fastened. Make sure the petcock is tight. Connect the lower radiator hose and the transmission cooler hoses, and make sure all the clamps are in place. Now you can re-hang your skid plate. There are eight bolts that hold it in place. I'll thread those in here and then tighten those up. Again, tighten them up firm, not extremely tight though.
Now refill your radiator directly with either Toyota or a universal coolant. Generally it's probably going to take 2 1/2 to 3 gallons. Just put the radiator cap on. We add a little of the antifreeze to the reservoir. Reconnect the battery. Tighten it up. So we're running the truck, making sure it's up to operating temperature here. Run it a little bit. Check the engine. Obviously what we're checking for is any signs of leaking fluid. What you want to do ... let the engine idle a little bit. Make sure it's up at operating temperature. Take it for a drive for a while. And then again, check underneath, make sure there's no dripping fluid anywhere. Let it cool down. Remove the radiator cap. Check the level of fluid and fill it appropriately.
We hope this helps you out. Brought to you by www.1AAuto.com, your source for quality replacement parts and the best service on the Internet. Please feel free to call us toll free 888-844-3393. We're the company that's here for you on the Internet, and in person.
Tools used
Brought to you by 1AAuto.com, your source for quality replacement parts and the best service on the Internet.
Hi, I'm Mike Green. I'm one of the owners of 1A Auto. I want to help you save time and money repairing or maintaining your vehicle. I'm going to use my 20-plus years experience restoring and repairing cars and trucks like this to show you the correct way to install parts from 1AAuto.com. The right parts installed correctly: that's going to save you time and money. Thank you and enjoy the video.
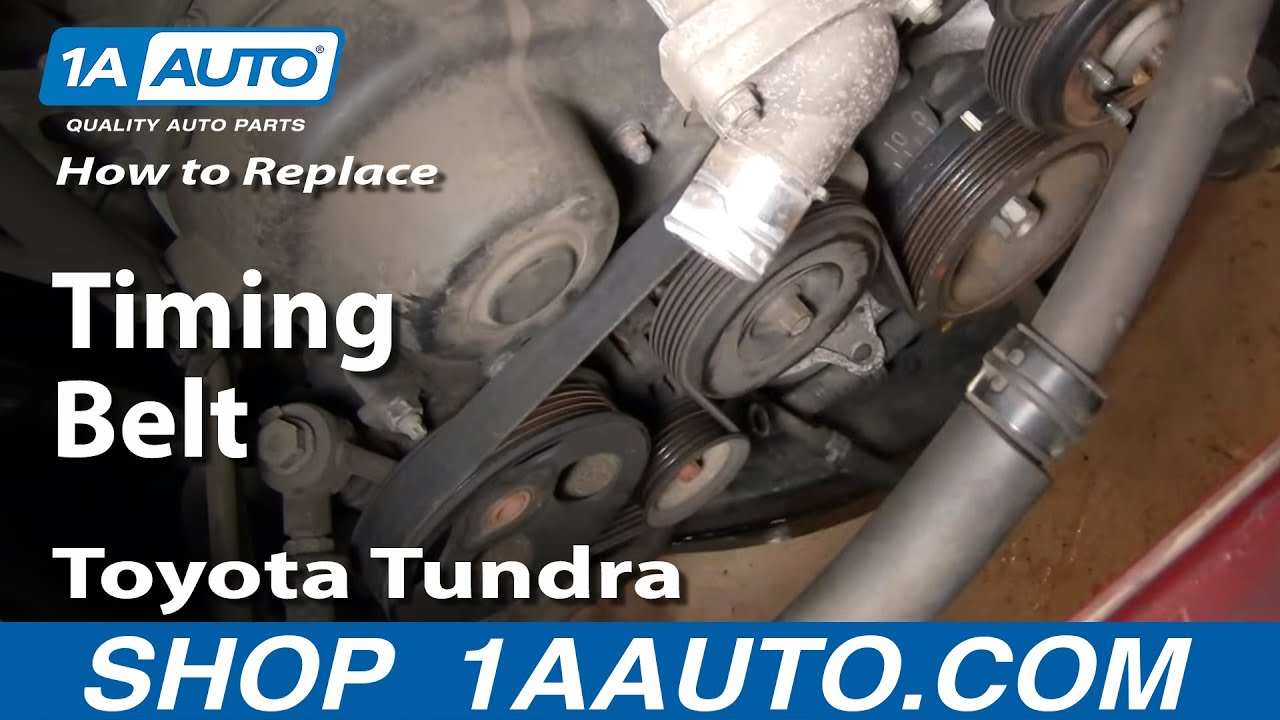
This video is part one of a multiple part series. We're going to replace the timing belt in this 2002 Toyota Tundra. In this video, we pretty much go through disassembling the front of the engine down to where you would be removing the harmonic balancer.
The tools you'll need are jack and jack stands as you have to raise and support the vehicle to get a couple things out from the bottom. You'll need a catch pan, various sockets and wrenches from 10mm to 22mm, with the most common ones being the 12mm and 14mm, pliers, screwdrivers. You'll need two 12mm wrenches for removing the fan, impact wrench or harmonic balancer tool for loosening and tightening the harmonic balancer bolts, a harmonic balancer puller, a torque wrench, and lots of room to organize your parts. As you take the parts apart, you want to lay them out basically in order, and put the hardware with them. It just makes it easier for reassembling everything.
Using a 10mm wrench, disconnect your negative battery cable. In this shot, the vehicle is upon a lift. You really don't need to do that to get the skid plate off and to drain the radiator. I just do it because it makes filming a whole lot easier. You will need to jack and support the car later to get some of the components off.
Were going to start by removing a series of 12mm bolts and taking off this skid plate. Well fast-forward it through removing those bolts, and we will use fast-forward quite a bit to try and keep this as short as possible. Okay, once you have that out of the way, your radiator drain is right here. It should just come loose with your finger tips without using a pair of pliers. Drain your radiator.
While the radiator drains, you can start removing some of the top plates. Two 10mm nuts hold the little name plate on top. Then a 10mm bolt holds that hose clamp. Use a Phillips screw driver to loosen the clamp from the intake tube to the air filter box as well as there is an electrical connection on top of the air filter box that you need to disconnect. Then, use your screwdriver to loosen the clamp for the throttle body side. Then, pull that tube up and out of the way.
Use a pair of pliers, and you pinch the clamps and slide them back off the end of the hose. Then the clamps can just stay right on the hose like that. Now, twist and pull to remove the hoses from the radiator and the inlet tube. Same procedure for the upper on the passenger side hose, you'll reach the lower. It's much easier from the bottom side of the truck.
Okay, disconnect this lower flow tube. Just squeeze with your hand. We're going to remove four bolts that hold the shroud to the radiator out here. Then over on this side, these are 10mm bolts.
Well speed through that. Just as a reminder, as you're taking these parts apart, lay them out neatly and put the hardware with them so it makes it easier to reinstall in the end.
Now, were going to remove four 12mm bolts, one there, one right down there, one there and one down there. Okay, to get to the lower ones, it's best if you have a two-inch extension. Well fast-forward here. The radiator is held in by a couple of slots and tabs, so you don't have to worry about it falling out when you remove these bolts.
There's a couple of cooler lines that were going to disconnect, one there, and one there, and also, take the lower radiator hose off. We do have a drain pan ready in case we get some transmission fluid dripping out of those lines. Fast-forward here as we remove those lines just like the upper radiator hoses. Pinch the clips, pull them back, pull them off, as well, the lower radiator hose. As you can see, some coolant does drip out, so have your catch pan ready.
Now, push your fan shroud out. Lift the radiator right up and hold it back. Grab your fan shroud. Pull it back and out. The next thing you want to do is remove the fan. Okay, filming this was almost impossible. To get the nuts off of the radiator fan, you use two 12mm wrenches. Hold one nut with one of the wrenches, and then undo three of the nuts with the other one.
Once you're down to just one bolt left, as you can see down here, I actually thread the bolt on backwards. Then, you can put a screwdriver in here and use the screwdriver to hold the assembly while you loosen the last bolt. All the nuts are off. I'm just going to shake the fan back and forth while you're pulling. Once you feel that It's loose, ease up on the pulling forward because you don't want to have it come forward too fast and hit your AC condenser too hard.
Now, with a 14mm socket and a ratchet handle or bar, you want to turn your tensioner counterclockwise. Remove the tensioner from the belt. Okay, fast-forward as I remove the belt, and then also take the fan pulley off. You want to take your same wrench and go clockwise. This bolt actually comes out opposite, so righty actually is loosey. Remove this tensioner pully. Over here, we have a pipe that goes down to the oil cooler that we're going to remove. We're going to remove that by loosening . I'm going to put the pan back under it . loosen up a clamp here.
There's a clamp right up here, and then, this clamp here, then also, a small bolt here, a 10mm bolt to loosen for a bracket that holds it.
There's another little nut here holding a bracket, 10mm. Now fast-forward here as I remove the rest of the clamps. I apologize, the camera shifts here a little bit. You can't really see what I'm doing, but I'm just removing the clamps and then removing that hose assembly the rest of the way.
Next, we want to remove the AC compressor from the engine. I didn't do a great job filming it, so I want to just go over it before I show you the footage. Basically, the AC compressor is held on by three 14mm bolts, but the top front bolt is blocked by a small bracket, and the bottom bolt is blocked by a reinforcement bracket that's held on by a 12mm bolt, and a 12mm nut. Start out by disconnecting the AC compressor. It's a gray terminal. It has a little release button. You just have to find where that button is, press it, and it should come up and off.
Next, there's a little bracket held in by a Phillips screw, so you use a large Phillips screwdriver. You may need to use a hammer, to tap on the screwdriver to loosen the screw, and then it should come out. Here, up underneath is a 12mm bolt and a 12mm nut that hold the reinforcement bracket that blocks your front lower bolt. Then, going up further back underneath and you can see, you need to lift and support the car to do this. You can see that the rear bolt and I point to it in a minute. The rear bolt for the AC compressor is right here. It's another 14mm bolt.
Just to further clarify, looking down from the bottom, you want to get to all the bolts from the bottom. You can see, we have a six-inch extension on our ratchet that goes to a socket. That's hooked on to the rear bolt right now. Ill remove the last bolt from the top here. The AC compressor just dropped down. A good idea for these parts that don't come away from the car: take all the attaching hardware and have a couple of Ziploc baggies, put them into those Ziploc baggies, and label them, again just to make reassembly that much easier.
Use a flat blade screwdriver to help you disconnect the crank position sensor. Then, you'll want to pull the wire up and out from its clip that clips it to the engine. Then, there are two more little harness clips that you just use a screwdriver to help you separate the clip. Then, pull that harness out, so that it can be moved out of the way. Then, over on the passenger side timing chain cover, there's just a little clip that holds a couple of tubes. Undo the clip, pull those tubes out of there.
Now, you want to remove this water inlet. 12mm bolts. Use a rubber mallet to loosen it up a little bit. You just want to carefully try and pull it as straight out as possible. Your idler pulley is held in by a 14mm bolt. Go ahead and remove that. Here, I'm undoing the 12mm bolts that hold my center cover on, my timing bolt cover. Then, three 10mm bolts and a 10mm nut right in the center that hold my right-hand or passenger side timing cover on.
To the other side, driver side or left-hand side, there are four 10mm bolts that hold the cover on. The nut you already removed, it was holding that tube on. It was one of the nuts holding the bracket of the tube. Then, when you pull it off, you have to pull the wire through. Pull the grommet out and free the wire. Now, on the passenger side or right side of the engine, you're going to want to remove the power steering pump. You're just removing the pump from the engine, you're not disconnecting it. There are three nuts or two nuts and a bolt that you can access right to the holes in the pulley.
Then, once you have the bolts and nuts off, the pump just pulls off. You pull it pretty firmly right up and off the stud, and lay it down to the side. Then, same thing for the alternator, there is a 14mm nut and a 14mm bolt down below. Remove those, pull it forward and just lay it down to the side. Then, there are two additional 12mm nuts, or, I think a nut and a bolt for your tensioner, so you want to remove those. Then, you can pull the tensioner right off.
It looks like we're really starting to make some headway here. Now, were going to remove the bracket assembly or the fan pulley assembly. It's got two 12mm fasteners, and then two 14mm fasteners. At this point, we've got basically, the front end of the engine taken apart. I'm going to end this video for now. To see the continuation, just check out part two.
We hope this helps you out. Brought to you by www.1AAuto.com, your source for quality replacement parts and the best service on the Internet. Please feel free to call us toll-free, 888-844-3393. We're the company that's here for you on the Internet and in person.