Replaces


Recommended for your 2004 Toyota Camry
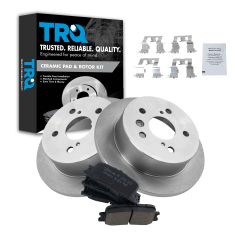
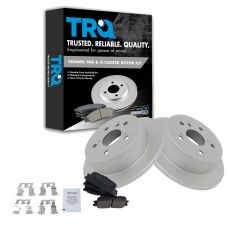
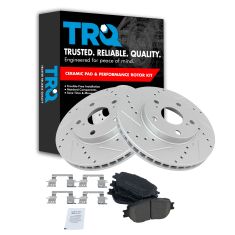
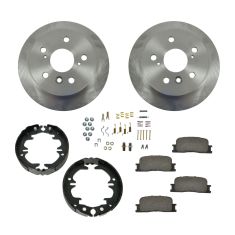
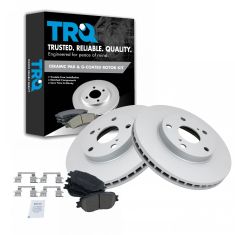
Part Details
Specifications
About TRQ:
TRQ is a trusted brand dedicated to making every repair a success story by combining premium parts with easy installation. Each TRQ part is engineered by a team of automotive experts to meet or exceed OEM standards, delivering enhanced performance and maximum longevity. With rigorous in-house testing, the brand ensures superior fit and function across every product line. TRQ also provides customers with best-in-class, step-by-step installation videos—so you can complete repairs with confidence, whether you're a first-time DIYer or an industry professional.
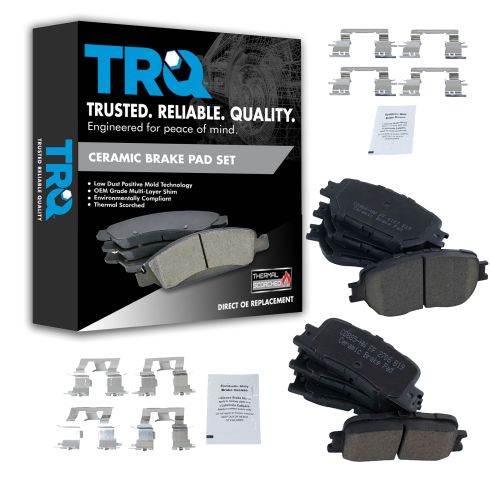
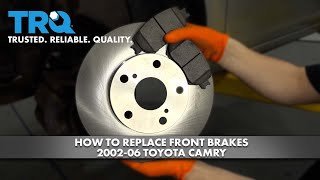
TRQ brake pads are manufactured using premium raw materials and design standards to restore original performance. TRQ brake pads are positive molded and utilize a multi-layer shim for enhanced performance and service life. TRQ’s combination of materials and design ensures a low dust and low noise braking experience. TRQ recommends replacing your brake rotors when you replace your brake pads to ensure even wear of components and improved braking comfort. All products are fit and road-tested in our Massachusetts R&D facility to ensure we deliver on our promise of Trusted Reliable Quality.
Attention California Customers:
 WARNING: This product can expose you to chemicals including Lead and Lead Compounds, which are known to the State of California to cause cancer, and birth defects or other reproductive harm. For more information, go to www.P65Warnings.ca.gov.
Lifetime Warranty
This item is backed by our limited lifetime warranty. In the event that this item should fail due to manufacturing defects during intended use, we will replace the part free of charge. This warranty covers the cost of the part only.
FREE Shipping is standard on orders shipped to the lower 48 States (Contiguous United States). Standard shipping charges apply to Hawaii and Alaska.
Shipping is not available to a P.O. Box, APO/FPO/DPO addresses, US Territories, or Canada for this item.
Expedited is available on checkout to the United States, excluding Alaska, Hawaii.
Final shipping costs are available at checkout.
Created on:
Tools used
Brought to you by 1AAuto.com, your source for quality replacement parts and the best service on the internet.
Hi, I'm Mike Green. I'm one of the owners of 1A Auto. I want to help you save time and money repairing or maintaining your vehicle. I'm going to use my 20-plus years' experience restoring and repairing cars and trucks like this to show you the correct way to install parts from 1AAuto.com. The right parts installed correctly. That's going to save you time and money. Thank you and enjoy the video.
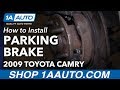
In this video we'll show you how to service the front disc brakes on this 1994 Camry, pretty much the same as any 1992 to 1996 Camry. The tools you'll need are a large flat-blade screwdriver, a 21 mm socket and ratchet or your lug wrench, 14 and 17 mm sockets with ratchet, a torque wrench, a large C-clamp and a jack and jack stands.
First we'll remove the hubcap. Use a large screwdriver or a pry bar. Remove the lug nuts from your wheel. I've got a 21 mm socket and I have an air wrench. You can obviously leave your car on the ground, use your lug wrench or a 21 mm socket and wrench to get them off.
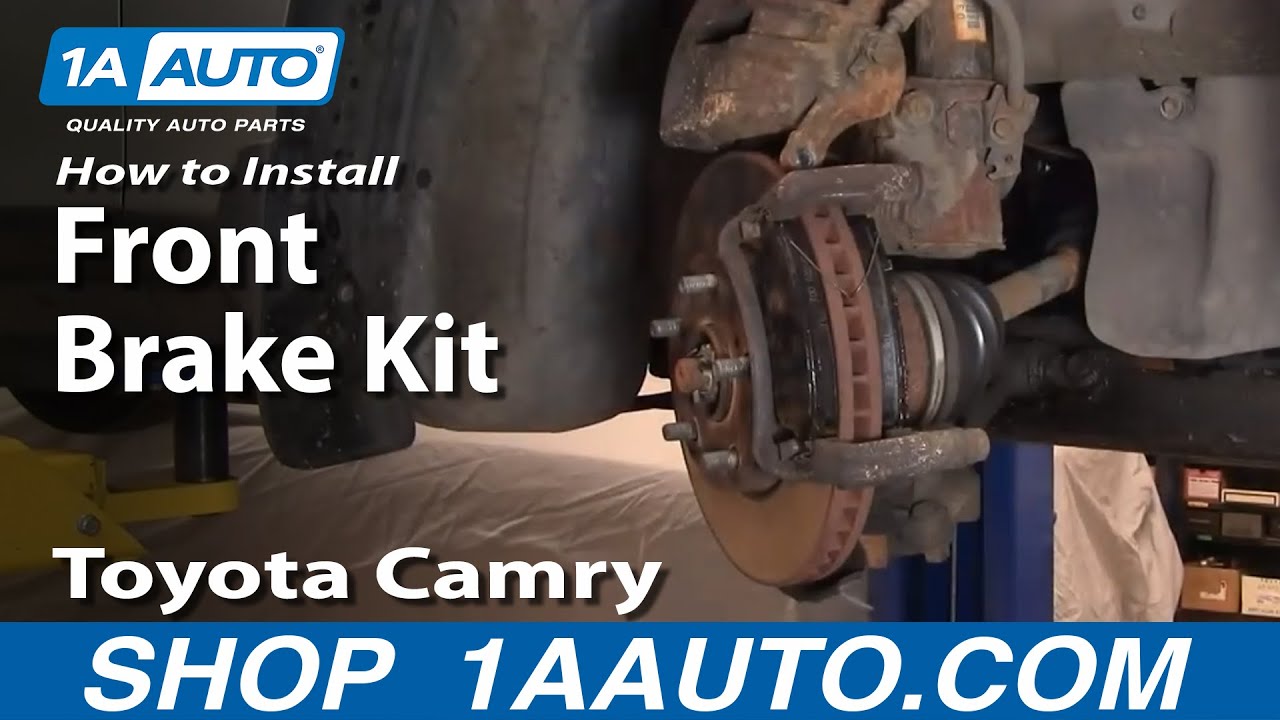
As you can see I've turned the wheels, and to remove the caliper which you need to do to remove the pads you've got two 14 mm bolts, one here and then one up here. You can remove the caliper and the pads and then if you want to replace the rotor, which actually this car the rotors look really good. If you did want to replace the rotors you've got bolts that need a 17 mm bolt here and then one down lower right there.
Remove these 14 mm bolts just using a regular wrench. You can see that it's not hard to do. It's just going to take some pressure but not a ton. The other bolt is removed. Use your screwdriver and pull the caliper right off. Support it up here. Here are my pads. I'm just using my screwdriver to pry them out. You can see that they're pretty well worn, but as I said my disc is nice. What you want to do is just kind of take the back of your fingernail and run it back and forth across there. If it's nice and smooth then you're okay. If it has any deep grooves or gouges in it you'll want to replace them.
If your discs are in bad shape and you want to replace them, it is 17 mm bolts down in here. These ones are going to be quite a bit more torque to get them loose. I always like to hang up and hang down. That's usually the best way to get torque on them, or stand on the wrench. That comes off and once that bracket is off the disc for the rotor generally just comes right off. Just to show you, if you do order new discs from 1A Auto, they are going to go on there just like the originals and work for you. Like I said, these are in good shape, and I'm not a person to waste good discs. I'll put those back on.
One thing you'll want to do is take these little pins out. These look nice. They are well lubricated. They slide well. You can either take them out or just make sure that they slide back and forth with no drag. Tighten these up to the foot panels. Here are the old pads, new pads from 1A Auto. You can see they've got quite a bit more meat on them and they even have the plates and everything. They actually just kind of go down into the little. Just squeeze them together. Next, you're going to want to use a C-clamp and you're going to want to force the piston back into the caliper here. You can see the piston right in there. I'm just going to keep this C-clamp right on there and it goes back in pretty easy without a whole lot of pressure. You probably can loosen up your cap on your brake fluid reservoir and make sure it's not overfull because it will leak out if there is too much in there.
Before you install your caliper you'll want to put this little spring back in. Just kind of keeps them apart so they don't squeeze on the rotor. What we did with that C-clamp is we pushed this piston back in. Now this will go down on there very nice. Now the two 14 mm bolts. These 14 mm bolts you'll need to tighten up to about 25-foot pounds. I've got a wrench holding the stud that they're going into. Okay, and 25-foot pounds is not a lot, but it is the right amount. Let's see here. These don't really do any of the braking. The braking energy is absorbed by that big bracket. These just kind of hold that caliper in place and let it float. Now we'll do the other side and then put the wheel back on and when you put the wheel back on you want to torque the lug nuts to 100-foot pounds and then before you drive your car anywhere you want to get in, start it up and pump the brakes a few times to make sure that piston gets back out and the brakes are working. They'll take a few pumps to the brakes to make sure that everything is back where it should be. Then before you drive your care just put it in gear, make sure the brakes hold then do a stop from 5 miles an hour before you go out and test it on the road.
Here we've put the wheel on. I am just preliminarily tightening up the lug nuts with an air gun, and now I'm tightening them to 100-foot pounds using a star pattern with the torque wrench. Install the center cover; line up the indent on your valve stem there.
We hope this helps you out. Brought to you by www.1AAuto.com, your source for quality replacement parts and the best service on the internet. Please feel free to call us toll free, 888-844-3393. We're the company that's here for you on the internet and in person. Thank you.
Tools used
Hi, I’m Mike from 1A Auto. We’ve been selling auto parts for over 30 years!
Use a pry bar or a large flat bladed screwdriver to remove the hub cap. Just going to slide it under the edge and put that aside. Using a breaker bar and a 21 millimeter socket, and loosen the lug nuts when the car is still on the ground. Raise and support the vehicle. Now you can finish removing the wheel. These lug nuts are pretty loose, so I'm just going to use a socket, take them off. I'm removing the last lug nut, and I'm just going to hold onto the wheel so it doesn't fall off. Take it right off.
Start by removing the two caliper pin bolts: one on the bottom; one on the top. These are 14 millimeter. That one actually broke free without having to use the mallet. If it's tight, you can take a mallet and just tap it and break it free. Just kind of squeeze the caliper a little bit by pulling it out. It should slide right off the pads. Take a bungee cord and just hang it up and out of the way. I'm going to use a small pry bar or you can use a flat bladed screwdriver. You need to pop them away from the brake rotor out of the caliper bracket. Remove the caliper bracket bolts. There's two at the back: one on the top; one on the bottom. They are 14 millimeter. They'll be in there pretty tight. Use a box wrench and a mallet and break them free. When you get the bottom one loose, then work on the top one. As they're broken free, you can switch to a ratcheting wrench. They're pretty loose, so then I remove the bottom one with my fingers, set aside to reuse it.
Now you get the top one out. Pull the bracket out and the bolt out. This car is missing a rubber plug that goes in the rotor here. The rubber plug is so that you can access the parking brake mechanism to release it. Somebody just put some duct tape over it. I'm going to peel it off. Inside here is the mechanism. I'm going to try to pull it off first, though, because sometimes it's loose enough you don't need to release it. Parking brake's not on, it is spinning free. I can spray some rust penetrant around the hub, a little bit in here. Take our dead blow mallet, I'm going to hit around the edge here to try to break it free. Sometimes you'll get lucky, these might come off, but they usually get stuck on the parking brake shoes. You need to release the adjustment. It's very hard to see right now, but through this opening that normally has a rubber plug on it, it had some duct tape on it, we removed it, take a flat bladed screwdriver, we're going to spin it, trying to grab the little tabs on there and spin it up to the little wheel. Make sure I'm going the right way.
You can check. See, I went the wrong way. It locked it, so it's going to actually be spun down. You basically just have to spin that wheel down and keep retracting the parking brake shoes in so that the rotor will come free. When you adjust it, you're going through the rotor and into this hole. Then you're pushing down on it, and that spins the parking brake shoes in to release them.
To cut down on some of the brake dust that's in here, I'm going to take some brake parts cleaner before I remove all the hardware in the shoes and clean it out. To remember how this goes back together, I'm going to use my phone, take a couple pictures of it, underneath. I'm going to take some needle nose pliers and remove these two springs up top that are holding the brake shoes on. That one. You'll pull this adjuster piece out. I'm going to put the spring back on it just the way I found it, so I don't forget how that went together. Now the shoes are just on these little retaining springs and the hardware that's underneath them. These are usually a pretty soft springs. They're kind of keyed, so you can turn them by just kind of compressing them.
Sometimes you have to reach in the back and actually hold, they call it a nail that they're held onto, you can actually hold the back of it so it doesn't get pushed through. Some pliers in here, push it down and attempt to turn it. Whoops. Put those springs aside. The shoe should come off this. Grab this little washer, too. Slide this down. This is the auto-adjuster. Put that aside so I don't lose it. I'm going to repeat the same on this side, remove that little spring and retainer, so you can actually take, this is what they call a nail because it looks like a nail, you can actually take this out and put that aside. Same exact thing. There is a tool for this, but it's actually not a lot of clearance in here to get the special tool in here to push these in, so pliers work pretty well. Lower this all down.
Take the nail out. That's interesting, this one has a little special taper to it, so that's the other side. Now, this is your parking brake cable. Let's try pushing this this way. Got one part of the needle nose on the end of the cable and one on this brake shoe arm. Pop it this way, it almost worked. These brake shoes are in good shape, we're not going to replace them. If you did have to replace them, you would reuse this arm, this is what gets pulled when you push down the parking brake pedal, and it spreads the shoes out inside to lock the brake rotor.
To replace it, you'd spread apart this clip and pop it off this pin. Then you'd swap this over to the new brake shoe, put this clip back on, and squeeze it back together. That's really the only major thing you have to do. Other than that, you just replace the same hardware that we already have, and put it back together in the same way you took it apart. This is what we're going to do now. I need to get the brake cable back into this holder here. I'm going to try some locking pliers. I don't want to crush the spring, so I'm just going to set them so they don't pop off. I can use these now. I need to attach this spring that goes on the back side to this retaining spring. Going to get it into place, so this rounded part of the shoe is going to fit on this pivot point here. This nail or retainer for the brake shoes has this bend in it so it's offset. It comes through here, and then it's offset so that it can go around this and sit in here.
I'm going to install it from the back. Spin it in place. Slide this assembly up, trying to get it to hold the part from the back. Nail, just slide this little cup in there. Take our retaining springs, put that over the little retaining part. Try to line up the slot on the top of the pin to that wide opening, and then you turn it to lock it. You may be able to use the opening in the hub here to help go through and set up the retaining spring. You just want to make sure that this is pushed in and turned so that it's locked in place. On the inside of the opposite brake shoe is the same type of little hook part. I'm going to hook the spring onto the inside of that one, and then hook it onto the inside of this one. Put the shoe into place, and attach the retaining spring and nail. Take these pliers, get that one hooked in place.
This is the adjuster that, when it turns out, pushes the shoes out, so you adjust the tension on the shoes. They also automatically adjust as they wear. This spins nice and freely so we don't need to clean it up, but we need to install it in place before I get too far. It sits right in here, and it's going to sit, I'm going to pull this shoe up, and it's going to sit just like that. To put the other side, nail goes in through the back. You can see it better on this side. Make sure that this little retaining tab goes into this little hole over here. Put that into place. Reinstall the spring and the seat, just like the other side. This plate here with the spring, put the spring back on it. It slides into the parking brake arm and shoe. Separate this one a little bit apart, just get it lined up because it fits together like that.
These springs have a hook. The hook is going to go around this portion here. Then this end here is going to slide into the opening to the bottom of the brake shoe right here. With that in place, grab them with pliers, pull them down and over the pin. We'll just make sure that that shoe fits in that slot and presses that spring, because these two shoes should be resting on this pivot point here. Just making sure everything's connected so all of our parking brake hardware is now in the correct place.
Install the rotor backwards. Take brake parts cleaner and clean off the oil that comes on these so they don't rust while they're shipped. Flip it over. Make sure you install it in a way that this hole lines up with one of the openings here so you can adjust the parking brake. Instead of taking our caliper off of our bungee cord, I'm going to take one of the old brake pads. Take a C-clamp, and now what I'm going to do is gently compress the caliper, push the piston into the body, and that way when we put our new pads in, it'll slide right together. Just going to rest the caliper like that. Take the brake parts cleaner, and clean it off.
Install our caliper bracket. Get the top one caught first—it makes it a little bit easier. Then install the bottom one. It’s a little easier because it just hangs on the top one. Reach in behind here, get that bracket lined up. Use the 14 millimeter ratcheting wrench to snug these up. Install our new pads, just take some brake parts cleaner, make sure they're nice and clean. Brake caliper grease on the ears of them. Inside and outside pad is the same, I'm going to start with the inside pad. Place it in the bottom clip, push it up into the top clip, snaps into place. Do the same for the outside one. We're just kind of following the curb of the pad, too, they're contoured, so the wider part is going to match up with the wider outside part of the rotor, and the inside part. Just push them down into the clips. Squeeze them together.
Place the caliper back in place, and reinstall the bolts. Tighten these up. They'll get tight and I will stop. I torqued the caliper bolts, 46 foot-pounds. You need to adjust the drag on the parking brake. You can turn this so you can see the adjuster. Then you can put your screwdriver in and just catch the gears in the wheel just right, so now that's how you'd adjust it so that it's actually really tight, it's holding the brake rotor. Now you know where the limit is. You want to back it off a little bit by turning it back down. Eventually, if you touch the parking brake pedal it would self-adjust out, but this way it just gets it closer right away.
Now I'm going to reach in and turn it down a little bit. What it's dragging on right now is just the brake pads, but that should spin freely enough. Of course, when you hit the parking brake pedal, it should come out and lock the rear wheels. Important to note, these lug nuts have a taper. Taper meets the wheel, matches the inside of the wheel. Don't install them the flat side like this, that is incorrect. Install them with the taper to the wheel. It helps locate the wheel on the lug nut stud.
I'm just using the socket and ratchet to bring these down snug before I put the car on the ground, and torque the lug nuts to 76 foot-pounds. I'm going in a cross pattern. We'll reinstall the hub cap. Going to line up the opening for the valve stem with the valve stem on the wheel. Just push it in place.
Before we start the car, just going to gently press the brake pedal down, not all the way to the floor, maybe about a quarter of the way, and just pump it. This will bring the brake caliper piston out to meet the pads because we compressed it, and you'll start to feel it get more solid as it pumps up.
Thanks for watching. Visit us at 1AAuto.com for quality auto parts, fast and free shipping, and the best customer service in the industry.

BFA12948