Replaces


Frequently bought together
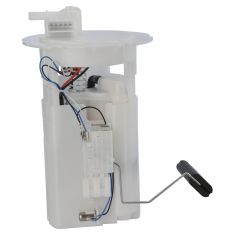
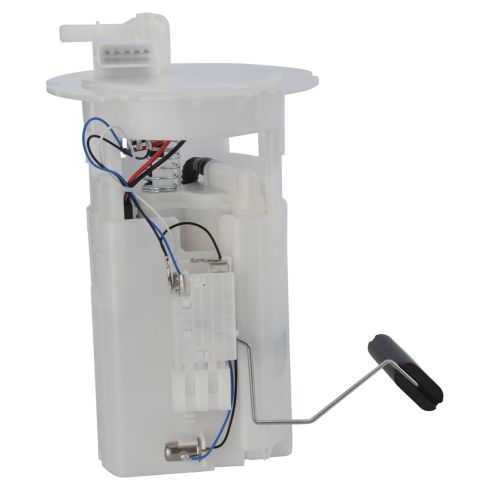
Part Details
Product Features
Returns: Parts with electrical components cannot be returned once installed.
Attention California Customers:
 WARNING: This product can expose you to chemicals including Di(2-ethylhexyl)phthalate (DEHP), which is known to the State of California to cause cancer, and birth defects or other reproductive harm. For more information, go to www.P65Warnings.ca.gov.
Lifetime Warranty
This item is backed by our limited lifetime warranty. In the event that this item should fail due to manufacturing defects during intended use, we will replace the part free of charge. This warranty covers the cost of the part only.
Returns: Parts with electrical components cannot be returned once installed.
FREE Shipping is standard on Orders shipped to the lower 48 States (Contiguous United States). Standard shipping charges apply to Hawaii, Alaska and US Territories. Shipping is not available to Canada.
Expedited is available on checkout to the United States, excluding Alaska, Hawaii and US Territories as well as P.O. Boxes and APO/FPO/DPO addresses. Final shipping costs are available at checkout.

Created on:
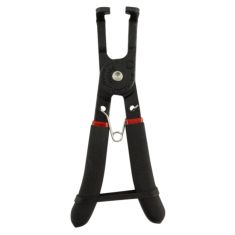
Tools used
Hi, I'm Mike from 1A Auto. We've been selling auto parts for over 30 years. We're dedicated to delivering quality auto parts, expert customer service, fast and free shipping, all backed by our 100% satisfaction guarantee. Visit us at 1AAuto.com, your trusted source for quality auto parts.
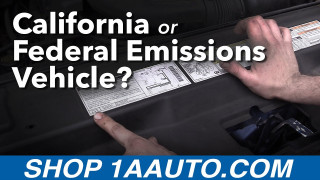
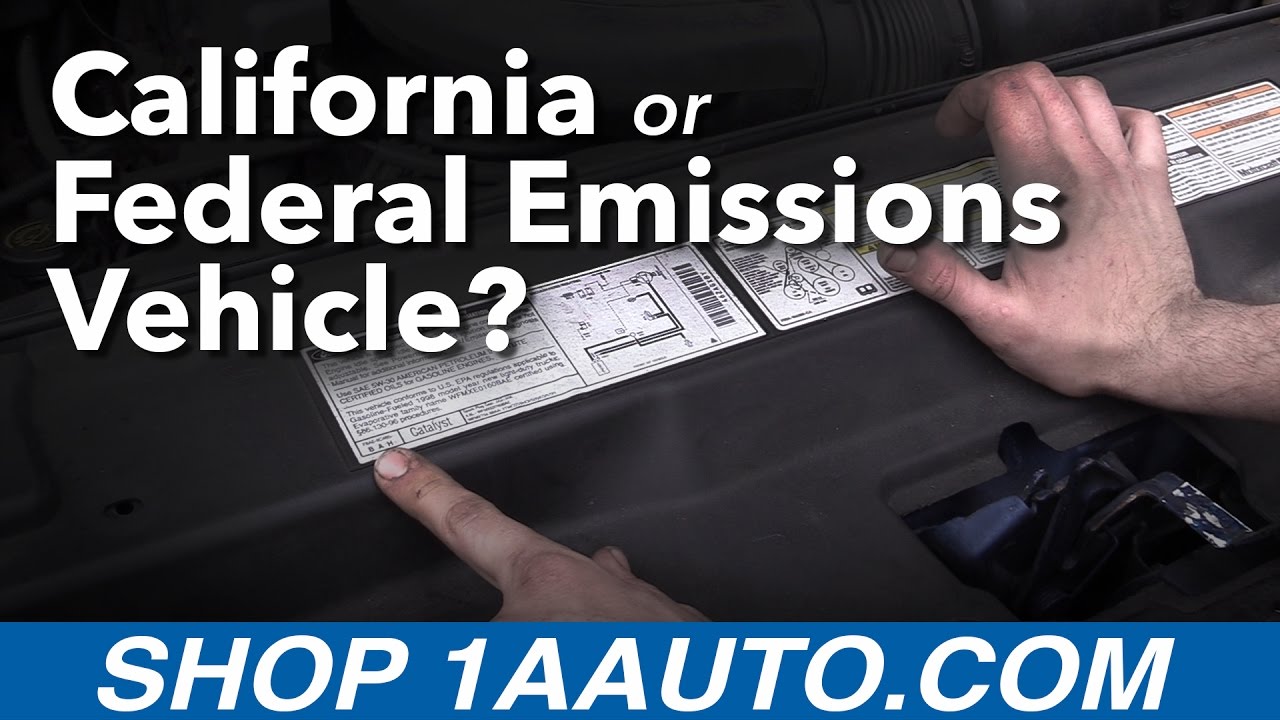
Determining whether or not your vehicle is a California emissions or a federal emissions vehicle is pretty straightforward. To do this, you'll want to locate your catalyst sticker under the hood of your vehicle. It'll either be actually on the bottom side of the hood, most GM vehicles have it on the air box, and other vehicles may have it along your radiator support at the front of the engine bay.
All you need to do is see, "This vehicle conforms to California regulations." That means that this vehicle is a California emissions car. Just because you're not in California or are in California doesn't necessarily mean your vehicle will be one way or the other.
Now, our F150 has it down here on the radiator's support, right at the front of the engine bay and you can see here, "This vehicle conforms to US EPA regulations." This means that this vehicle is a federal emissions.
Now, here we have two things that are a little different. Our catalyst is located on the vehicle's air box and this vehicle conforms to US EPA regulations and California regulations. If it conforms to both federal and California emissions, it's considered a California emissions vehicle.
Thanks for watching. Visit us at 1AAuto.com for quality auto parts, fast and free shipping, and the best customer service in the industry.
Tools used
Hi, I’m Mike from 1A Auto. We’ve been selling auto parts for over 30 years!
We need to relieve the fuel pressure from the system before we remove the fuel pump. We go up here to the front fuse box, open it up, and it just unclips. There's a 15 amp fuse for the fuel pump. I'm going to remove that fuse and then run the car until it stalls, basically running it out of gas. This will remove the fuel from the lines. Take some small needle-nose pliers. The 15 amp fuse is this blue one here. Pull it out. Put that aside. I'm going to start the car and let it idle until it stalls out. It might not even start. If it doesn't start, just crank it a couple times to remove any fuel from the lines. That should be good.
Remove the negative battery terminal using a 10mm socket or 10mm wrench. Place that aside. Open our gas door. We're going to pen the fuel cap to release any pressure that might be in the tank. Leave that off.
To remove the back seat, I like to take our seat belts and buckle them to hold them out of the way. You reach under the front of the seat. There’s a pull clip right here. You pull it out and lift up. It'll unlock it. There's a corresponding one on the other side. I can crawl in here and grab it. Pull that. The seat will simply lift out and be removed.
This is the access panel to get to the fuel pump. Need to remove these clips here. They have little arrows in the direction you need to turn them. Use a Phillips head screwdriver. They need to be turned clockwise. You try to turn them counterclockwise, and they will break. Turn them clockwise. This will just lift right up. Unclip the electrical connector. Push down on the lock. Pull it off. Then I can place this aside.
This is all very dirty and dusty from road grime. You need to clean this area before you even think about taking this pump off. You don't want this debris and dirt falling into the tank. Our vehicle is a California emissions vehicle, so it uses these bolts to hold the fuel pump in. Other vehicles may be slightly different, but on this one, it's got bolts. If you don't have access to a compressor, you can use some brake parts cleaner and just spray the dirt away from there as best you can. Take a rag, wipe it off.
If you do have access to a compressor, I like to take some water displacement oil. We'll spray it on here. This will break up a lot of the grime. We can take our compressor and blow gun and we'll just blow a lot of the dirt away from the tank area. That's nice and clean. We need to squeeze these green tabs together. That will unlock this. Going to push it forward. I'm also going to take our rag. I'm going to put it over here just in case there's any residual fuel pressure. It could spray out of it. What I'm going to do is push this hose in a little bit to try and unlock it, and then pull it off. If it doesn't want to come off, you have to sort of work at it a bit or you wiggle it a little bit. It'll pop right off. It's going to leak some fuel. I'm also going to take a rag and just put it on there so nothing gets in it. Fits inside.
Now I can begin to remove these little bolts here, these six of them, to pull this cover off and then slide the fuel pump assembly out. These are 8mm bolts. They do have Phillips head screw sockets in them, but I recommend using a socket ratchet so you don't strip them. That one popped over here. Be very careful because they are super, super small. Put that aside. This should just lift out of the tank. May have to maneuver the sending unit out, the fuel level sending unit. Take this plate off. Put this plate aside. We're going to reuse this.
Here is the float on here for the level sensor. We're just going to hold it for a second to let some of the fuel drain out. I also have a box ready here because I want to avoid dripping fuel all over the interior. Use a box or a bucket. I'm trying to get it. I'm turning it. Here's the float. I have to get the float out. Put this right into our box and we can take it out of the vehicle. If you spill some gasoline, just wipe it up. It's a good idea after you do this repair, you have to let the car sit for a couple hours with the windows down. You'll probably have a fuel smell, but it will eventually go away.
Here's our old fuel pump and sending unit assembly from our vehicle. This is our new one from 1aauto.com. See it's similar in design, style. Has the single feed line, same electrical connector. There's a cap over here during shipping.
You want to remove that. We're going to reuse this green clip here. Take a small flathead screwdriver. You bend the tab up and over the white collar. Turn it and get the other side. Okay. Install it on our new pump. The float comes with a plastic bag on it. This tells your gas gauge how much gas you have. I need to remove that. Now this is ready to be installed and get you back on the road.
Our seal here looks good, the o-ring seal. I'm going to take our new pump. You have to feed it in around the float. I'm holding the high pressure line out of the way, so I'm feeding the float down in. Going to lower this right in. Take our plate. Take one of the bolts here. Get this one caught. This one caught over here. These bolts are so tiny and short and very few threads on them that I'm actually going to use the Phillips head to start them because they were getting stuck in the socket. I push down on the fuel pump flange.
Again, these are very, very tiny bolts. I'm just going to tighten them nice and evenly. When I feel them get tight and they stop, I'm going to stop tightening them. Don't want to break them. I'm going to go opposite, almost like you're tightening a wheel, so they come down nice and even. Now we reconnect our feed line for the fuel. Push right on and clip in. Reconnect our electrical connector. This is marked, so it needs to go to the front. Push that on so it locks. Place our cover over the locks. Fiddle with it a bit. Turn this one a little bit. There it is.
Now I can turn them counterclockwise to lock them. Make sure your seat belts are pulled up here so they don't get stuffed under the seat. There's a tab here that correspondingly goes into this here. Pull these up out of the way because there is some slots in the seat foam for the seat belts to come through. Let's slide our seat bottom back into here. Find the slots in the foam for the seat belts. Push the seat in. Push it in so it finds the little white tab right here that's going to go into this clip. Push it in. That'll lock. Same thing for the other side. Backseat is installed.
Reinstall the gas cap. Reinstall the 15 amp fuse and fuel pump. Place the cover on the fuse panel.
Reconnect the negative battery terminal and tighten it down. Going to turn the key on to cycle the pump before I start it. May take a couple starts because you have to build up fuel pressure in the lines. Our fuel gauge is reading the same level it was before. Your fuel pump is replaced.
Thanks for watching. Visit us at 1AAuto.com for quality auto parts, fast and free shipping, and the best customer service in the industry.

FPA62037