Brought to you by 1AAuto.com, your source for quality replacement parts and the best service on the Internet.
Hi, I'm Mike Green. I'm one of the owners of 1AAuto. I'm going to help you save time and money repairing and maintaining your vehicle. I'm going to use my 20+ years' experience restoring and repairing cars and trucks like this to show you the correct way to install parts from 1AAuto.com. The right parts installed correctly, that's going to save you time and money. Thank you and enjoy the video.
In this video, we'll be showing you how to replace the ignition coil on this 1997 Pontiac Sunfire with a 2.2 liter in it. This is basically the same as any 2.2 liter or 2.4 liter 1995 to '05 Cavalier or Sunfire. The only tools you'll need are a 6 mm socket and ratchet with an extension.
In this video, I do it from underneath the vehicle. That's how I recommend it. I have been told that you can do it from above, but you can't really see anything and it's pretty difficult. If you do it my way, you'll need a jack and jack stands to raise and support your vehicle.
To replace an ignition coil, it's actually best to go up underneath the car. You can see, here's the axle and this is the coil. It's hard to get my arm up in there to point it out. The coil is right there. First, mark the plug wires. To mark these wires, I'm just going to use the Roman numeral method. On the top one, I'm just going to put one mark, on the second one I'm going to put two marks, third one I'm going to put three marks, and the fourth one I'm just going to leave unmarked. Number one has got one mark, the second one down here has two marks, third one has three marks and the fourth one is unmarked.
Now I can remove those plug wires. You want to reach up above them, get your hands on them, and pull them off. Obviously, if you're replacing one coil, you might as well replace them both since you're underneath here. If one has gone bad, then the other one is probably not far behind it. If you can, it's good to give these wires just a little bit of a twist and you might find that the boots pull off a little easier.
Looking up in here, you can see that there is one bolt and then up above is the other bolt. The other bolts are basically right diagonally across. There's no good way to film them. That one bolt that we can see here and then the other bolt goes in right here. You want to take those two bolts, per coil out and they're either 6 mm or actually 7/32's work if you have standard-sized tools. Obviously you want to be working up here when the engine is cold because you're working next to your exhaust pipe.
There's one bolt out. There's the other bolt. You're going to reach up in here and pull it straight out and then down. You can see on there, there is a one and a four. The top one is cylinder number one, and the bottom one is cylinder number four. If you do have a code, and you're getting a code of a misfire on one and four, you know it's the bottom coil you've got to replace. If you're getting a misfire of two or three, it's the top one. Again, if you're getting a misfire on one, you might as well replace them both because, like I said, if one is failing, the other one's probably not far behind.
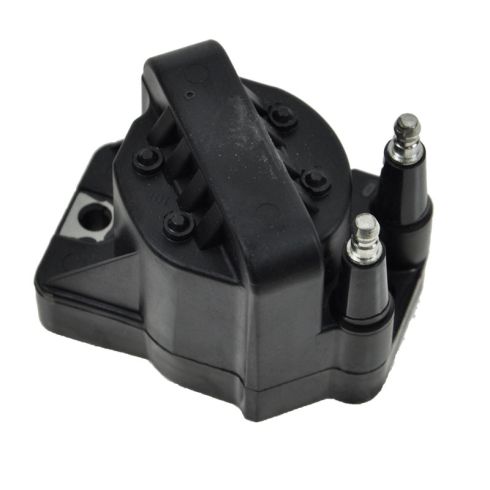
Here's our original coil. Here's the coil from 1A Auto. Everything is the same. It's going to bolt up all the same. Obviously, they're going to have the one or the four because it's intended to replace either one. If you wanted to, you could just use a little bit of paint or something and paint the one and the four on there, so you knew which one, but like I did before, is I just marked the plug wires from top to bottom as they came down. I didn't necessarily mark them with which cylinder they pertain to.
The 1A Auto one is going to bolt in. It's going to work great, no problem. You can see where I took the coil from. There's two prongs. Those prongs go into the coil right there, so when you put them back up in there, you want to be careful to not bend those prongs or anything. I'm going to put it back up in there. I'm going to go straight at the prongs lightly dance back and forth here until I feel the right spot and then push on. Grab a bolt and put the bolt in and start it, feed it in there. Another bolt, put it up in my wrench, and go up in between, feel for the hole and get it started. These need to be tight, but not incredibly tight.
Here's my wires. Find the one with the single mark on it. That one's got two marks, that one's got one mark, I'm going to put it up top. This one's got two marks on it, we'll put it on the second one from the top. That one has no marks,that one's got three marks and that has no marks: number four, the fourth from the bottom. There you go.
We hope this helps you out. Brought to you by www.1AAuto.com, your source for quality replacement parts and the best service on the Internet. Please feel free to call us toll free 888-844-3393. We're the company that's here for you on the Internet and in person.