How to Replace Rear Brake Pads and Rotors 2010-16 GMC Terrain
Created on: 2017-07-14
Learn how to do a rear brake job yourself by following our experts in this how-to video
-
step 1 :Removing the Wheel
- Loosen the 22mm lug nuts with the vehicle on the ground
- Raise the vehicle with a floor jack
- Secure the vehicle on jack stands
- Remove the lug nuts
- Pull off the wheel
-
step 2 :Removing the Brake Pads
- Remove the 14mm bolts from the brake caliper
- Pry the brake pads into the caliper with a flat blade screwdriver to push in the pistons
- Pull the caliper aside
- Pry the brake pads off with a flat blade screwdriver
- Remove the brake pad slides
-
step 3 :Removing the Brake Rotor
- Remove the 15mm bolts from the brake caliper bracket
- Pull off the brake caliper bracket
- Make sure the parking brake is off
- Remove the T30 Torx screw from the rotor
- Pry out the rubber plug if needed and adjust the parking brake adjustor with a flat blade screwdriver
- Pull the rotor off
-
step 4 :Installing the New Brake Rotor
- Slide the rotor on and line it up with the appropriate holes in place
- Adjust the parking brake adjuster if needed
- Tighten the T30 screw into the rotor
- Press on the rubber cap
- Clean both sides of the rotor with brake parts cleaner
- Adjust the emergency brake, if necessary
- Clean the caliper bracket with a wire brush
- Put the bracket back into place
- Tighten the 15mm bolts
- Torque the bolts to 92 foot-pounds
- Clean the brake pad slides with a wire brush
- Apply grease to the caliper slides
-
step 5 :Installing the New Brake Pads
- Put an old pad in the caliper
- Use a large C-clamp and the old pad to push the pistons back
- Clean the slides with a wire brush
- Apply anti-seize fluid or white grease to the slides
- Push the slides on with a flat blade screwdriver
- Install the new brake pads into the bracket
- Put the caliper on
- Thread 14mm bolts by hand
- Tighten bolts to 20 foot-pounds
-
step 6 :Reattaching the Wheel
- Slide the wheel into place
- Start the lug nuts by hand
- Tighten the lug nuts preliminarily
- Lower the vehicle to the ground
- Tighten the lug nuts to 125 foot-pounds in a crossing or star pattern
-
step 7 :Testing the Brakes
- Pump your brakes repeatedly until they feel firm
- Test your brakes at 5 miles per hour and then 10 miles per hour
- Road test the vehicle
Tools needed
-
14mm Wrench
15mm Wrench
Large C-Clamp
Socket Extensions
Torque Wrench
14mm Socket
Hammer
15mm Socket
Rust Penetrant
Jack Stands
Brake Parts Cleaner
T30 Driver
Anti-Seize Grease
Ratchet
Floor Jack
Cloth Rags
1/2 Inch Breaker Bar
22mm Socket
Hi, I'm Mike from 1AAuto. We've been selling auto parts for over 30 years! We're dedicated to delivering quality auto parts, expert customer service, fast and free shipping, all backed by our 100% satisfaction guarantee. Visit us at 1AAuto.com, your trusted source for quality auto parts.
Before you do the job you have to take off the wheel. To do that we need to get a 22 millimeter socket and usually a half inch breaker bar, or you could use the lug wrench that comes with the vehicle. We'll just crack these loose before we jack up the vehicle, and that will make it easier to take the wheel off in a few minutes. Now you want to raise and support your vehicle. You can definitely use a jack and jack stands in a driveway. To make it a little easier to film, we're going to be using a vehicle lift. Make sure you use the proper spots on the vehicle to jack it up which we have another video for.
Now we will take the rest of the lug nuts off. We already loosened them while they were on the ground, so this step is really easy. Once the lug nuts are off, you can lift the wheel off the car. You're going to want to take out the two bolts that hold on the caliper. They hold the caliper to the caliper bracket. They're right here and right here and they're 14 millimeter. We'll start by putting a 14 millimeter wrench on the top one and cracking it loose. This one is actually coming out by hand, which is terrific. Sometimes they're a little stuck in there but not in this case. Let me go to this one. This one's coming out too so we're in good shape today.
What I like to do next is grab the caliper and kind of squeeze it, and by doing that it gets the caliper nice and loose and you can just pop it right off. At that point you want to set the caliper aside, make sure that it does not hang from the hose because you'll cause damage to the hose and potentially even the caliper.
These are your brake pads. These ones are actually worn out quite, quite well, and they're also stuck in the caliper bracket, which is not ideal. You can see this is the brake pad and this is the kind of the wear groove. Normally this should be about two or three times this thickness. We'll be able to compare them when we get the new brake pads out, but this is approaching the end of its life.
Now we'll do the inside one. There's the inside one. You can see this is the squeaker. This is the thing that makes the noise. If you're not pushing your brakes and you're driving around town and it's squeaking, this is the little device that does it.
Now we want to remove the brake caliper bracket from the knuckle. We'll put a 15 millimeter onto the upper bolt and we'll crack that loose. We'll do the same thing with the bottom one. Now you could use a wrench or a socket for this, either one will work. The sock is probably a little bit faster, but I have a wrench in my hand and they say the closest tool is the best tool so we'll go with it. There's one bolt. All right, now you can pull the caliper bracket right off.
Now we want to take off the rotor. One thing worth noting is you don't want your parking brake to be on if you're trying to remove the rotor because the parking brake is going to hold the rotor onto the car. So first make sure your parking brake is off. Second we're going to take a T30 Torx bit on a three Ace ratchet, looks like a star, and we're going to put it right here. Now a lot of the time these things are really tight, so what I like to do is I'll take a wrench and go like this and that'll hold the rotor in place. Sometimes it's better if you have a friend doing this and then you can go like this.
The bolt is actually coming loose really easily in this case, but a lot of the times these things are stuck really tight, so normally what would happen is you turn this and the rotor will turn with it and you won't be able to loosen it. So having a wrench like this to hold the rotor still is sort of a trick to get around that. Now we'll spin this thing out.
In New England when you get one of these out it's almost a miracle because they almost always have to be drilled out. It looks like the rotor is going to be stuck on. So now we're going to put some rust penetrant around here and around the lug nuts, and we'll try and get this rotor off. Get the rust penetrant in there. Make sure you rotate it around. All right, this is where the job starts to get fun because you get to use hammers, and what you're going to want to do is hammer right in between all of these lug nuts until the rotor comes loose. It's basically just stuck around this hub. It's a really common thing to happen. If you whack it around here, then it'll come loose. The one thing you have to watch out for is hitting these threads. You don't want to hit those because then you have to replace the lug nut, the actual lug, or you have to re-thread them, which is also a pain .There we go. With that loose, you can pull the rotor off.
Here we have the old rotor and the old pads versus the new rotor and the new pads. You can see the rotors are identical. The little rubber plug for adjusting the parking brake. Switch is right over to the new rotor. It's got the spot for the factory bolt. It's obviously the same bolt pattern. As far as the brake caliper or the brake pads go, you can see new ones have the squeaker, just like the old ones, and you can see how much of a difference there is between the old pads worn out and the new pads and how much is left on this. As you can see, they will look and fit and function just like the original ones, except a whole lot better because these ones are completely smoked.
Okay, now we're going to install the brake rotor. You want to line up this hole with this taper hole right here and set it into place just like that. Now you can take your Torx head bolt and get it started by hand, and you want to tighten it up. This is one of those times where the rotor is starting to spin, so you'll want to hold it with one hand and tighten it with another. Right here is the rubber cap that blocks the hole that gives you access to the parking brake adjuster.
You want to adjust the parking brake by putting a flat tip screwdriver into the hole with it just about at 12 o'clock. At that point you can spin the adjuster wheel up, so you want to start off with it down and lift up and do it a couple times just like this, and then spin the rotor by hand, and you want to just barely hear it touching, hear the parking brake shoes touch the rotor. We'll do it a little bit more. As you adjust it, you want to give it like a turn or two and then turn the rotor, and as soon as you hear the brake, the parking brake shoes touch the rotor—that's when you want to stop, because that's when they're just about, they're just about out enough to actually work really well. At this point I can hear the shoes touching the rotor but the rotor still spins freely so now I can pull or I can put the rubber plug right back in the hole. That protects it from water intrusion and it'll slow down the rust that goes on inside there.
You can see that there's some greasy palm prints all around this along with a little bit of anti-seize. We're going to go ahead and spray that off with some brake cleaner, and that way when the new pads and the new rotors go together for the first time, it'll be a nice clean environment for them and there won't be any grease or other material messing up the brakes. Then be sure to do the back side as well.
Now we want to clean the caliper bracket because you want your brake pads to be able to move freely within the bracket. This one is kind of dirty so we're going to clean it up as best we can. We're going to be using a parts washing tank because it makes the job a little bit easier, but you can easily just use brake clean and a scrub brush. Really you can use a variety of things. You could probably use dish soap if you really wanted to, but break clean works ideal for this, and so does the parts washing tank. We're going to use the parts washing tank and a scrub brush to try and get all the debris off of the caliper bracket slides.
Before you put your caliper bracket back on the knuckle, you want to make sure that these slides will move freely in and out. If they're stuck in anyway, then you want to pull them out, clean them really well, add a thin coat of grease, and then put them back together again. Sometimes if you put too much brake or if you put too much grease in here, it will actually create a hydraulic effect where it'll always want to push the thing out. You don't want that to happen. So you always, always want to use a very, very thin coat of grease whenever you're greasing these slides. Ours are actually in really good shape and they slide perfectly so we're going to leave them as is and just mount the caliper bracket back on the car.
You'll want to reinstall your two caliper bracket bolts and hand tighten them first, and then you can go back with your wrench or your ratchet and snug them up. Now we're going to use our torque wrench to torque these two bolts to 92 foot-pounds. Now we're going to put a little bit of anti-seize on the caliper slides. You don't want to get any on the rotor itself because it will obviously affect your braking. Now we'll slide the rear brake pad in or the back one. Then we'll do the front one.
Now we need to compress the piston back into the caliper. You can use a block of wood for this with a c-clamp. Sometimes the c-clamp by itself will work just fine, so we'll go ahead and compress that piston. All right, now we'll remove the caliper or the clamp I should say and we should be able to slide this right onto the brake caliper bracket. Now we can reinstall our two 14 millimeter bolts and we'll torque these to 20 foot-pounds.
We're now at a point where we can put the wheel back on and we'll loosely install all of the lug nuts by hand. With the vehicle back on the ground you can torque the lug nuts to 125 foot-pounds. Make sure you do it in a star pattern.
The last thing you want to do is get in the vehicle and pump the brakes a few times. That way the brake fluid goes out to the calipers and pressurizes the whole system and now you'll feel a nice firm pedal and you're safe to start the vehicle.
Thanks for watching. Visit us at 1AAuto.com for quality auto parts, fast and free shipping, and the best customer service in the industry.
Shop Products

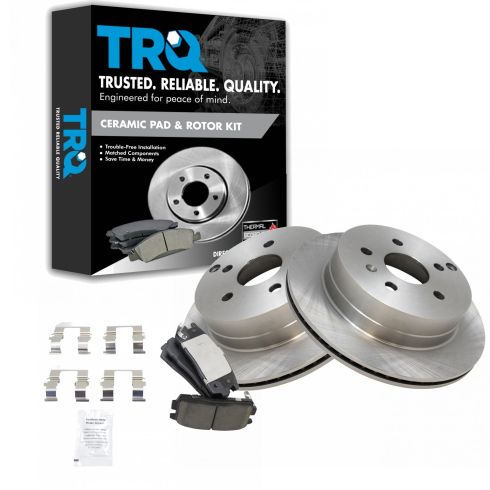
2010-17 Chevrolet Equinox GMC Terrain Rear Ceramic Brake Pad & Rotor Kit TRQ BKA11738
Part Details:
- Ceramic
- Premium Posi
- Vented
- 11.93 in. (303mm)
- 5 Lug
- (2) Rear Brake Rotors
- (1) Rear Ceramic Brake Pad Set
How to Replace Brake Kit 2000-05 Chevy Impala
If your 00-05 Chevy Impala brakes are squeaking, its probably time for a new set! Replace your own with expert help from 1A Auto in this tutorial video!
