How to Replace Rear Brakes 2001-03 Nissan Maxima
Created on: 2013-05-11
Check out this video to learn how you can replace the worn or squeaky rear brakes on your 01-03 Nissan Maxima.
-
step 1 :Removing the Wheel
- Loosen the 21mm lug nuts with the vehicle on the ground
- Raise the vehicle with a floor jack
- Secure the vehicle on jack stands
- Remove the lug nuts
- Pull off the wheel
-
step 2 :Removing the Brake Pads
- Remove 14mm bolts from the brake caliper
- Pry the brake pads into the caliper with a flat blade screwdriver to push in the pistons
- Pull the caliper aside
- Pry the brake pads off
- Reset the caliper using a caliper reset tool
-
step 3 :Removing the Brake Rotor
- Remove the two 17mm bolts from the caliper bracket
- Remove bolts from the brake caliper bracket
- Pull off the brake caliper bracket
- Pull the rotor off
-
step 4 :Installing the New Brake Rotor
- Slide the rotor on
- Thread on one lug nut to hold the rotor in place
- Put the bracket back into place
- Start the 17mm bolts by hand
- Tighten the bolts to between 65 and 70 foot-pounds of torque
-
step 5 :Preparing the Caliper Slides
- Remove the caliper slide
- Clean the caliper slide
- Apply grease to the caliper slides
- Replace the caliper slide
-
step 6 :Installing the New Brake Pads
- Reinstall the brake pad springs
- Apply grease to the brake pads
- Install the new brake pads into the bracket
- Put the caliper on
- Thread 14mm bolts by hand
- Tighten bolts to 23 to 25 foot-pounds
-
step 7 :Reattaching the Wheel
- Slide the wheel into place
- Start the lug nuts by hand
- Tighten the lug nuts preliminarily
- Lower the vehicle to the ground
- Tighten the lug nuts to 100 foot-pounds in a crossing or star pattern
-
step 8 :Testing the Brakes
- Pump your brakes repeatedly until they feel firm
- Test your brakes at 5 miles per hour and then 10 miles per hour
- Road test the vehicle
Tools needed
-
14mm Socket
17mm Socket
21mm Socket
3/8 Inch Breaker Bar
3/8 Inch Drive Ratchet
A Piece of Pipe (for leverage)
Brake Caliper Piston Rewind Cube Tool
Flat Blade Screwdriver
Floor Jack
Jack Stands
White Grease
Brought to you by 1AAuto.com, your source for quality replacement parts and the best service on the Internet.
Hi, I'm Don from 1A Auto. I hope this how-to video helps you out, and the next time you need a part for your vehicle, think of 1AAuto.com. Thanks.
In this video, we're going to show you how to remove and reinstall the rear brakes. We find that the brakes on this 2003 Maxima are in good shape, so we just take them off and put them back on to show you how the process works. You'll need new pads and rotors from 1AAuto.com, we show you the right hand side, obviously, the left hand side is the same procedure, and we do always recommend you replace brakes in pairs. You'll need jack and jack stands, 14mm, 17mm, and 21mm sockets, ratchet, and either a breaker bar or pipe for some extra leverage, screwdriver, a caliper reset tool, and some brake or some white grease.
Just one tip, make sure that your parking brake is not set because it engages the caliper and you won't be able to get your brakes apart if your parking brake is on.
Start by removing the wheel and tire. If you don't have the benefit of air tools, then start with your vehicle on the ground, loosen the lug nuts, and then raise and support the vehicle and remove the lug nuts, wheel and tire. Now we're going to remove two 14mm caliper bolts using a 14mm socket or 3/8 inch ratchet. As you can see those bolts should not be in there that tight, they usually tighten to about 20 to 25 foot-pounds. We're going to use a flat head screwdriver to free up the caliper off of the caliper bracket, simply by placing it in against the rotor and pulling up against the caliper, going back and forth between top and bottom until the caliper comes off.
At this point, we can remove the brake pads, clip on the bottom on the inside and no clip on that side, two shims. We've got a caliper reset tool, where you can get this at any place automotive tools are sold. We matched up the pattern with the pattern on the caliper, and we're using a 3/8 inch drive and applying pressure and turning at the same time. You want to turn it clockwise and push in. That should push the caliper or the piston back into the caliper. Before you can be able to put this back on and have the brake pads aligned, the bottom notch, your notches have to be up, down, left and right.
I'm going to remove the two 17mm bolts that hold the caliper bracket on. Fast-forward as we remove those the rest of the way, as you can see they take some pretty good initial force, but then they come out fairly easily. Putting the caliper bracket back on. We'll fast-forward here, make sure you get both bolts in, and then tighten them up. When you torque these, you want to torque them between 65 and 70 foot-pounds. Before I put the caliper back on, I'm going to make sure that the two slides move freely. If they don't, you can pull them out, clean them up, put a little grease on them, slide them back in, and resecure the boot.
Putting the brake pad springs back in place. I'll apply some brake grease to the pad. I'm going to put on the back and to the edges that sit in the caliper. Now, if you experience any resistance or it's not going on smoothly, double check to make sure that your piston is in the right position. Fast-forward again, again we put both bolts in first, make sure they're going in correctly, then tighten them, and when you tighten these, you only want to tighten them to probably about 23 to 25 foot-pounds.
Now you can reinstall your wheel and tire. Put the lug nuts on by hand first, make sure you don't cross thread them, then tighten them up preliminarily. With the vehicle back down on the ground tighten your lug nuts to 100 foot-pounds using a star pattern. Anytime we do brake work just make sure that we get in, pump the brakes a bunch of times, make sure you have a good solid petal, and then do test stops from 5 and 10 miles an hour before road testing the vehicle.
We hope this video helps you out. Brought to you by www.1AAuto.com, your source for quality replacement parts and the best service on the Internet. Please feel free to call us toll-free, 888-844-3393. We're the company that's here for you on the Internet and in person.
Shop Products


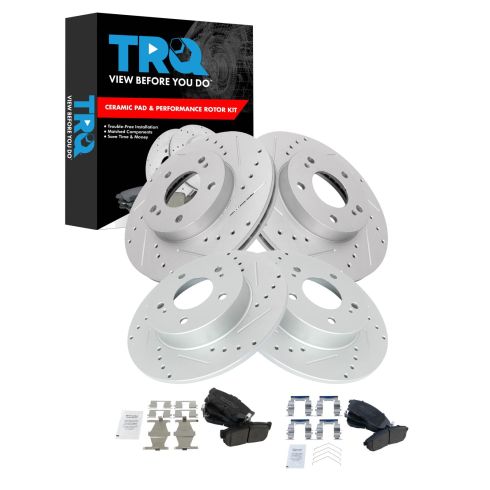
Nissan Maxima Infiniti I30 Front & Rear Ceramic Premium G-Coated Performance Brake Pad & Rotor Kit TRQ Performance BKA12735
Part Details:
- Ceramic
- Premium Posi
- Vented
- Solid
- 5 Lug
- 10.94 in. (278mm)
- 11.02 in. (280mm)
- Performance
- Premium G-Coated
- Slotted X Drilled
- Performance
- (1) Front Ceramic Brake Pad Set
- (1) Rear Ceramic Brake Pad Set
- (1) Front Premium G-Coated Performance Brake Rotor Set
- (1) Rear Premium G-Coated Performance Brake Rotor Set
How to Replace Front Brakes 2005-10 Chevy Cobalt
Watch this video to learn how to replace the front disc brakes on your 05-10 Chevy Cobalt.
