How to Replace Front Driver Side Axle 2006-10 Dodge RAM
Created on: 2020-10-13
This video shows you how to install a new TRQ CV axle in your 2002-2009 Dodge Ram 1500.
Tools needed
-
Torque Wrench
Hammer
Socket Extensions
Rust Penetrant
Jack Stands
Pocket Screwdriver
21mm Socket
Bearing Grease
Rubber Mallet
Socket Driver
Copper Anti-Seize
Wheel Chocks
Center Punch
Bungee Cord
Straight Cutters
Ratchet
Floor Jack
Swivel
1/2 Inch Impact Gun
Okay, friends, one of the first things we need to do is safely raise and support the vehicle. We're going to remove all of our lug nuts, and take the wheel off. Now that we have the wheel off, we have a nice, clear view of our caliper. We need to remove our two mounting bolts here, and then we're going to hang the caliper out of the way on something such as maybe a bungee cord. Grab that caliper. Now we'll just hang it out of the way, like I said.
Get the rotor off of here. Now let's go ahead and remove our axle nut here. Let's spray this area, and give the axle a couple bonks to break it free. Now it's going to be time to get our ABS wire disconnected. If you follow it up to the wheel well, you can see the little white tab. Let's go ahead and pull that out of there. Now, looking at it, you can see a red tab. That's a lock. Let's go ahead and pull up on that lock, and then press in on this black piece, so we can release this. I always like to take a peek, make sure everything looks good. Now let's grab our ABS wire, and we're going to start taking it down to the knuckle. Okay. Wrap this up so it can't get damaged.
Now it's going to be time to remove our outer tie rod end from the knuckle. Let's go ahead and remove our locking clip here. Now let's give the knuckle a couple loving bonks until this breaks free. There we are. Set that aside. Let's remove our upper ball joint nut from the knuckle. Start that nut back on there a couple good threads. Now we're going to give this a couple loving bonks to separate the two. Remove our lower ball joint nut from the knuckle. Put that back on just a couple threads. Now we're going to give this a couple loving bonks to break it free as well.
Okay. So now we're just going to kind of pull this out and then down. We need to remove the axle from the knuckle at the same time as the lower ball joint. Now we need to get the axle out of our front differential. You're going to notice it's stuck in there because it has a locking clip. So if you just give it a couple loving bonks, you should be able to break it free. There it is, friends.
So, now that we have our axle assembly out of here, you might notice that it looks different than the new axle assembly. The reason for that is because this shaft right here is actually a pressed-in shaft. So, essentially, you would just kind of take this, you'd slide it in there, bonk it in, and then you have this same exact axle here. The problem is that these get stuck inside there, so it's best to just go ahead and replace this unit at the same time.
Okay, so, it's time to prep our brand new axle here. And what I mean by that is we're just going to take a little bit of lubricant, we're going to come inside these threaded areas. That's going to help keep the moisture away. Go ahead and put a bunch in there. That feels good, inside all those splines. Beautiful.
Now we're going to take our insert piece here, and you're going to notice that one side is shorter, the shanked area, and it also has a little rubber, okay? This is a gasket, and it's supposed to help keep moisture out, so that's going to go up against the axle. Put it in just like this. I've got this on a nice piece of wood so it can't be damaged, and I'm going to use a rubber mallet, and we're just going to bonk this in till it locks in. There it is right there. Give it a nice tug, make sure it's completely secured all the way around, nice and level.
So, before we go ahead and put the axle in there, something that's important to think about is your seal right there. It's always a great idea to go ahead and replace it. For the purpose of this video, we're not necessarily going to do that. So, of course, I'm just going to inspect it, make sure it's not torn or worn in any way. This one looks decent, so let's go ahead and put this up in there. Carefully slide it in.
You should feel it want to line up with the splines inside the front differential. There it is. Okay. So that just went in a little bit. Just going to give it a couple loving bonks here with my rubber mallet. Give it a nice tug. It's definitely locked in. Let's move along.
Next, let's use a tiny bit of copper never-seize and go along the splines of the axle, but beware of the actual threaded area. Now it's going to be time to get our knuckle back up on here. We're going to go over the axle, start sliding the splines into this area here, and then of course, we need to be doing the lower ball joint at the same time. So just kind of line up the two so they are both trying to go at the same time. There it is.
Now we're just going to take our lower ball joint nut and start that in there. Let's go ahead and get that ball joint nut on there. All right. Now let's snug that up. Now it's going to be time to do the upper ball joint. Let's go ahead and start that in. What you might notice is you have a hard time pulling down. Just use a nice pry bar for leverage. There we are. Start that nut on there. Now let's go ahead and torque this upper ball joint nut to 40 foot-pounds. Let's torque the lower ball joint nut to 38 foot-pounds. Now, the next thing we want to do is make sure that our hub surface is nice and clean, and then give it a nice coating of copper never-seize. You want to make sure that the hub surface on the backside of your rotor is clean as well, so you have a smooth surface to mount up here.
Let's go ahead and get this rotor on. Perfect. Now we're going to grab the caliper. We'll start in the bolts, and then we'll torque those to manufacturer specifications. All right. Let's go ahead and get the caliper on here. Let's torque these to 130 foot-pounds. Let's get our tie rod back on here now. Let's torque this to 45 foot-pounds. Now we want to make sure that our slot on the nut lines up with the corresponding hole in the tie rod end stud. If it doesn't, just continue tightening until the next slot does. Put in our locking cotter pin. Peen it over. There we are. Now it's time to re-secure our ABS wire here. Just going to look underneath the control arm. You can feel the slots. Slide that one up in there. There it is. Connect in our wire, give it a nice click, a nice tug. Yeah, see, it comes right apart. Click it in there, a tug, lock it in. Push this back through. Make sure your ABS wire isn't going to get caught anywhere. This looks good.
We're going to put on our axle nut and then we'll bottom it out, and then we'll torque it to 185 foot-pounds. It's going to be time to torque the axle nut. To do that, I like to put a nice bar across the studs, nice and flat as can be. That's going to prevent this from turning. Now let's torque it to 185 foot-pounds. Now let's clean down the mess on our differential. Let's get our wheel back on here. Start all your lug nuts on there, and torque them to 130 foot-pounds.
Okay, friends, so now, all you want to do is go ahead and pump up those brakes so they're nice and firm, check your brake fluid, and of course, get it down to your local alignment shop.
Shop Products


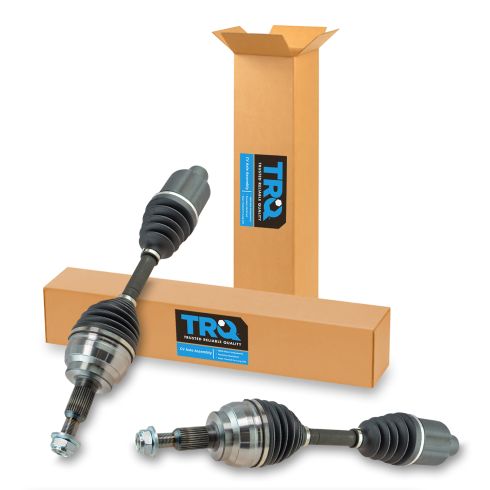
Dodge Ram 1500 Ram 1500 Front Driver & Passenger Side 2 Piece CV Axle Assembly Set TRQ CSA82526
Part Details:
- 2 Piece
- (1) Front Driver Side CV Axle Assembly
- (1) Front Passenger Side CV Axle Assembly
How to Replace Front Passenger Side CV Axle 2003-07 Honda Accord
Watch this video to learn how to replace the passenger side CV axle on your 03-07 Honda Accord. The driver side is covered in another video!
