Replaces


Part Details
About TRQ:
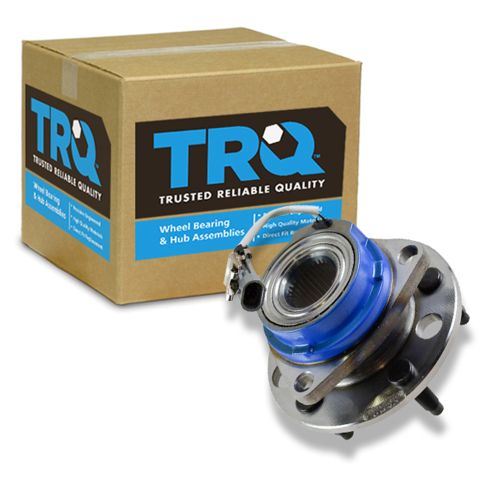
TRQ is a trusted brand dedicated to making every repair a success story by combining premium parts with easy installation. Each TRQ part is engineered by a team of automotive experts to meet or exceed OEM standards, delivering enhanced performance and maximum longevity. With rigorous in-house testing, the brand ensures superior fit and function across every product line. TRQ also provides customers with best-in-class, step-by-step installation videos—so you can complete repairs with confidence, whether you're a first-time DIYer or an industry professional.
Attention California Customers:
 WARNING: This product can expose you to chemicals including Lead and Lead Compounds, which are known to the State of California to cause cancer, and birth defects or other reproductive harm. For more information, go to www.P65Warnings.ca.gov.
Lifetime Warranty
This item is backed by our limited lifetime warranty. In the event that this item should fail due to manufacturing defects during intended use, we will replace the part free of charge. This warranty covers the cost of the part only.
FREE Shipping is standard on orders shipped to the lower 48 States (Contiguous United States). Standard shipping charges apply to Hawaii and Alaska.
Shipping is not available to a P.O. Box, APO/FPO/DPO addresses, US Territories, or Canada for this item.
Expedited is available on checkout to the United States, excluding Alaska, Hawaii.
Final shipping costs are available at checkout.
Created on:
Tools used
Brought to you by 1AAuto.com, your source for quality replacement parts and the best service on the Internet.
Hi, I'm Don from 1A Auto. I hope this how-to video helps you out, and next time you need parts for your vehicle, think of 1AAuto.com. Thanks.
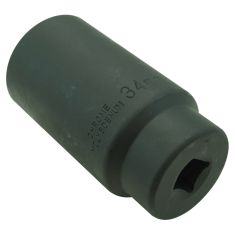
In this video, we're going to show how to replace a front hub. We do the right hand hub on this car. The left hand hub is basically the same procedure, and it's also the same - this is a '97 LeSabre - this hub's the same for any '93 to '98 or '99 LeSabre. It's also the same for Bonneville, Olds '88 and '98, and Buick Park Ave. You'll need a new hub from 1AAuto.com, 34mm, 19mm socket with a socket wrench, hammer, chisel, wire brush, and 3/8 Allen key tool or a socket-style tool, torques 55 socket, a pipe for some extra leverage, a pry bar or a long screwdriver, and a torque wrench.
Okay, we're going to fast forward here, remove the center cap. If you don't have the benefit of air tools, you'll want to start with the vehicle on the ground, loosen the lug nuts first, then raise and secure the vehicle, and remove the lug nuts, wheel, and tire.
We use a 34-mm socket, breaker bar and pipe extension. I've got Mike sitting in the car, holding the brakes. I'm going to fast forward as I finish removing that 34-mm nut. The caliper's held on with two bolts and a 3/8-inch Allen, and this has got quite a bit of rust on it. Knock this one in.
I'm going to speed up the video here while I remove the two Allen head bolts that hold the caliper on. I want to be able to separate the caliper off the rotor, and in order to do that, I'm just going to pry, and then pry up. Rotor all the way off. I want to make sure that the axle's going to be free from the hub before I take it off. So, I can see it moving, so it's ready to go.
The hub's held in with three T55 bolts, and when you spin this around, you're going to get access to then through the larger of the three holes. We have a lot of rust on these bolts, so I want to make sure that this T55 is really in there, because I don't want to strip out the bolt. I'm using my T55, a long ratchet, and a pipe for extra leverage, and I'm removing the three bolts. I'm going to leave one of them in just a little bit so that when I knock the hub free from the backside, it just doesn't come flying out.
Go ahead, unplug your sensor. Then, with the hammer, hit the backside of the hub until it gets free, and then go ahead and remove that last bolt that you had in there that was just going to hold the hub so it didn't go flying. When I pull the hub out, the hub separated from itself, so we got to still get this out of the way. I'm going to use the punch and a hammer from the backside to push it out. As I fast forward here, I'm just cleaning the inside of the spindle with a wire brush. You can use a flat screwdriver or chisel to get some of that rust that's on the outer surface of the spindle, so that when you put the new hub on, it sits right up against it flush.
We got the old part, and we get the new part from 1A Auto, and they're identical even down to the clip and the harness connector, so it should go in no problem. So, you can take the connector. Go ahead and feed it through your spindle and then feed your drive shaft through your bearing. And, we've got our backing plate.
With backing plate back in place, go ahead and reinstall the three T55 bolts, torquing them to 55foot-pounds, and I'm going to go ahead and fast forward as I torque those bolts. Reconnect your connector. Clip it under your backing plate. Reinstall your 34-mm nut. Here we're just tightening the nut preliminarily. As you put the brakes back together, you'll notice we're putting in new brakes. Just a good time to do it, but if you want to see a more detailed video of how to do this, check out our other videos for the Buick LeSabre front brakes. The outward pad is going to slip in like this, and the little tabs are going to fall into place, and the inward pad. These clips are going to go inside the caliper piston, and then, just slide it right back over to your rotor. We'll fast forward as we just straighten those out. Tighten up the calipers, remove that lug nut that we used to hold everything in place, and then, stick the wheel and tire back on, and lug nuts and tighten them. One hundred foot-pounds is the torque spec for the lug nuts; 107 foot-pounds is the torque spec for the CV shaft nut. Whenever you've had the brakes apart, just make sure you go in and pump the brakes a bunch of times to make sure you have a nice firm peddle before your road test the vehicle.
We hope this helps you out. Brought to you by www.1AAuto.com, your source for quality replacement parts and the best service on the Internet. Please feel free to call us toll free 888-844-3393. We're the company that's here for you on the Internet and in person.
Tools used
Brought to you by 1AAuto.com, your source for quality replacement parts and the best service on the internet. Hi, I'm Mike from 1A Auto. I hope this helps, the video helps you out and next time you need parts for your vehicle, think of 1AAuto.com. Thanks.
In this video, we're going to show you how to replace the front hub on this 2000 Buick LeSabre, pretty much the same as any 2000, 2005 Buick LeSabre and obviously we sell new hubs at 1AAuto.com.Tools you'll need are Jack and Jack stands, 34, 19, 15 and 13mm Sockets. You'll need Ratchets and Extensions and you'll also need a Breaker Bar and possibly a Pipe for some extra leverage on some of those bolts and a large Flat Blade Screwdriver, a Hammer and Torque Wrench. On this LeSabre, you want to remove this center hub cap. Just pull firmly. If you don't have the benefit of air tools, you want to use a 34mm Socket and a big Breaker Bar, probably the pipe. With your vehicle on the ground, loosen up this center knot. Loosen up here first. You want to loosen your lug nuts with the wheel on the ground then raise and support the vehicle and then remove the lug nuts and wheel the rest of the way. I'll fast forward here as I use a 19mm Socket with an Impact Wrench and remove the lug nuts and the wheel and tire, and then just turn the suspension so that I can get a good look at the brakes. To get the brakes apart, first you're going to remove two 15mm bolts here and here. You should be able to use a 15mm Socket with a Ratchet and this should come apart with some force but it should come apart very easy.
I'll speed it up here as I loosen the top one and take both those bolts out and I'll show you them in a minute. The bolts are actually, the items that the calipers slide on as well so I'll show a little close up to you. These are slides taken apart. You want to note their condition. This probably should be just clean up and put a little grease on to them. I'll speed it up here again as I just remove, finish removing the upper bolt out of the top. With a large screwdriver, put it right in here and pry out and that actually forces the piston back into that actually forces the piston back into the caliper a little bit. You could see, I use a screwdriver pry out on the caliper a little bit and that loosens up so I can get the caliper up and off and then I just hang it up on the strut. I'll show you that right there. Now, your brake pads very easily. Just pry out. Remove these two bolts here. I needed my Socket again and a Ratchet. Use a Breaker Bar or a piece of pipe. A piece of pipe helps you get some extra leverage and just push nice and firm until you start to get them loose. I'll fast forward here as I use the Ratchet and pipe to loosen up the top one and then take both the bolts out. Now, your rotor comes right off. Here, I'm applying some penetrating oil to the center hub knot as well as the three knots that hold the hub to the steering knuckle. Here, I'm removing that nut with an Impact Wrench.
Again, if you don't have air tools, you'll want to loosen up this knot when your tire is still on and the vehicle is on the ground. You want to make sure that your axle is free from your hub. You're going to give a one good hit with a hammer. You don't want to be on it continuously with a hammer because you could damage your CV joints but one good hit and just watch the axle in relation to the hub, if it moves then your axle is free and is no problem. Just give it a good wrap and just watch. Like I said, the axle in relation to the hub and it moved so it's nice and free. I can actually move it just with my thumb. Now, three bolts hold the hub to the steering knuckle. You could see one down there and one up in there. Generally, you want to use 3/8s drive tools because they're a little narrower and they can get in here better. There's the bolt here, there's one down here and then over on the other side, there is a bolt right down in here. This is your ABS lead, you want to use a screwdriver, pry this clip away. Pull that off and then just push up on this clip here and disconnect it. I'm going to fast forward here as I take and loosen up those three bolts and you should be able to get them with a good sized 3/8s Ratchet. You want to just keep applying even pressure. Don't jerk the wrench or anything. Apply even pressure and they'll come loose and what I'm doing is actually turning the steering knuckle back and forth so I can easily get to all three of the bolts. Once you get up to this point, you need to push. I've got pushing it with my thumb on the axle and then pulling the center wire out. You want to take this off and put right there.
New hub available on 1AAuto.com, you want to put in there. You want the sensor kind of towards the rear towards where it goes in and this goes on so that this tab is in this position over here. Put it on and again, just reach through with your thumb, push on the axle so that you could push your sensor connector through. Pull that connector through this bracket up and on. I'm going to get that up on here. Pull this connector; pull this back and in there. Kind of a matter is getting the grooves all lined up and in. Tug on your ABS sensor a little bit, make sure it's through cleanly. Push that on, the bolt. These ones' the easiest lugs that put it through and start it into the hub. I'm going to speed it up again as I start all three bolts in. You want to make sure you start them all in first, then usually tighten up the rear one until it snug and then you tighten up the other two until they're snug. The last step of tightening is to torque them. Make sure the leads through correctly. Put right on to that bracket and then plug it in. I'm going tighten these bolts to 60 foot pounds, starting with this rear one. I'm going to reinstall this hub knot just preliminarily. Rotor goes back on. Before you put this caliper bracket back on, take a wire brush and make sure these all nice and clean. In particular, you're cleaning the grooves where the brake pads sit and slide.
This part goes between the rotor and the steering knuckle and that bolt goes to the steering knuckle first, then into the caliper bracket. Start my lower one. Now, start my upper one. I'll speed it up here as I just kind of preliminarily tighten those two bolts up. Now, we'll torque these to 80 foot pounds. Put it down and make sure your hose isn't twisted. You might want to pull these grommets in a little bit. Put your caliper down on, make that those aren't bunched up. Here are my sides, I cleaned them up, put a little light coated grease on them. That's a little one came out with this sleeve so I took that off, cleaned it all out, put a little bit of grease on the inside, on the outside of it. Put our brake pads back, it just kind of slides right in, the support one. Now, push down in a little bit diagonally. Top one back in first, start it a little bit and our bottom one. I'll fast forward again as I just kind of preliminarily tighten those bolts. I'll torque these for about 50 foot pounds. Again, apologize for the low volume, 50 foot pounds is what you want to torque those to. Okay, speed it up here as we put the wheel and tire back on and then just start the lug nuts by hand and then tighten them preliminarily with the Impact Wrench. Now, you want to torque the center nut to a 118 foot pounds. Torque your lug nuts to a 100 foot pounds using a start pattern. Okay, and we'll speed up the tape as we torque up the lug nuts. Anytime you take the brakes apart, make sure that you pump your pedal a whole bunch of times until it gets firm and then do test stops from five and 10 miles an hour, make sure the brakes are working correctly before you road test your vehicle.
We hope this helps you out. Brought to you by www.1AAuto.com, your source for quality replacement parts and the best service on the internet. Please feel free to call us toll-free, 888-844-3393. We're the company that's here for you on the internet and in person.

BHA53904